B5 - Project Centauri Vorchan

zathros

*****SENIOR ADMINISTRATOR*****
Staff member
Administrator
Moderator
Apr 5, 2013
13,498
9,549
228
You guys are really banging away at this, excellent!! :)
 
  • Like
Reactions: Sky Seeker

Sky Seeker

Well Established Member
Jun 1, 2015
1,178
1,083
95
You guys are really banging away at this, excellent!! :)

Trying to (visualize air reaching - trying to grab at something nearby but just missing).;) That head is going to be the death of us, but we WILL figure it out eventually through use of duct tape, bailing wire, chewing gum and a LOT of divine guidance! Gandolf is on an interesting path and has done a lot of hard work, which is to be commended.

Sky Seeker
:tank:
 

zathros

*****SENIOR ADMINISTRATOR*****
Staff member
Administrator
Moderator
Apr 5, 2013
13,498
9,549
228
Just for the record, I have been working on the Minbari Sharlin from the same site. The models have 2 or 3 of the same models super imposed on each model. If you don't delete the copied models in the same space, you have all kinds of problems, and a file that is three times bigger than it should be. I do not know why they did this. I discovered this when I selected the top section of the Minbari ship, and the selection had two drop down alternatives. I deleted one section, no change, I deleted the next same section, no change, I deleted the final section, and it was going, I went back one step to retrieve it, then proceeded deleting all of the superfluous models within models till I got to only one copy. This causes much errors, and can be a great impediment if you don't get rid of these. This is really bad CAD practice (Great CAD model though) and I think it is done purposely, especially if you explode the sections, then try to reconstruct them.

I have now converted the Sharlin to a fully Nurbs model, and can work with it line by line, inserting control points if necessary. Just in case you didn't know. :)
 
  • Like
Reactions: Sky Seeker

Sky Seeker

Well Established Member
Jun 1, 2015
1,178
1,083
95
Just for the record, I have been working on the Minbari Sharlin from the same site. The models have 2 or 3 of the same models super imposed on each model. If you don't delete the copied models in the same space, you have all kinds of problems, and a file that is three times bigger than it should be. I do not know why they did this. I discovered this when I selected the top section of the Minbari ship, and the selection had two drop down alternatives. I deleted one section, no change, I deleted the next same section, no change, I deleted the final section, and it was going, I went back one step to retrieve it, then proceeded deleting all of the superfluous models within models till I got to only one copy. This causes much errors, and can be a great impediment if you don't get rid of these. This is really bad CAD practice (Great CAD model though) and I think it is done purposely, especially if you explode the sections, then try to reconstruct them.

I have now converted the Sharlin to a fully Nurbs model, and can work with it line by line, inserting control points if necessary. Just in case you didn't know. :)

Z -

The Sharlin !?! - Damn that's IMPRESSIVE!! :surprise: Big ship!! Will definitely want to see pics of that when you start building it. I wonder why they superimposed 3 models on the same model? That's kind of redundant isn't it? Wastes memory too.

Sky Seeker
:tank:
 
Last edited:

Sky Seeker

Well Established Member
Jun 1, 2015
1,178
1,083
95
New pics - Vorchan

Below is a pic of the nacelle with the ribs installed. I opted for one piece for ease of assembly so all of those ribs are actually just one piece, but look like many. Next to the big nacelle is the small front nacelle.
upload_2016-12-31_23-50-23.jpeg

Here is the main fuselage. This is my first attempt at texturing. I placed it next to the old fuselage for comparison.
Bottom view.
upload_2016-12-31_23-53-23.jpeg

Top view. - The white spot near the back is that way to distinguish between the parts that are in the wing and the parts that are NOT. The part with the white rectangle is where the fuselage is slid into the spacer which is used to gauge insertion distance.
upload_2016-12-31_23-53-31.jpeg

Wing with both wing turret plates positioned. This was a mess for construction. The left side of the wing was NOT constructed properly it left the wing canted upward at about 20 degrees when the wing turret was positioned. A big mess!!!:frak: Here at Zealot do we give up? Heck no!!! :flag:This is what it looked like AFTER the corrections were made. It looks normal now , but it sure wasn't earlier.
upload_2016-12-31_23-57-50.jpeg

As you can see a bulge occurred where I had to cut part of the wing (see below). Then moved everything back into position (i.e. how I wanted it). After gluing it looks like this.
upload_2017-1-1_0-1-59.jpeg

The end of the turret plate also ended up being pushed in some more than necessary.
upload_2017-1-1_0-3-19.jpeg

As you can see here the end of the wing ended up becoming slightly twisted.
upload_2017-1-1_0-4-15.jpeg

More pics to follow.

Sky Seeker
:tank:
 

Attachments

  • upload_2017-1-1_0-3-7.jpeg
    upload_2017-1-1_0-3-7.jpeg
    148.9 KB · Views: 1
Last edited:

Sky Seeker

Well Established Member
Jun 1, 2015
1,178
1,083
95
Vorchan pics.

Fuselage with the wing and multiple nacelles installed.
upload_2017-1-1_0-8-19.jpeg

Side view.
upload_2017-1-1_0-14-24.jpeg

Top view.
upload_2017-1-1_0-14-42.jpeg

upload_2017-1-1_0-15-9.jpeg

upload_2017-1-1_0-15-21.jpeg

Revised fuselage template - the extra piece on the right lower corner is for additional modding later if you so choose. The pieces on the left are to be placed on the blank spaces on the front of the ship.
upload_2017-1-1_0-16-47.jpeg


Redone turret plate templates
upload_2017-1-1_0-19-40.jpeg
Have a Happy New Year!

Sky Seeker
:tank:
 

zathros

*****SENIOR ADMINISTRATOR*****
Staff member
Administrator
Moderator
Apr 5, 2013
13,498
9,549
228
Excellent!! I have to learn how to Texture. It's one of my many my weak points!! :)
 
  • Like
Reactions: Sky Seeker

Sky Seeker

Well Established Member
Jun 1, 2015
1,178
1,083
95
Oh...ok you are doing a different version...

Gandolf,

Is there any way you can get jpegs of both side views, a front view, a back view and orthogonal view of the head / nose portion? I think I got an idea of what can be done. I'm thinking that a box could be created that would indicate how high and long the head would be for the side. Another box would be made for the front view. I roughly know the dimensions that we have to work with to make the head work with the pre-build model done already. From there the sides could be extracted. The front is going to be a little tricky (as you already know) from generating all of those little pieces. Here is a rough (putting it mildly) concept drawing of what I'm talking about:


upload_2017-1-2_23-14-0.jpeg
Another thing that could be done is what Revell Fan has done for the Sandman vehicles See here:

http://www.zealot.com/threads/solar-car-sandman-car-from-logans-run.179666/

Just some ideas for right now.

Sky Seeker
:tank:
 
Last edited:

Gandolf50

Researcher of obscure between war vehicles...
Staff member
Moderator
Jan 28, 2013
1,327
1,576
96
New Mexico USA
Not sure what you mean by extracting.... as that tends to imply to me anyway..tracing each image and recreating from the multi views the 3d object..? yes/no

If we could get 3 multi views of the version that you are doing then that would be no problem to create the views...but all I have seen is that head on version, some decent views of the pixelated views you have would work...but they are kind-o-bad...
I just sent the update to you of what I just did ..which is a cross between the versions.. but here it is for all ..

Totally rebuilt the head from ground up..and removed just about all the problem areas..still have 1 I have to work on..but it is minor...
It is NOT any easier to build! Still very small, when scaled to the wings ..but far less parts and flattens like hot butter!
HeadV2-Beta.jpg
 

Sky Seeker

Well Established Member
Jun 1, 2015
1,178
1,083
95
Houston it's a GO!! Oh I forgot to ask for a back and bottom views. Could we also have a top view?

Looking forward to the build! Thanks for all of your work!

Sky Seeker
:tank:
 
  • Like
Reactions: zathros

Gandolf50

Researcher of obscure between war vehicles...
Staff member
Moderator
Jan 28, 2013
1,327
1,576
96
New Mexico USA
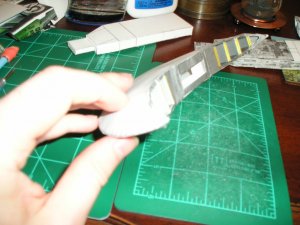
Test build main wing.

Here's the main wing (i.e. pita pocket):

One of the wings have tabs and the other side does not. Also, tried to experiment with forming the engines from the existing cardstock around the engine areas (see below). I don't think that it worked too well and recommend that separate engine constructions be made by inserting from the front to the back. This would give a more round shape to the back.

In constructing the wing, you start by gluing the center tab of the tabbed wing to the non tab wing
View attachment 155308

Next, you glue the tabs from one side of the wing working form the center to the outer most portion of the wing.
View attachment 155309

Reate what you did above to the other side. Back side of the wing. Note the tabs at the back.
View attachment 155310

Top view. Both sides joined together. Recommend making dashed line marks at the front for placement of the front struts, engine nacelles (on either side of the top vertical stabilizer), as well as lines for the top and bottom vertical stabilizers.
View attachment 155311

Inside view joined together. Note the inside tabs.
View attachment 155312

1st left engine joined.
View attachment 155313

Engines have been colored in with a highlighter. The side portions form triangular pieces instead of rounded more oval shaped sides on either sides of the engines.
View attachment 155314

That's it for now.

Sky Seeker
:tank:

I just was re-viewing..and for future reference...on the wings..each BLACK line radiating to the center ..is a cut line! You have to take a thin section out and tab them back together...the dashed line around the edge is a fold line..you then roll the edge down to form the back curve...they are all EXTREMELY SUBTLE! and tricky! but it makes for a solid and nicely curved wing...!
 
  • Like
Reactions: Sky Seeker

Sky Seeker

Well Established Member
Jun 1, 2015
1,178
1,083
95
I just was re-viewing..and for future reference...on the wings..each BLACK line radiating to the center ..is a cut line! You have to take a thin section out and tab them back together...the dashed line around the edge is a fold line..you then roll the edge down to form the back curve...they are all EXTREMELY SUBTLE! and tricky! but it makes for a solid and nicely curved wing...!
Now the man tells me!:headbange::lolsign::hammerhead::bulgeeye::Computer::nailbiting::facepalm:

Now I know why they call this "the test build":flag::frak::robot3:

Still I was able to get a nicely shaped wing (it just didn't turn out too well on one side (builder error :hammerhead: - correctable though). Minor curve near the tip on one side that caused a huge deflection when assembling the turret plates to the main wing. Fixed though. Have to be careful in future constructions for the unwary.

Sky Seeker
:tank:
 
  • Like
Reactions: Rhaven Blaack

Gandolf50

Researcher of obscure between war vehicles...
Staff member
Moderator
Jan 28, 2013
1,327
1,576
96
New Mexico USA
I did a new design head object for your build , from the ground up......at least it should be something you can adapt.. just can't get it to you as yet till the server error is fixed...sorry can't show a picture either...???

:frak: but it is ready..dropped it into Pepakura as it was a very simple mesh, very clean... and you should be able to scale to what-ever size you need and so-forth..as well as drop to bmp and texture.. formed it from the 3views of the original Centauri-Vorchan by Lc4Hunter...the same as your 3views..but I did not make it quite as pronounced in the curves..as that would have lead to many more problems..or back to the same-o-same-o...get it to you ??? asap!!
 
  • Like
Reactions: Sky Seeker

Sky Seeker

Well Established Member
Jun 1, 2015
1,178
1,083
95
I did a new design head object for your build , from the ground up......at least it should be something you can adapt.. just can't get it to you as yet till the server error is fixed...sorry can't show a picture either...???

:frak: but it is ready..dropped it into Pepakura as it was a very simple mesh, very clean... and you should be able to scale to what-ever size you need and so-forth..as well as drop to bmp and texture.. formed it from the 3views of the original Centauri-Vorchan by Lc4Hunter...the same as your 3views..but I did not make it quite as pronounced in the curves..as that would have lead to many more problems..or back to the same-o-same-o...get it to you ??? asap!!

Ok will do. Have been working on the head and the side nacelles. Will get pictures when I can. Have been having scaling issues with MSPaint when printing. For some reason it wants to squish the horizontal, but not the vertical. Go figure.

Sky Seeker
:tank:
 

Gandolf50

Researcher of obscure between war vehicles...
Staff member
Moderator
Jan 28, 2013
1,327
1,576
96
New Mexico USA
Gonna see if it works or not....
vorchan_Head3view.jpg
Hoora!!! There ya go Seeker your new Vorchan Head object..now to see if I can get it to ya!!
 
  • Like
Reactions: Sky Seeker

zathros

*****SENIOR ADMINISTRATOR*****
Staff member
Administrator
Moderator
Apr 5, 2013
13,498
9,549
228
How long is the "Head/Nose" piece going to be? If it is more than an two inches, the file could by cut along the mesh edges, surfaces formed, and then unfolded. I started it out of curiosity. How long is yours going to be, because your model looks pretty big, and I think this would work.
 

Sky Seeker

Well Established Member
Jun 1, 2015
1,178
1,083
95
Gonna see if it works or not....
View attachment 156444
Hoora!!! There ya go Seeker your new Vorchan Head object..now to see if I can get it to ya!!

Gandolf,

Thanks! Got the other pic earlier.:) Could you get the smaller unfolded portion above (on the left of the pic above) portion to me as well? I will compare and contrast, then build. See you got into the box bit.:):yesyes: LC4Hunter did some good work. Now to scale it up or down a little to make it fit with what we have so far!:animated:

Sky Seeker
:tank: