B5 - Project Centauri Vorchan

zathros

*****SENIOR ADMINISTRATOR*****
Staff member
Administrator
Moderator
Apr 5, 2013
13,498
9,549
228
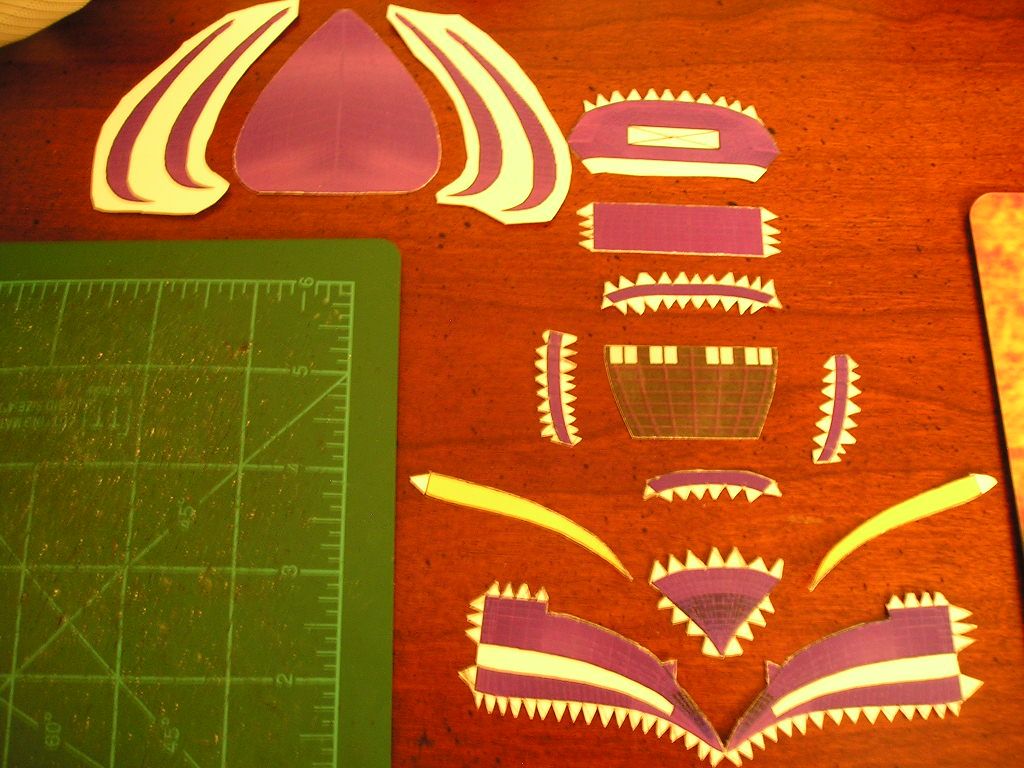
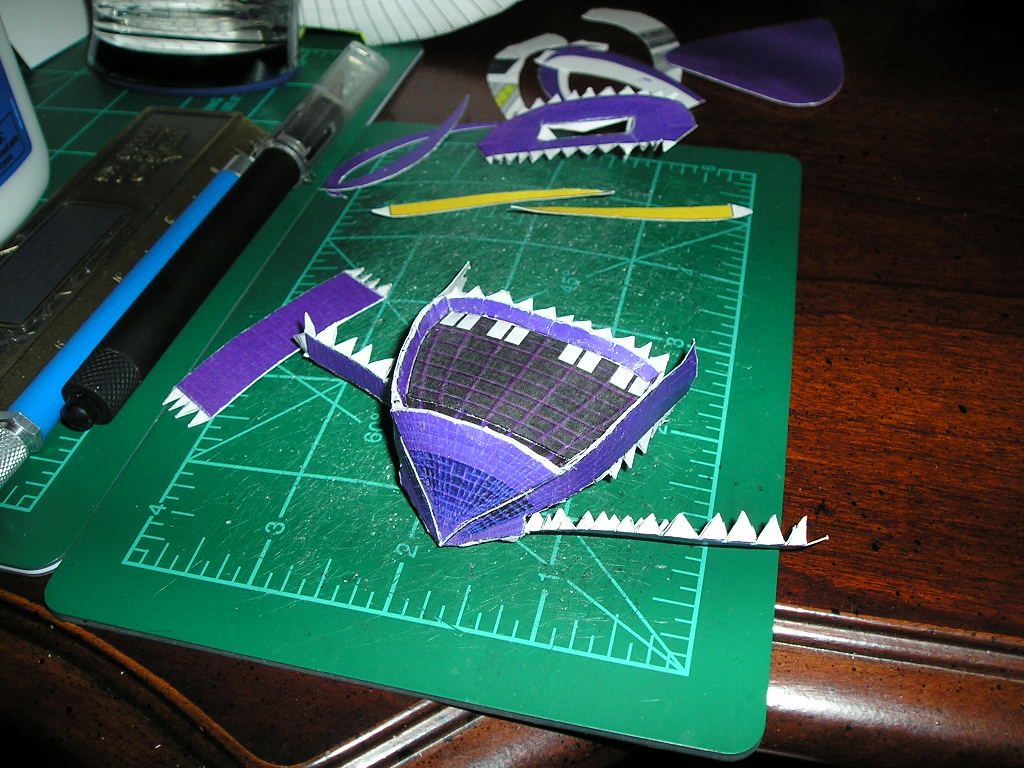
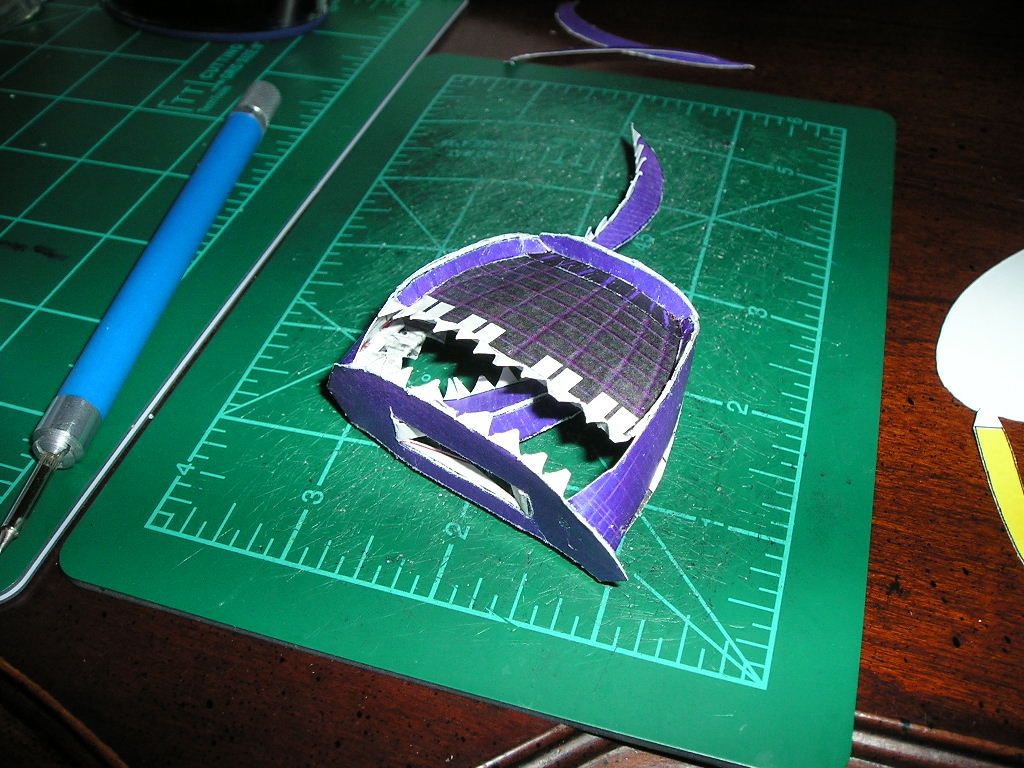
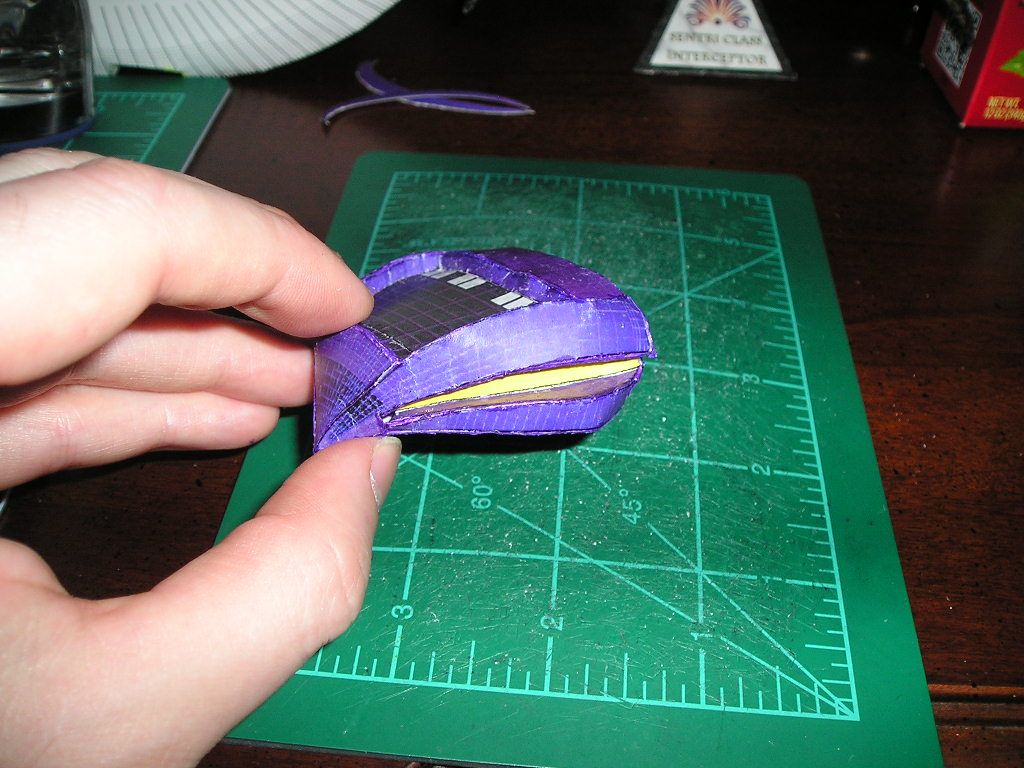
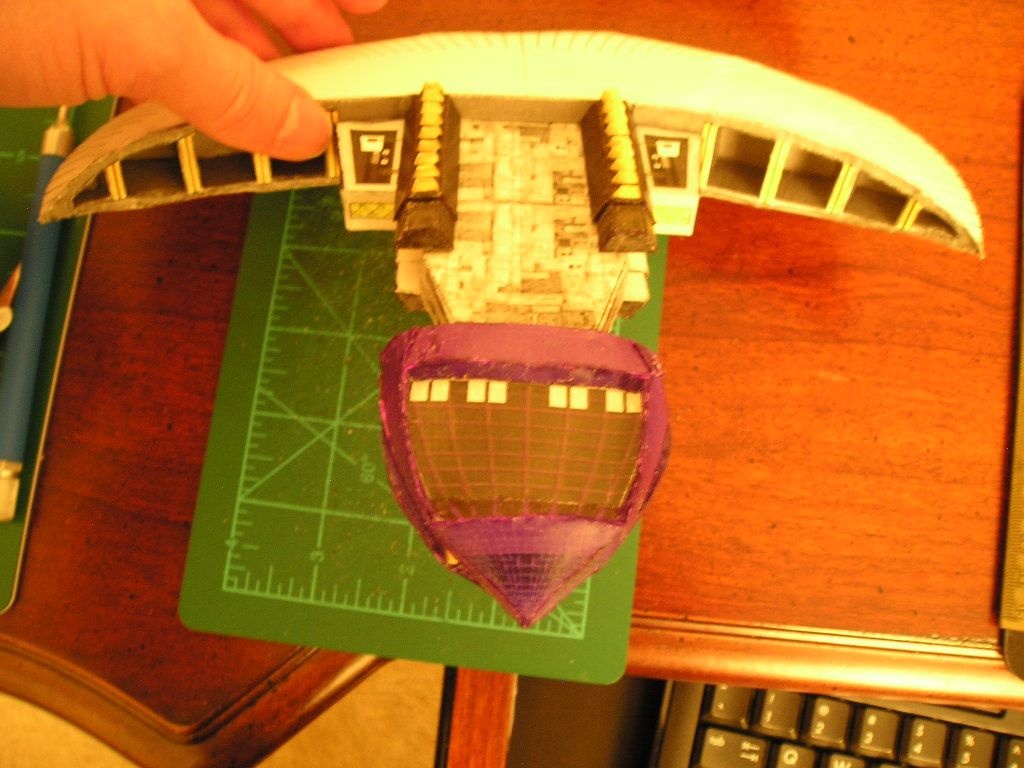
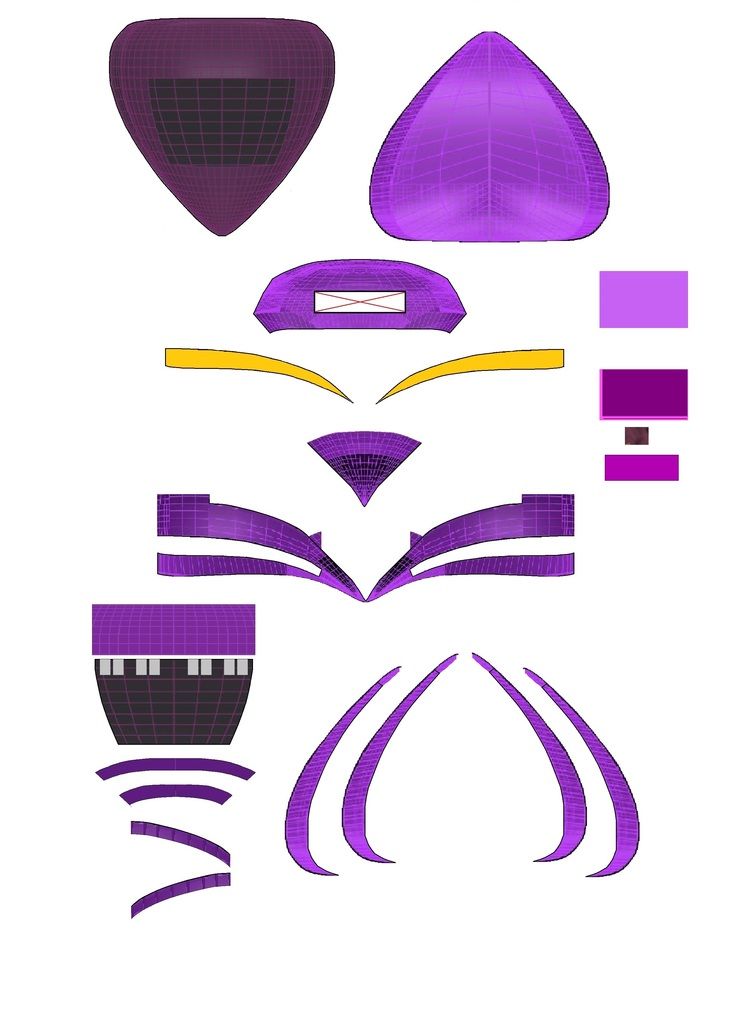
That's a good look head piece. You're off to a good start. The thing with Rhino, while there may be wrong ways of doing things, there are many right ways. Many roads to the same place. It's making a system your comfortable, and understanding the commands, sometimes, just opening it up and bumping and grinding with no end in mind, you can discover a lot of Commands. The "Drape" command is like throwing a blanket over something. You can then cut off what you need, and end up with incredible shapes. Though this is not really applicable for paper models, but it teaches you tidbits of info that come in handy later. I use the "Project Curves" command a lot because, for instance, Projecting the name of something onto a surface allows those Curves to be used as cutting tools. It's a good way of making lettering for odd shaped surfaces. I kew a guy who used to cut his models up to get panel lines, instead of just drawing them, then Projecting them. The lines wrap around the parts too and will unfold with the part, as long as you group everything. Projecting has to all be done from the same Viewport to work. You can line stuff up using all the Viewports, but the final commands must be done through only one Viewport.
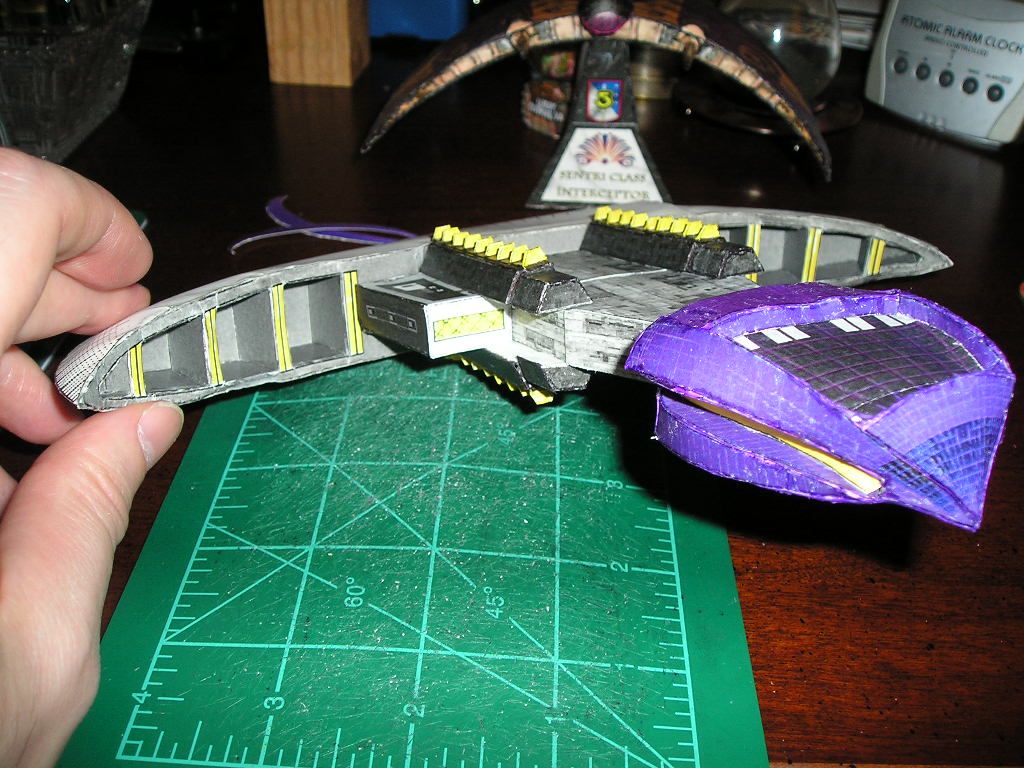
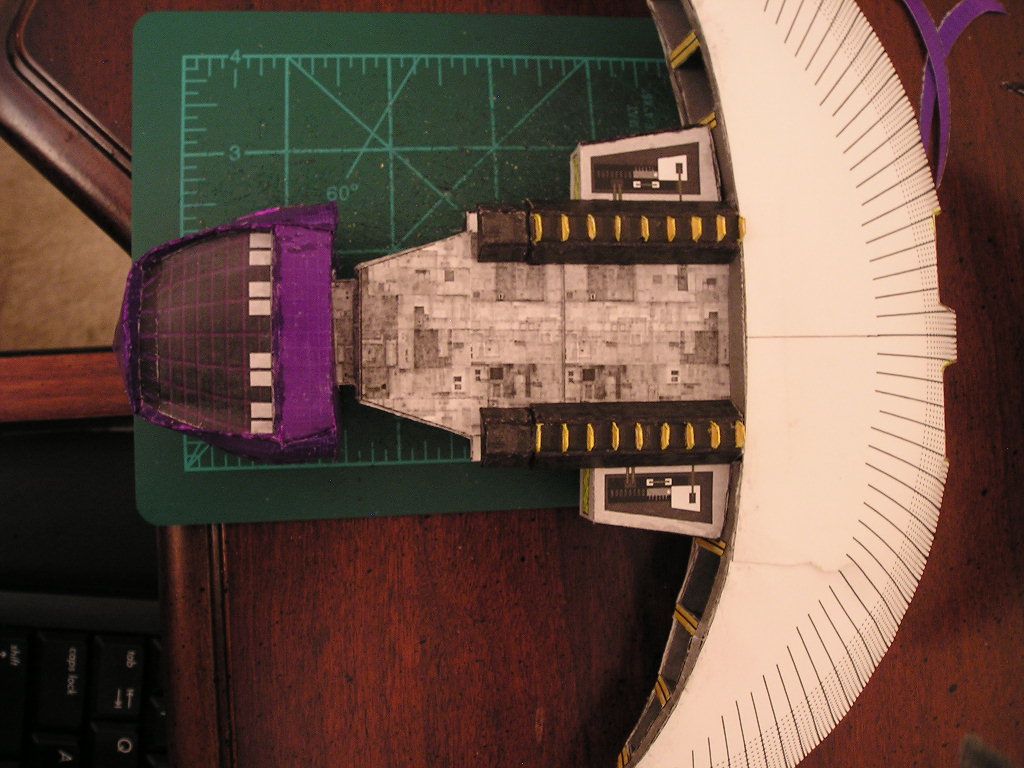
I like the design you have chosen. :)
 
  • Like
Reactions: spaceagent-9

Gandolf50

Researcher of obscure between war vehicles...
Staff member
Moderator
Jan 28, 2013
1,327
1,576
96
New Mexico USA
Thanks !!... I took only 5 curves from the original mesh 1 down the center, which I modified a lot..3 from the top insert, so it could match..and 1 down the side as a reference, most of these lines ended up being cut up, referenced and large sections deleted. Side opening was a projected line !! then cut the side..extruded the line to the inside for the new insert which can still used the fiddly bits from the original! Made all the others to sweep. I think it was when I picked duplicate..I should have picked pull curve..anyway..once I had the curve it would not join together. ended up deleting..and just creating a new one.. I also..didn't make the curves long enough to sweep all the way to the insert..ended up 1 mesh short! so slipped in a single sweep sideways.just to get something that I could test..easy to go back and fix...as well as re-run some new curves as some ( be-tweeners) to smooth things out...don't want to get the runs too small though or will end up with hair-line cuts on the nose end! I can quickly use this one to rebuild and refine a whole new one for a final version! Grabbed a UV of this to see what it will look like with the purple panels I am using for a texture!!
 

Sky Seeker

Well Established Member
Jun 1, 2015
1,178
1,083
95
Hey everyone just thought I'd post some pics (finally) of what's been done in the past couple of weeks.

Big nacelles

P1140083_zpst4kc1s7c.jpg

Nacelles along fuselage - front view
P1140084_zpsav9kk2o7.jpg

Side view
P1140085_zpsmsrhfdxg.jpg

top view
P1140086_zpsn38m8v1z.jpg


That's it for now.

Sky Seeker
:tank:
 
Last edited:

Sky Seeker

Well Established Member
Jun 1, 2015
1,178
1,083
95
Here's another series of posts regarding the head / nose for the Vorchan.

Template
P2010090_zpsii9myu90.jpg


Front plate attached between the two sides. Note also the attachment behind the front plate for the top. This sets the angled shape of the front plate.
P2010092_zpsacxhdozg.jpg


Top center plate. Note the angled side attachments and top attachment. These side attachments determine the angled shape of the center top piece.

P2020093_zpsntlwenxg.jpg

The top plate joined to the front plate.

P2020095_zpsqxubyxmj.jpg

Top side arms glued to the top center plate.
P2030099_zpsspqk7d7l.jpg


Side view - Note inside portion of the top plate with angled side attachments joined to the main body side arms.
P2030100_zpskqhqtfy9.jpg


Head assembly turn up side down with side attachment points for the gold stripe.
P2030106_zpsp9m5h6ql.jpg


Side attachment points for the gold stripe on the bottom arms. Back portion connected to one upper side arm. Note the color for some reason the purple becomes magenta without the flash (go figure). This is actually the color I thought I was getting when I was printing it out. I guess with this color some things get "lost in electronic translation".
P2030109_zpsq54kaj7o.jpg


Both side arms joined to the back.
P2030110_zpssjv15zti.jpg


Side gold stripe glued to the upper right side arm assembly.
P2030115_zpspmagqsdt.jpg


Right side view - Gold stripe joined to upper and lower arms and back.
P2040116_zpsl0f6m3rg.jpg


That's it for now.

Sky Seeker
:tank:
 
Last edited:

Sky Seeker

Well Established Member
Jun 1, 2015
1,178
1,083
95
More pics Vorchan head.

Other side with gold stripe joined to both arms.
P2040118_zpsovwoo6n5.jpg


Front view.
P2040119_zpsb7tkuoi2.jpg


Another front / top view.
P2040121_zpsdk2h8smw.jpg

Top view.
P2040122_zpsv1dzeipk.jpg


Back view. Top plate joined to rear top plate that is connected with the back plate. As you can see from the rear the side are kind of twisted (not what I anticipated).
P2040123_zpskxx5id8f.jpg


Head assembled. The front of the head is flatter than expected. Needs to be more elongated and not as flat on the sides. The sides should be more canted upwards. However, it was noticed during assembly that that as the upper side arms are canted the nose bends downwards. Have to figure out a way to get a better cant on the sides and more of a tapered shape to the nose.
P2040124_zpsvk5yw2ra.jpg


P2040126_zpskcf9fjhi.jpg


Back view. Note the sides - not quite even. The back of the side arms are supposed to merge evenly with the back. No large side separations. Need to redesign back. Lower arms merge well with the back.
P2040128_zps8itb4zsl.jpg


Bottom view. This is actually printed a bit more oversized than needed to cut to shape due to having so many complex curves. The bottom plate was glued to the head assembly, dried, and then cut to the desired shape you see here.
P2040129_zpsj2nyzezg.jpg


Head mounted on ship assembly.
P2040130_zpsrtu0c31s.jpg


Top view.

P2040133_zpsqk9llz8p.jpg


Left Side view.
P2040134_zpsxv8p9vs2.jpg


Top / Front view.
P2040136_zpsnqapbvnh.jpg


Right Side view.
P2040137_zpsehnm3bxj.jpg


Template. Will have to modify several sections. Still a work in progress. As you can see the "hot pink" becomes deep purple when printed on a laser printer. The color schemes on the right are there to determine what prints out as what. The magenta on the lower right will be the ideal color for the final design.

The designs down on the lower right hand corner are the supports for the gold stripes. They are being redesigned to give the lower arm section a more bowed look than the upper arm section, which will be thinner and more straight. Back needs to be redesigned to be more bowed outward and not flat when assembled. The central box that receives the main fuselage will be made smaller for a snug fit. Top of the upper arms will be cut flat along the top and separated from the present multi-armed assembly. The lower arms as well will be separated as well. Another piece between the upper arms and front plate needs to be created to allow for greater canting of the upper side arms. The top plate (portion with silver or gray boxes) will be made smaller and the side attachment will be smaller as well.

pg.%205%20-%20nose_zpse3ac0sov.jpg

Any guidance is appreciated. If you want to modify the template above please feel free to do so.

That's it for now.

Sky Seeker
:tank:
 
Last edited:

zathros

*****SENIOR ADMINISTRATOR*****
Staff member
Administrator
Moderator
Apr 5, 2013
13,498
9,549
228
Thanks !!... I took only 5 curves from the original mesh 1 down the center, which I modified a lot..3 from the top insert, so it could match..and 1 down the side as a reference, most of these lines ended up being cut up, referenced and large sections deleted. Side opening was a projected line !! then cut the side..extruded the line to the inside for the new insert which can still used the fiddly bits from the original! Made all the others to sweep. I think it was when I picked duplicate..I should have picked pull curve..anyway..once I had the curve it would not join together. ended up deleting..and just creating a new one.. I also..didn't make the curves long enough to sweep all the way to the insert..ended up 1 mesh short! so slipped in a single sweep sideways.just to get something that I could test..easy to go back and fix...as well as re-run some new curves as some ( be-tweeners) to smooth things out...don't want to get the runs too small though or will end up with hair-line cuts on the nose end! I can quickly use this one to rebuild and refine a whole new one for a final version! Grabbed a UV of this to see what it will look like with the purple panels I am using for a texture!!


@Gandalf: Why didn't you try the splines I gave you and Run the Rails with those? Just wondering.

@Slyseeker, Great job!! ;)
 
Last edited:
  • Like
Reactions: Sky Seeker

Sky Seeker

Well Established Member
Jun 1, 2015
1,178
1,083
95
Why didn't you try the ones I gave you? Just wondering.

@Slyseeker, Great job!! ;)

Z - Haven't messed with Rhino yet. I'll see about looking closer at Gandolf's design again. His recent head design is quite good. Not canon, but good. I think I've got an idea regarding the back and the wide gap at the top. Still have to solve the canting problem.

Thanks for the compliment.

Sky Seeker
:tank:
 

Sky Seeker

Well Established Member
Jun 1, 2015
1,178
1,083
95
Why didn't you try the ones I gave you? Just wondering.

@Slyseeker, Great job!! ;)

Z - I just checked your earlier posts. I see what you mean now. You've got a lot of little strips. I'm trying to go for the fewest amount of parts that can be done to make this a simple model (not succeeding.. yet). However, the shape of the strips has given me some ideas as far as combining the strips into one strip and the orientation of the strips on the model I believe is probably the way to go. Thanks for the assistance.

Sky Seeker
:tank:
 

Gandolf50

Researcher of obscure between war vehicles...
Staff member
Moderator
Jan 28, 2013
1,327
1,576
96
New Mexico USA
@Gandalf: Why didn't you try the splines I gave you and Run the Rails with those? Just wondering.

@Slyseeker, Great job!! ;)
I did!! And THANX!! That's how I learned how-2-do-it!! but they where way too thin towards the nose, so I had to change all the front... and flatten the top and spread the sides out...and by the time I did all that..I basically had to start all over with new rails anyway! ...sooooo...:(

@Slyseeker Think AIRCRAFT! and take apart the head parts I gave you and use/adapt the strips to PANEL your CRAFT!! ;)
 
  • Like
Reactions: Sky Seeker

Gandolf50

Researcher of obscure between war vehicles...
Staff member
Moderator
Jan 28, 2013
1,327
1,576
96
New Mexico USA
Z - Haven't messed with Rhino yet. I'll see about looking closer at Gandolf's design again. His recent head design is quite good. Not canon, but good. I think I've got an idea regarding the back and the wide gap at the top. Still have to solve the canting problem.

Thanks for the compliment.

Sky Seeker
:tank:

I watched the preview of Babylon 5-X and the mesh in Darkness Ascending is the one they used in that...if you watch it there is a good shot of the side view close-up ..and that what I used for my design.
 
  • Like
Reactions: Sky Seeker

zathros

*****SENIOR ADMINISTRATOR*****
Staff member
Administrator
Moderator
Apr 5, 2013
13,498
9,549
228
I watched the preview of Babylon 5-X and the mesh in Darkness Ascending is the one they used in that...if you watch it there is a good shot of the side view close-up ..and that what I used for my design.


I feared they would be only good for a very big model of this ship. I think I would have carved this out of balsa!!! ;)
 
  • Like
Reactions: Sky Seeker

Gandolf50

Researcher of obscure between war vehicles...
Staff member
Moderator
Jan 28, 2013
1,327
1,576
96
New Mexico USA
I feared they would be only good for a very big model of this ship. I think I would have carved this out of balsa!!! ;)

The more I work with this ...the deeper dread I have that you are right ( actually I know you are, just not ready to go that direction as yet). It screams out for all the details and that's not talking greebles...that is the basic stuff in the renders, it needs the vents (though what possible use they would be is another question) the details in the nose, wings all that stuff..and even with the wings quartered..it is small!! and that makes the detail stuff very small..!!!!
 
  • Like
Reactions: Sky Seeker

Sky Seeker

Well Established Member
Jun 1, 2015
1,178
1,083
95
I did!! And THANX!! That's how I learned how-2-do-it!! but they where way too thin towards the nose, so I had to change all the front... and flatten the top and spread the sides out...and by the time I did all that..I basically had to start all over with new rails anyway! ...sooooo...:(

@Slyseeker Think AIRCRAFT! and take apart the head parts I gave you and use/adapt the strips to PANEL your CRAFT!! ;)

Thanks am trying to do so, also where do you think I got the template for most of this anyway? The posts where you gave the top, front, bottom, and side views were my launching point. Of course the main launching point for all of this in the first place was your "experimental" wings. Thanks again.

Oh just a reminder.. when you do texturing do a pre-print of the textures to make sure it's what you want, otherwise you'll end of with a blueish purple head like what I got. I was thinking hot pink and got purple instead. Oh well for now. I'll rebuild anyway.

"Babylon 5-X and the mesh in Darkness Ascending" are you referring to the episode in B5 or the picture we were looking at the other day? Just wondering.

Sky Seeker
:tank:
 

spaceagent-9

Right Hand Man and Confidant
Moderator
Jul 10, 2013
3,108
3,474
143
62
pheonix
on the white star I printed on metallic purple paper. it turned out ok, but I should have enhanced the purple saturation and then printed it on neon green poster paper.
that would have let the energy ports look really neon green and the purple would cover well on the other parts of the ship.
I don't know what to do here, except, maybe a plum color, or even if there is just medium purple and print it on that and hope the light and darks show up right.
hope that helps somehow.
 
  • Like
Reactions: Sky Seeker

Sky Seeker

Well Established Member
Jun 1, 2015
1,178
1,083
95
on the white star I printed on metallic purple paper. it turned out ok, but I should have enhanced the purple saturation and then printed it on neon green poster paper.
that would have let the energy ports look really neon green and the purple would cover well on the other parts of the ship.
I don't know what to do here, except, maybe a plum color, or even if there is just medium purple and print it on that and hope the light and darks show up right.
hope that helps somehow.

Spaceagent,

I would love to see your White Star and how it turned out. It's on "the list" of ships to be built.

Sky Seeker
:tank:
 
Last edited:
  • Like
Reactions: spaceagent-9

Sky Seeker

Well Established Member
Jun 1, 2015
1,178
1,083
95
This is awesome! :)

RF - Hey thanks! More work needs to be done, but the overall design now just needs to be tweeked here and there. BTW the head is actually quite strong on the sides. The back also needs some reinforcement and the head needs a better way to stay on the rest of the body.

BTW - How's the sandman car design coming along?

Sky Seeker
:tank:
 

Gandolf50

Researcher of obscure between war vehicles...
Staff member
Moderator
Jan 28, 2013
1,327
1,576
96
New Mexico USA
Thanks am trying to do so, also where do you think I got the template for most of this anyway? The posts where you gave the top, front, bottom, and side views were my launching point. Of course the main launching point for all of this in the first place was your "experimental" wings. Thanks again.

Oh just a reminder.. when you do texturing do a pre-print of the textures to make sure it's what you want, otherwise you'll end of with a blueish purple head like what I got. I was thinking hot pink and got purple instead. Oh well for now. I'll rebuild anyway.

"Babylon 5-X and the mesh in Darkness Ascending" are you referring to the episode in B5 or the picture we were looking at the other day? Just wondering.

Sky Seeker
:tank:

The one from Darkness Ascending and the video Babylon 5-X http://www.zealot.com/threads/b5-project-centauri-vorchan.179598/page-5#post-1013489 ...lost the link to the videos for the time being... but there are some great shots of them in battle shows what I used as a base for the design direction I went with...oh I remember now..I captured the videos..and have them here...
http://www.moddb.com/mods/babylon-5-x3-mod/videos/latest-in-game-video GREAT STUFF! That's what they used the ship from Darkness for!

I haven't run a color print as yet for anything, just a few B/W to see if it will be cut-able or not!! ..jesshh just my luck it will be all muddy and all the detail will dissolve into nothing..not on my printer but on others, perhaps! That is about the way things have been working out! I went with the DARK version of my texture...and added the deep purple to the file out-side of Inkscape since it would not transfer to PDF's...
 
  • Like
Reactions: Sky Seeker

spaceagent-9

Right Hand Man and Confidant
Moderator
Jul 10, 2013
3,108
3,474
143
62
pheonix
hang in there dude!!! you are so close!! you have done something akin to the crazy horse memorial as per paper modelling!!! this is a great endeavor and hopefully the first of many, and I for one will be honored to build this and to have seen this project from the start to print! great job.
 
  • Like
Reactions: Sky Seeker