B5 - Project Centauri Vorchan

Sky Seeker

Well Established Member
Jun 1, 2015
1,178
1,083
95
How long is the "Head/Nose" piece going to be? If it is more than an two inches, the file could by cut along the mesh edges, surfaces formed, and then unfolded. I started it out of curiosity. How long is yours going to be, because your model looks pretty big, and I think this would work.

Z - The head will be a little less than two inches. Hopefully this model can be to scale up or down accordingly. Although if we make it over two feet we will have to make quite a few changes. Right now the model will be about 8" x 7" (with the vertical stabilizers). The main body is an inch thick by the main fuselage and wing.

Sky Seeker
:tank:
 

zathros

*****SENIOR ADMINISTRATOR*****
Staff member
Administrator
Moderator
Apr 5, 2013
13,499
9,551
228
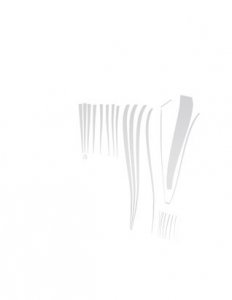
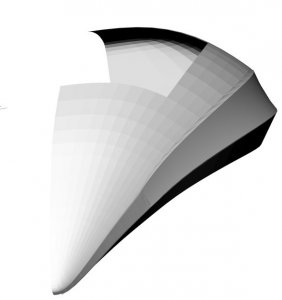
I am going to unfold the model. I can give you the file in whatever format you want. Let me know. Then you can work with it and size it without worrying about the size. This is how the Top Front left tip, and side look unrolled. It may be too small in the final analysis. I think this part could be sanded out of Balsa to get the best results, in all honesty. The middle long pieces wrap around to the back edge, and the last piece is the side flat piece, which is actually sunken in, I just "Patched" it so you could see how the indented piece would work, like I wrote earlier, 95% done, may 80%, looking at it now, but it's probably too small to work with. Might provide a guide for a piece made from Resin, or Epoxy.

Unroll_Vorch-1a.jpg
 
  • Like
Reactions: Sky Seeker

Gandolf50

Researcher of obscure between war vehicles...
Staff member
Moderator
Jan 28, 2013
1,332
1,585
96
New Mexico USA
I a
How long is the "Head/Nose" piece going to be? If it is more than an two inches, the file could by cut along the mesh edges, surfaces formed, and then unfolded. I started it out of curiosity. How long is yours going to be, because your model looks pretty big, and I think this would work.

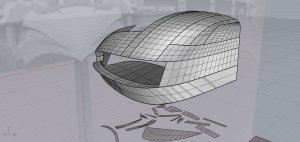
I am not sure as of now..as far as my version anyway... seeker is basing his on the the original single horizontal wing which fits on an a4 sheet, so his will be quite small!! Mine on te other hand I have done as you suggested and have remodeled the whole thing into a better version ( simpler each section of the whole is a mesh on its own, and not the original mesh) a combination of lofting and open curve meshes, only somewhat using the general outline of the original...brought the line down the middle to a flat hawkish front, then swept the sides flat to that line so I could eliminate the small curved front area..the lower side from the nose to the center back is now one single mesh. The curved top back is several strips with only one section that sweeps..

closeup.jpg
As far as how big...I think this one will be LARGE!! I am going in a different direction..due to the difficulty of the detail parts..as I want really detailed areas..I will go with something along the lines of the head both sides on an a4 sheet then scale up from there .making the wings around 1/4 to ea to an a4 sheet...the rest will actually fit even though it seems they are huge..but by the time you tear them apart and turn them into boxes one to two sides to a sheet it should work out..actual printed parts are smaller than construction elements..as the skeleton/formers can be cut and spread across sheets to be used as templates to cut the thick stuff!;)
 
  • Like
Reactions: Sky Seeker

zathros

*****SENIOR ADMINISTRATOR*****
Staff member
Administrator
Moderator
Apr 5, 2013
13,499
9,551
228
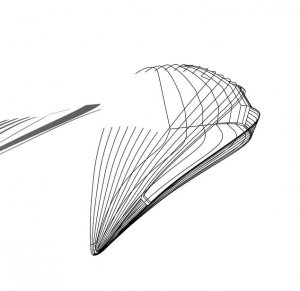
I'm not sure why you modeled it that way, if you want the Rhino file, so you can look at it, it will give you an ideal of what I did, and you can go from there, you can have it, I can attach it to a P.M.. If you are making a bigger one, the part definitely unfolds, using the Curves from front to back, eliminating the Cross, 90 degree curves, you get the lines that allow you to easily "Sweep 2 Rails" Under the "Surface" command.

Wireframe_Vorchan.jpg
 

zathros

*****SENIOR ADMINISTRATOR*****
Staff member
Administrator
Moderator
Apr 5, 2013
13,499
9,551
228
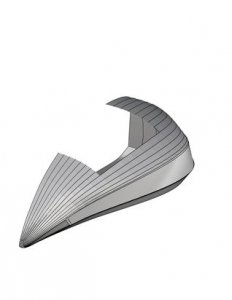
Rendered: It's almost there. I have not recessed the sides yet, that's easy enough as they are cut out. The little part sticking out of the nose on the bottom is the bottom, which I have not connected the surface to yet. :)

Vorchan_Nose Rendered.jpg
 
  • Like
Reactions: Sky Seeker

Gandolf50

Researcher of obscure between war vehicles...
Staff member
Moderator
Jan 28, 2013
1,332
1,585
96
New Mexico USA
I'm not sure why you modeled it that way, if you want the Rhino file, so you can look at it, it will give you an ideal of what I did, and you can go from there, you can have it, I can attach it to a P.M.. If you are making a bigger one, the part definitely unfolds, using the Curves from front to back, eliminating the Cross, 90 degree curves, you get the lines that allow you to easily "Sweep 2 Rails" Under the "Surface" command.

View attachment 156465
Need a full tutorial on sweep 2 rails, as well as everything else....just about everything I have tried to do ..I select something, tell it to do this, is ask me to select which, and I can't select anything!!!!!!!

Basically because I have no idea what I am doing...or rather Rhino is the most un-intuitive program to work with after you have worked with all the others out there! So searching on details on how to do something I have to first figure out what the hell Rhino has decided to reference it... maddining... but I basically did what you did ..though it does not look like it any more..as I took the sweeps and broke them into sectional meshes..so the average kid out there can actually cut it out and glue it together. We might be able to water form or cast a mold and laminate copies of this in compressed layers but most just want to glue pieces together and get a model. I really like the elegance of yours! I liked it when I had the basic same lines..but quickly realized after a print of the unfold..it would be a very difficult thing to work with..so I went with the chunky mesh that can be tabed together. On a brighter note... I also have to switch between 3 different programs as none will do everything! Texturing in Rhino I do not like..and UV maps..forget it.. I do wish it would save in SVG format or import..that would save half the work..!!

Texture test on SGV file in Inkscape... not sure which one I like best..may add a gold bump to the darker version to pop some of the panels...
Texture-1.jpg Texture-2.jpg
 

zathros

*****SENIOR ADMINISTRATOR*****
Staff member
Administrator
Moderator
Apr 5, 2013
13,499
9,551
228
In Rhino, texturing is possible, I just haven't spent enough time. Since I mostly do ships and planes, I texture the parts after they are unrolled, with the appropriate material from swaths I find on the net. If you look at the picture I posted with just (mostly) the longitudinal lines, you start from the outside, go to "Surface", and select "Sweep 2 Rails, you select the outside line, the the one next to it, then, for the "Profile piece, which if is a straight line, will always make the part able to be unfolded, and continue on. I select the straight Curve at the end of the two rails, that connects the ends as the profile curve. If you want the file to look at, send me a P.M., I should be able to attach it there. In that model, after you remove the 90 degree curves you are not going to use, you must join the curve segments together to "Run the Rails". :)
 

Sky Seeker

Well Established Member
Jun 1, 2015
1,178
1,083
95
Have some new pics , but the system, won't let me upload them. The big nacelles were assembled and positioned in place on the model. That's all that has been done so far. Working on designs for the head / nose, wing struts, and then side "Lshapes" behind the head / nose. Will supply the pics when the system works normally again.

Sky Seeker
:tank:
 

Gandolf50

Researcher of obscure between war vehicles...
Staff member
Moderator
Jan 28, 2013
1,332
1,585
96
New Mexico USA
In Rhino, texturing is possible, I just haven't spent enough time. Since I mostly do ships and planes, I texture the parts after they are unrolled, with the appropriate material from swaths I find on the net. If you look at the picture I posted with just (mostly) the longitudinal lines, you start from the outside, go to "Surface", and select "Sweep 2 Rails, you select the outside line, the the one next to it, then, for the "Profile piece, which if is a straight line, will always make the part able to be unfolded, and continue on. I select the straight Curve at the end of the two rails, that connects the ends as the profile curve. If you want the file to look at, send me a P.M., I should be able to attach it there. In that model, after you remove the 90 degree curves you are not going to use, you must join the curve segments together to "Run the Rails". :)

I wasn't able to send anything via PM ..but I figured the Sweep 2 Rails, did not realize I had to cut the end curves apart so that they were only connected to the 2 rails I was running in every case... in tutorials they kind-a skipped over that part and really didn't explain that! I did take the center line and re-work it so that when it approaches the nose it stops then I transitioned it to a flat on the front, more like the prow of a ship...the the sides and the top pieces can either join at a point or end in a flat line., helped to get rid of the slivered pieces or the difficult rounded nose piece. Basic shape remains the same. One thing I have to remember is to keep the openings exact as the top insert and the side inserts are made already (really don't want to remake them, too many parts!) the neck connector to the main body isn't a problem as it can just be re scaled...
 

zathros

*****SENIOR ADMINISTRATOR*****
Staff member
Administrator
Moderator
Apr 5, 2013
13,499
9,551
228
Happy you figured it out. I couldn't attach the Rhino file for you to explore because of recent issues here. You can make almost anything running the rails, you just have to make sure if you import the Mesh from another model, there aren't curves superimposed, and you reduce everything, then almost anything can be done with the "Running the Rails" method. It's imperative that the Profile curve always be a straight line, as that will ensure that the part Unfolds . :)
 
  • Like
Reactions: Sky Seeker

Sky Seeker

Well Established Member
Jun 1, 2015
1,178
1,083
95
Have some new pics , but the system, won't let me upload them. The big nacelles were assembled and positioned in place on the model. That's all that has been done so far. Working on designs for the head / nose, wing struts, and then side "Lshapes" behind the head / nose. Will supply the pics when the system works normally again.

Sky Seeker
:tank:

Ok Here are the pics. Well... I guess that didn't work.
 

Sky Seeker

Well Established Member
Jun 1, 2015
1,178
1,083
95
Have some new pics , but the system, won't let me upload them. The big nacelles were assembled and positioned in place on the model. That's all that has been done so far. Working on designs for the head / nose, wing struts, and then side "Lshapes" behind the head / nose. Will supply the pics when the system works normally again.

Sky Seeker
:tank:

Ok - Just tried to post again. Looks like the amount of info to upload needs to be modified. It comes up then is denied. Still needs work.

Sky Seeker
:tank:
 
  • Like
Reactions: zathros

zathros

*****SENIOR ADMINISTRATOR*****
Staff member
Administrator
Moderator
Apr 5, 2013
13,499
9,551
228
I just posted, soon, need to bide time. I look forward to seeing your design concept. :)
 
  • Like
Reactions: Sky Seeker

Gandolf50

Researcher of obscure between war vehicles...
Staff member
Moderator
Jan 28, 2013
1,332
1,585
96
New Mexico USA
Been working..not much to say till picture snafu is worked out so dropped a couple on outside image host for the time being..
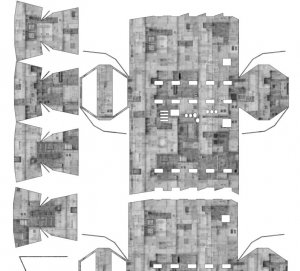
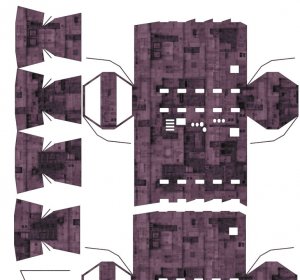
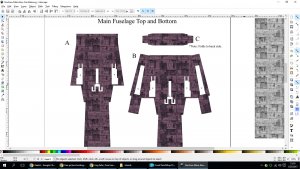
worked away only to find out that Inkscape does not play well when saving patterns in pdf's! Any transparencies..are lost unless you convert them to raster then it looks like trash!! so all the work I did has to be re-done..not a big deal..color the raster image and convert to pattern and bypass the transparency...just did not want to have to color all the panels and have several different imports..only wanted one and use trans to color them for the parts...my old copy of Corel Draw has a tendency to crash A LOT in windows 10 so...:(
Get this..which is just fine!
demo.jpg


but wanted ...
demo2.jpg

to add that nice dark purple feel to the over-all model! back to work....
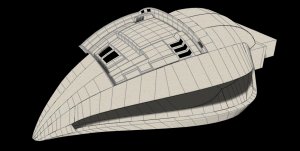
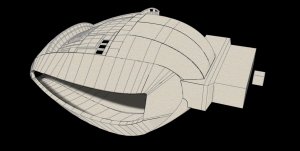
I was doing this as a break from going buggy from deleting tiny bits of useless mesh parts..and working around Boolean operations that did not want to work correctly.. Cutting sections of model to fit other sections into as you can see from the above large sections have been cut to allow the side http://www.zealot.com/threads/b5-project-centauri-vorchan.179598/page-7#post-1013883 to fit into these chunks..and this chunk fits into another and it ...........:Coffee::Coffee::Coffee::headbange:.......you get the idea...so much for taking a break from that part of it!! Onward and side-wards!!
 
Last edited:

zathros

*****SENIOR ADMINISTRATOR*****
Staff member
Administrator
Moderator
Apr 5, 2013
13,499
9,551
228
Geez, that looks really great!! I wish I understood texturing. I think it's the vernacular. Every tutorial assumes you have this basic knowledge. I need a step by step tutorial, for "dummies', because when it comes to that, I am a dummy. ;)
 

Gandolf50

Researcher of obscure between war vehicles...
Staff member
Moderator
Jan 28, 2013
1,332
1,585
96
New Mexico USA
Geez, that looks really great!! I wish I understood texturing. I think it's the vernacular. Every tutorial assumes you have this basic knowledge. I need a step by step tutorial, for "dummies', because when it comes to that, I am a dummy. ;)

Thanks...I think that is possible as soon as the picture mess is cleared up...and use something drawn for the purpose and not deal with an unknown and have to figure out what in the world the person that created it was thinking of! You are more than accurate in saying it is vernacular. It is all the same procedure give or take...only real difference is in what some-one or some-program calls it...texturing/colorizing/transparency/.... it is all filling an area with either a color of some sort or filling it with a graphic. In the 3d world it has also become the same as in some programs you can paint directly on the 3d mesh/ fill/airbrush/etc...for example ( you can import an .obj file into photo-shop and paint away, gloss reflections all the good stuff from photo-shop and actually save if I remember correctly layer 3 or 4 and it will save the 3d mesh and the UV layer which can be ported back to your 3d prog...nice undocumented ( little-known ) trick! Way better than fighting with some difficult if not impossible to use UV editor! ...and use the same thing...in our new forums/gimp and perhaps photo-shop, perhaps corel draw if some one uses it as well as Adobe Illustrator. ( not full tutorials in all but maybe a list commands in each program.
 
  • Like
Reactions: Sky Seeker

zathros

*****SENIOR ADMINISTRATOR*****
Staff member
Administrator
Moderator
Apr 5, 2013
13,499
9,551
228
I have Adobe CS3 and CS5, and can due rudmentary things, but the U/V stuff makes my head spin like the girl in The Exorcist!! I have tried playing with it in Rhino, getting from absolutely nothing to whacky ass'd results that show no progression or reference point to continue from. Maybe when this is all over, you can throw this bouncing dog a bone. :)
 

Gandolf50

Researcher of obscure between war vehicles...
Staff member
Moderator
Jan 28, 2013
1,332
1,585
96
New Mexico USA
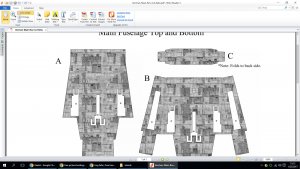
Been working away...small update back to the head object on my version of this beast... I added some stuff to the main box sheet and even though I have the wings quartered on their own a4 sheets it still looks like it may still be too small for what i wish to accomplish..some of the stuff I have detailed out which will have simpler versions included..are ( tiny ) to say the least...had to set line size to .o9mm just so that you can see the fold lines!! and I really did simplify the design..really! anyway..will see what will happen....
Have gone in a slightly different direction with the head for this version...basic shape the same...
newHead.jpg

but changed the side panels to wrap around the side opening and cut the neck instead of original idea of a flat back and flat base on the neck... adds a bit to the shape..as well as some strength, then I can just add frame to the interior..more like an aircraft build...
newHead2.jpg


Still a lot to learn with Rhino..but it is getting a bit better... thought I think I should have done a few things different...when I pulled some curves, I pulled a few hairs when I cut that mesh with a poly-line for the first time in Rhino!!...but then..that's what learning is all about..and that is what a beta build is for!
 
Last edited: