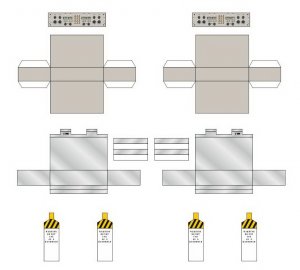
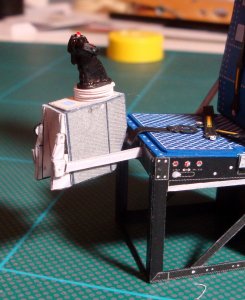
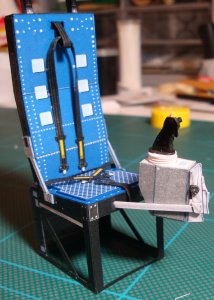
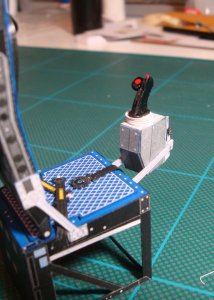
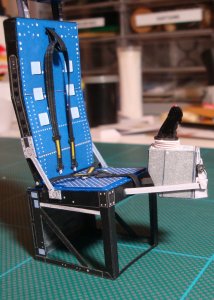
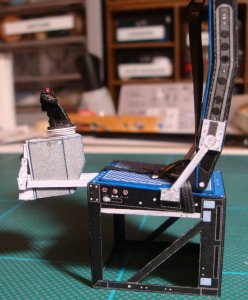
1:16 Space Shuttle flight deck

zathros

*****SENIOR ADMINISTRATOR*****
Staff member
Administrator
Moderator
Apr 5, 2013
13,498
9,549
228
I think it is the way to go. They wore their space suits all the time after the disasters. Their suits provided the padding they needed, and in space, you butt doesn't hurt from sitting down on a spartan chair. I am sure that any gaseous anomalies would escape the suit, and it would be hard to say which astronaut was the culprit, but the carbon scrubbers would wipe the air clean. :)
 
  • Like
Reactions: Tonino

zathros

*****SENIOR ADMINISTRATOR*****
Staff member
Administrator
Moderator
Apr 5, 2013
13,498
9,549
228
There could have been stored an airbag there in case of an accident, as I remember there being a white cloth like box under there, but I cannot find the pic. It just may have been storage, as they used every nook and cranny. :)
 

Tonino

Well-Known Member
Apr 15, 2004
791
1,775
83
61
Republic of San Marino
www.facebook.com
Someone told me pic upload works again...

YESSS!!! IT'S TRUE!!! :D

Well here are other pre-builds to test fitting of new added parts.

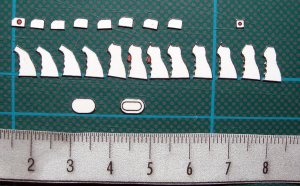
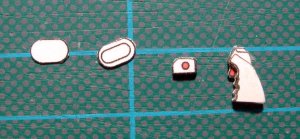
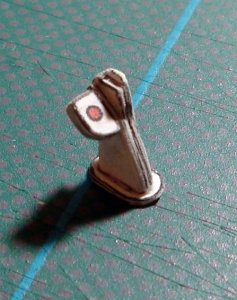
First challenge: the joystick. It has a very complex shape. Very hard to recreate in 3D in this scale. I tried the "sandwich" method and realized a number of slices, imagining to cut a real joystick with a knife.

DSC08103.JPG DSC08104.JPG DSC08105.JPG
I left some slices back because the thickness would be excessive, but, even after some sanding at the edges, the result doesn't satisfy me a lot. This detail is put in "waiting mode"...

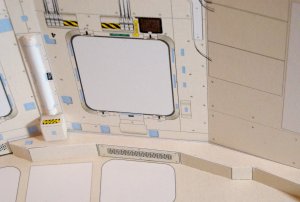
Here are some tries with ceiling details:
DSC08108.JPG
Here is central lamp and aft wall structure...

DSC08110.JPG
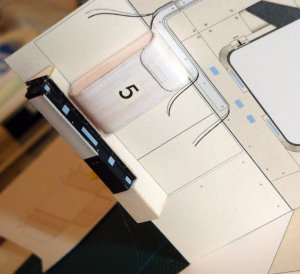
And here is side lamp with one of the mysterious pouches. After some searching I found some infos about them: they contained cable devices (one for every crew member, hence the numbering) used in case of emergency exit throug the upper windows.

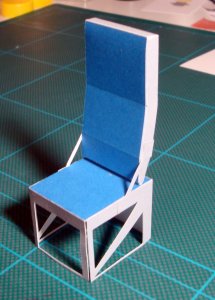
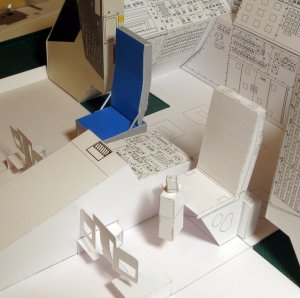
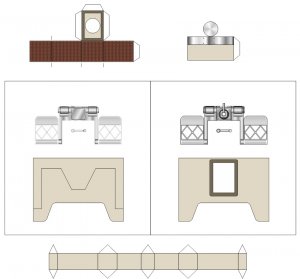
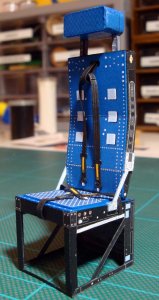
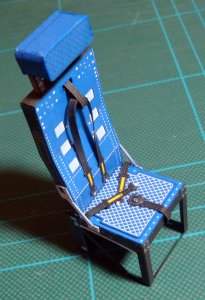
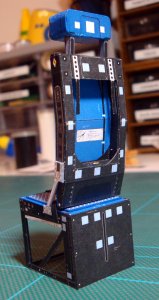
And here is my very first attempt with pilot's chair.
DSC08113.JPG DSC08115.JPG
It's just a draft to check dimensions and proportions. I already found a mistake: the seat should not be parallel to floor as I made it, but slightly inclined backwards, in the photos it appears to be aligned with central console (that is inclined) so I must correct the shape of the base.

Screenshot 2017-02-21 23.43.18.jpg
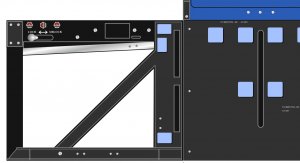
Unfortunately I already have drawn the final seat pieces and now I have to modify them. Not a great problem: it's the nice part of vector graphics: you have just to shift some nodes and the drawing follows them as it was made of rubber bands...

Going to make a new test build for the chair. It's a very important piece of my cabin and I want it to be really nice! I'll be back soon

Bye
 

Rhaven Blaack

!!!THE MAN BEHIND THE CURTAIN!!!
Staff member
Administrator
Moderator
Jun 12, 2009
12,529
9,912
228
Oregon
www.deviantart.com
The joystick looks very good. I like the design of it. Although, I can see why you did not put in all of the layers. I can also see this used as a side joystick in a fighter plane (like a Viper or Advanced Thunder Fighter) :tank:
Everything else looks FANTASTIC!
KEEP UP THE GREAT WORK!!!
 
  • Like
Reactions: Tonino

zathros

*****SENIOR ADMINISTRATOR*****
Staff member
Administrator
Moderator
Apr 5, 2013
13,498
9,549
228
I could see those seats being "borrowed" for other projects!! :)
 
  • Like
Reactions: Tonino

zathros

*****SENIOR ADMINISTRATOR*****
Staff member
Administrator
Moderator
Apr 5, 2013
13,498
9,549
228
Someone told me pic upload works again...

YESSS!!! IT'S TRUE!!! :D

Well here are other pre-builds to test fitting of new added parts.

First challenge: the joystick. It has a very complex shape. Very hard to recreate in 3D in this scale. I tried the "sandwich" method and realized a number of slices, imagining to cut a real joystick with a knife.

View attachment 156625 View attachment 156626 View attachment 156627
I left some slices back because the thickness would be excessive, but, even after some sanding at the edges, the result doesn't satisfy me a lot. This detail is put in "waiting mode"...

Here are some tries with ceiling details:
View attachment 156628
Here is central lamp and aft wall structure...

View attachment 156629
And here is side lamp with one of the mysterious pouches. After some searching I found some infos about them: they contained cable devices (one for every crew member, hence the numbering) used in case of emergency exit throug the upper windows.

And here is my very first attempt with pilot's chair.
View attachment 156630 View attachment 156631
It's just a draft to check dimensions and proportions. I already found a mistake: the seat should not be parallel to floor as I made it, but slightly inclined backwards, in the photos it appears to be aligned with central console (that is inclined) so I must correct the shape of the base.

View attachment 156633
Unfortunately I already have drawn the final seat pieces and now I have to modify them. Not a great problem: it's the nice part of vector graphics: you have just to shift some nodes and the drawing follows them as it was made of rubber bands...

Going to make a new test build for the chair. It's a very important piece of my cabin and I want it to be really nice! I'll be back soon

Bye


I bet they stored their extra "Pamper's" diapers in there. It would be embarrassing having to change a fellow astronaut. You have to throw down a tarp in case they peed their spacesuits. (Only parents get these jokes, and maybe Revelle-Fan! ). :)
 
  • Like
Reactions: Rhaven Blaack

zathros

*****SENIOR ADMINISTRATOR*****
Staff member
Administrator
Moderator
Apr 5, 2013
13,498
9,549
228
I think the "Bar" is now in orbit, and not is it only high, being in orbit, it's longer!! (check your physics) :)
 
  • Like
Reactions: Tonino

Tonino

Well-Known Member
Apr 15, 2004
791
1,775
83
61
Republic of San Marino
www.facebook.com
Slowly, step by step, I'm almost arrived to the end of this huge design work.
Now finishing all little bits still on the "to do" list.

Here are:

the HUDs
HUD.JPG

The bar hanging from the ceiling in front of commander and pilot's seat
bar.JPG

The central element placed between front windows
f1.JPG

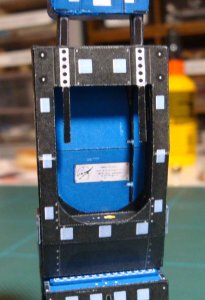
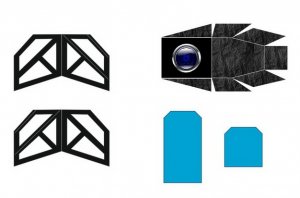
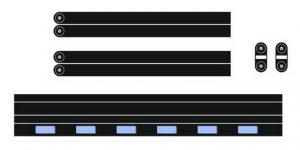
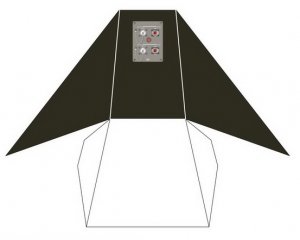
And those two devices attached to lower rear side of front seats (btw: what are those things? Anyone knows what's their function?)
box2.JPG box.JPG

Next - and last - element: the joystick command boxes.
And then... ... ... ... ... the REAL build will start!!!! :D