

M4A4 Sherman VC Firefly, Halinski 1:25
- Thread starter snake7
- Start date
You are using an out of date browser. It may not display this or other websites correctly.
You should upgrade or use an alternative browser.
You should upgrade or use an alternative browser.

Beautiful!! I think this might just be the BEST BUILD I have seen!!
Thank you!
Well, i don't think it is the best one, but i try my best
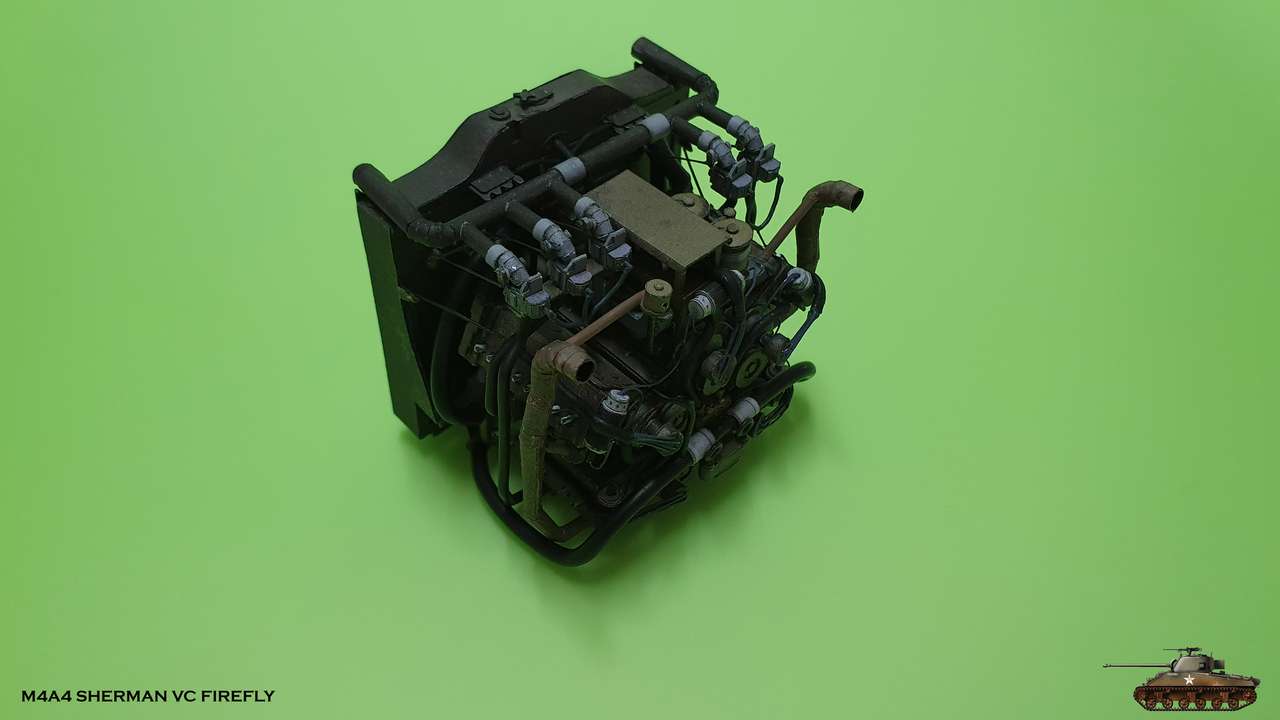
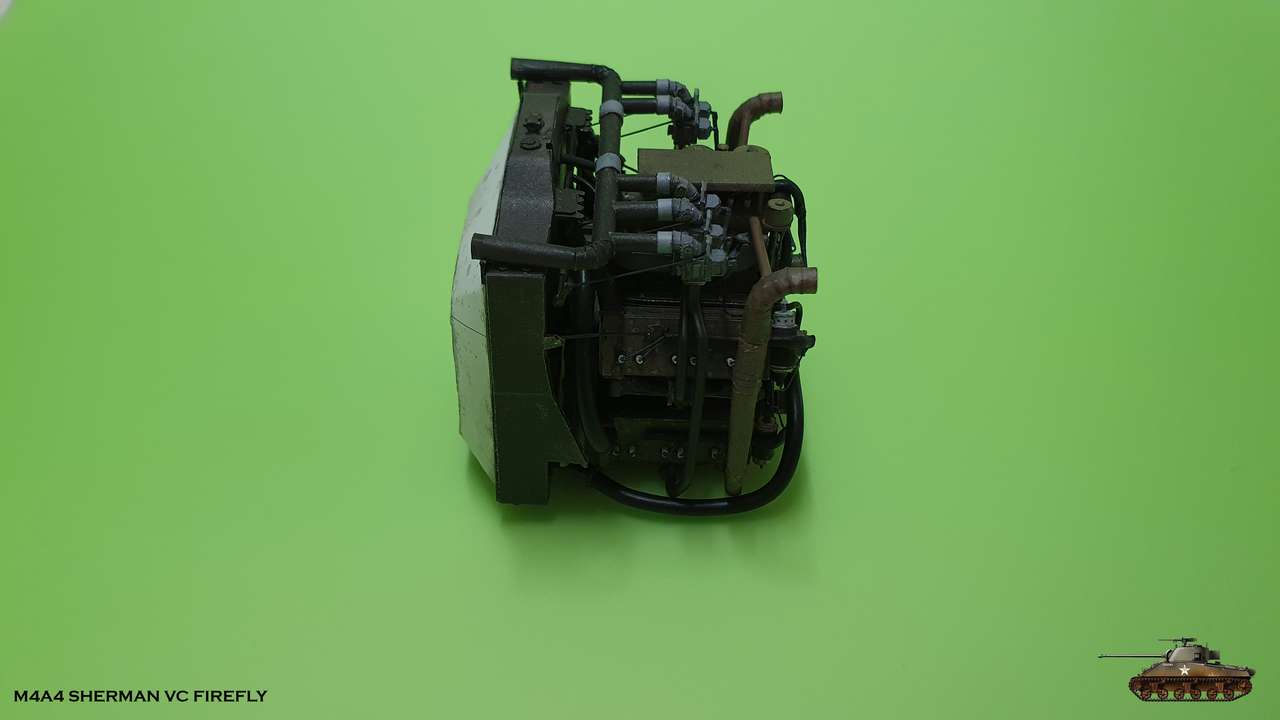
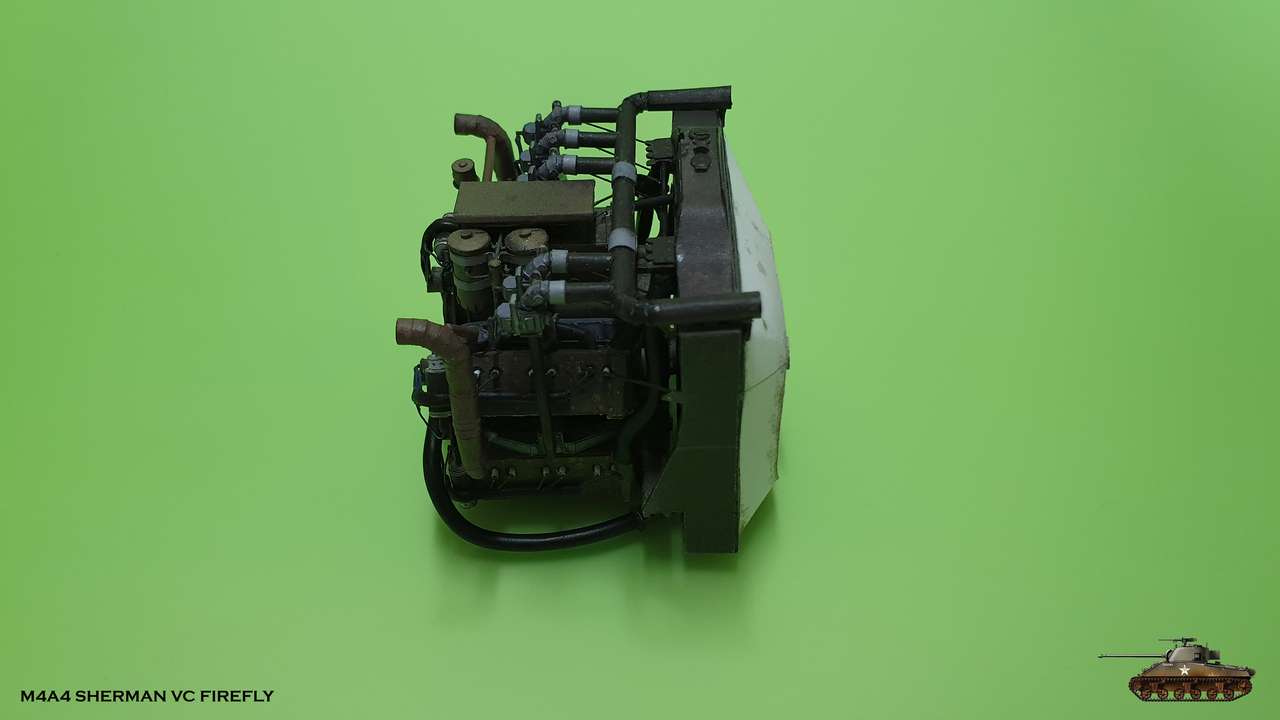
... and suddenly I noticed that there were no more paper parts for the engine. There are only a few tubes and levers left and that’s all!
First, I bent connecting pipe between the radiator and the water pump, which poured cold water into the pump,
accelerating it into five blocks. I took a wire with insulation of a suitable diameter.

And then I had to connect the throttle levers to all five carburetors,
But I was worried that later it would interfere with the alignment of the carburetors when connecting the distribution pipe from the filters.
So I did the opposite - first I glued the pipe and aligned all five carburetors, and then I added levers. For a while I felt like a jeweler :-D
Along the way, here and there I broke some parts and glued it back. The whole unit has become very fragile in the hands.
Also added fuel hoses leading from carburetors to fuel pumps.
I did it from scratch because the developer didn't plan it in design. (Now you can definitely start this engine!") )
)
The last two details - the upper connecting rods between the radiator and the engine and ... the engine is ready!
Welcome - Chrysler A57 Multibank!


Now I take a breath
Well, i don't think it is the best one, but i try my best
... and suddenly I noticed that there were no more paper parts for the engine. There are only a few tubes and levers left and that’s all!
First, I bent connecting pipe between the radiator and the water pump, which poured cold water into the pump,
accelerating it into five blocks. I took a wire with insulation of a suitable diameter.
And then I had to connect the throttle levers to all five carburetors,
But I was worried that later it would interfere with the alignment of the carburetors when connecting the distribution pipe from the filters.
So I did the opposite - first I glued the pipe and aligned all five carburetors, and then I added levers. For a while I felt like a jeweler :-D
Along the way, here and there I broke some parts and glued it back. The whole unit has become very fragile in the hands.
Also added fuel hoses leading from carburetors to fuel pumps.
I did it from scratch because the developer didn't plan it in design. (Now you can definitely start this engine!
)The last two details - the upper connecting rods between the radiator and the engine and ... the engine is ready!
Welcome - Chrysler A57 Multibank!
Now I take a breath
Last edited:


Last edited by a moderator:
Museum quality realism in the palm of your hand. A beautiful model, and that is just the engine.
Took the words right out-a-my mouth!! Video is sweet as well...!!!Museum quality realism in the palm of your hand. A beautiful model, and that is just the engine.
- Apr 5, 2013
- 13,876
- 10,215
- 228
That engine is just fantastic! Every time I look at it I see a labor of love. ")
Everything looks squared-up nicely, which is very hard to do. I'm sure you will really see how your work is when this thing connects to other parts of the model. Good work.
Thanks again
Well... back to "boring" stuff
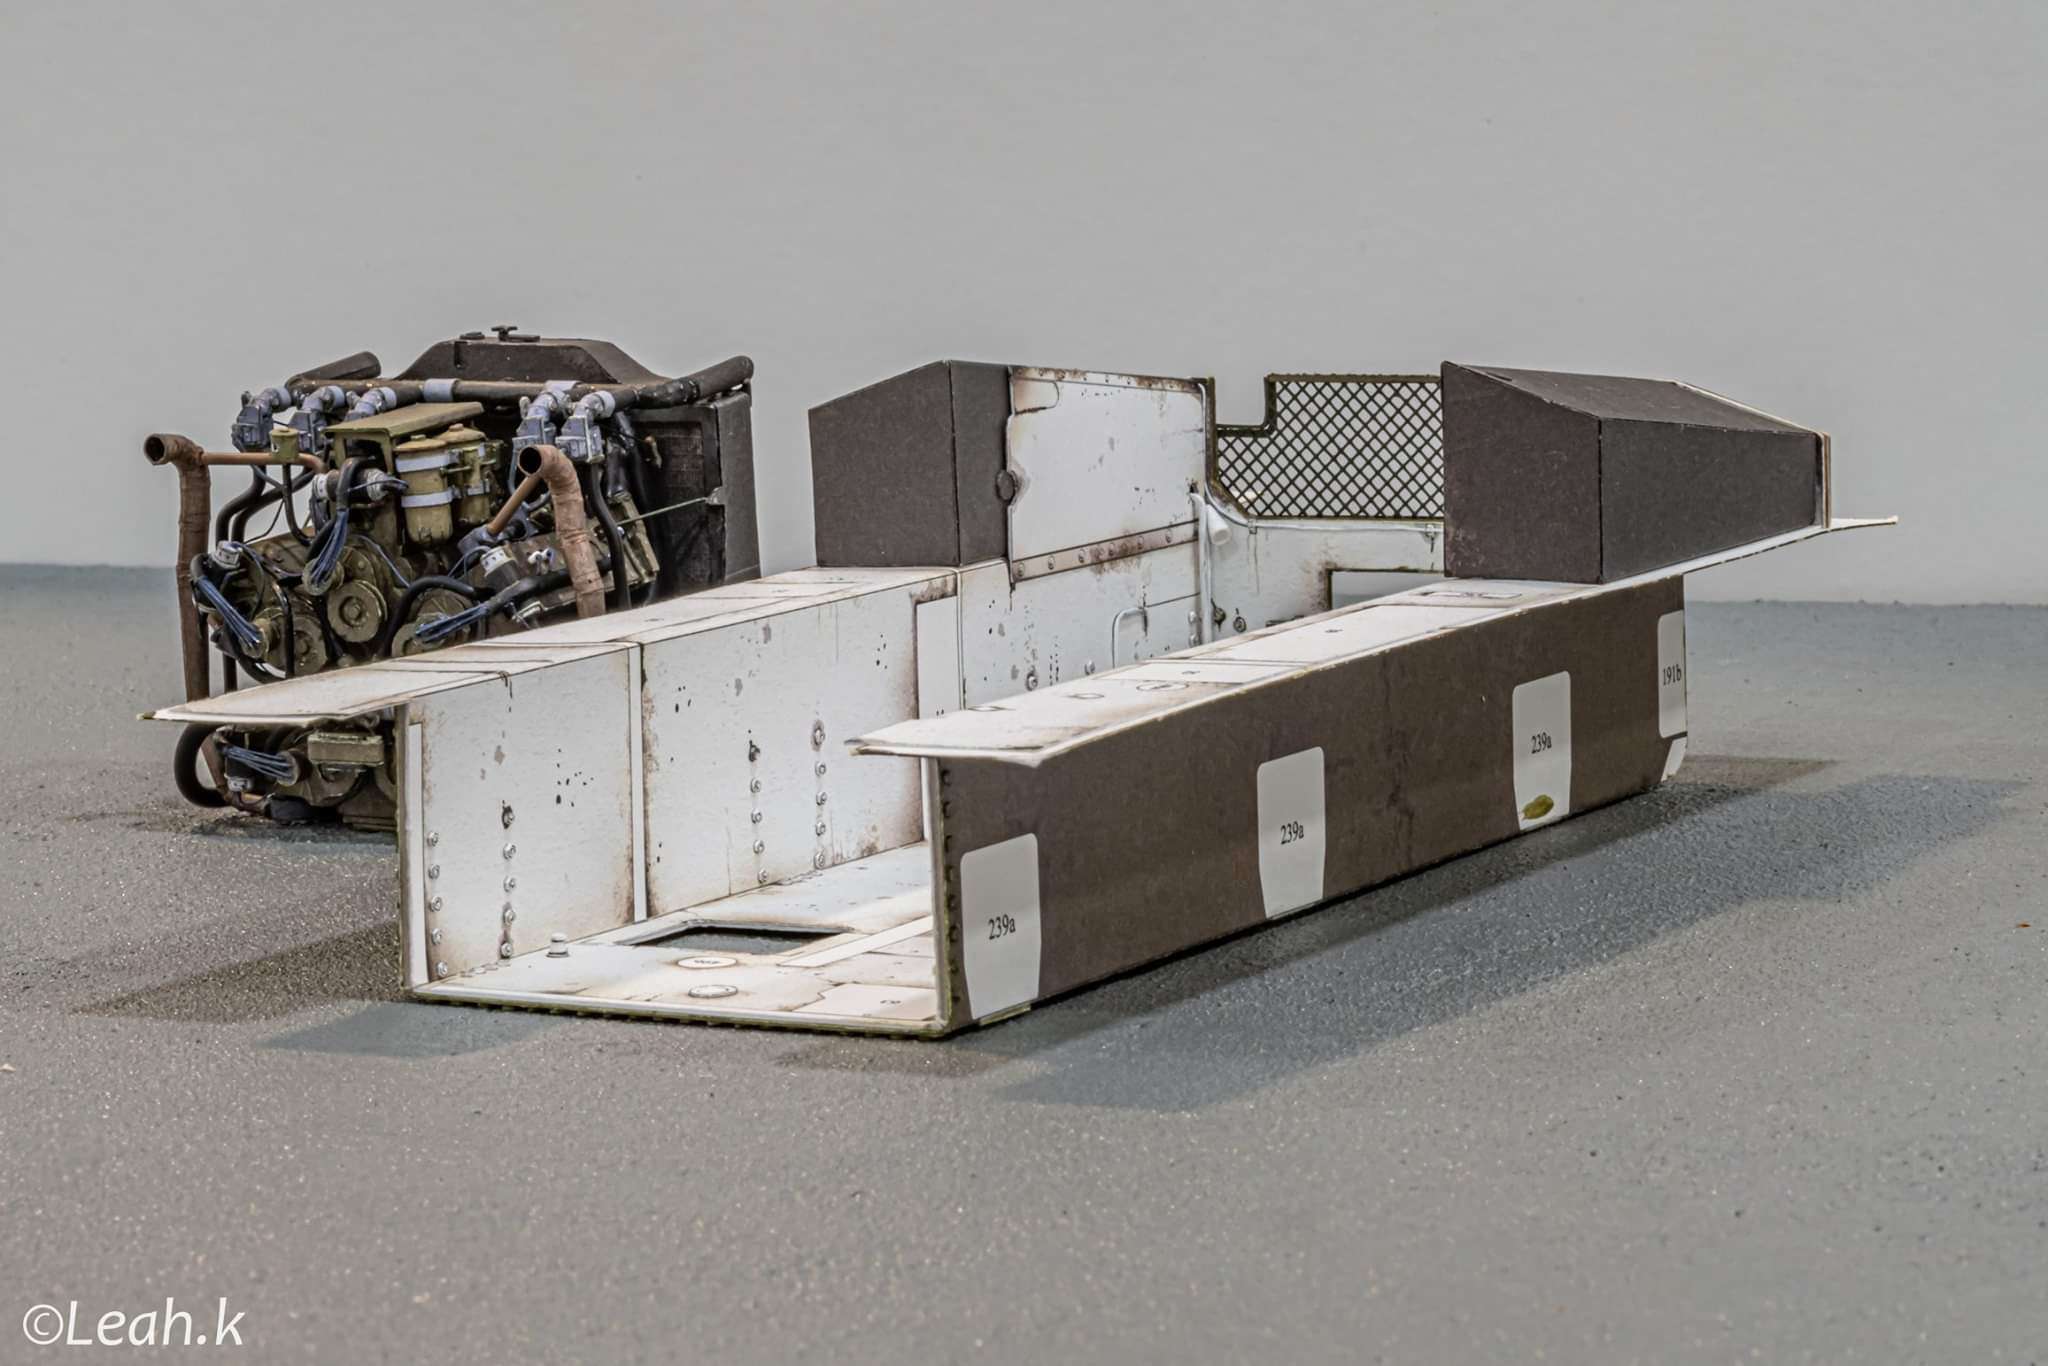
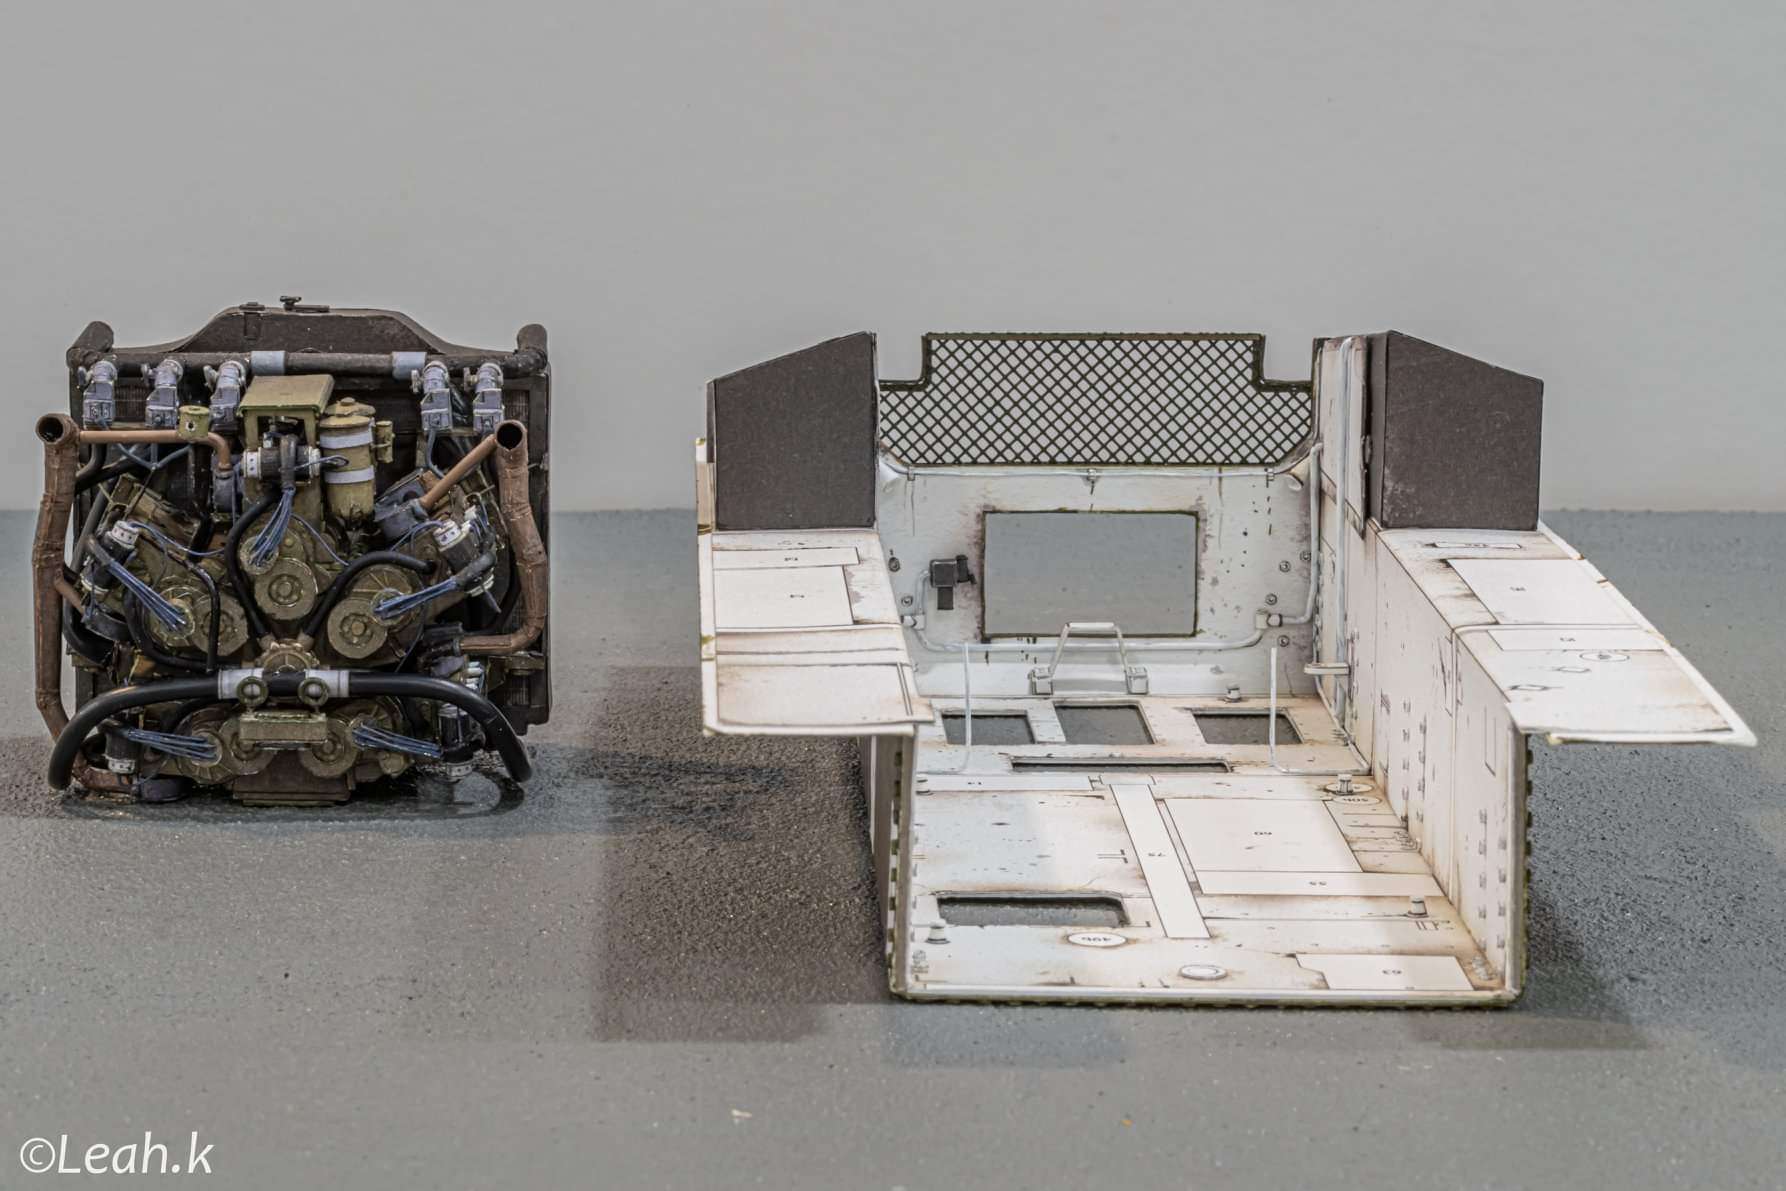
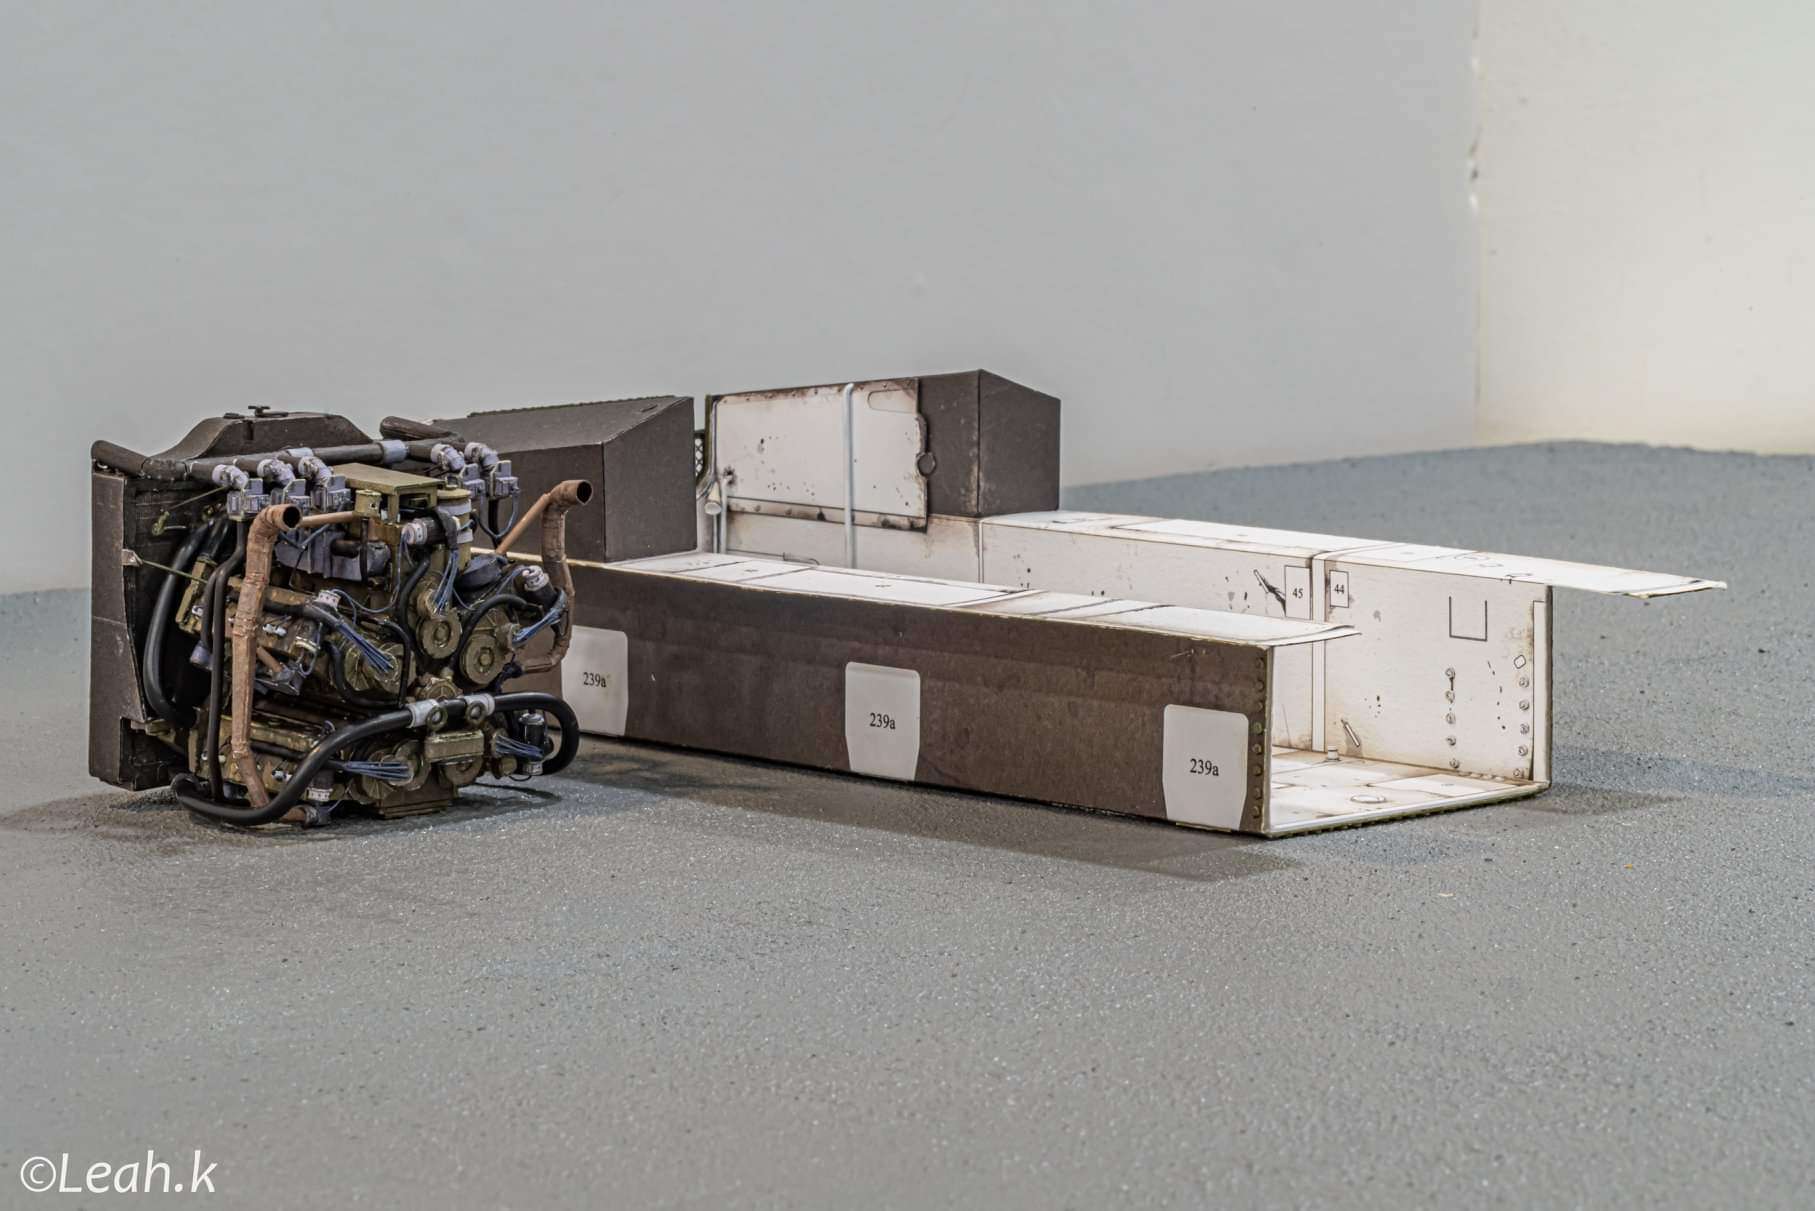
There are few more parts left to finish engine compartment.
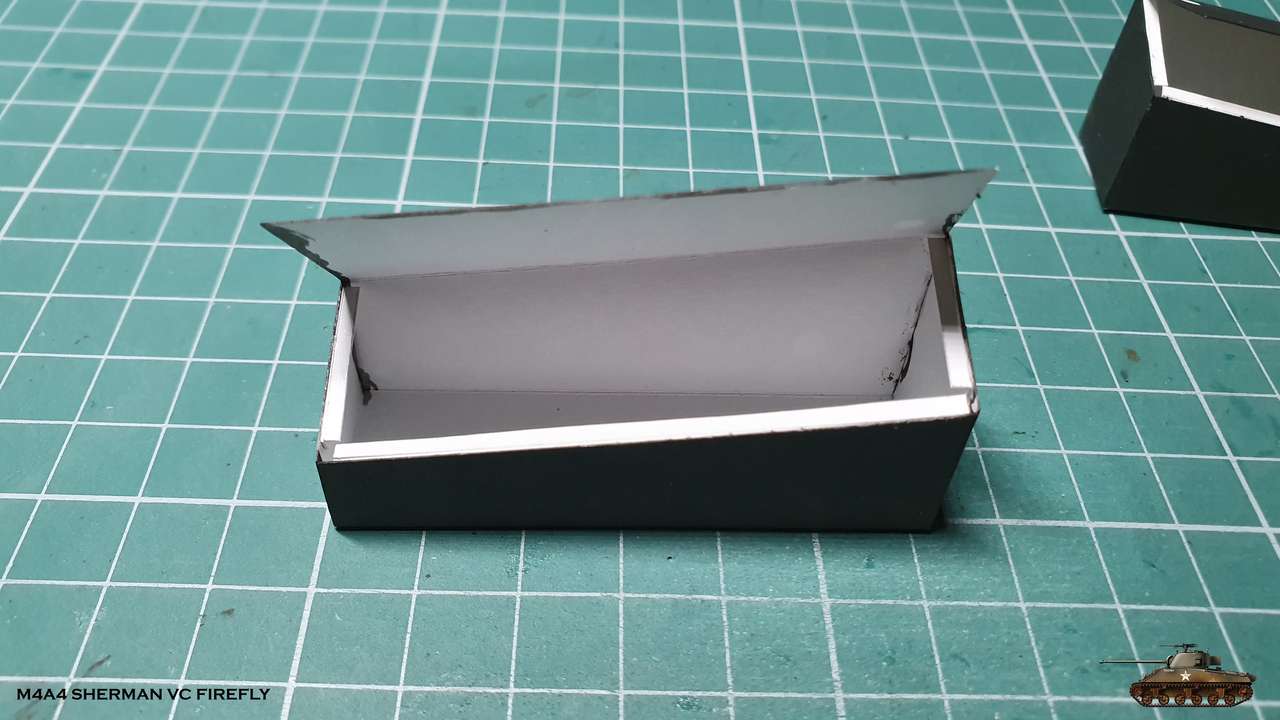
Fuel tanks and side screens - assembling is easy, though parts were given in a "hardcore" no tabs way, as must in this high level model
So I joined edges with super glue gel, except the final part with long line, where i used method with inner tabs, that i cut by myself from remaining paper. This gave me easy way to close the tank with just UHU glue.

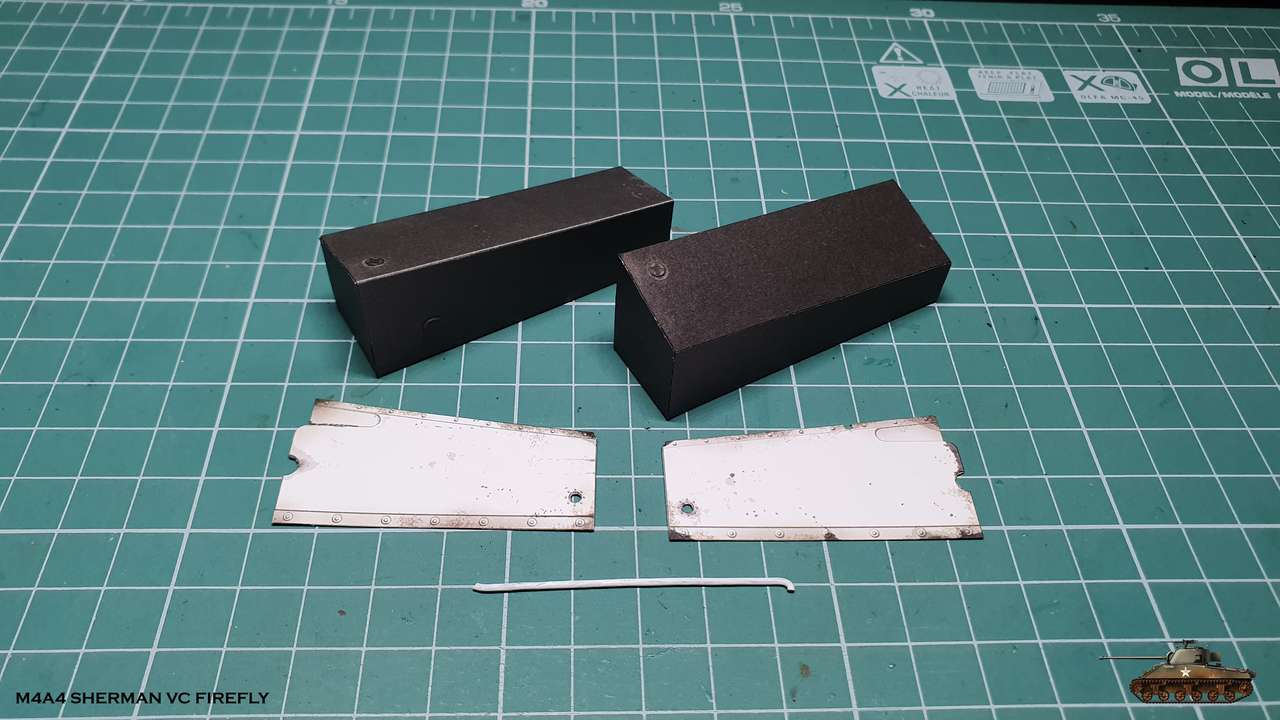
Glued to its place + draining hose (probably)

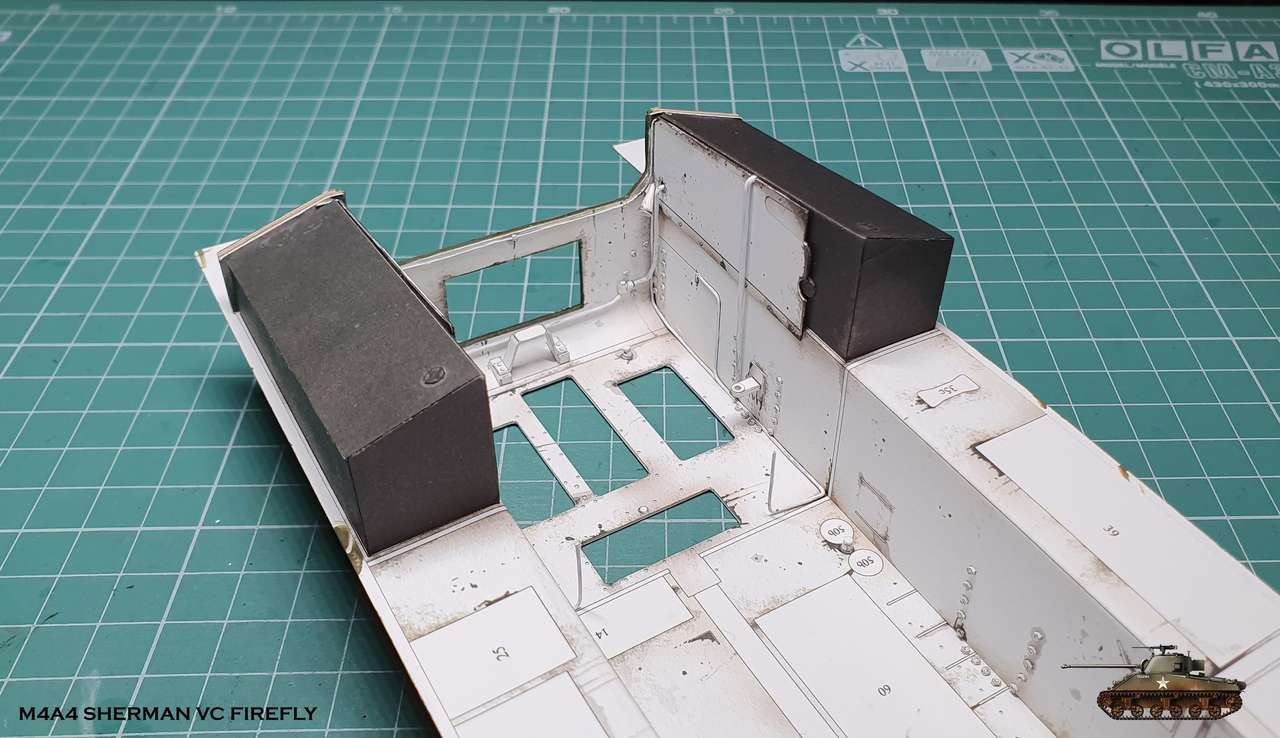
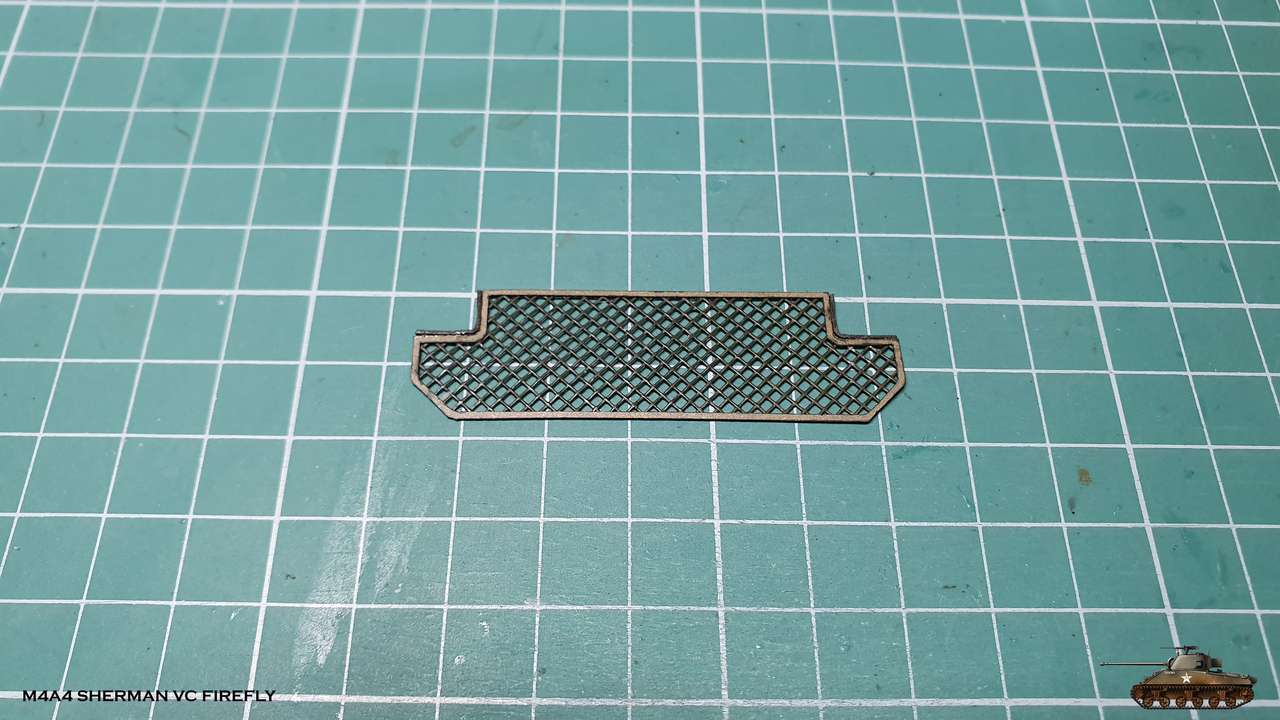
And one more thing - rear mesh. Cut it from mosquito mesh, preliminary fixing it with paper tape on drawings.
Painted it, put a frame on and into place


Well... back to "boring" stuff
There are few more parts left to finish engine compartment.
Fuel tanks and side screens - assembling is easy, though parts were given in a "hardcore" no tabs way, as must in this high level model
So I joined edges with super glue gel, except the final part with long line, where i used method with inner tabs, that i cut by myself from remaining paper. This gave me easy way to close the tank with just UHU glue.
Glued to its place + draining hose (probably)
And one more thing - rear mesh. Cut it from mosquito mesh, preliminary fixing it with paper tape on drawings.
Painted it, put a frame on and into place
- Apr 5, 2013
- 13,876
- 10,215
- 228
No offfense to anyone intended, but I think this is presently my favorite model on the forum. It is a masterpiece in the works.
I won't lie, it's not my favorite subject, but it is the most beautiful build I've seen on here in quite a while.
Woohoo! Thank you fallas! I really appreciate your responses
Didn't think it will bring so much impact. Just trying do build this "monster"
Didn't think it will bring so much impact. Just trying do build this "monster"
All of the time, effort, energy, and work that you have and still are putting into this project is really paying off in how it looks and how everything is turning out!|Woohoo! Thank you fallas! I really appreciate your responses
Didn't think it will bring so much impact. Just trying do build this monster
KEEP UP THE GREAT WORK!!!
We had holidays, so work on a model slowed down a little. Now I've back, but still nothing new to show.
In the meantime here are few profi pictures of current state, from Modelists Open Club meeting. All the credit goes to Lea Khananashvilli
In the meantime here are few profi pictures of current state, from Modelists Open Club meeting. All the credit goes to Lea Khananashvilli