

M4A4 Sherman VC Firefly, Halinski 1:25
- Thread starter snake7
- Start date
You are using an out of date browser. It may not display this or other websites correctly.
You should upgrade or use an alternative browser.
You should upgrade or use an alternative browser.

Thanks you and thanks for the tipon soldier like the old white metal figures, you would have to use a really 'hot' primer, lacquer based will work, the acrylic lacquers might work... your work on this engine goes above and beyond in every way... beautiful work.
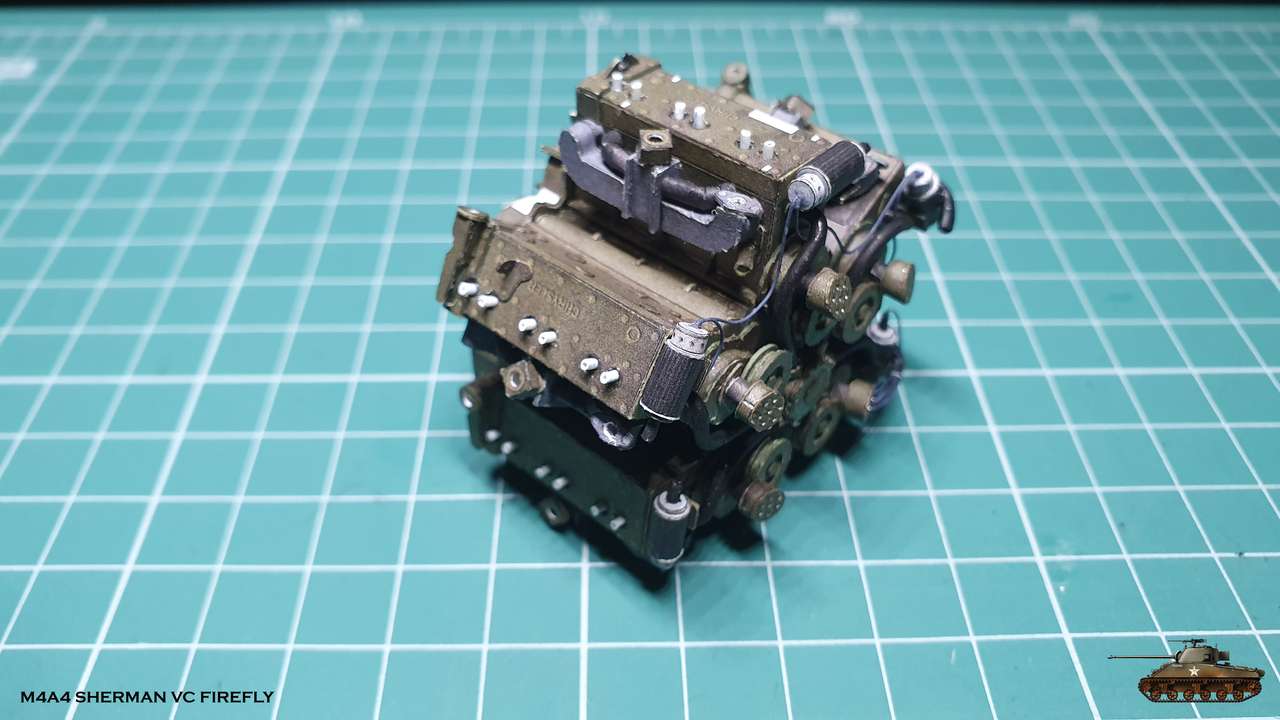
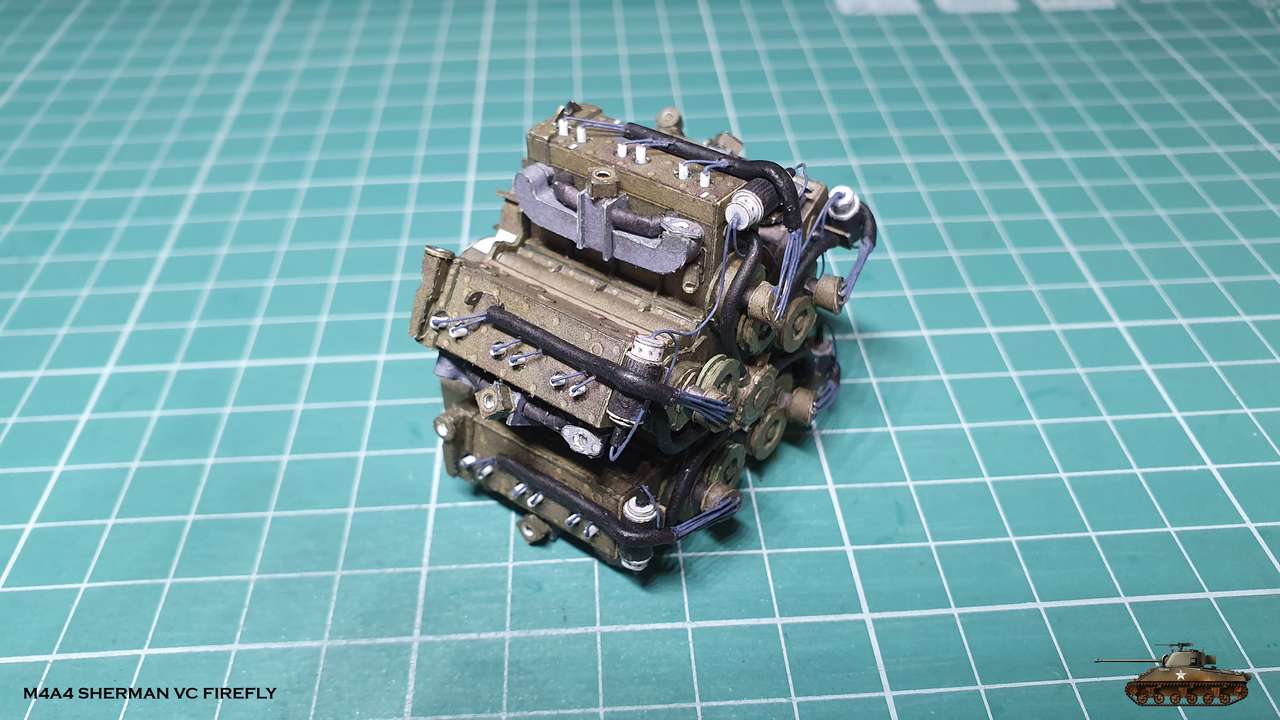
It's time for more scratch build, so i continue with tubes and wires.
Started to assemble sleeves with wires from spark plugs to distributors and ignition coils.
First, I imitated spark plugs, as on live version they stand out well
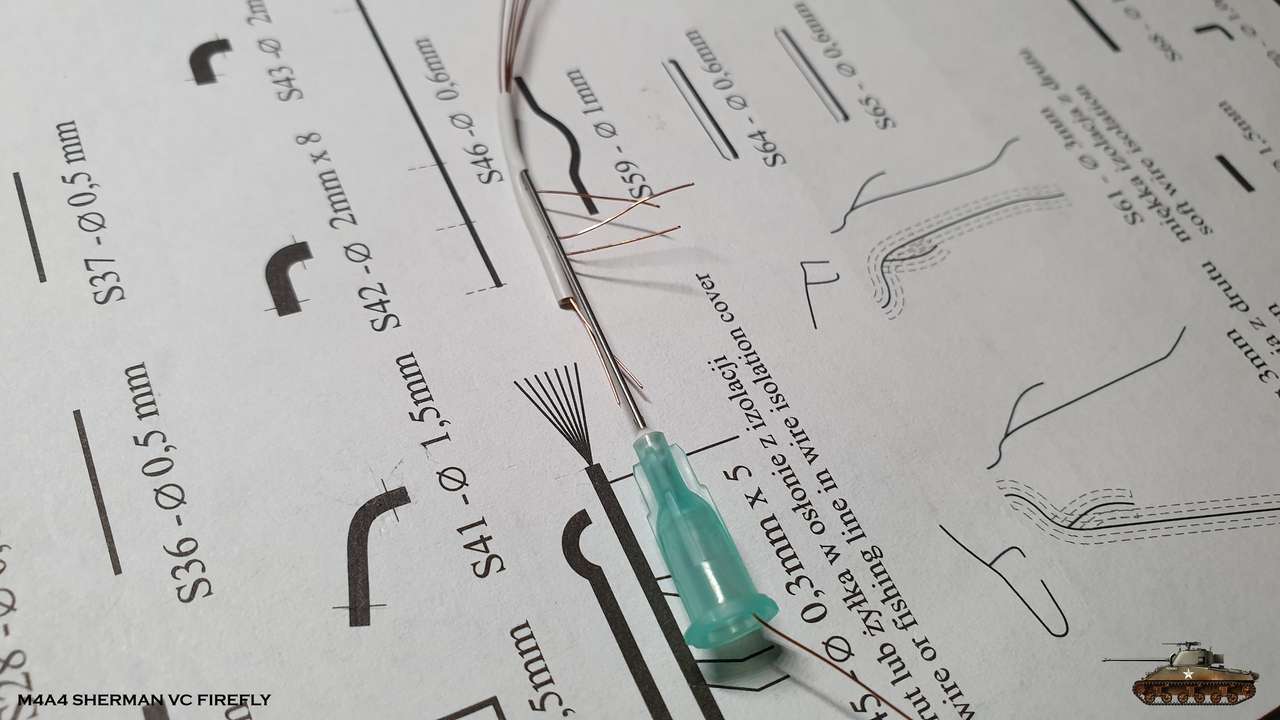
Then I turned to sleeves with wires. Here I worked hard, because I had to work twice.
At first I decided to use the comrade method from another forum - to pierce with syringe needle an wire insulation and pull through a thin wire.
It imitated the live version well. I spent time and patience on this, but
when I dry feeted it on place, I realized that banding the wire and adjusting the size will be a difficult operation.
In addition, paint did not want to lie on the copper wire, no matter what.
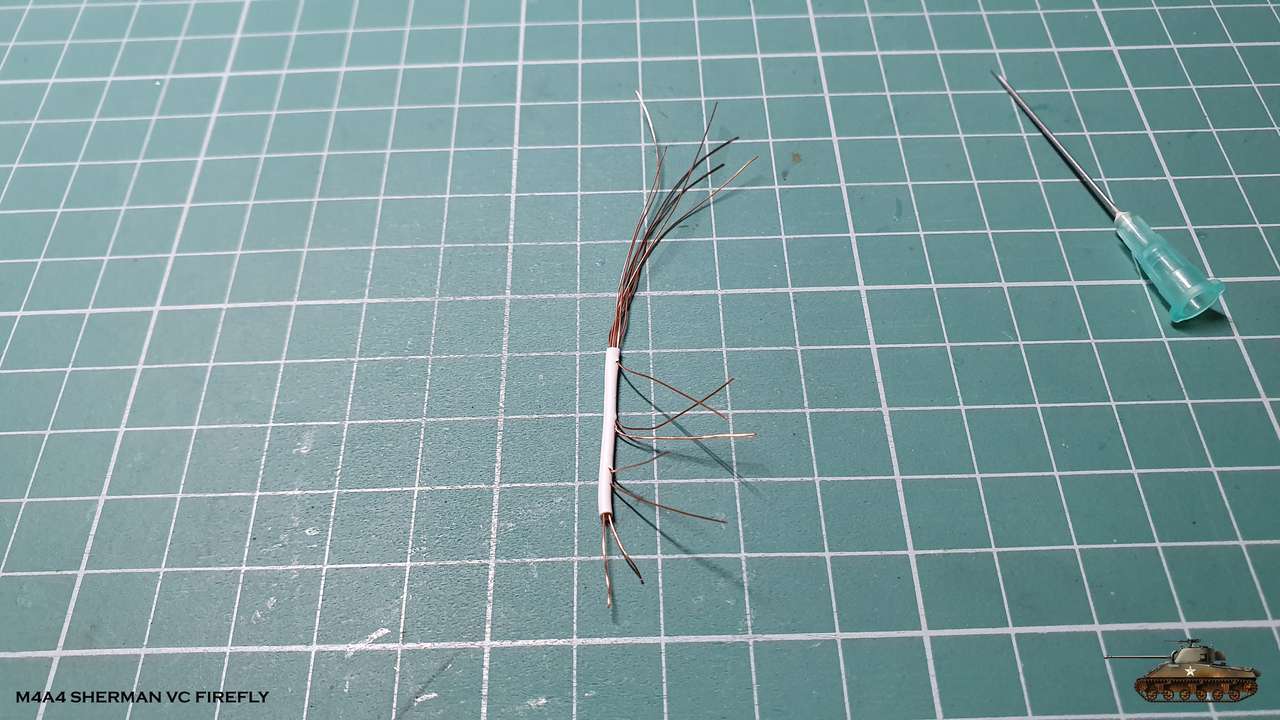
I had to abandon this method and pick a different one, all over again.
But I just cut all the ends of the wire on sides of insulation and left it inside.
This gave me the opportunity to bend and leave the insulation in the right shape.
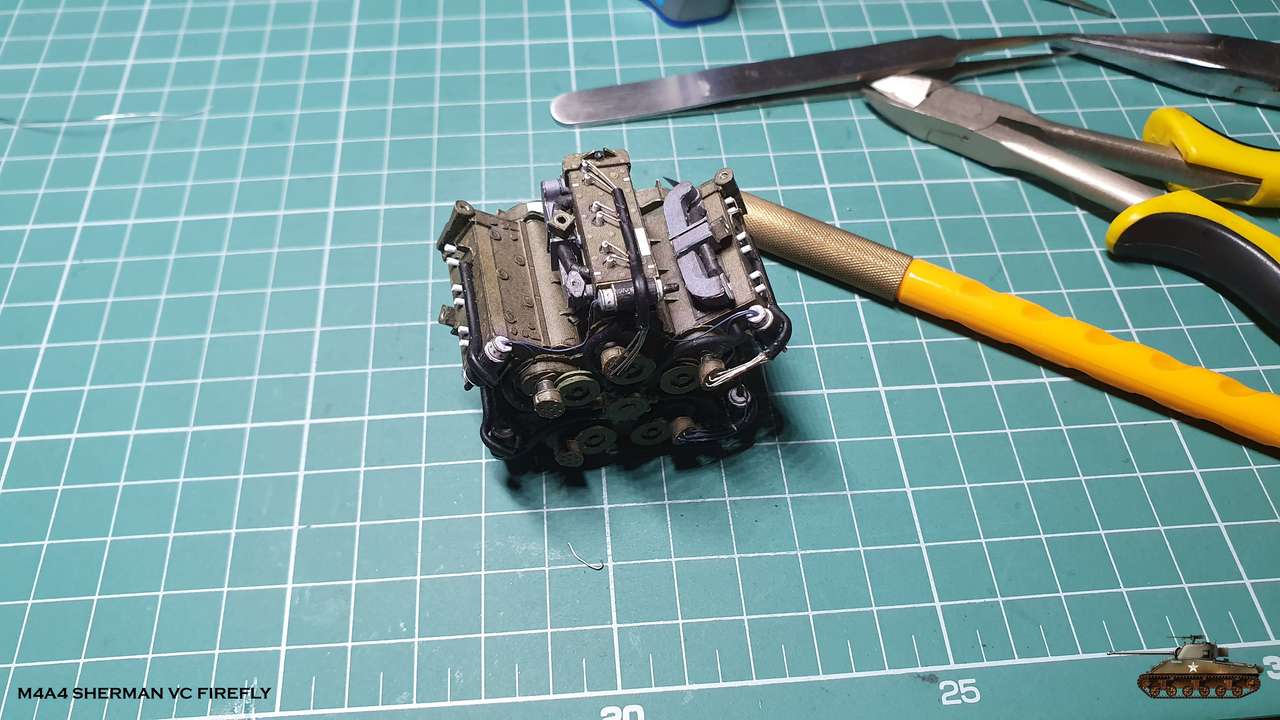
Then I glued all five sleeves into place and began to attach solder wiring one by one.
This was more convenient, though it took more time.
And this is the result

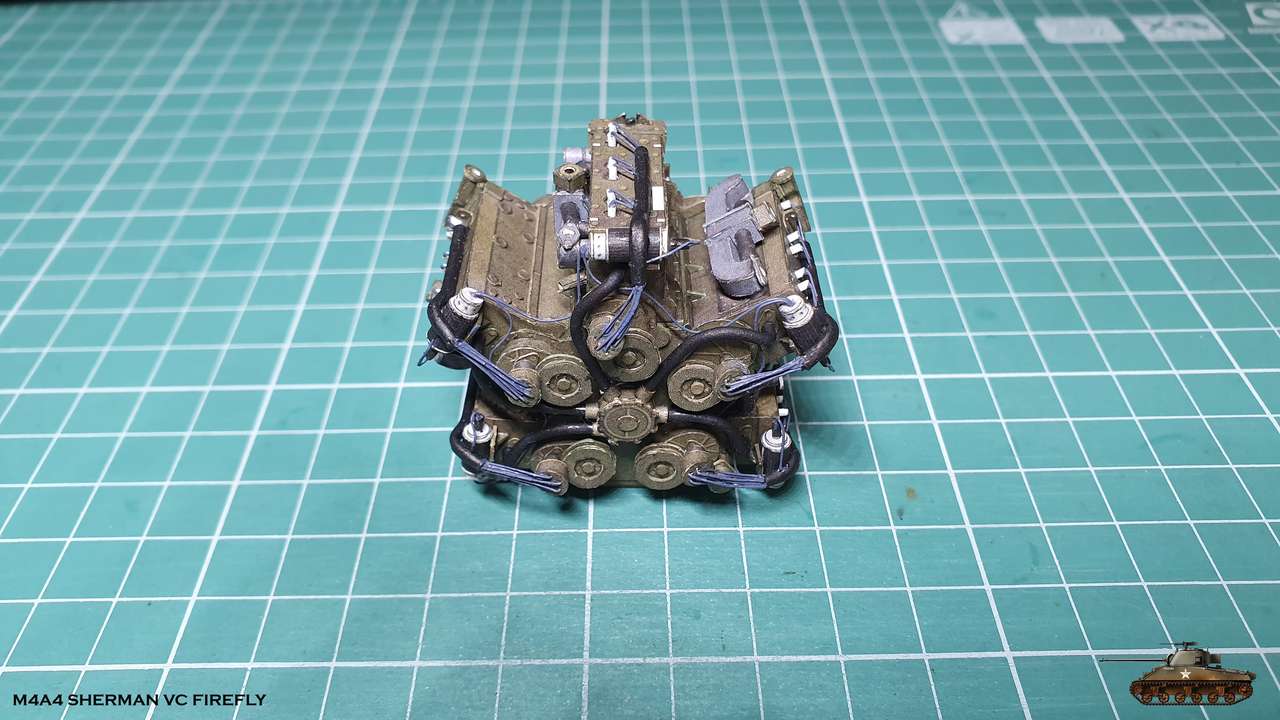
Started to assemble sleeves with wires from spark plugs to distributors and ignition coils.
First, I imitated spark plugs, as on live version they stand out well
Then I turned to sleeves with wires. Here I worked hard, because I had to work twice.
At first I decided to use the comrade method from another forum - to pierce with syringe needle an wire insulation and pull through a thin wire.
It imitated the live version well. I spent time and patience on this, but
when I dry feeted it on place, I realized that banding the wire and adjusting the size will be a difficult operation.
In addition, paint did not want to lie on the copper wire, no matter what.
I had to abandon this method and pick a different one, all over again.
But I just cut all the ends of the wire on sides of insulation and left it inside.
This gave me the opportunity to bend and leave the insulation in the right shape.
Then I glued all five sleeves into place and began to attach solder wiring one by one.
This was more convenient, though it took more time.
And this is the result
Last edited:

Thank you!
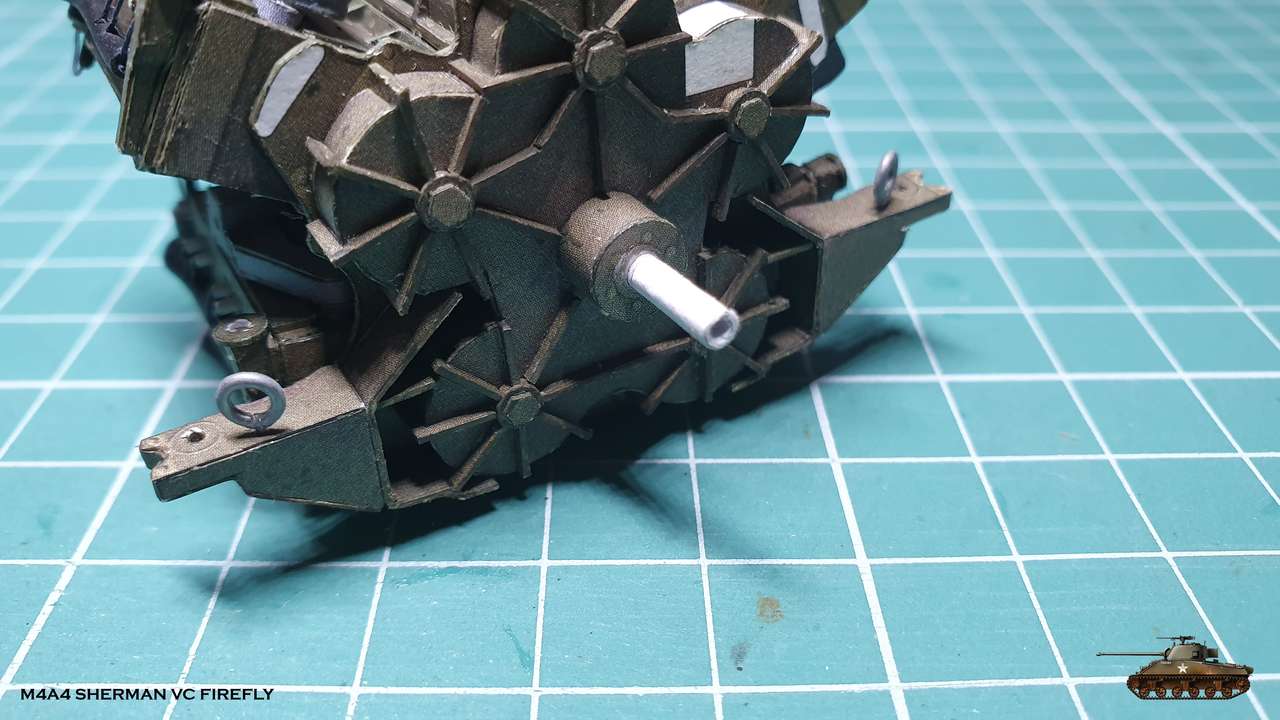
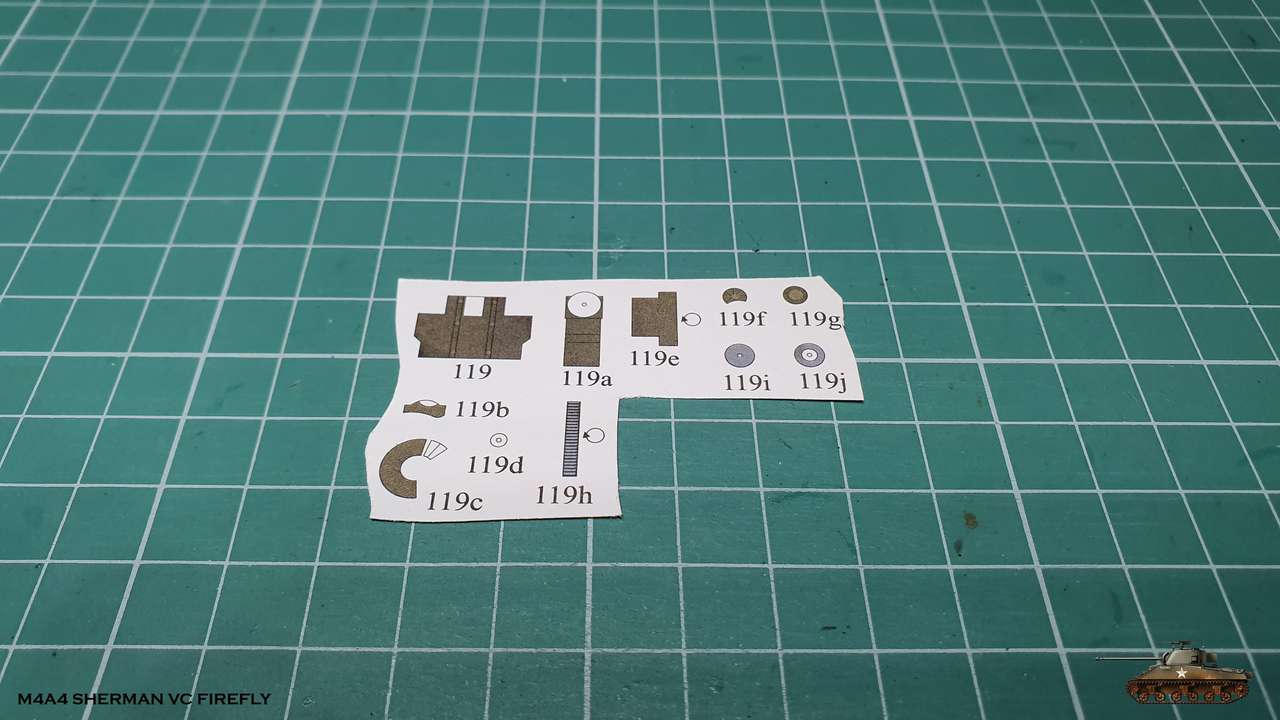
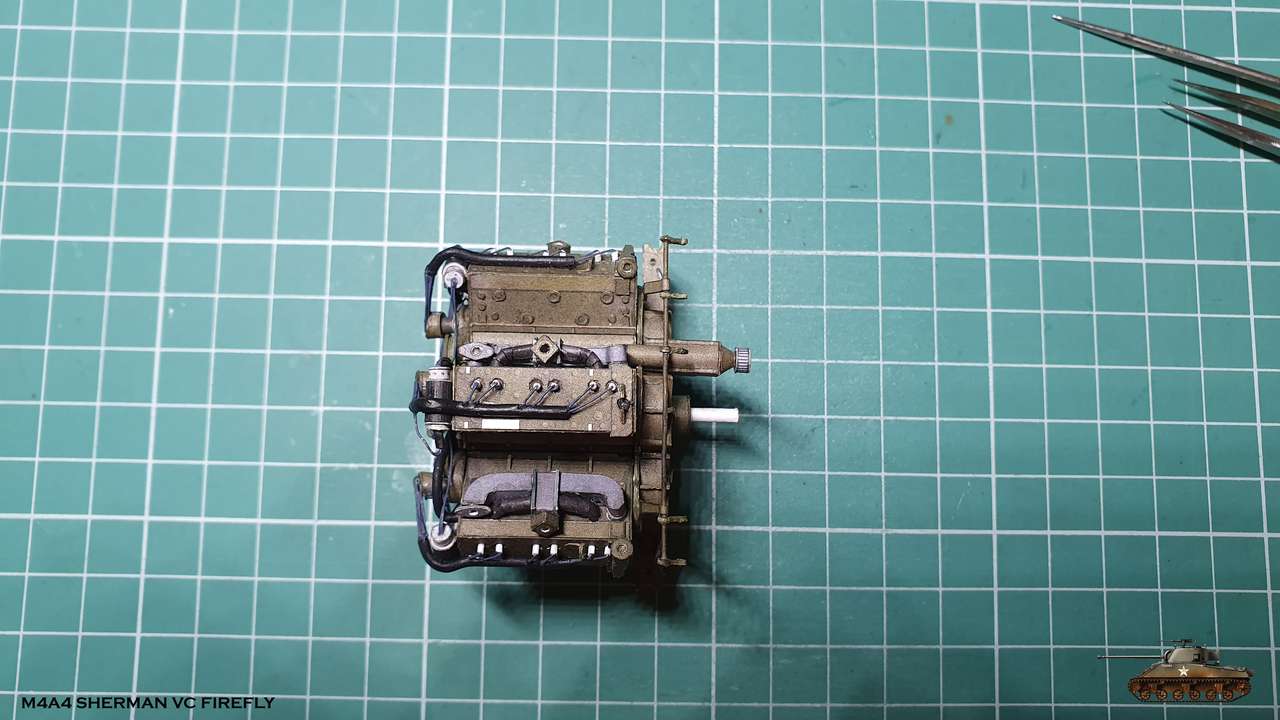
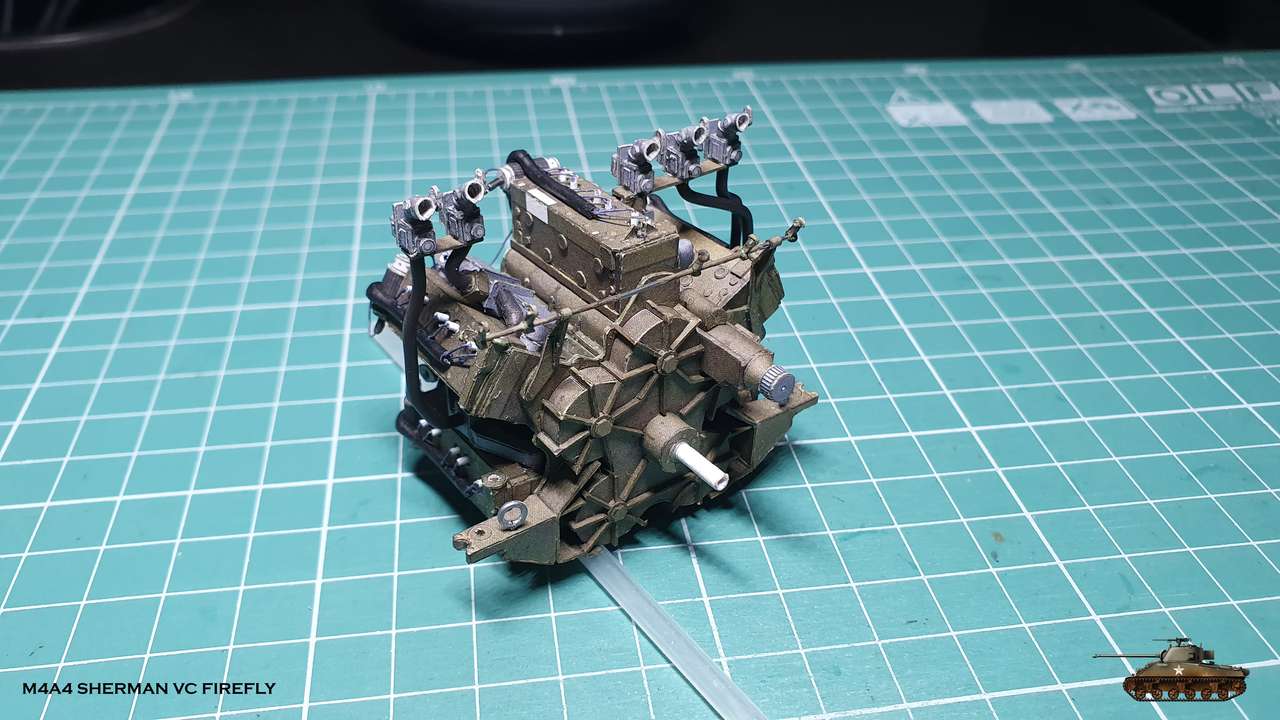
Slowly, I am finishing all the details on the first page of the engine drawings.
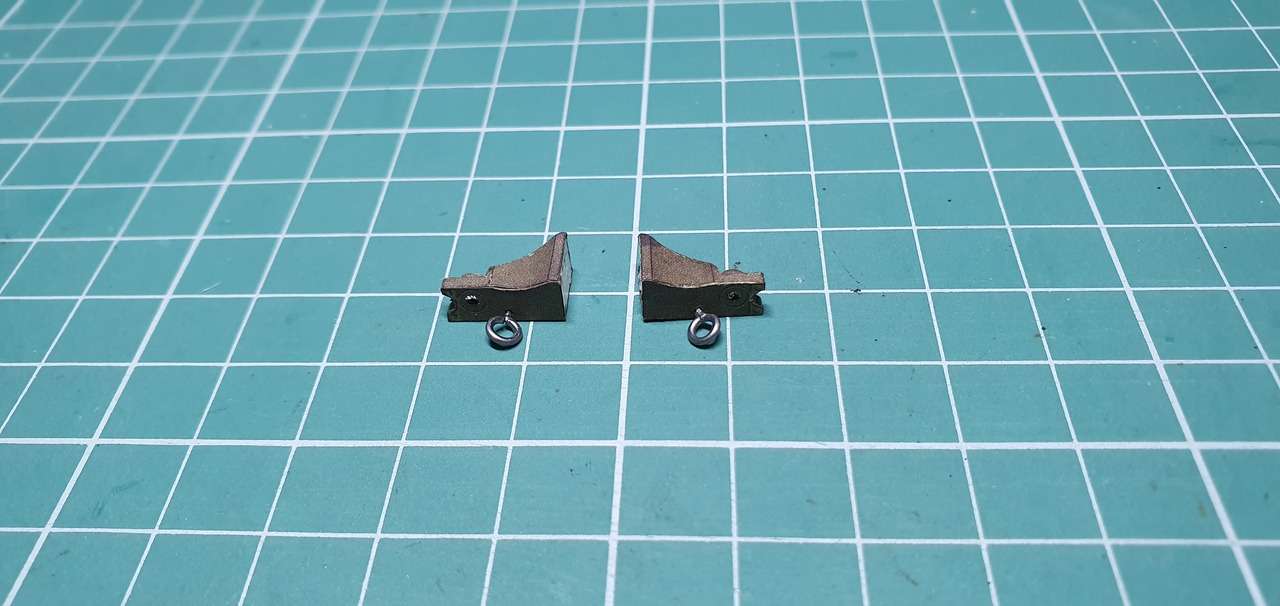
Supports: two at the back and one at the front
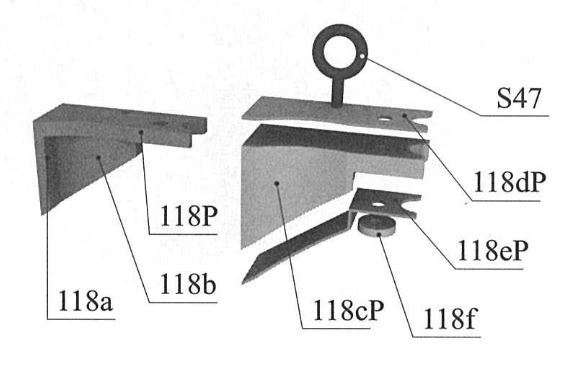

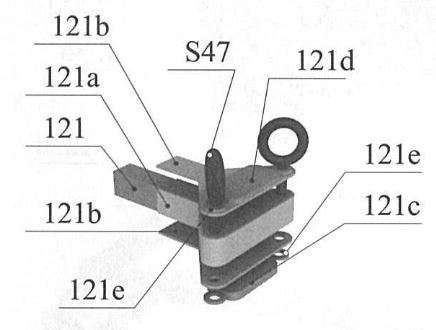
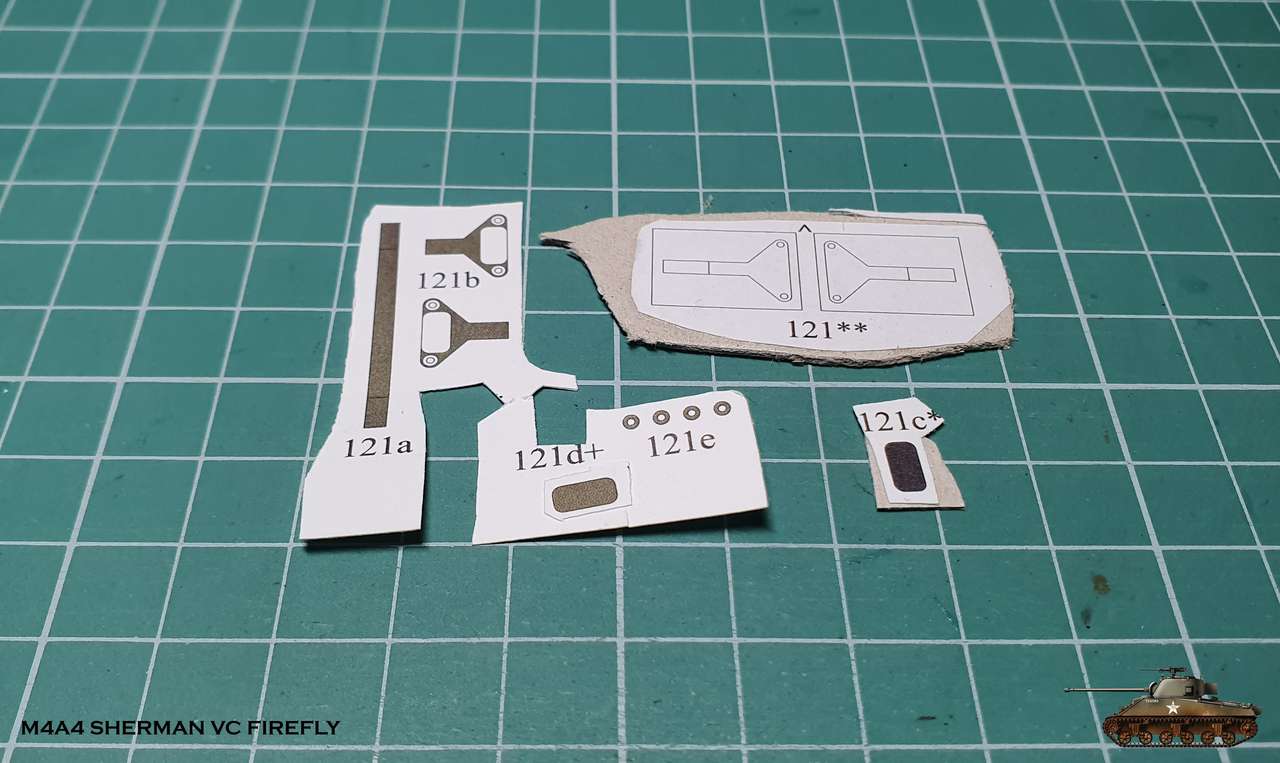
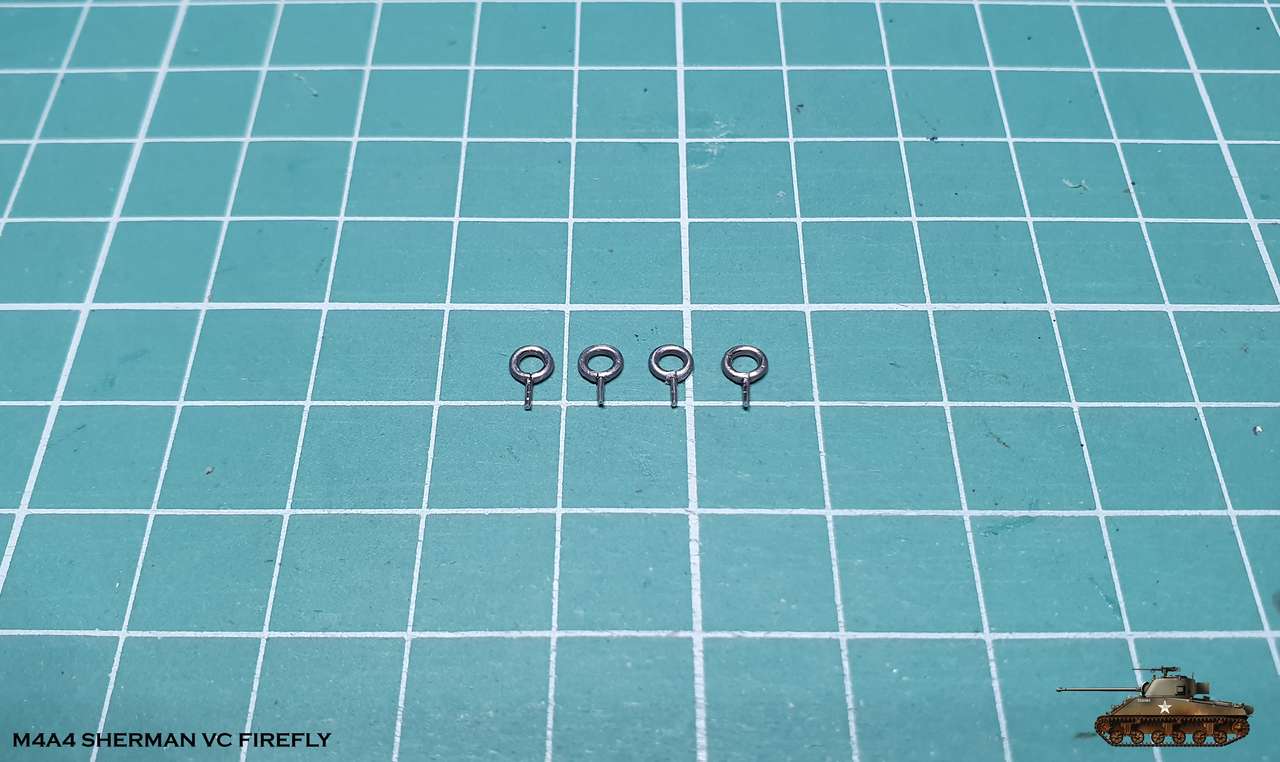
Lifting rings I, as usual, made with solder wire. Maybe I will paint them later in the color of the engine, when the paint comes")

Assembled, glued to the engine and for the first time tried to put it in its place... To remind you that eventually I am building a tank :-D
The engine entered well at the right points. It was only necessary to adjust the rear supports a little to firmly sit on the pillows.
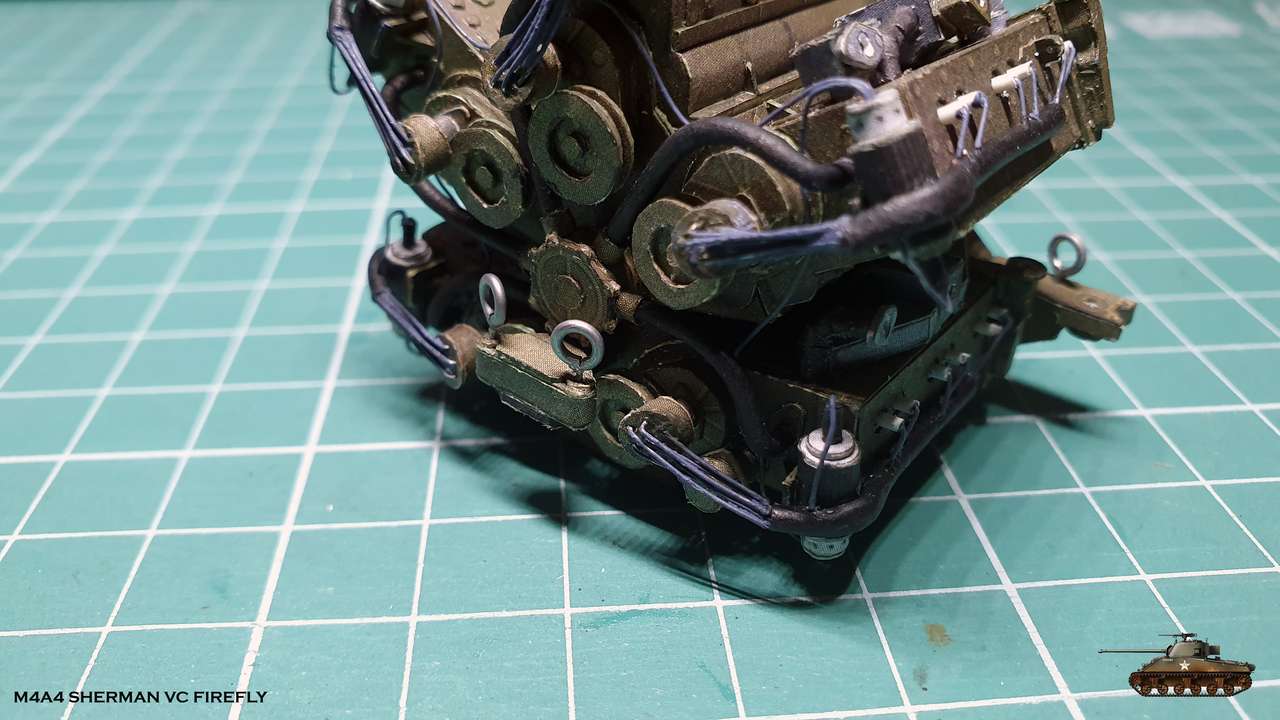

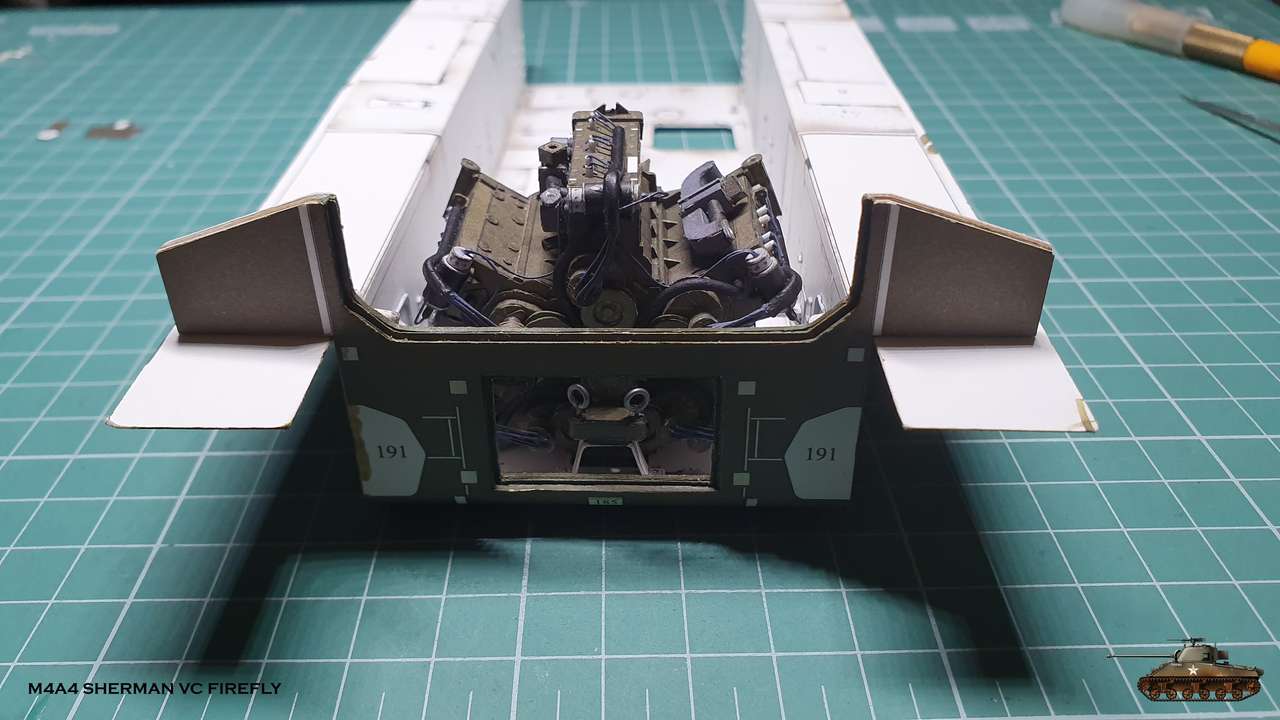
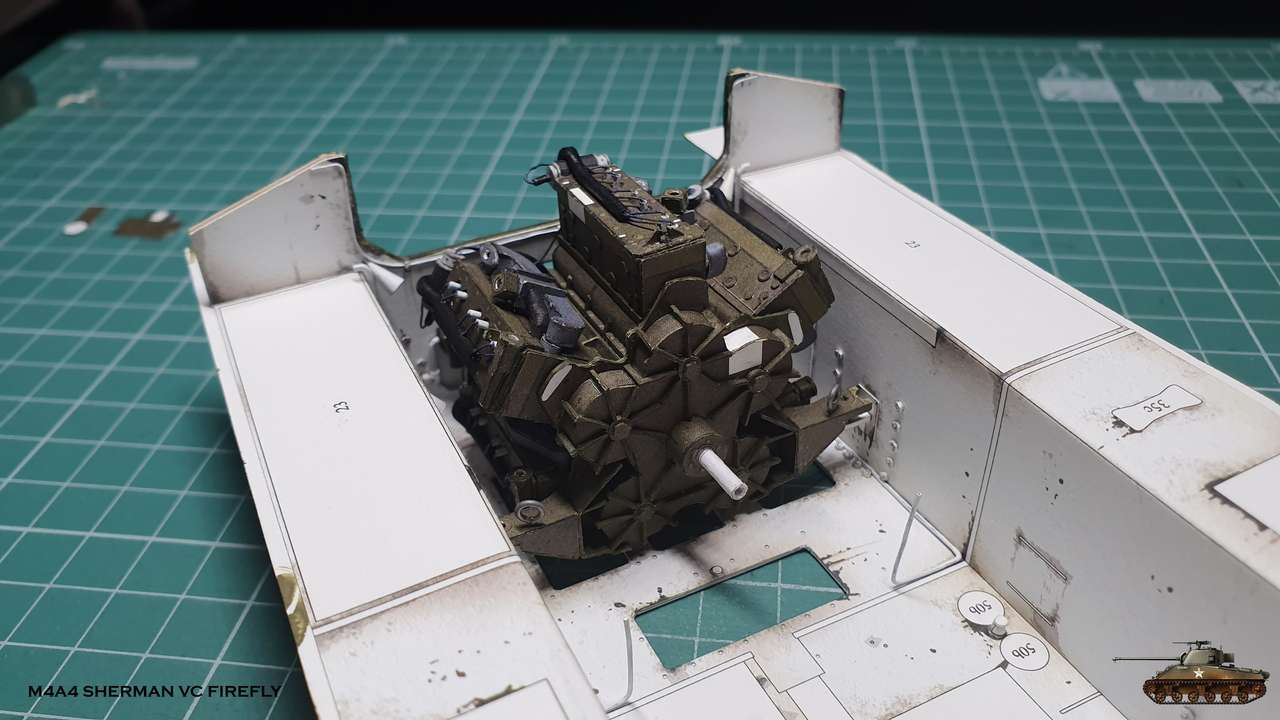
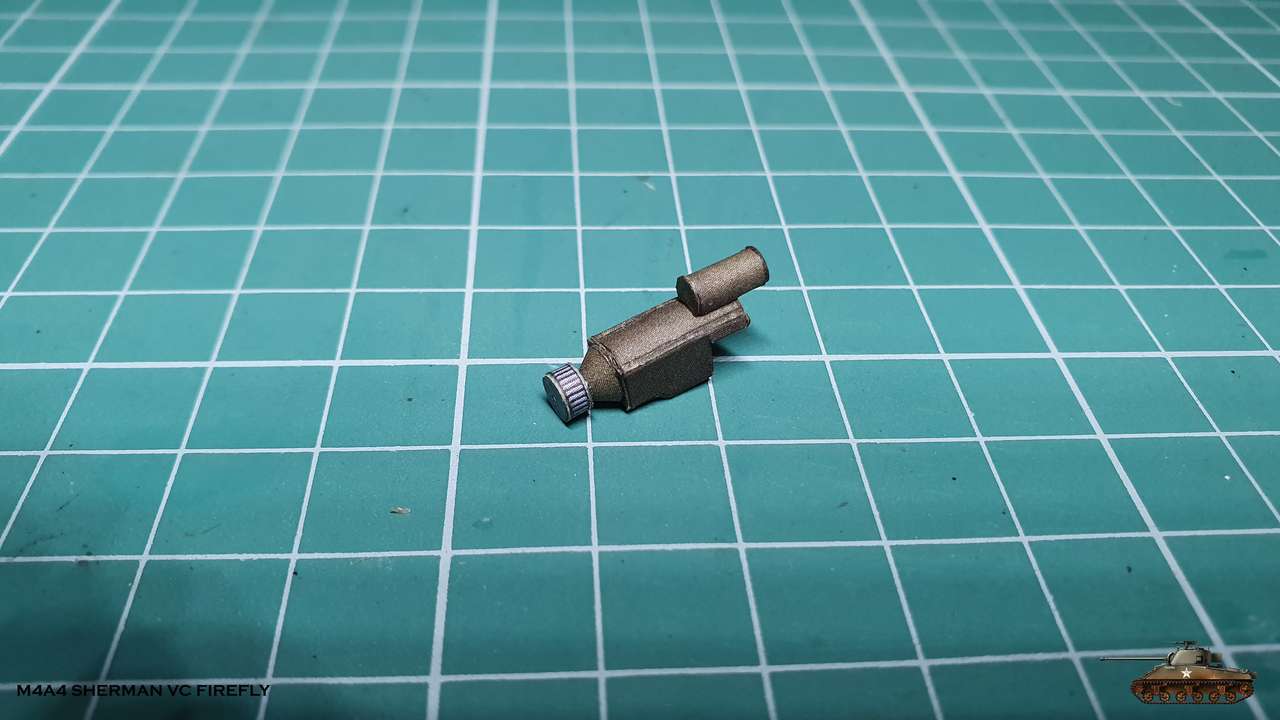
In addition, I assembled an auxiliary motor for driving a radiator fan

Slowly, I am finishing all the details on the first page of the engine drawings.
Supports: two at the back and one at the front
Lifting rings I, as usual, made with solder wire. Maybe I will paint them later in the color of the engine, when the paint comes
Assembled, glued to the engine and for the first time tried to put it in its place... To remind you that eventually I am building a tank :-D
The engine entered well at the right points. It was only necessary to adjust the rear supports a little to firmly sit on the pillows.
In addition, I assembled an auxiliary motor for driving a radiator fan
Thanks again
We have holidays and I got a short break.
Now back in the business.
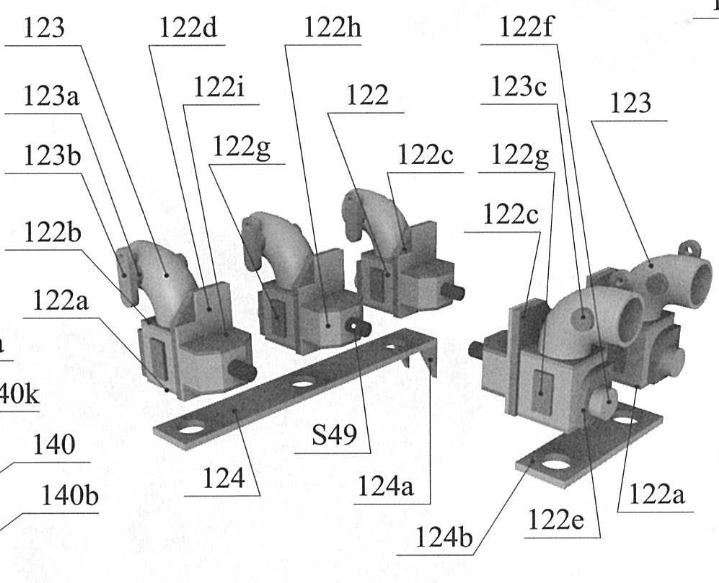
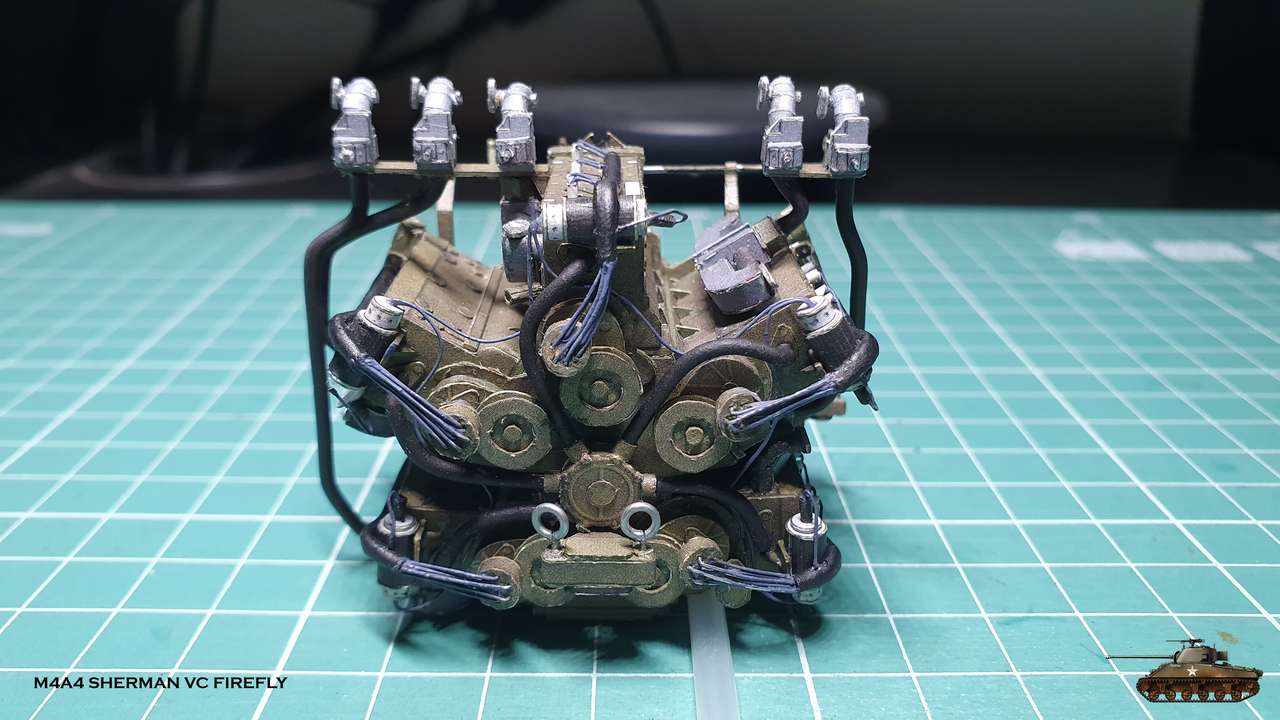
Carburetors .. And i can't describe how I do not like these tubes at an angle:
Since there are 5 blocks, each block has its own carburetor. And in this case, in the original version,
each carburetor was connected directly to the block, and after improvement they decided to align them all in a single row,
probably for a more convenient service.
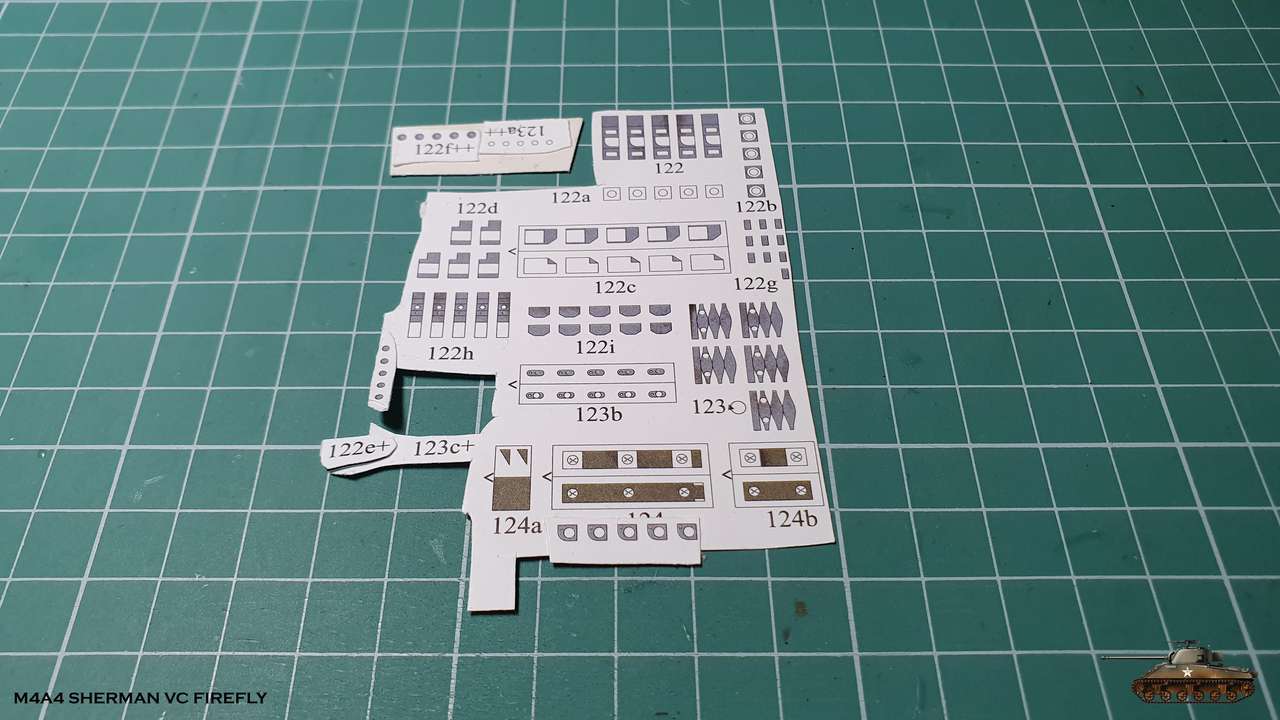
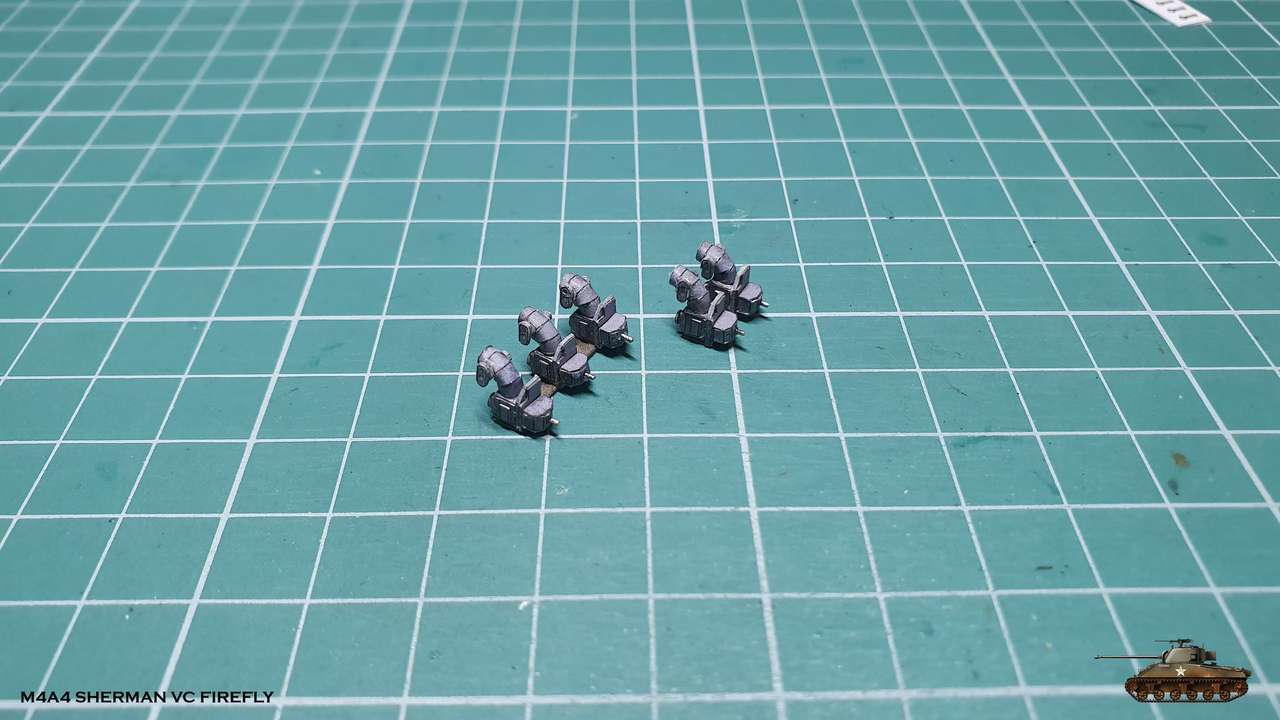
So, there are 5 carburetors, three on the left and two on the right. In the assembly a lot of small parts,
including 1 mm and small pipes at an angle. I used the same method
as before - I rolled up the tubes and glued tongue to tongue and then folded and glued slice to slice.
After assembly, I glued them to the bracket

And then I stopped and did not attached them to the engine. Because now there is a beginning of a chain, which is very dependent
on different parts and their location:
On the one hand, carburetors sit on a base that literally hangs on tubes leading to the blocks.
On the other hand, they are connected to a distribution pipe, which rests on the radiator at a later stage.
So the correct height and alignment in parts is very important here.
That is why I turned to assembly of following parts.
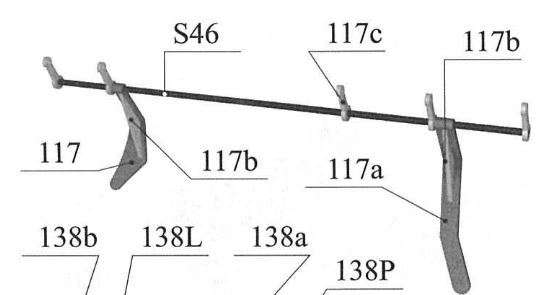
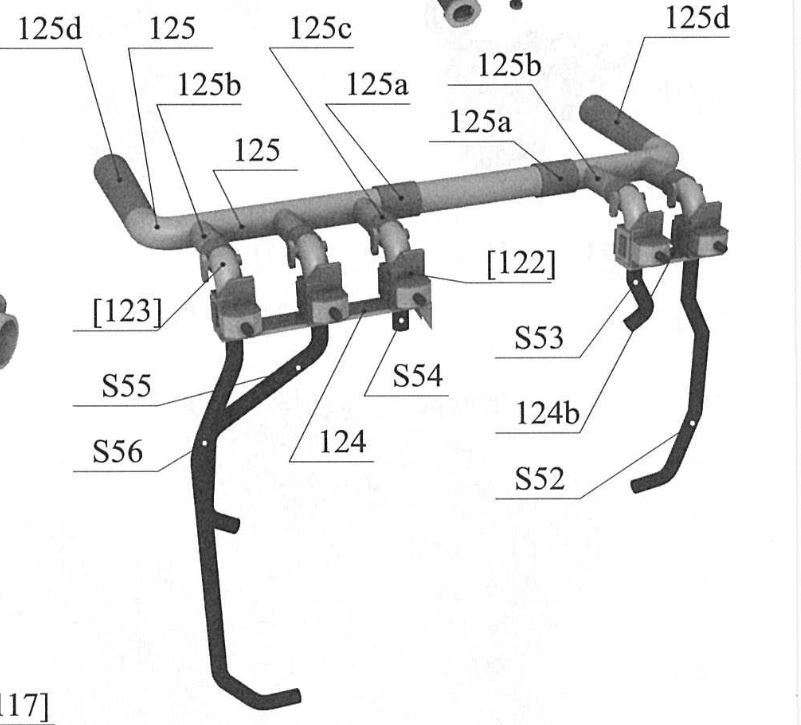
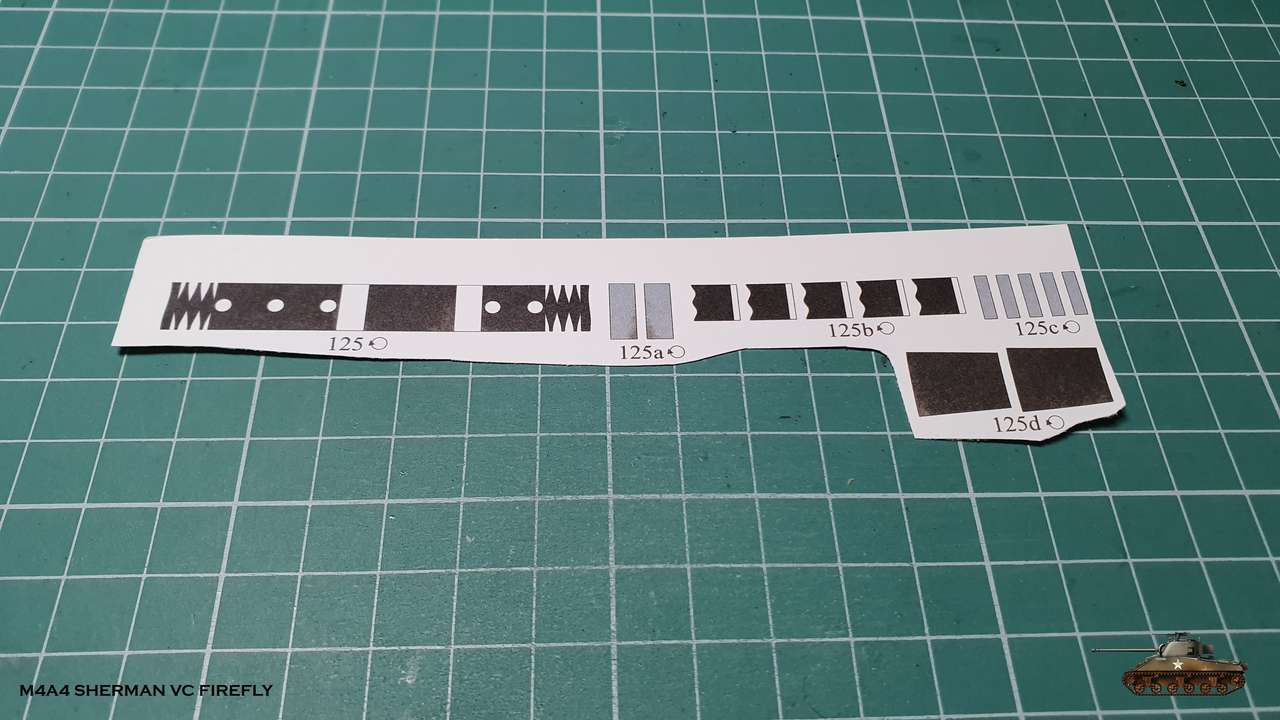
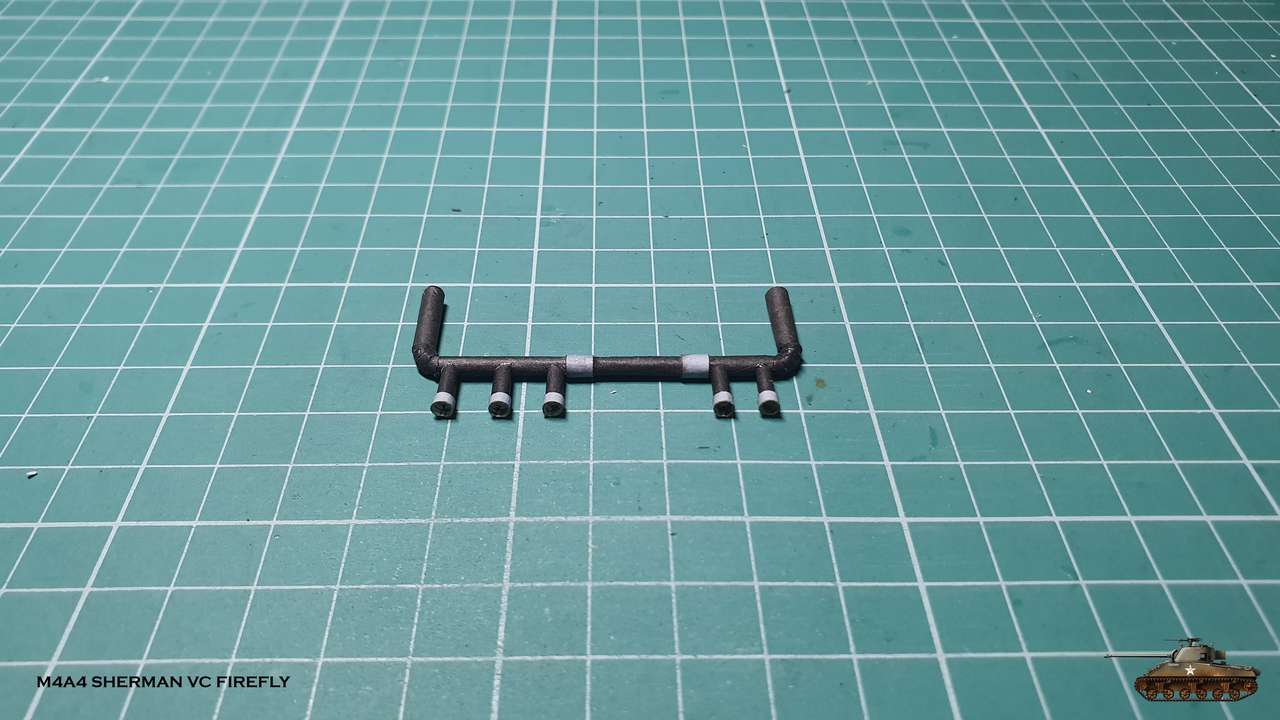
The throttle rod is also interesting and contains 5 levers for each of the throttles.
I fixed the levers at the same level and filled with super glue to improve stiffness.
The supporting knees aren't attached. This will give me the freedom to connect levers to throttles.
The throttle rod is glued exactly horizontally in place, and the next step will be the assembly of the distribution pipe.
And maybe a few more details ... because I ran out of black paint for tubes
and a new one still shipped.

We have holidays and I got a short break.
Now back in the business.
Carburetors .. And i can't describe how I do not like these tubes at an angle:
Since there are 5 blocks, each block has its own carburetor. And in this case, in the original version,
each carburetor was connected directly to the block, and after improvement they decided to align them all in a single row,
probably for a more convenient service.
So, there are 5 carburetors, three on the left and two on the right. In the assembly a lot of small parts,
including 1 mm and small pipes at an angle. I used the same method
as before - I rolled up the tubes and glued tongue to tongue and then folded and glued slice to slice.
After assembly, I glued them to the bracket
And then I stopped and did not attached them to the engine. Because now there is a beginning of a chain, which is very dependent
on different parts and their location:
On the one hand, carburetors sit on a base that literally hangs on tubes leading to the blocks.
On the other hand, they are connected to a distribution pipe, which rests on the radiator at a later stage.
So the correct height and alignment in parts is very important here.
That is why I turned to assembly of following parts.
The throttle rod is also interesting and contains 5 levers for each of the throttles.
I fixed the levers at the same level and filled with super glue to improve stiffness.
The supporting knees aren't attached. This will give me the freedom to connect levers to throttles.
The throttle rod is glued exactly horizontally in place, and the next step will be the assembly of the distribution pipe.
And maybe a few more details ... because I ran out of black paint for tubes
and a new one still shipped.
WOW...I would have cheated and bent sections of sprue from a plastic kit and drilled the holes...paper fiddly-bits drive me NUTS!!
This is REALLY LOOKING GREAT!!!!
This is REALLY LOOKING GREAT!!!!
I have show this model to so many people. You have 100's of people you do not know that are in awe of you!!")
Ha ha, that's cool Zathros

Trying to do my best
- Apr 5, 2013
- 13,876
- 10,216
- 228
Those tubes came out excellent. I would have probably cheated and bent plastic around a metal armature. I have made paper tubes that way, as long as the radius is not too sharp, with water forming, and glue mixed in, it dries hard and you get a smoother surface. Your engine deserves to be seen, maybe you could make a diorama of guys putting the engine in. You could use the guys from Paper-Replia.com, you could scale them to the right size, if they aren't already.
Here's a link a pic to what I am writing about. Just a suggestion, I'd probably stick it in the tank to protect it.
Link = http://paper-replika.com/index.php?...4a3e8-tank-paper-model&catid=38&Itemid=207362

Here's a link a pic to what I am writing about. Just a suggestion, I'd probably stick it in the tank to protect it.
Link = http://paper-replika.com/index.php?...4a3e8-tank-paper-model&catid=38&Itemid=207362
Snake, seriously, please, think about presenting this beast of a beauty outside the tank. It'd be pity to put it inside the hull where no details could be seen.
Zathros, thanks for the tip, but your later suggestion is wiser
Boris, if you look for completed ones, you'll see that a lot of t is seen pretty good. But i'll consider your and Zathros suggestion, though no promises
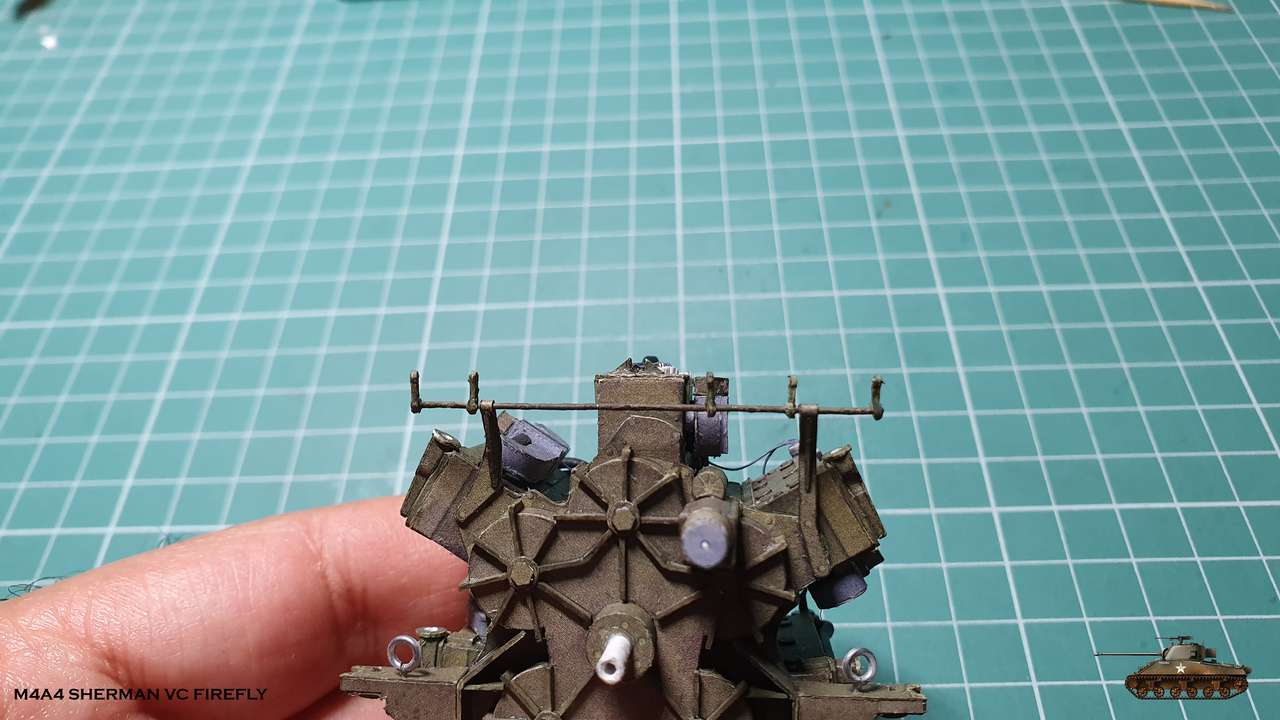
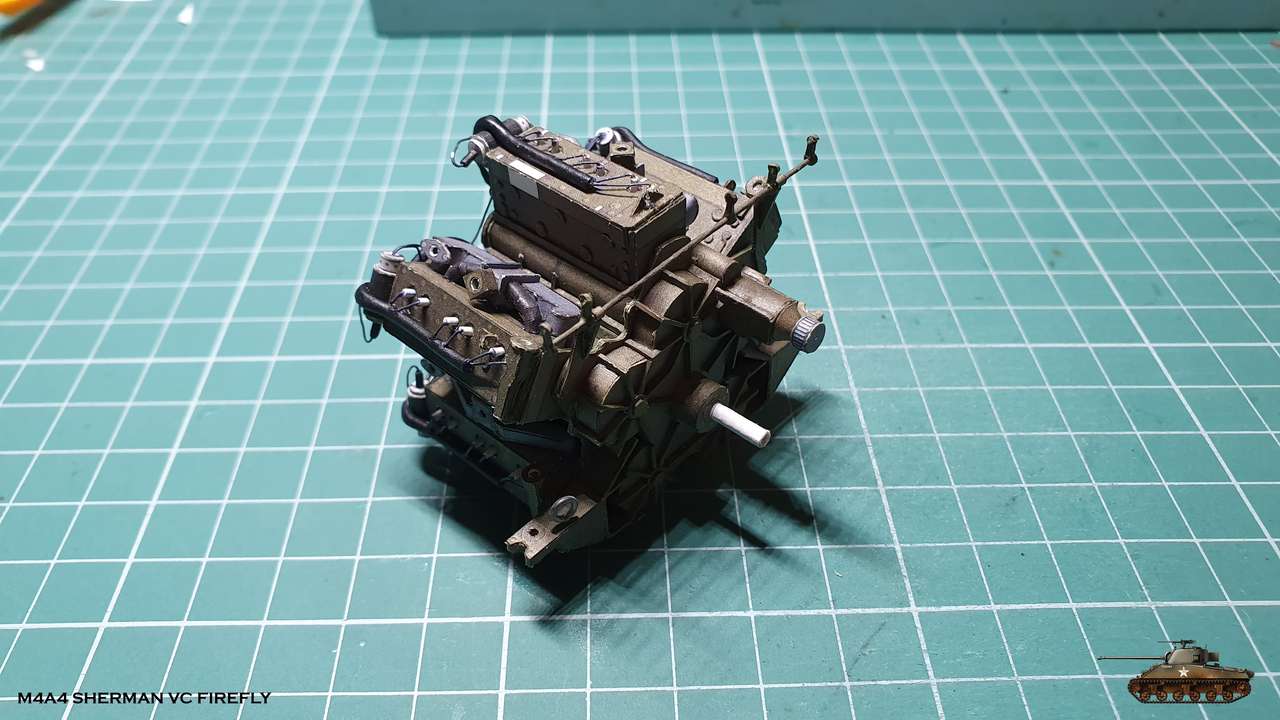
So, I proceeded to the assembly of distribution pipe.
Once again I realized how I do not like pipes and especially bending ones, with addition of paper, which strives to exfoliate at the earliest opportunity.
Extension tubes are not glued, because i don't know if the length will be enough for connection to filters tubes.
I didn't glued the pipe yet, since it was assembled only to help fit carburetors.
Although the black paint has already arrived, I was doubly glad, as I found
black wire with a suitable diameter for pipes from the carburetor to the blocks
and another one for pipes from the radiator to the blocks. So less mess with the paint
In addition, this wire is stronger than solder one.
On the left side, a bar with carburetors is attached to the edge of the block and adjusting the pipes was easy.
On the left side I sweated a little, because the bar is kept in the air on two pipes, and it was necessary to measure a lot and adjust it, so that everything would sit on one level.
As expected - distribution pipe and throttle stem helped to achieve it.


Boris, if you look for completed ones, you'll see that a lot of t is seen pretty good. But i'll consider your and Zathros suggestion, though no promises
So, I proceeded to the assembly of distribution pipe.
Once again I realized how I do not like pipes and especially bending ones, with addition of paper, which strives to exfoliate at the earliest opportunity.
Extension tubes are not glued, because i don't know if the length will be enough for connection to filters tubes.
I didn't glued the pipe yet, since it was assembled only to help fit carburetors.
Although the black paint has already arrived, I was doubly glad, as I found
black wire with a suitable diameter for pipes from the carburetor to the blocks
and another one for pipes from the radiator to the blocks. So less mess with the paint
In addition, this wire is stronger than solder one.
On the left side, a bar with carburetors is attached to the edge of the block and adjusting the pipes was easy.
On the left side I sweated a little, because the bar is kept in the air on two pipes, and it was necessary to measure a lot and adjust it, so that everything would sit on one level.
As expected - distribution pipe and throttle stem helped to achieve it.
@snake7 I have to say that this project is really taking on a life all its own! I really like how you are setting up the build thread. I like how you show the section that you are working on at the time and then show the actual work that you do and the final outcome of that particular section.
I think that I may implement this same technique. It makes sense for making perfect instructions.
KEEP UP THE GREAT WORK!!!
I think that I may implement this same technique. It makes sense for making perfect instructions.
KEEP UP THE GREAT WORK!!!