

M4A4 Sherman VC Firefly, Halinski 1:25
- Thread starter snake7
- Start date
You are using an out of date browser. It may not display this or other websites correctly.
You should upgrade or use an alternative browser.
You should upgrade or use an alternative browser.
Oh boy... That is awesome.
Snake, if I would have a hat I'd have taken it off.
What glue did you use for gluing manifolds? Will you colot the manifolds or or this is how they'll be?
Snake, if I would have a hat I'd have taken it off.
What glue did you use for gluing manifolds? Will you colot the manifolds or or this is how they'll be?
- Apr 5, 2013
- 13,876
- 10,215
- 228
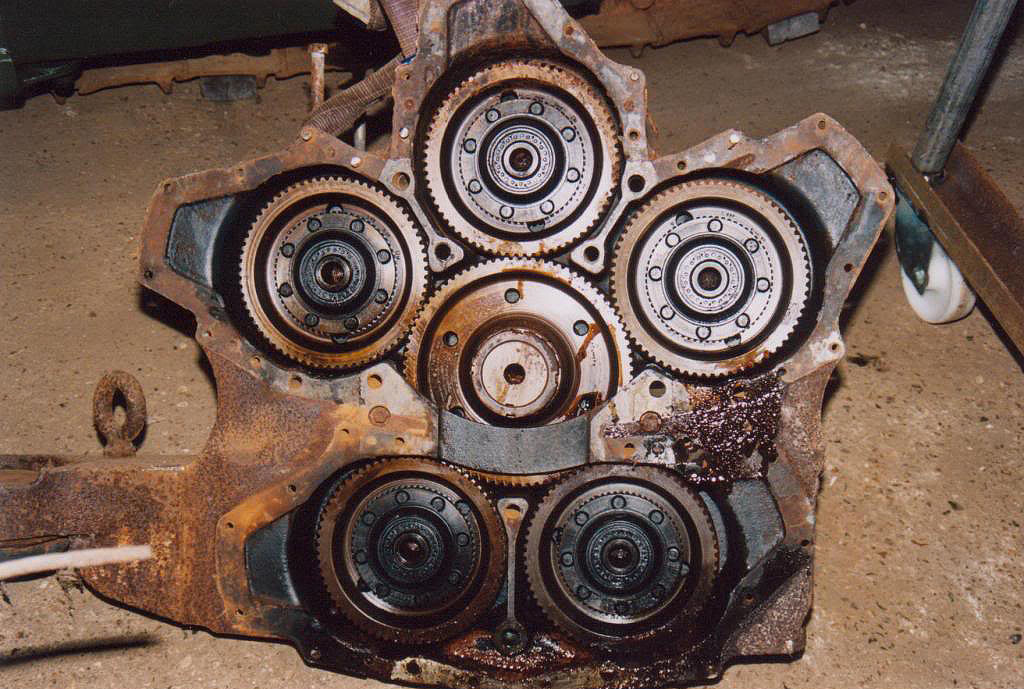
I did some research on those engines. They're worth a fortune, if you can find one. Some interesting YouTube videos about them. I'd love to have one of those engines to play with. That's one thing threads like this do, they teach about things that would otherwise remain unknown. ")

Oh boy... That is awesome.
Snake, if I would have a hat I'd have taken it off.
What glue did you use for gluing manifolds? Will you colot the manifolds or or this is how they'll be?
Part white, part super glue gel. Depends on the situation. I try to use more white glue, because you can reposition parts and it is cleaner one.
I didn't understand last question. Did you mean color? They already colored from print
Regarding the last question I meant recolor. You have answered itPart white, part super glue gel. Depends on the situation. I try to use more white glue, because you can reposition parts and it is cleaner one.
I didn't understand last question. Did you mean color? They already colored from print
Thank you all!
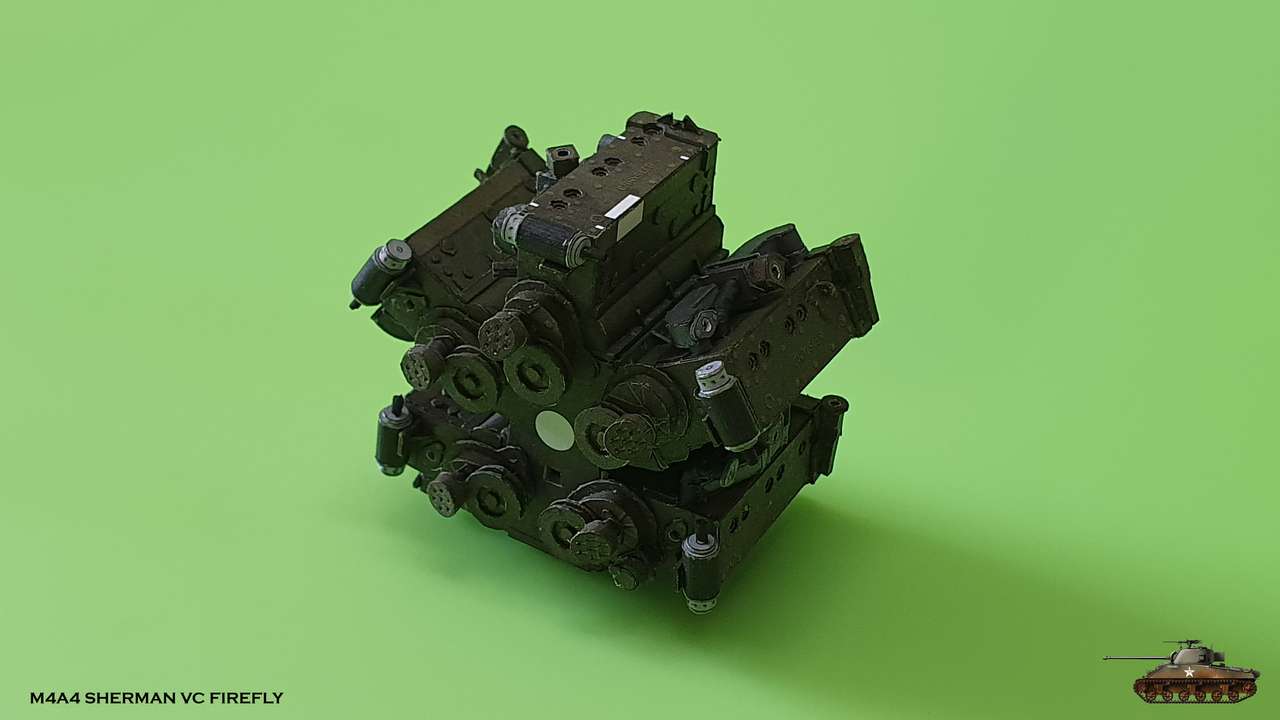
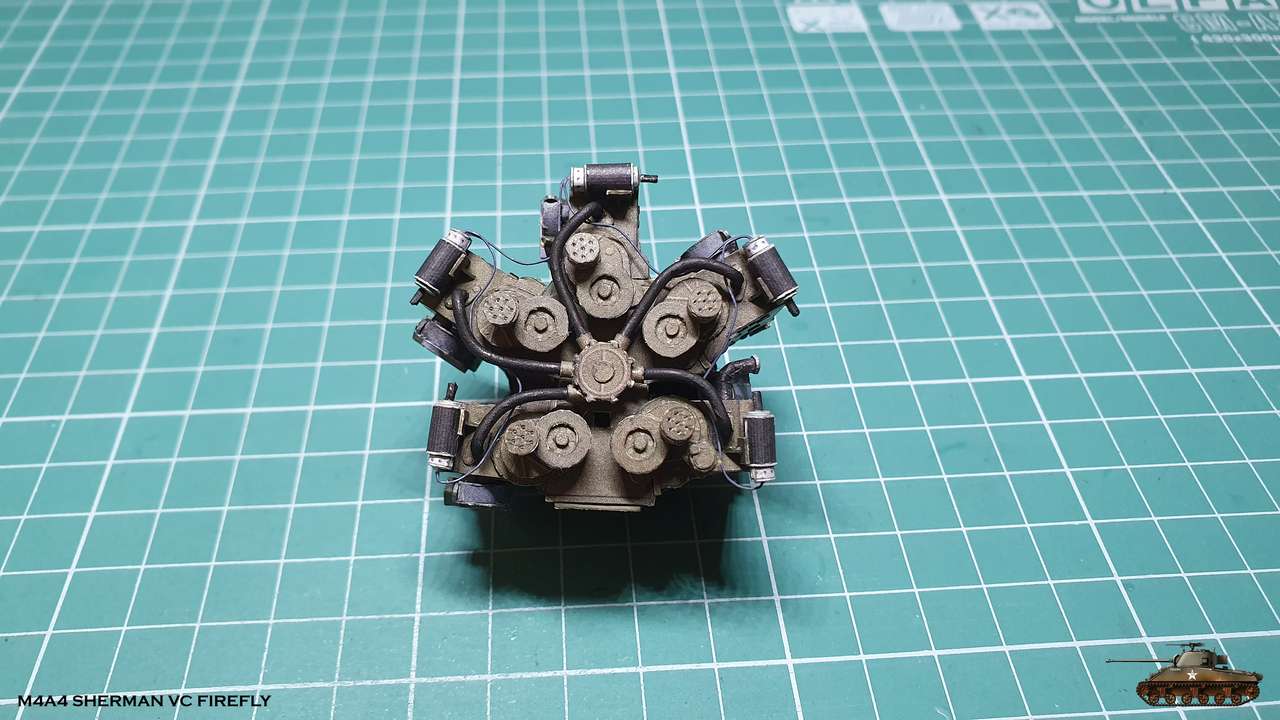
I continue to equip this miracle of engineering.
Next in line are ignition distributors, idle rollers and ignition coils
First of all, the base. There are also several types and one even comes with a fuel pump.
So you need to keep track of where to glue each one
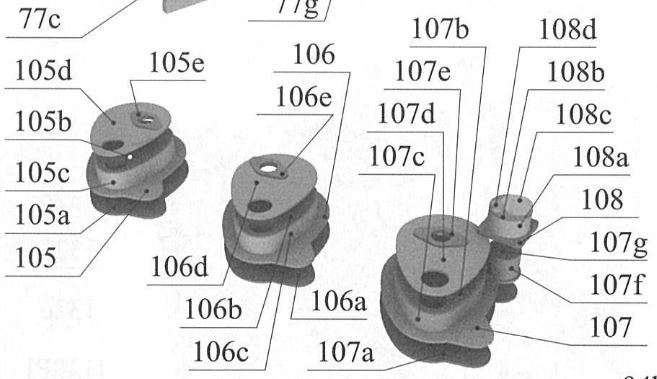


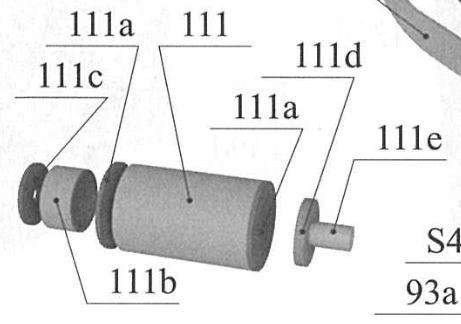
Then the rollers. And why they are useless - in the previous version of the engine, they turned water pumps,
but due to poor flow distribution and problems with such a solution - in this version 5 pumps were replaced by
one in the middle with the distribution pipes for each block (you will see in the future) and the rollers were left without work
Therefore, there will be no connecting belts
Ignition Distributors - those simple
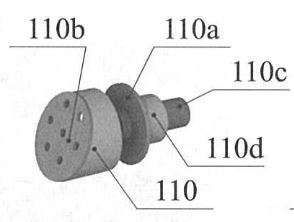
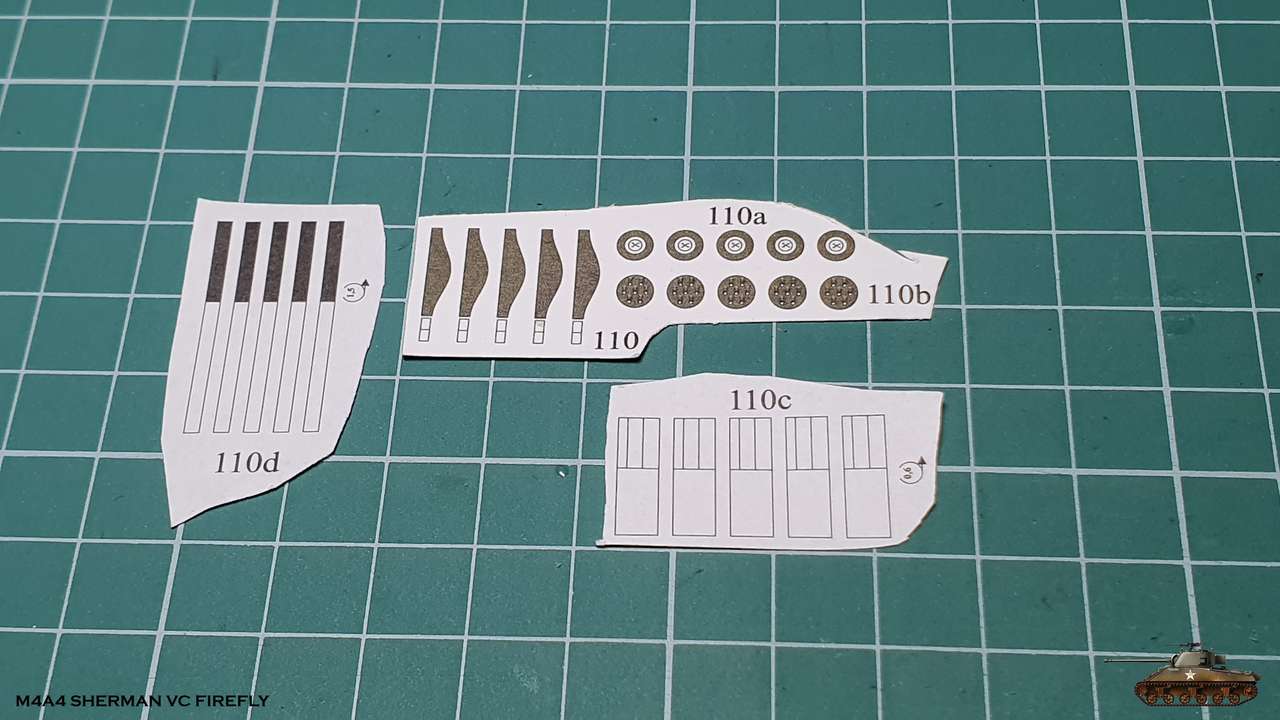
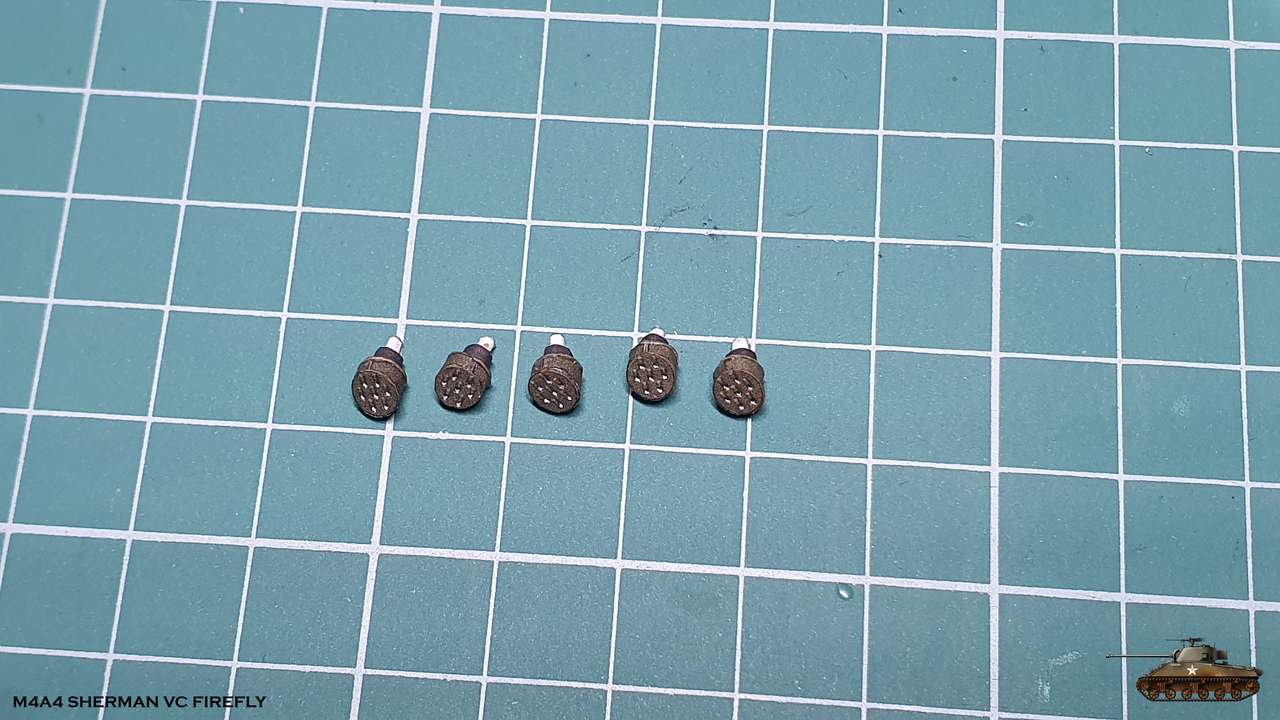
And the ignition coils. Here, too, you need to pay attention to direction of attachment. On each block it is in its own way
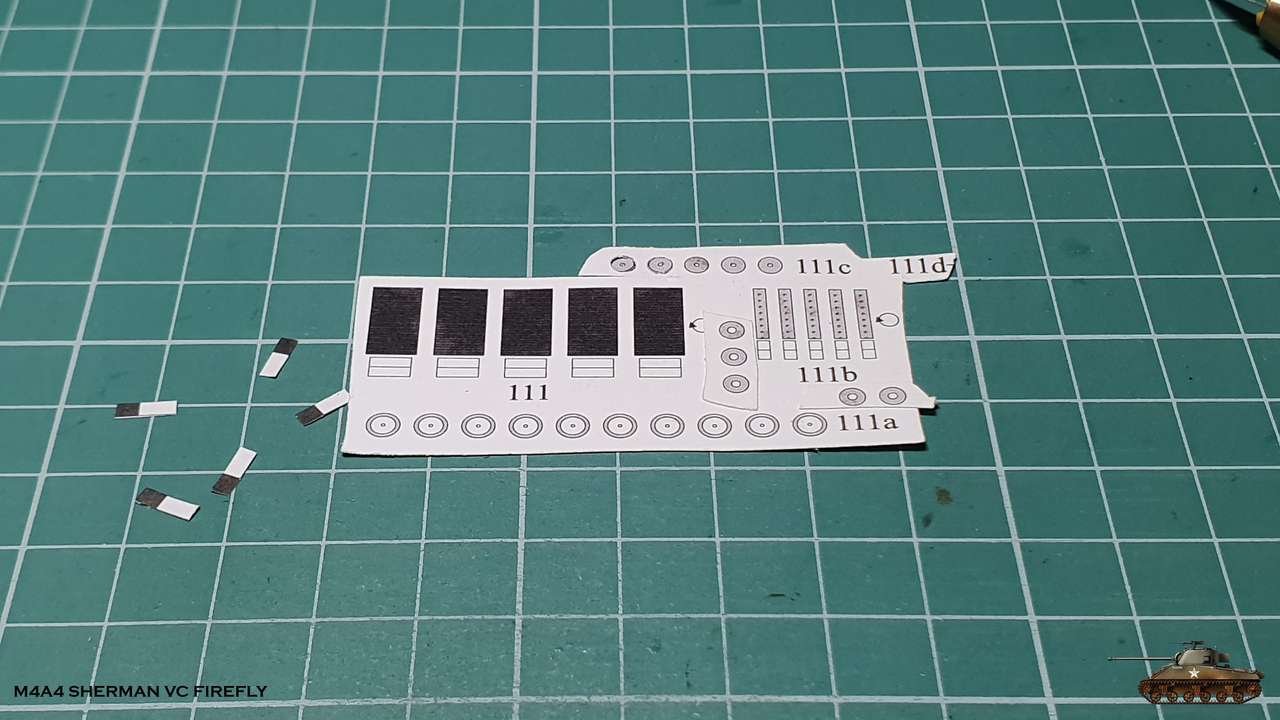
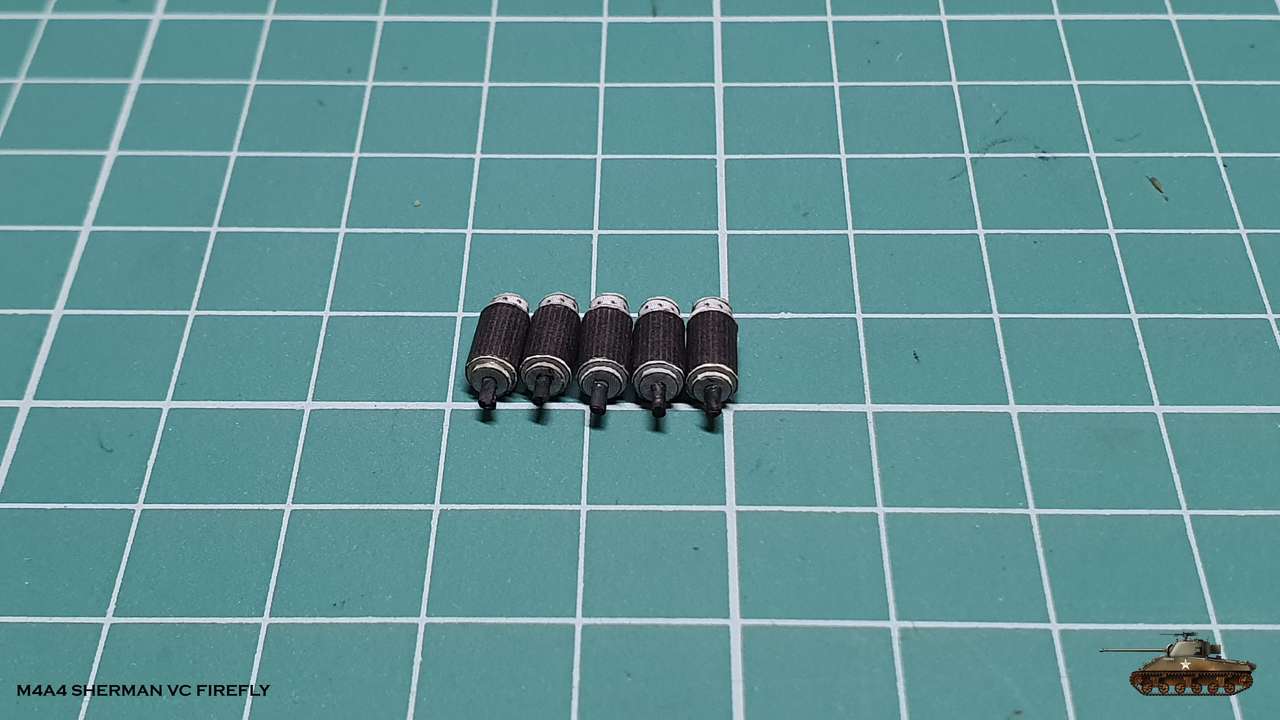
And everything is attached to the engine
On a side note, I would like to share my impressions of Halinski paper.
On the good side - a paper of convenient thickness, it is well cleaned of glue and glued strong together.
On a bad one, IMHO - it is not possible to bend sharp corners normally with drawing a bend line from the inside (from the outside it ruins the paint)
Therefore, it is sometimes necessary to cut parts into pieces and glue edge to edge.
Also, when twisting small parts - the paper is stratified.
I compare it against paper from GPM and old Halinsky.
Another note - there are details that are given on thin paper for dense twisting.
So it seems to me that the calculation was to twist them by a robot into a super dense, with no minimum clearance in the middle, tube. :-D
Otherwise, it is not possible to enter into the desired diameter with given length. It is necessary to constantly trim and adjust to fit.
Again IMHO.
I'm going on vacation, but stay tuned!
I continue to equip this miracle of engineering.
Next in line are ignition distributors, idle rollers and ignition coils
First of all, the base. There are also several types and one even comes with a fuel pump.
So you need to keep track of where to glue each one
Then the rollers. And why they are useless - in the previous version of the engine, they turned water pumps,
but due to poor flow distribution and problems with such a solution - in this version 5 pumps were replaced by
one in the middle with the distribution pipes for each block (you will see in the future) and the rollers were left without work
Therefore, there will be no connecting belts
Ignition Distributors - those simple
And the ignition coils. Here, too, you need to pay attention to direction of attachment. On each block it is in its own way
And everything is attached to the engine
On a side note, I would like to share my impressions of Halinski paper.
On the good side - a paper of convenient thickness, it is well cleaned of glue and glued strong together.
On a bad one, IMHO - it is not possible to bend sharp corners normally with drawing a bend line from the inside (from the outside it ruins the paint)
Therefore, it is sometimes necessary to cut parts into pieces and glue edge to edge.
Also, when twisting small parts - the paper is stratified.
I compare it against paper from GPM and old Halinsky.
Another note - there are details that are given on thin paper for dense twisting.
So it seems to me that the calculation was to twist them by a robot into a super dense, with no minimum clearance in the middle, tube. :-D
Otherwise, it is not possible to enter into the desired diameter with given length. It is necessary to constantly trim and adjust to fit.
Again IMHO.
I'm going on vacation, but stay tuned!
- Apr 5, 2013
- 13,876
- 10,215
- 228
Micah, you took the words right out of my mouth. That engine is amazing. I spent hours reading on it. They are worth a small fortune if you can find one. Great job. This is a wonderfully built tank model.
So good.
The detail and quality is top draw. No ifs, no buts.
Looking forward to further installments.
The detail and quality is top draw. No ifs, no buts.
Looking forward to further installments.
Big thanks to you, guys!
Appreciate your feedback.
I'm back from vacation.
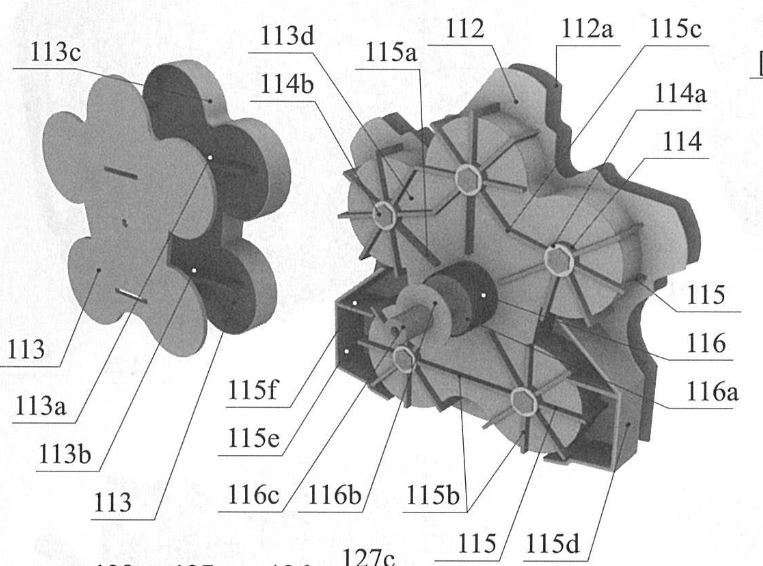
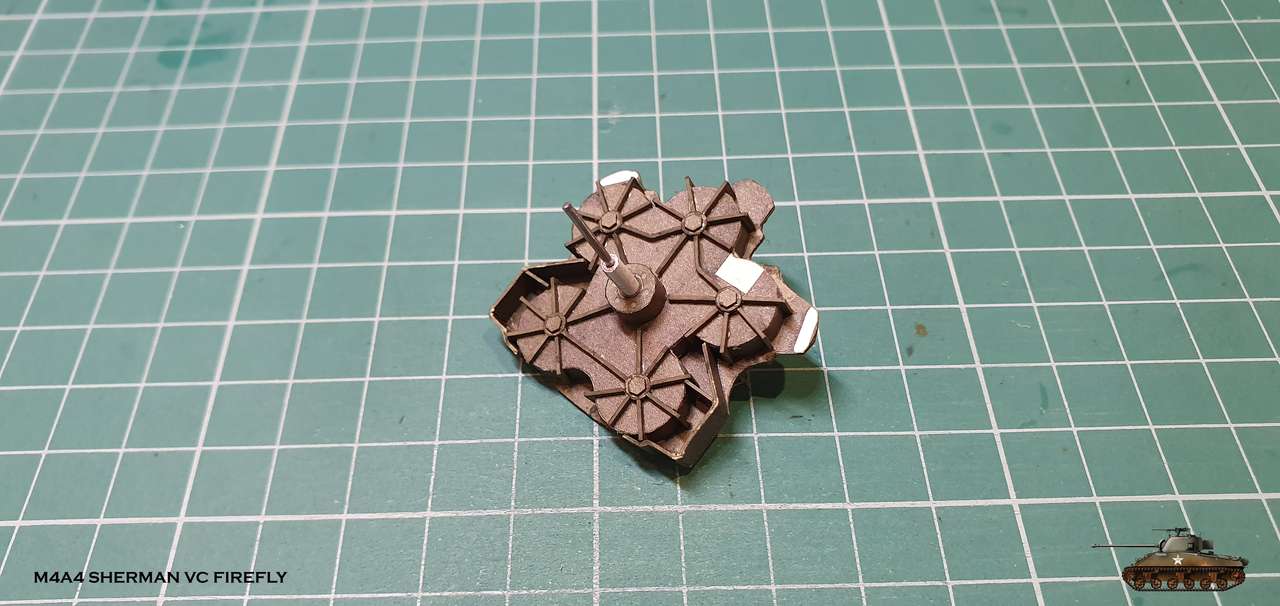
Next is the gearbox.
In fact, it's just 5 shafts with five engines connected to the main shaft by gears.
There are not many parts, but overall it looks interesting

Gearbox is ready.
And attached to its place
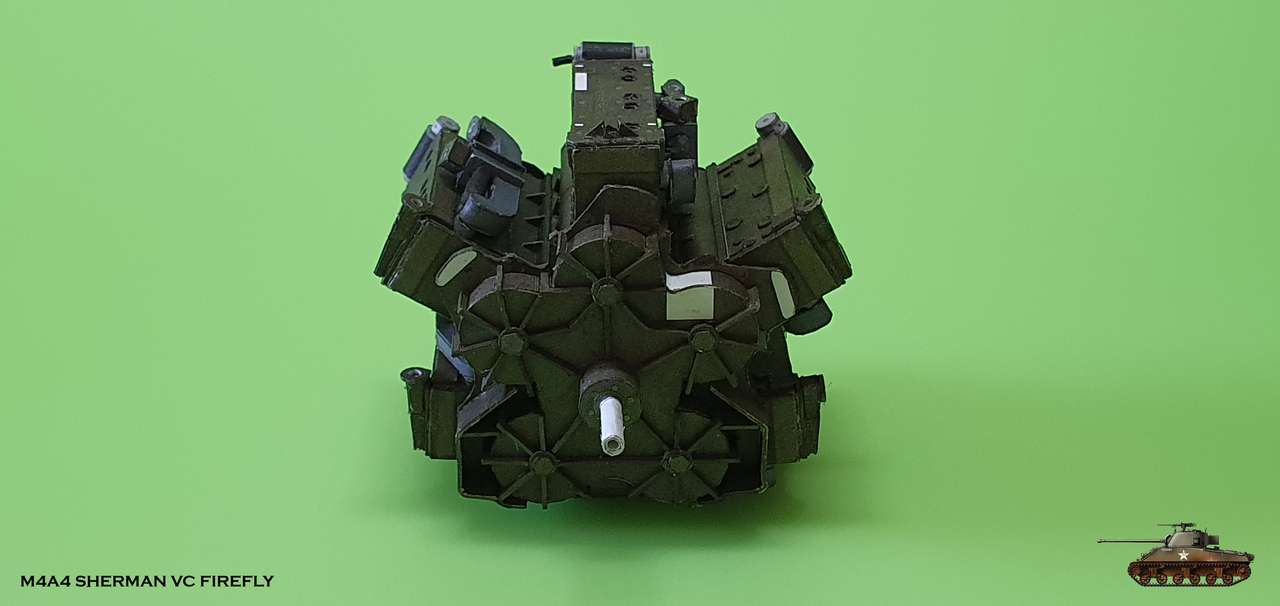
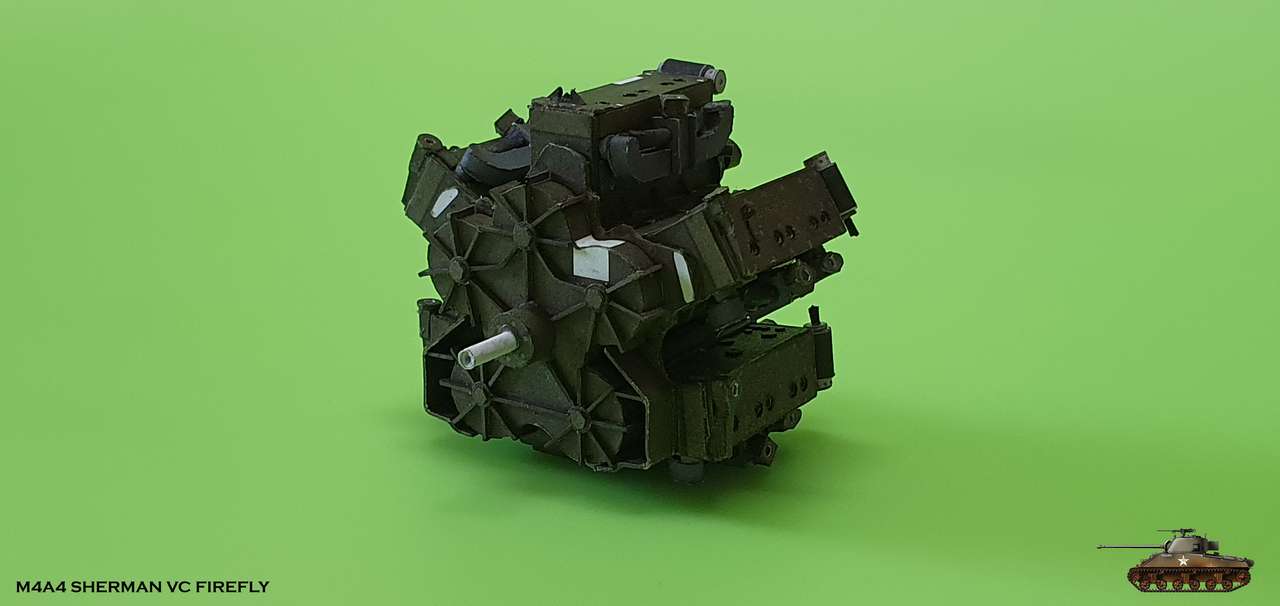
And that's how it looks inside
Appreciate your feedback.
I'm back from vacation.
Next is the gearbox.
In fact, it's just 5 shafts with five engines connected to the main shaft by gears.
There are not many parts, but overall it looks interesting
Gearbox is ready.
And attached to its place
And that's how it looks inside
Last edited:
Thank you Zathros and Boris
I'm entering chapter with scratch build parts
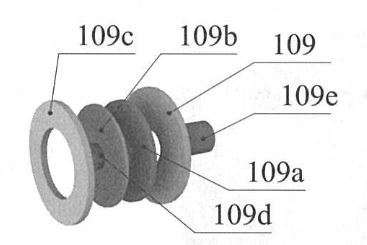
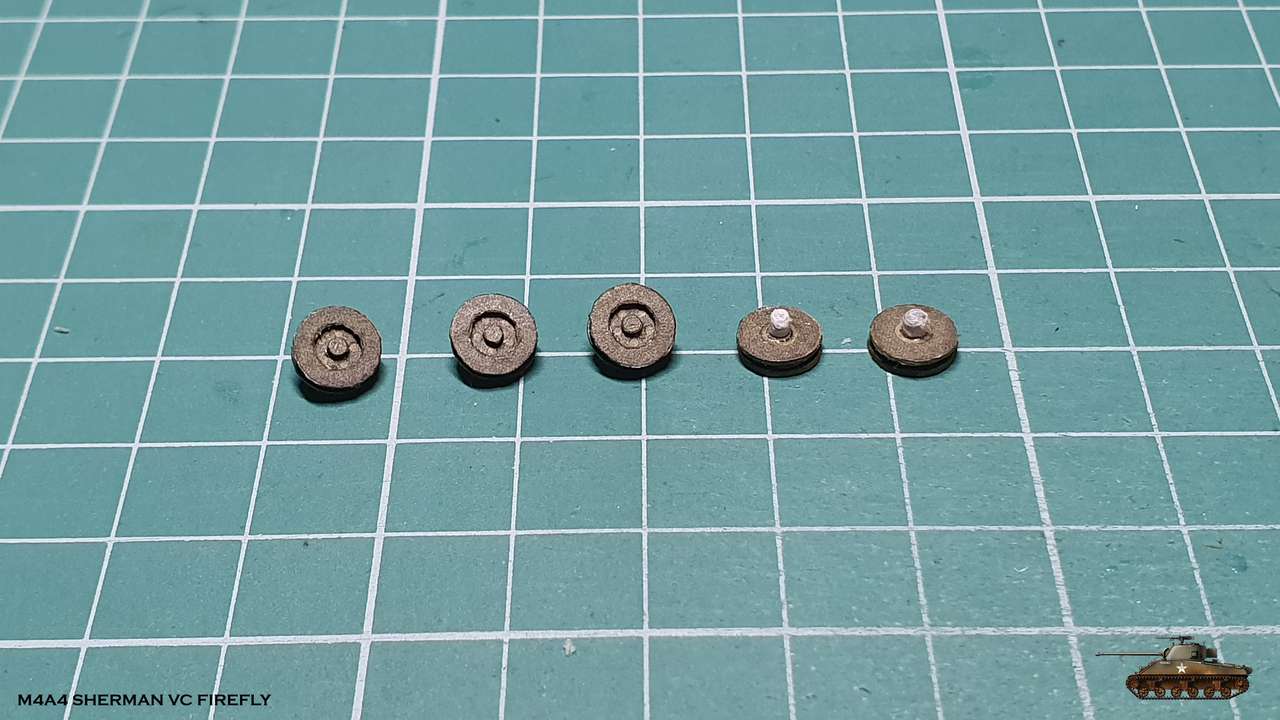
Now it is water pump.
As I wrote earlier - in the first version there were 5 of them, one for each block.
But it turned out to be not effective and therefore they designed one central pump, which distributed
cool fluid throughout each block through 5 tubes.

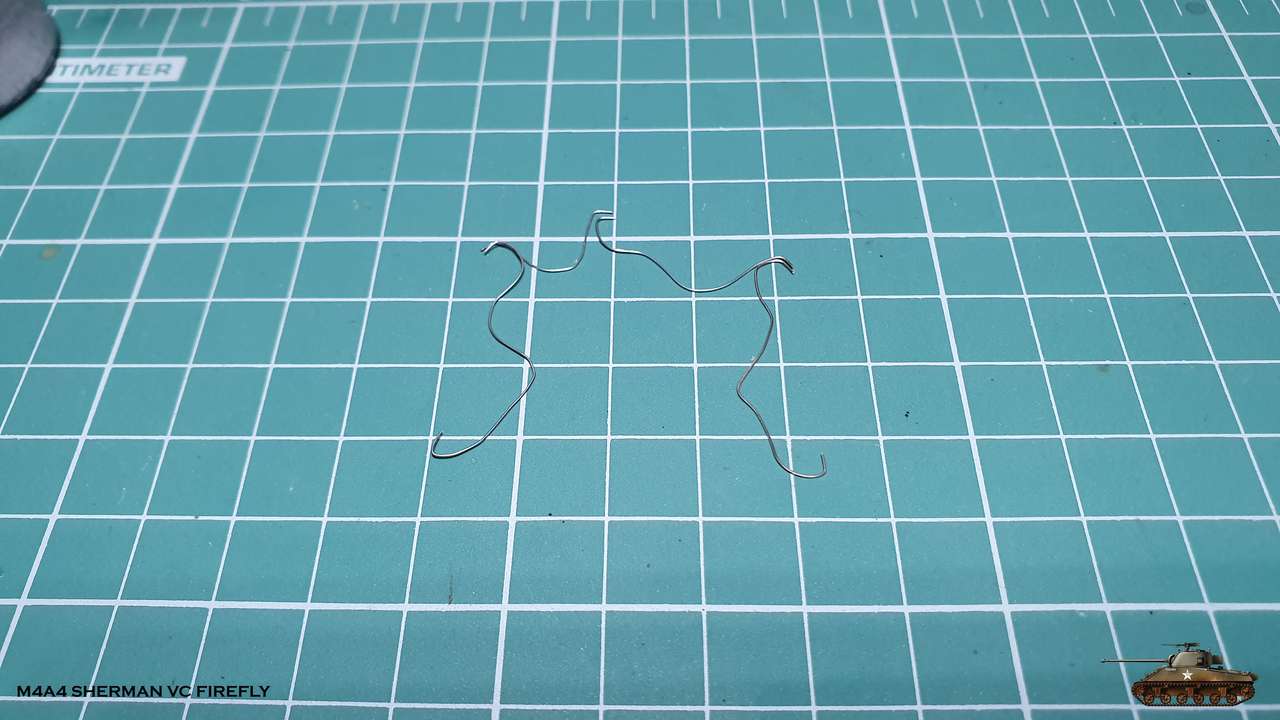
I made tubes from solder of suitable diameter and painted black.
The pump has already been fixed in place (care must be taken with direction of all exits)
and then I noticed in the drawings that under the tubes are passing synchronization cables between ignition coils.
I turned to shape those cables from the same solder of a suitable diameter and installed them before pump tubes.
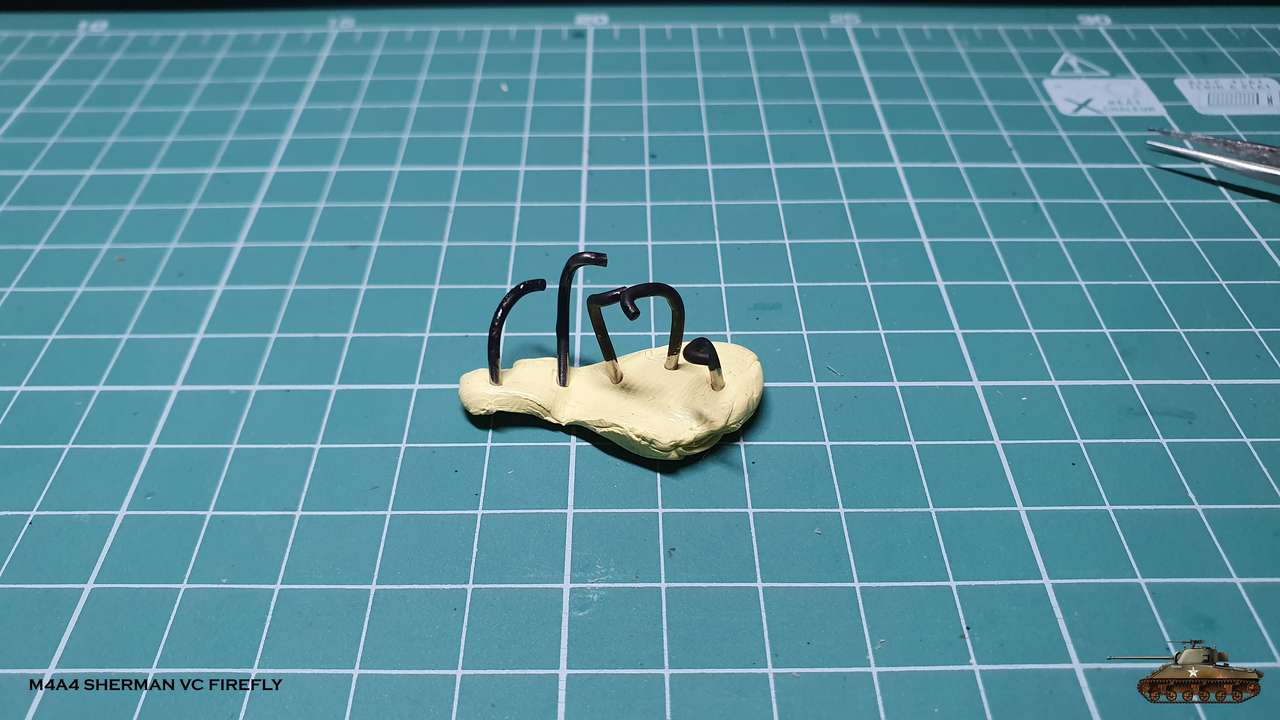

Then I carefully attached the tubes, each in its place with drops of super glue.

I'm entering chapter with scratch build parts
Now it is water pump.
As I wrote earlier - in the first version there were 5 of them, one for each block.
But it turned out to be not effective and therefore they designed one central pump, which distributed
cool fluid throughout each block through 5 tubes.
I made tubes from solder of suitable diameter and painted black.
The pump has already been fixed in place (care must be taken with direction of all exits)
and then I noticed in the drawings that under the tubes are passing synchronization cables between ignition coils.
I turned to shape those cables from the same solder of a suitable diameter and installed them before pump tubes.
Then I carefully attached the tubes, each in its place with drops of super glue.
Last edited:
Thank you guys.
Boris, regular acrylic paint. Water colors, that I use as my prime paint, don't lay and stick on solder.
As a matter of fact, acrylic paint hard to stick as well, but I managed to paint it eventually.
I'm not good in painting technics, but there is not as much parts to mess with, so I didn't invest in it.