Last edited:
Bashing a church
- Thread starter Bill Nelson
- Start date
You are using an out of date browser. It may not display this or other websites correctly.
You should upgrade or use an alternative browser.
You should upgrade or use an alternative browser.
Hi Bill,
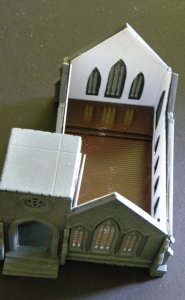
Nice looking flooring. What did you make it out of?
Dr Tomops:[/quote
Tom that is evergreen V grove styrene. the specifications are lost in time, as it is leftover from , I believe, my last Styrene Skid shack construction binge. I think I have a supply list for that somewhere, as I had always intended to make more. I could use some in Ridgemont, and Gegokayoosa, and it would probably be fun to have some at the club as well; or at least some extras to make a moving day train, without raiding established logging camps.
The thin evergreen v-grove material is lightly glued (to minimize the same warping problem that has me not gluing the interior walls in place at all ) to the same heavy gray plastic material I used for the sub floor. up in the sanctuary area that sub floor is 3 layers thick , which gives me the proper steps up to the sanctuary level..
I made the floor assembly very slightly oversize, After the floor was assembled, I sanded until it would fit tightly in between the interior walls. when I add the glazing it will thicken the walls, and I may need to do a little more sanding. It all fits so tightly that right now, even though only the two walls adjacent to the tower and the tower are glued together: the sub floor, the floor. the other two walls, and all six interior walls are not glued together, they are just a press fit; I can pick this building up by any two opposite walls, and the fit is tight enough to hold the whole structure together.
To get that finish (I used the same technique on St, Joseph's in the Gizzard- my finest styrene scratchbuild, and one of my best builds ever) I took the flooring and spray painted it with flat black to get a dark base, and then I spray painted the rest with a glossy chocolate brown paint, putting on just enough paint to fully cover the board surfaces, but to leave just a hint of the black down in the v-grove. The result is a decent approximation of a dark highly polished floor.
Next I have to hunt for glazing materials. I think I will make my first attempt at stained glass with hand made art, rather than photography.
Bill Nelson.
Bill Nelson
flooring material
I found some still in a bag, and it looks like the flooring is Evergreen 2060 v-grove .060 spacing .020 thick
Bill Nelson- cleaning my work table
I found some still in a bag, and it looks like the flooring is Evergreen 2060 v-grove .060 spacing .020 thick
Bill Nelson- cleaning my work table
I found my window glazing stash while cleaning and reorganizing my work table area.
am experimenting with sand witching some glazing in between the walls. I developed this technique building St, Josephs in the Gizzard, which uses very fine Grant Line window castings In evergreen styrene walls. I figured I could never neatly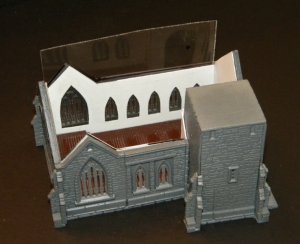
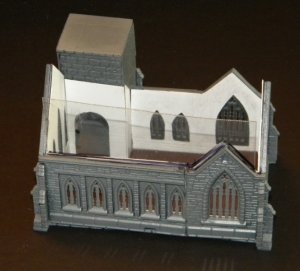
 match the arched windows to fit the glazing on top of the inside wall.
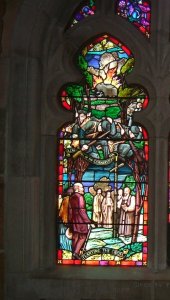
After studying these photos, a whole lot of glazing does not show, so I probably won't spend as much time as I had planned on doing actual pictures on the glass, because it won't show, and I doubt that my efforts would satisfy me either, so I may do a pointillist impression, just aiming at the impression of stain glass. rater than to attempt the kind of realistic glass I like the most. an example here showing the founding of The University of the South, and Union troops, blowing up the cornerstone (they thought there was money in it.)
Bill Nelson
am experimenting with sand witching some glazing in between the walls. I developed this technique building St, Josephs in the Gizzard, which uses very fine Grant Line window castings In evergreen styrene walls. I figured I could never neatly


 match the arched windows to fit the glazing on top of the inside wall.
After studying these photos, a whole lot of glazing does not show, so I probably won't spend as much time as I had planned on doing actual pictures on the glass, because it won't show, and I doubt that my efforts would satisfy me either, so I may do a pointillist impression, just aiming at the impression of stain glass. rater than to attempt the kind of realistic glass I like the most. an example here showing the founding of The University of the South, and Union troops, blowing up the cornerstone (they thought there was money in it.)
Bill Nelson
Last edited:
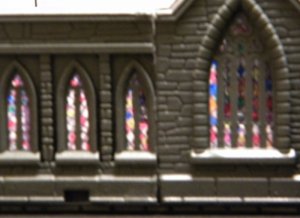 stained glass window test #1
I went grocery shopping at Wally world tonight.
I picked up a pack of colored fine point Sharpie markers, and did a test on some windows. this is the wall that faces opposite the aisle, and is thus the ideal one to practice on.
the effect is ok. although difficult to photograph without a roof and interior lighting. I threw out about eight digital photo's before I got this one. It looks better than this in person.
Bill Nelson
Last edited:
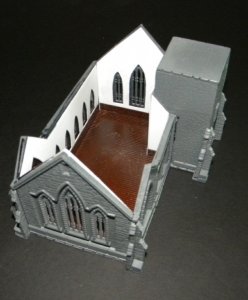
 wainscoting
I'm taking a break from the stain glass. the next window done will be easily visible from the aisle, so it won't be experimental like the first wall.
I'm poking at the wainscoting, which really gives a finished touch to the walls. Once again. I'm just following techniques I developed on St. Joseph's in the Gizzard
Bill Nelson
Last edited:
That's one heck of a silk purse, even if you put on a roof and stopped there. Great job converting a classic plasticville kit into something special.
Thanks Gaelen, This has been a lot of fun so far. I have all the stain class windows in, and the interior roof pieced together, with a medium level of detail. I had hoped to pull out all of the stops and have a bunch of arched supports, but The side wall windows are not exactly opposite each other. I elected not to fix that, as the fix would have shortened side walls , and added several splices to the side walls. I think that would have made the outside, that will be easily visible, look worse, in order to make the inside, which will be almost impossible to see, look better. so I left it alone.
I have found, in my scrap plastic bin, some shingle roof material, which is the right size to do the roof, but cutting it to fit will be tricky. I also have to cut some plastic for the inside of the roof structure that will stick down in such a manner to slide inside the interior walls snugly, so that there won't be a light leak at the roof joint. I will fit the interior wilt Led lighting ( I have covered the led lighting of a scratchbuilt church recently in my my main thread --- logging in east Tn on the DG CC & W RR in 1925 over in the logging mining and industrial section) I will document the process here as well when I get to it, as I have come up with a way to tone down the bright blue look of the light from LEDs.
I'm still struggling with the planning of the tower, but I will get through that at some time. I feel rater certain that I will have to do a full interior for this building at some time, but that might not haven right now. right now it fits so tightly it can be picked up and handled, but it can still be disassembled into fifteen pieces, so adding interior details will be easy.
Bill Nelson
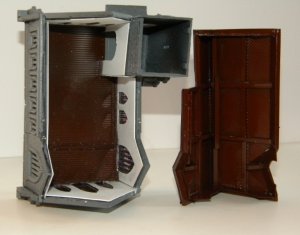
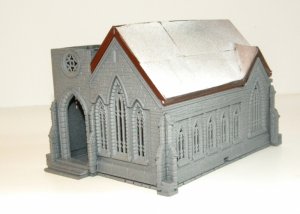

 I have the inside structure of the roof assembled, along with a lip, that will fit inside the inside walls, (it is a real tight fit, and a pain in the **** to fit the roof); that should minimize light leaks at the wall roof joint.
I usually photograph more steps in the construction. . I did not do that this time, as this had a lot of trial and error involved. after two or three tries to get something right, I was in a hurry to jump to the next step. Photos of the failed steps would have been a waste of time, photos of the successful steps only would have given the false impression that I knew what I was doing.
Here is the inside roof structure. I need to paint what will be visible from the outside gray to match the stone, and the over lapping flaps for the inside walls will have to be painted white.
There is an unprototypical bump out on the ridgebeam, which will support the LED strip, which is being modified to make it a little more subdued. I'm gluing a thin white styrene sheet over the LEDs to diffuse the light some, and I will try using yellow highlighter on the white styrene to try to minimize the Blueish light from the LED
Bill Nelson
Next I need to cut the sheets of plastic I have with shingle detail to match the roof line, and install them and paint them.
I also need to study the inside of the building and figure out where the wire for the LED lighting will go on the inside of the building.
Last edited:
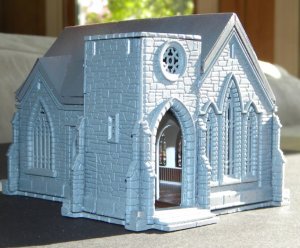
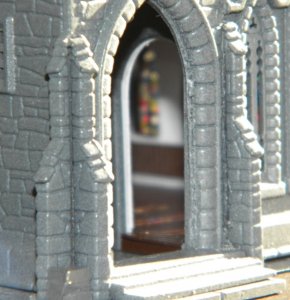
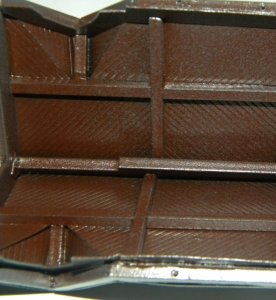
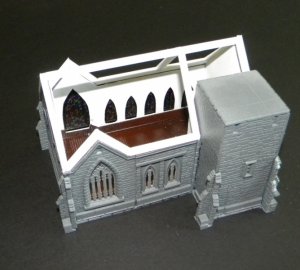
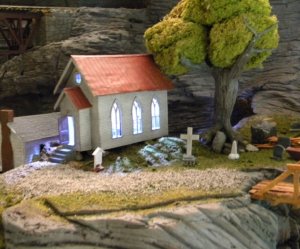 some progress with the roof , and a photo that shows the roof interior detail (that will never show) better . In the through the door photo , the far wall is not seated all the way down, so there is a white line viable under the wainscoting that wouldn't be there if it were assembled correctly.
The other church in the photo is a scratchbuild of my design, which serves as St Joseph's in the Gizzard. this shows the LED lighting that needs toning down. grain of rice bulbs have a much better color, but they burn out very quickly, and it is a pain to disassemble buildings with this level of interior detailing to deal with the wires, which are attached to the tiny bulbs, and must be hidden.
Bill Nelson
Last edited:
starting on the exterior roof
Being somewhat satisfied with the interior roof, I started on the exterior roof. I had found some sheets of plastic "shingle" material, of sufficient size for the project. This material has long been separated from it's packaging, and so it's origin and specifications are unknown.
Fitting roof material is very tricky, due to the angles which often must be cut or filed into the edges. In the past I have made more errors cutting roof material than anywhere else on a structure. so extra care is being taken here, where I don't have enough material to make a mistake, and don't know what the stuff is so I can't easily buy more. an error might cause me to have to a. purchase some material (perish the thought!), and b . start over.
I started with some index cards. I can quickly mark them with pencil, and attempt to cut the to fi t, making a slit for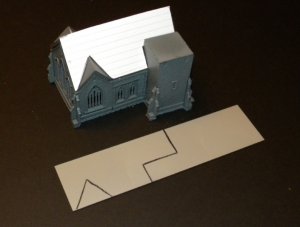
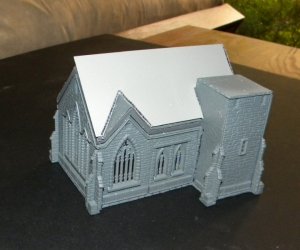 the ridge of the gables. and then with the card held in place I can fold the card material into the little valleys, cut it at the folds, and get something accurate, and fast.
I then traced the shape onto my shingle material, leaving a little extra where needed to file it to an angle.
So far I have one the large pieces cut and roughly fitted, It needs some very careful filling to lower the bottom edge. once I'm fully satisfied with the fit at the bottom, I'll cut the other side too, and then when I have both large pieces I will sand them at the top till they have the best angled fit I can get. With the doubled up material, I should be able to escape any possibility of a light leak @ the roof.
Nelson
Being somewhat satisfied with the interior roof, I started on the exterior roof. I had found some sheets of plastic "shingle" material, of sufficient size for the project. This material has long been separated from it's packaging, and so it's origin and specifications are unknown.
Fitting roof material is very tricky, due to the angles which often must be cut or filed into the edges. In the past I have made more errors cutting roof material than anywhere else on a structure. so extra care is being taken here, where I don't have enough material to make a mistake, and don't know what the stuff is so I can't easily buy more. an error might cause me to have to a. purchase some material (perish the thought!), and b . start over.
I started with some index cards. I can quickly mark them with pencil, and attempt to cut the to fi t, making a slit for

 the ridge of the gables. and then with the card held in place I can fold the card material into the little valleys, cut it at the folds, and get something accurate, and fast.
I then traced the shape onto my shingle material, leaving a little extra where needed to file it to an angle.
So far I have one the large pieces cut and roughly fitted, It needs some very careful filling to lower the bottom edge. once I'm fully satisfied with the fit at the bottom, I'll cut the other side too, and then when I have both large pieces I will sand them at the top till they have the best angled fit I can get. With the doubled up material, I should be able to escape any possibility of a light leak @ the roof.
Nelson
Last edited:
Bill,
The pictures in post #32 are beautiful. I really like the interior wood roof. It reminds me of Immaculate Conception"s Chapel built by Irish workers here to build the RR bridges in Clarksville. THe stained glass is looking good and the interior walls are coming along nicely. Keep up the good work!!!
Doc Tom:mrgreen::thumb::mrgreen::thumb:
Bill,
The pictures in post #32 are beautiful. I really like the interior wood roof. It reminds me of Immaculate Conception"s Chapel built by Irish workers here to build the RR bridges in Clarksville. THe stained glass is looking good and the interior walls are coming along nicely. Keep up the good work!!!
Doc Tom:mrgreen::thumb::mrgreen::thumb:
Thanks Tom.
It seems like every church of a certain age, built in that Gothic style, has that style roof. I have seen it throughout my churchgoing career, @ Sr. Paul's In Meridian MS. , Christ Church, in Glendale OH., Trinity, and Yes, the Chapel @ Immaculate Conception here in Clarksville; so there was no way I could build a roof without the opposing diagonal panels.
The fact that the windows on the left and right side are offset a little prevents me from going the whole 9 yards and putting in the arches. This kit is still available, so I may revisit this project at some later date, and do the arches correctly. but since it does not, can not, and will not show, I as safe ignoring that level of detail at this time.
Bill Nelson
I just read this thread from page one. Bill, you have done some incredible work! I really like the wooden floors and the stained glass windows.
Thanks Snake eyes. Having a rather large railroad at home, and lots of projects at the club, as well as a 130 year old home on 21 acres, most of my efforts are plain compared with this, but increasingly I have started to pull out all the stops on a few projects that will really stand out on the railroad, and this should be one, once the lighting is in place those windows should really shine.
Bill Nelson
Bill Nelson
Here is a link to my main layout thread
http://www.zealot.com/forum/showthread.php?t=164383
If you search through this thread you will find one of last year's insane projects , the construction of two Surry parker skidder loaders.
http://www.zealot.com/forum/showthread.php?t=157175
http://www.zealot.com/forum/showthread.php?t=164383
If you search through this thread you will find one of last year's insane projects , the construction of two Surry parker skidder loaders.
http://www.zealot.com/forum/showthread.php?t=157175
Bill, you have incredible talent. The closest I've come to anything like that has been with Lego...


