Sd.Kfz. 9 Famo (Angraf 5/2005)

Status
Not open for further replies.
Hello guys
i took a little brake from assembling, but the process is continue slowly

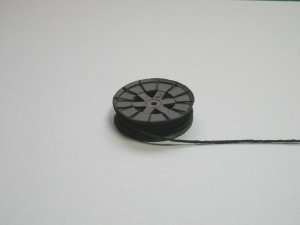
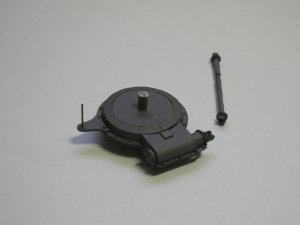
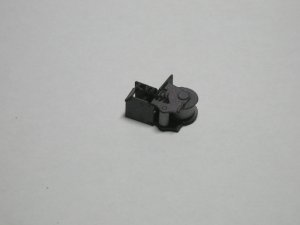
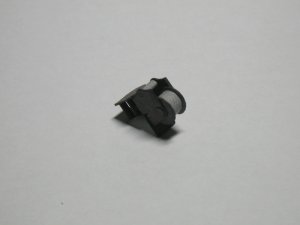
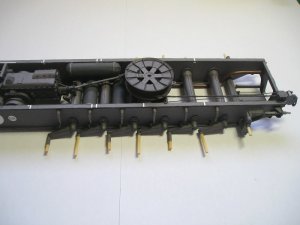
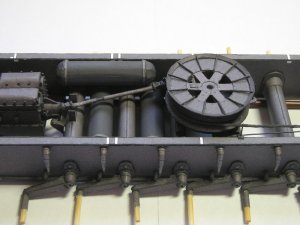
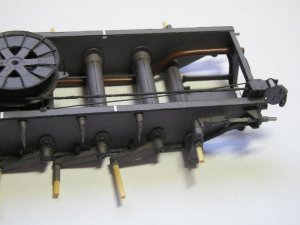
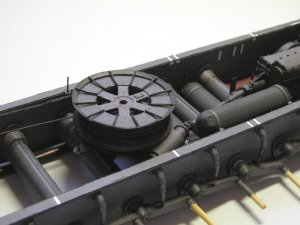
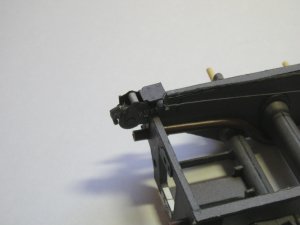
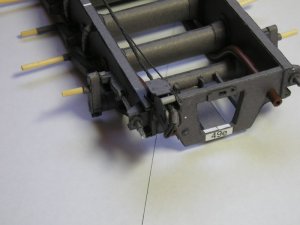
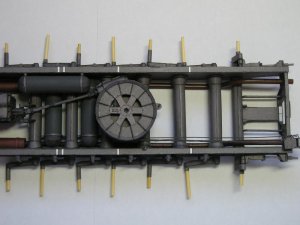
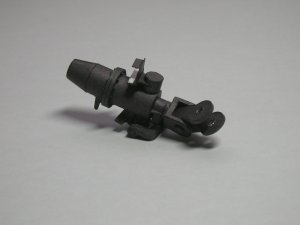
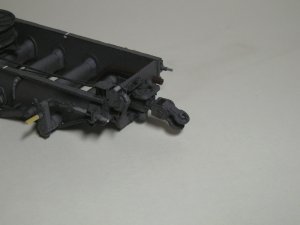
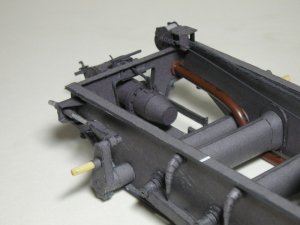
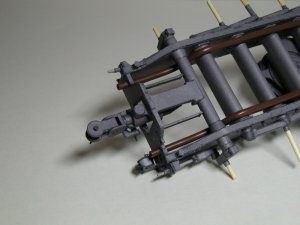
the winch!
the pictures show the winch itself, the rotating mechanism, the rear stopper and general view

on last picture you can see the right angle to position the winch mechanism, so that it will connect correct to transmission and copy the prototype position

there is still to assemble trailer coupling and i will enter the era of wheels and tracks!


bugs:
42c - gluing place for part 42o wrong
42b - wrong insert cut, reversed
45k - same as part 45i, but need to be mirror to it
45o, 45n - diameter to small
gluing places for parts 43d,43e,43f are wrong. the winch must be placed at angle and not perpendicular to the frame

pictures
 

Attachments

  • 80.JPG
    80.JPG
    87.5 KB · Views: 26
  • 79.JPG
    79.JPG
    92.5 KB · Views: 22
  • 81.JPG
    81.JPG
    100.2 KB · Views: 24
  • 82.JPG
    82.JPG
    96 KB · Views: 22
  • 83.JPG
    83.JPG
    108.3 KB · Views: 27
pictures continue from previous post
 

Attachments

  • 84.JPG
    84.JPG
    110.5 KB · Views: 33
  • 85.JPG
    85.JPG
    107.3 KB · Views: 26
  • 86.JPG
    86.JPG
    108.7 KB · Views: 29
  • 87.JPG
    87.JPG
    103.3 KB · Views: 21
  • 88.JPG
    88.JPG
    106.1 KB · Views: 22
  • 89.JPG
    89.JPG
    116.4 KB · Views: 30
What can I say ,...., when I look on this post I wish it never end, I wish to see more and more and more again...best regards (sorry for my english)

thank you I.Nicolae. i am trying to do my best


--------------------------------------------------------------------------------

in the shadow of our not so happy events i continue the assembling, because it's the only way to forget and relax a little

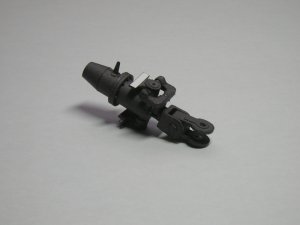
trailer coupling finished and mounted on the frame
it's fully workable an can turn in 2 vertical and one horizontal axes
(you can notice it on some pictures)


bugs:
49o - too small in length

and by this i finish another stage in this big project!
next: wheels and tracks... and a lot of them
stay tuned
 

Attachments

  • 90.JPG
    90.JPG
    102.7 KB · Views: 31
  • 91.JPG
    91.JPG
    89 KB · Views: 25
  • 92.JPG
    92.JPG
    92.2 KB · Views: 30
  • 93.JPG
    93.JPG
    104.8 KB · Views: 28
  • 94.JPG
    94.JPG
    104.1 KB · Views: 34
  • 95.JPG
    95.JPG
    108.1 KB · Views: 39
i see you like bamboo as well :mrgreen:


you are a very good modeler

it is fascinating to watch you assemble it.
:thumb:

Excellent work on this model. The engine is a marvel to behold in itself!

Can't wait to see how this turns out.

Ken

thank you The Hermit and Ken :)

back to the assembling
front wheels
frankly, i don't like how they look
maybe i will shape and paint them, like i did with SKOT...
what are your suggestions?
 

Attachments

  • P1010089.JPG
    P1010089.JPG
    124.3 KB · Views: 38
  • P1010092.JPG
    P1010092.JPG
    128.1 KB · Views: 31
  • P1010099.JPG
    P1010099.JPG
    98.8 KB · Views: 30
now, for some motivation rising - i assembled one link of a track
the process went well and with no problems, but the cutting and painting of 19 details for this link, its another story
...repeat 120 times please
so... 2280 details only for tracks. well it will take some time ;)
 

Attachments

  • 102.JPG
    102.JPG
    99.5 KB · Views: 24
  • 103.JPG
    103.JPG
    76 KB · Views: 26
  • 104.JPG
    104.JPG
    82.1 KB · Views: 29
  • 105.JPG
    105.JPG
    80.9 KB · Views: 26
front wheels finished
the inside part assembled surprisingly with no errors and entered well into the wheel drum
also tried it on frame, but will glue wheels later, because i don't wont them take all the weight now. it will ruin the supports


bugs: none

pictures will continue in next post
 

Attachments

  • P1010097.JPG
    P1010097.JPG
    92.6 KB · Views: 23
  • P1010100.JPG
    P1010100.JPG
    85.8 KB · Views: 20
  • P1010104.JPG
    P1010104.JPG
    89.5 KB · Views: 21
  • P1010110.JPG
    P1010110.JPG
    82.9 KB · Views: 19
pictures continue from previous post
 

Attachments

  • P1010113.JPG
    P1010113.JPG
    83.3 KB · Views: 20
  • P1010127.JPG
    P1010127.JPG
    96 KB · Views: 24
  • P1010131.JPG
    P1010131.JPG
    78.5 KB · Views: 20
  • P1010133.JPG
    P1010133.JPG
    80.4 KB · Views: 18
  • P1010135.JPG
    P1010135.JPG
    82.7 KB · Views: 22
Good work Snake. Love your work.
I own this model too but put in at the bottom of my drawer after hearing all bad about this kit .I would like to ask you if you experienced allot of mistakes in the model .
 
Good work Snake. Love your work.
I own this model too but put in at the bottom of my drawer after hearing all bad about this kit .I would like to ask you if you experienced allot of mistakes in the model .
hi Misacek
first of all thank you
second of all, until now, i had a lot of mismatching and mistakes, not too big, but a lot.
if you will check my posts from the beginning, you will notice the "bugs" column. that's will give the amount of mistakes that popped out until now.

but i am not trying to get every modeler away from this kit :). on the contrary, i want to help those who will start this model to get the picture about the difficulty and mistkaes this model have
excluding this, the model itself is amazing!!!
so don't put it too far ;)
 
I am just awed at your work. The inclusion of your build to include mistakes is one of the best ideas I have ever seen in a thread. With your photos, instructions of all the bugs to watch and how to correct, and the great photography, is this a thread or a Model Article of How-To. My hat is off to you sir, and I so very much look forward to your next post. Heck, you have convinced me, I want one of these. The engine was a work of art. Hope today finds you safe and well in your country, and my prayers are out to your country everyday.:wave:
 
I am just awed at your work. The inclusion of your build to include mistakes is one of the best ideas I have ever seen in a thread. With your photos, instructions of all the bugs to watch and how to correct, and the great photography, is this a thread or a Model Article of How-To. My hat is off to you sir, and I so very much look forward to your next post. Heck, you have convinced me, I want one of these. The engine was a work of art. Hope today finds you safe and well in your country, and my prayers are out to your country everyday.:wave:


thank you for your kind words. and for good wishes and prayers for my country.
i am not as good as you think, but i am trying :)
 
no problem Greg :)
the frame is too long from both sides. its not front and not rear. you can put it from front and it will be too long from rear and the other hand. i noticed that the mismatching started already from first hole for the chaises from the end. but the width was OK. only the length was wrong.
the solution is simple: i ignored the frame and glued the part itself on the carton :)
the other two problems where very small. the long detail was just cut out and the little one i just made bigger, because it was inside white part.
i hope i explained myself clear :)
I too have this kit and do intend as you to build. But I will follow your thread as long as you post. I am abit unclear as to what you are saying here: I understand that the frame drawings do not match and are too long from end to end, is this what you mean when you said I just ignored and glued the part on the carton (did you mean chassis). Please explain if you cut anywhere@all on frame or did you just simply realign the frame parts to the chassis????:confused:
 
I too have this kit and do intend as you to build. But I will follow your thread as long as you post. I am abit unclear as to what you are saying here: I understand that the frame drawings do not match and are too long from end to end, is this what you mean when you said I just ignored and glued the part on the carton (did you mean chassis). Please explain if you cut anywhere@all on frame or did you just simply realign the frame parts to the chassis????:confused:

ok, if you have the kit it will be easy to explain: there is white part(frame) that goes inside - 1fL and 1fR, and there are two outside parts, that you glue on both sides of the white frame, in color - 1aL, 1aR and 1bL, 1bR.
the outside parts longer then the inside.
the inside part also have holes for the chassis
so the outside parts longer not only in the end, but from the first hole. each hole after, there is a little mismatching between outside and inside and it goes bigger
so the solution was just to glue the outside parts on a card that eventually will match the thickness of the inside white part
i hope i explained it better
 
Thanks and I understand now what you are saying. This will help to iron out the bugs. I read the other build thread on the German site and was disappointed that the fella stopped after getting so far along in the build. I look forward to your next posting.:wave:Rick
 
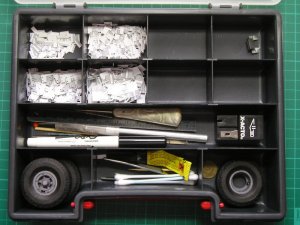
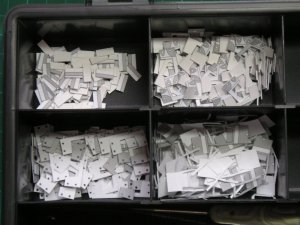
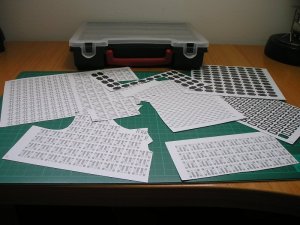
well, there is no big progress, but i decided to put some pictures of cutting process, so you wouldn't think i stopped the assembling :)
i also bought very useful case for the little details and instruments
and on the last picture there are the rest of details to cut...
it will take some more time ;)
 

Attachments

  • 115.JPG
    115.JPG
    116.9 KB · Views: 28
  • 116.JPG
    116.JPG
    111.1 KB · Views: 26
  • 117.JPG
    117.JPG
    119.3 KB · Views: 30
Hello snake7, I was glad to see you post again. And I wanted to say thank you for your help to my question about this kit. I too look forward to your postings, but alas I too understand that life some times keeps us busy. And may Peace rain upon your country, I am sure you understand the ref:rain as in blessed.:wave:
 
Status
Not open for further replies.