

Snake, is this a newer type of the cutter, with ratchet top handle? I have the older type, with thinner non-ratchet handle. It is quite usable but my fingers get tired after 5-6 pieces. How is the type you're using, in terms of comfortably of use?
M4A4 Sherman VC Firefly, Halinski 1:25
- Thread starter snake7
- Start date
You are using an out of date browser. It may not display this or other websites correctly.
You should upgrade or use an alternative browser.
You should upgrade or use an alternative browser.
- Apr 5, 2013
- 13,876
- 10,216
- 228
Snake, is this a newer type of the cutter, with ratchet top handle? I have the older type, with thinner non-ratchet handle. It is quite usable but my fingers get tired after 5-6 pieces. How is the type you're using, in terms of comfortably of use?
Good question, I was wondering the same thing! The model number of that Olfa tool would be nice.
")
I don't know if it is the newer, because i have it for over 15 years now, but my type is with ratchet handle, yes.Snake, is this a newer type of the cutter, with ratchet top handle? I have the older type, with thinner non-ratchet handle. It is quite usable but my fingers get tired after 5-6 pieces. How is the type you're using, in terms of comfortably of use?
I tried to use it before and was not satisfied with results, but i think you just need to get used to it and find the optimal handling.
Now i used it in this model and it was easier that cutting everything with knife.
But i was in need to add two stripes of isolation band on top and bottom of rail, because main part moved too freely on it.
Zathros, I'm sorry, but i threw away cutter package, so i don't know model number.
Last edited:
I prefer to post process and finished details, so you can see the end assembling..
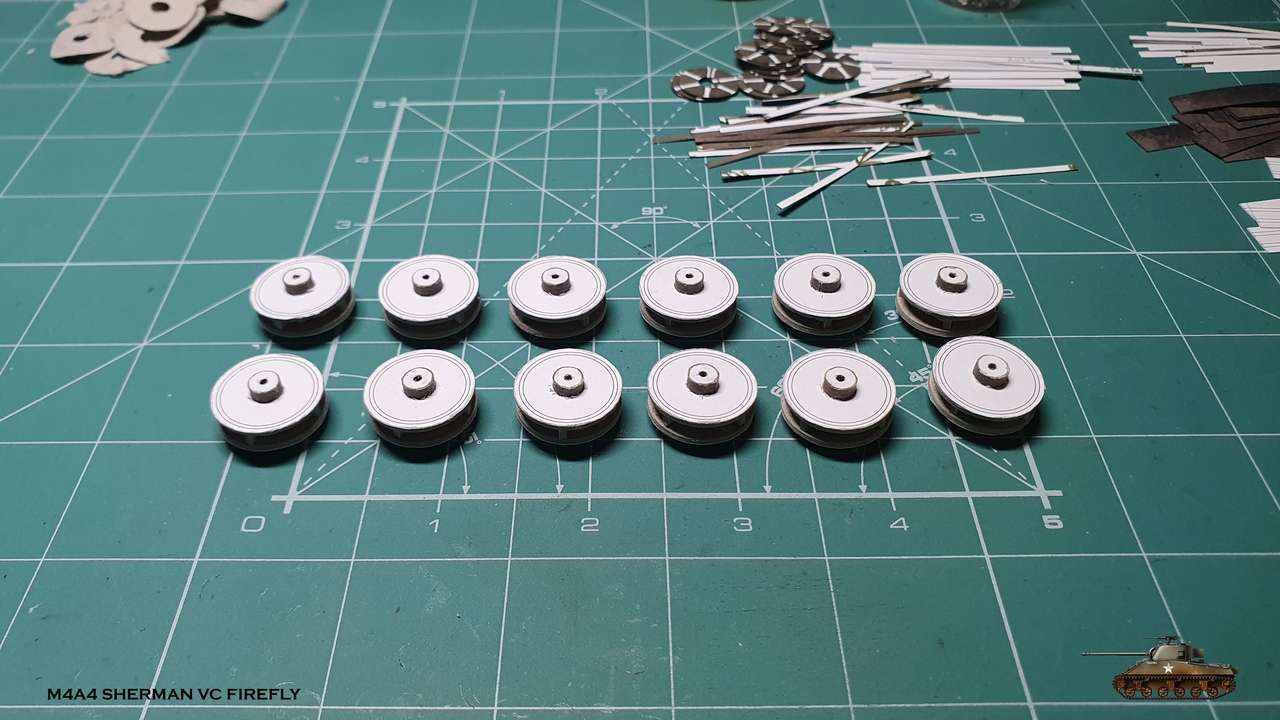
But road wheels take much time to assemble, so i decided to post some pictures before i finish.
As i stated before the key is conveyer assembling
Power structure finished
Outer stripes glued
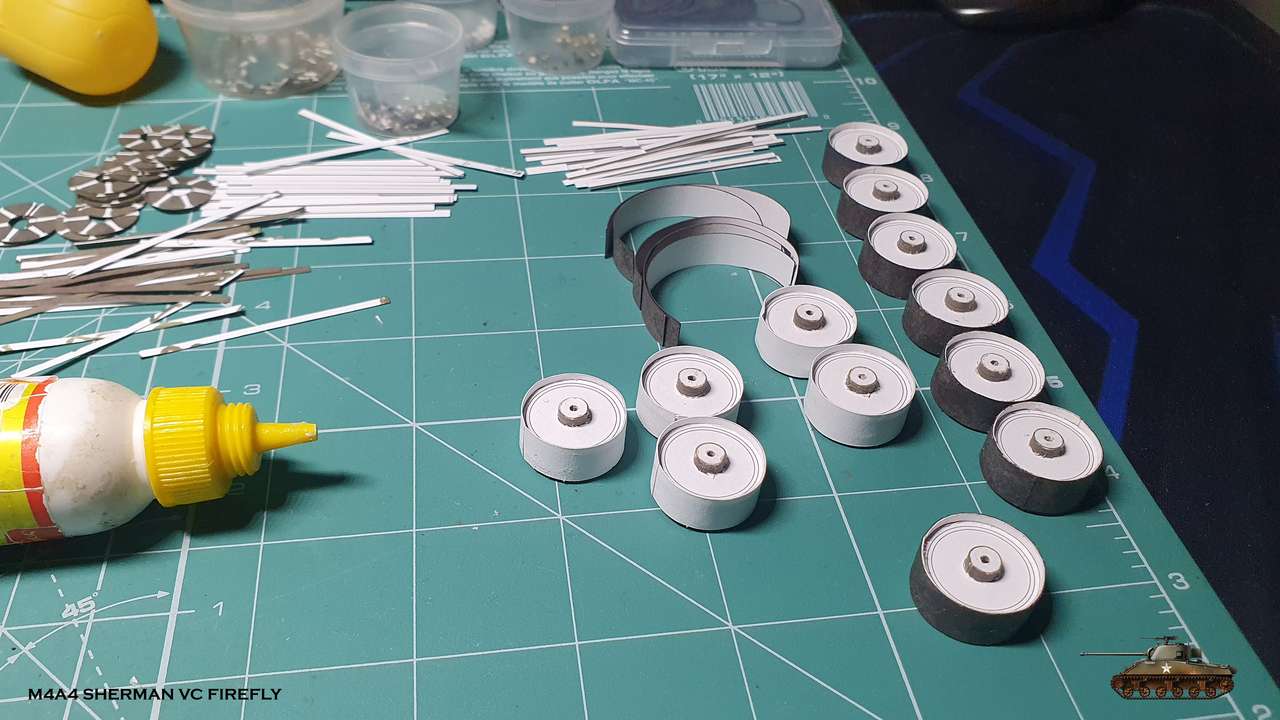
Inner rings glued
Outer rings assembled and glued

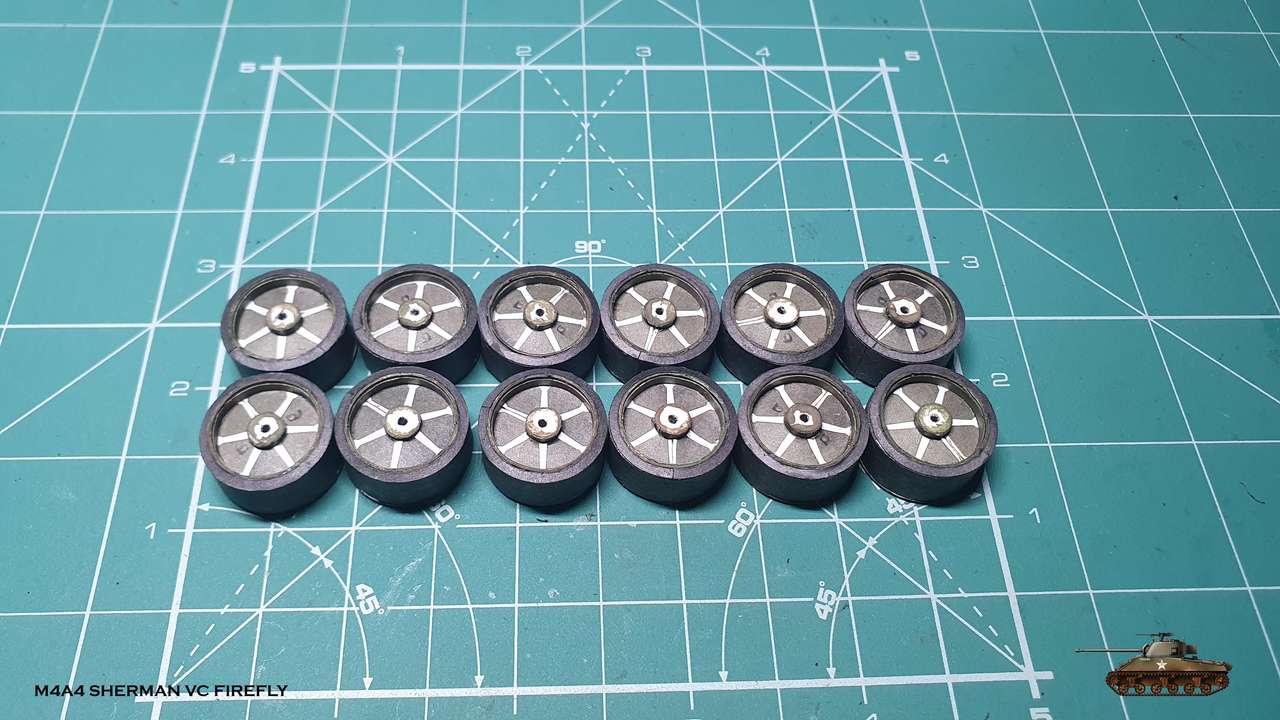
And this is the step I'm working on now. You can see that it will take some more time
Stay tuned!
But road wheels take much time to assemble, so i decided to post some pictures before i finish.
As i stated before the key is conveyer assembling
Power structure finished
Outer stripes glued
Inner rings glued
Outer rings assembled and glued
And this is the step I'm working on now. You can see that it will take some more time
Stay tuned!
Last edited:


Thanks Micah
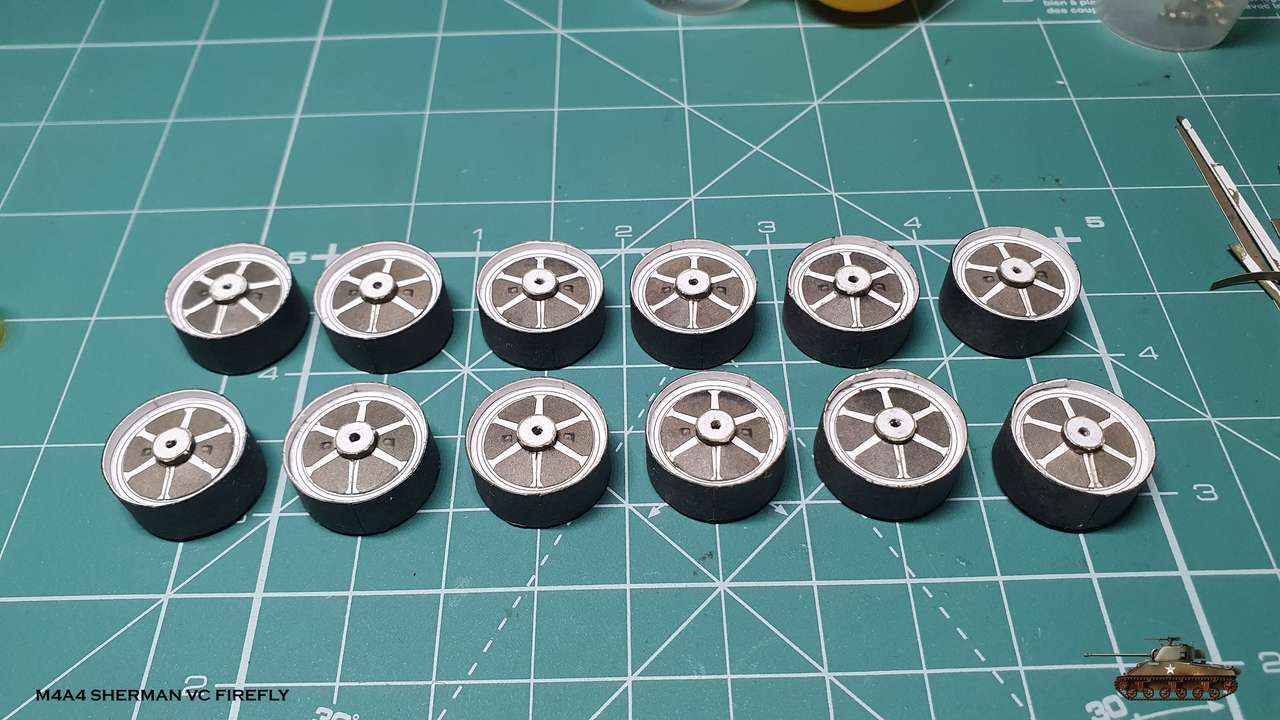
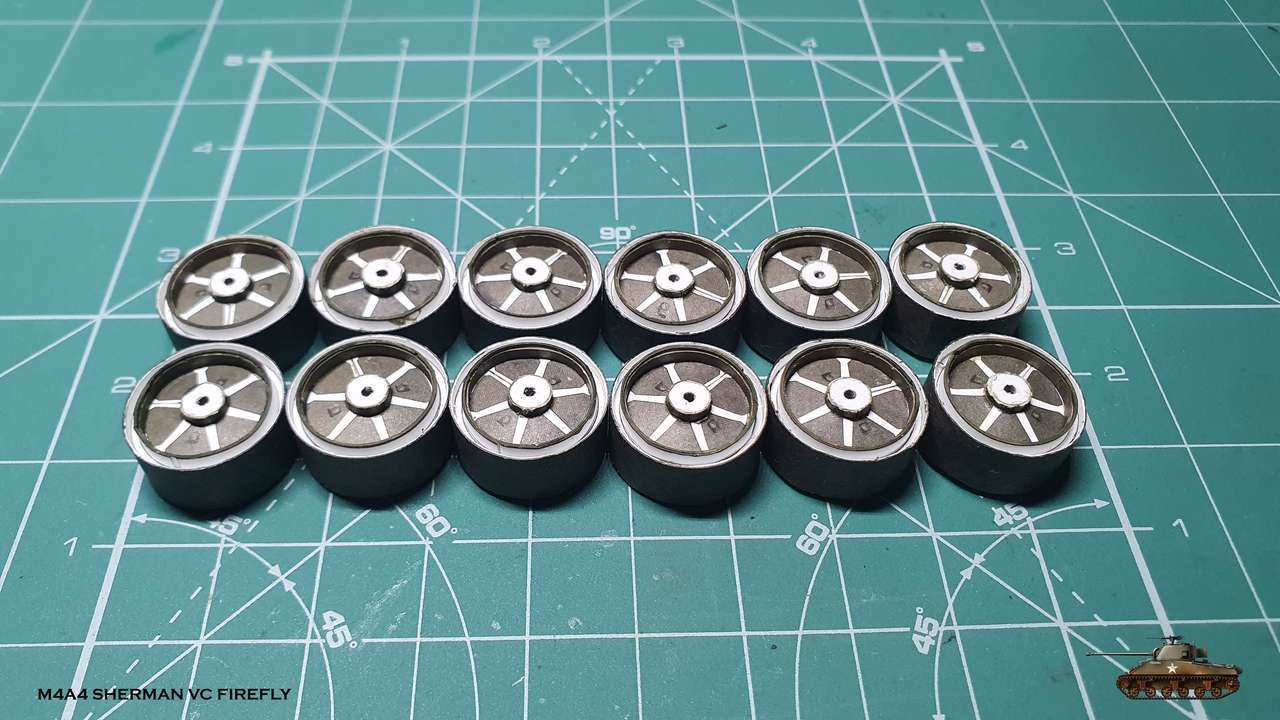
Finally! I finished road wheels.
I must admit, that i really don't like repeated assembling and especially with tiny parts. And the irony is that i build mostly armor vehicles
Last step was in process
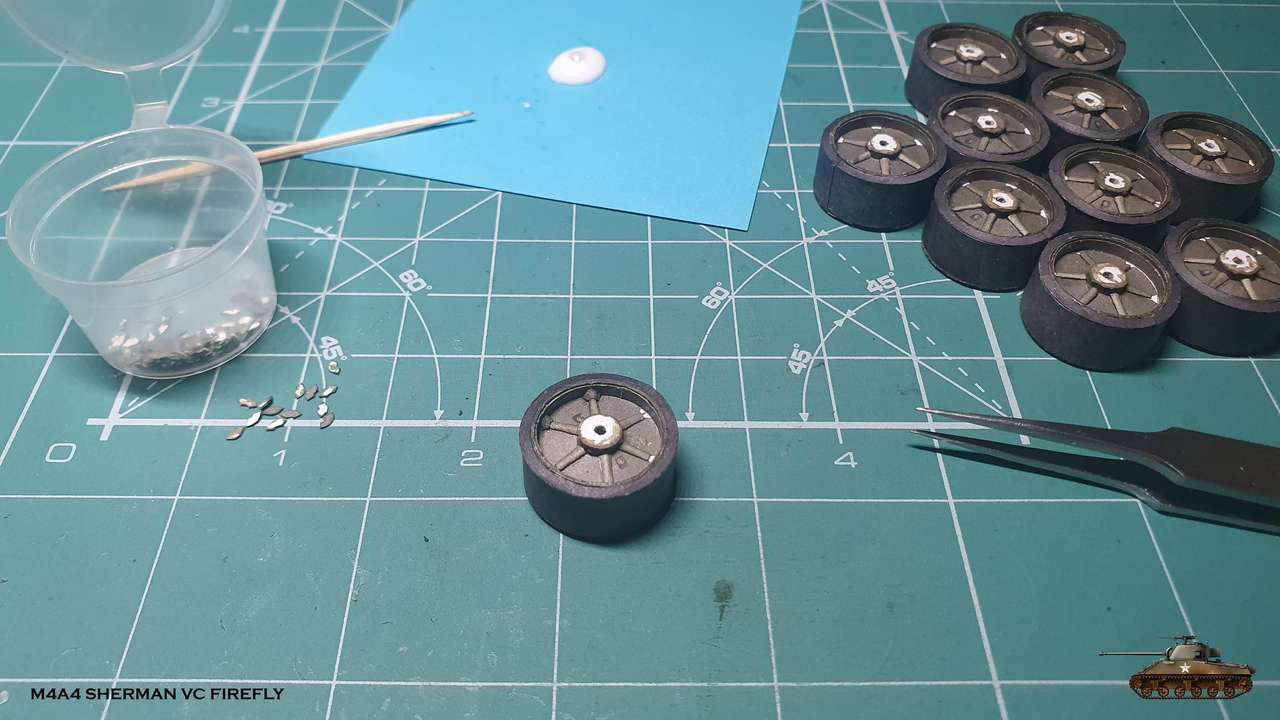
And finished
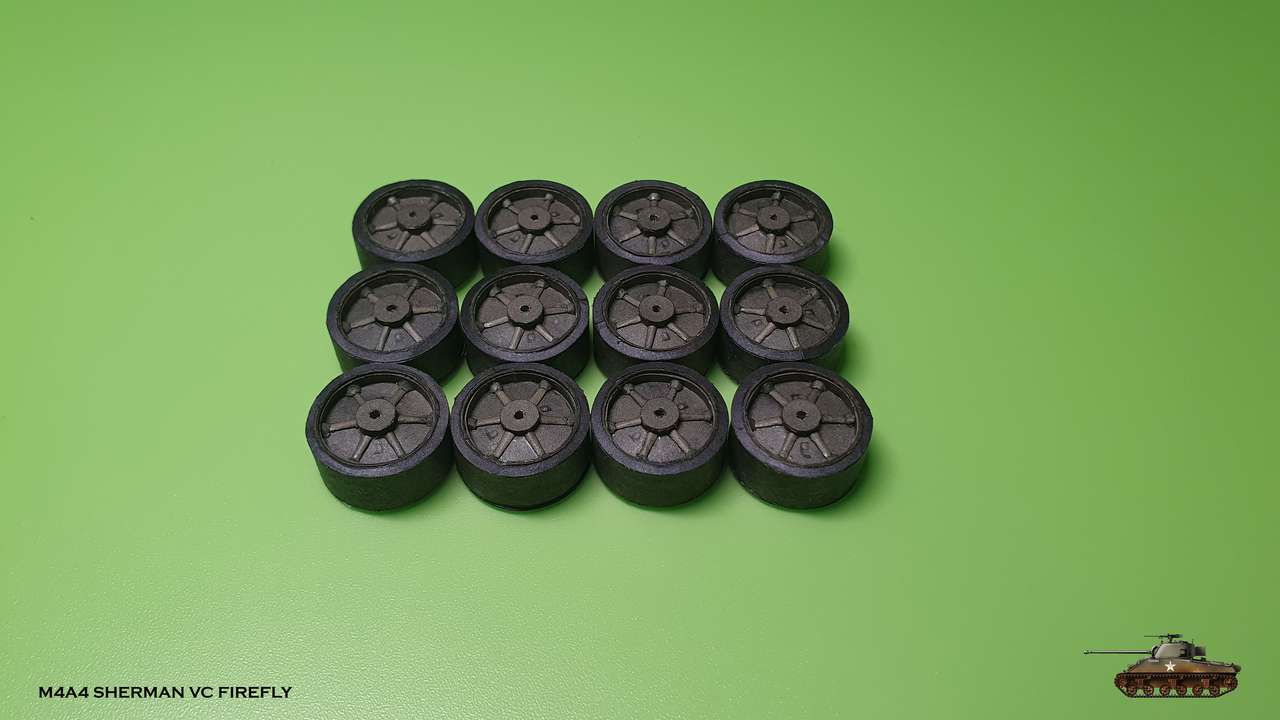
Now i only need to put it on bogies and done.
Finally! I finished road wheels.
I must admit, that i really don't like repeated assembling and especially with tiny parts. And the irony is that i build mostly armor vehicles
Last step was in process
And finished
Now i only need to put it on bogies and done.
Last edited:
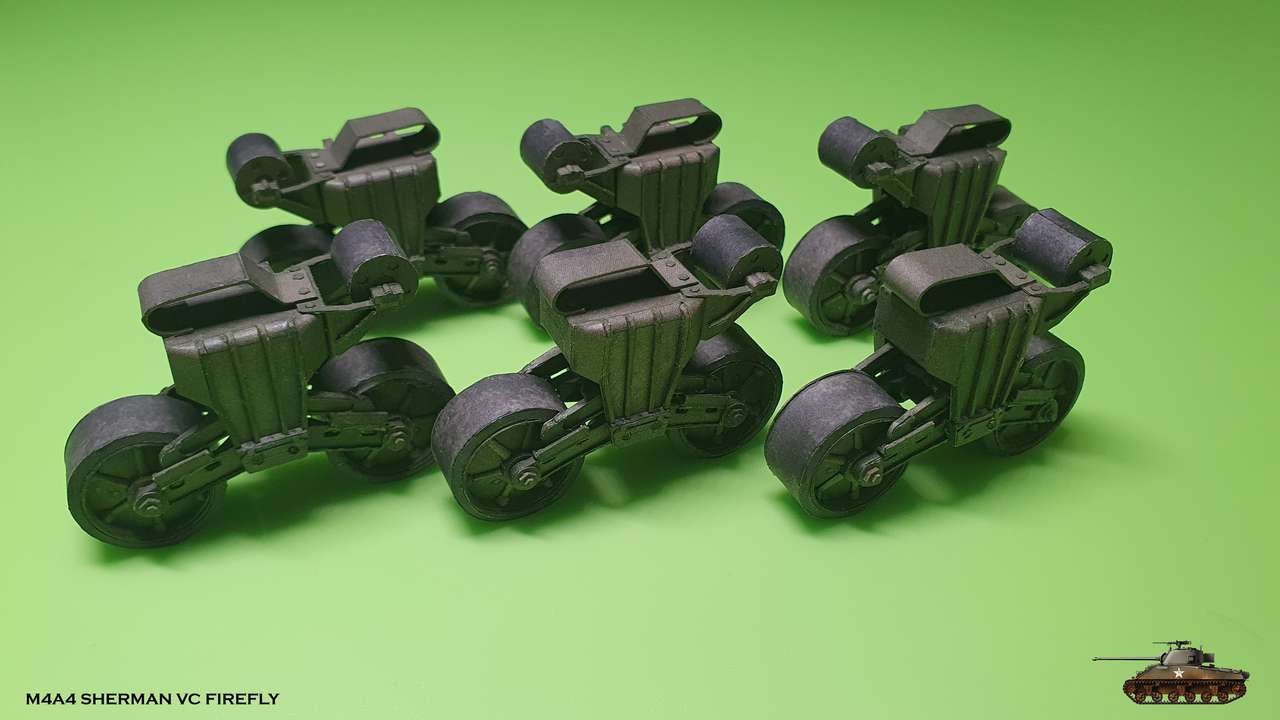
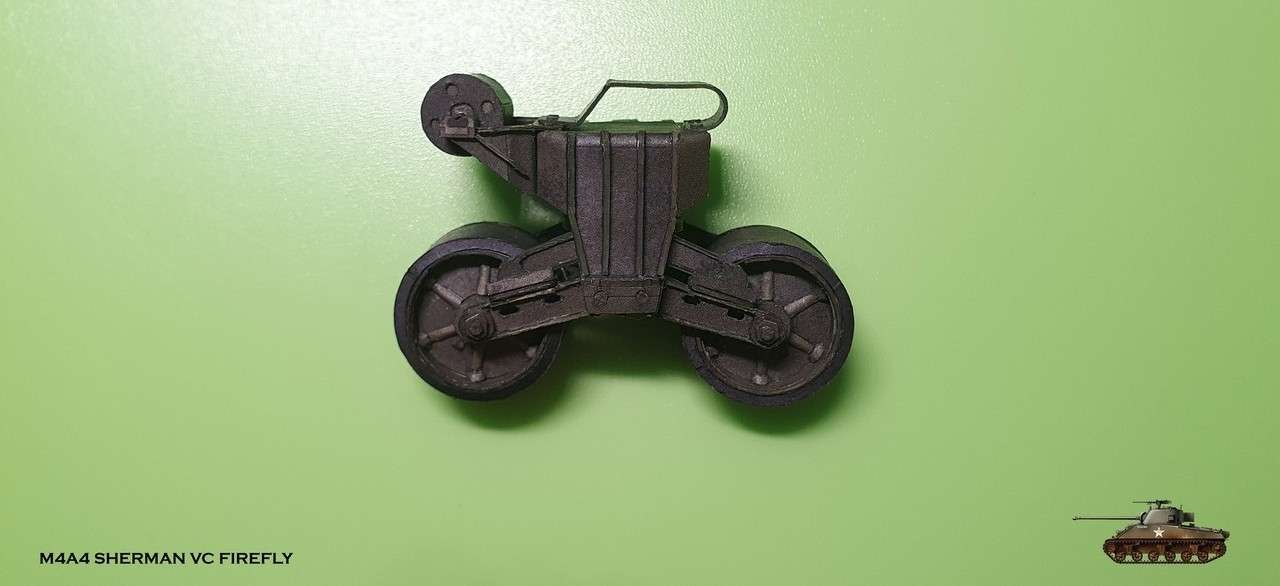
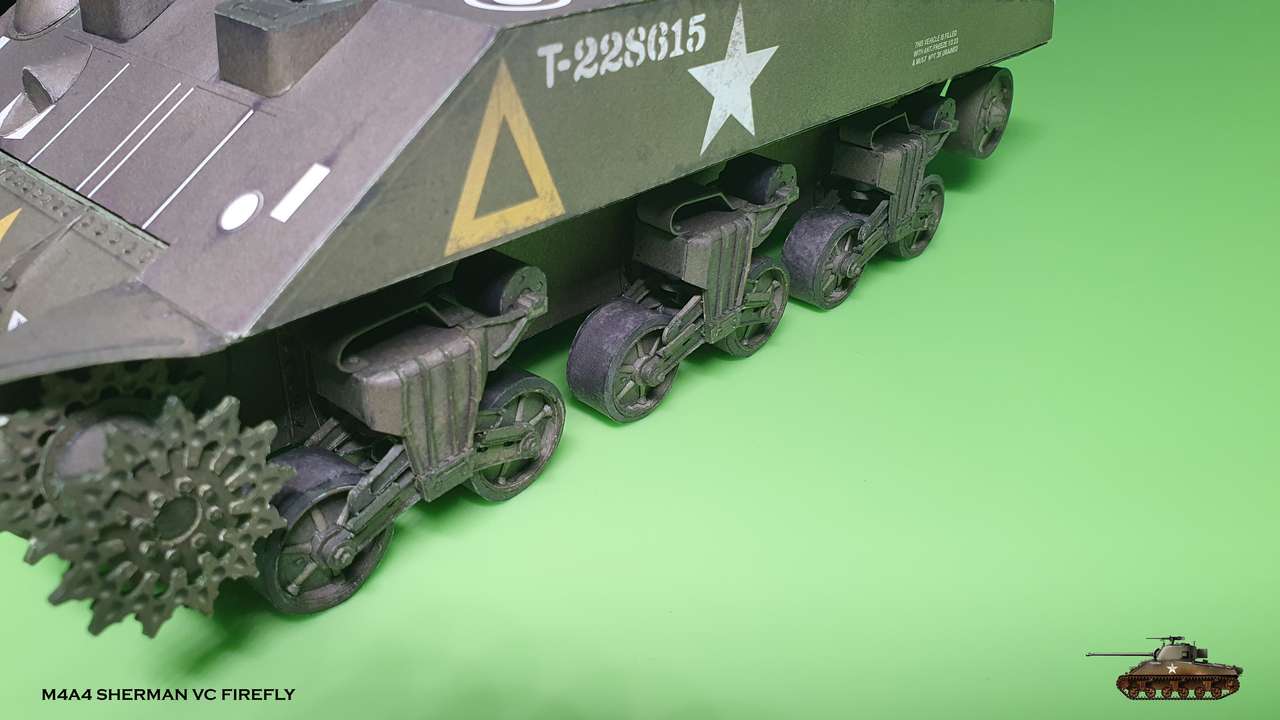
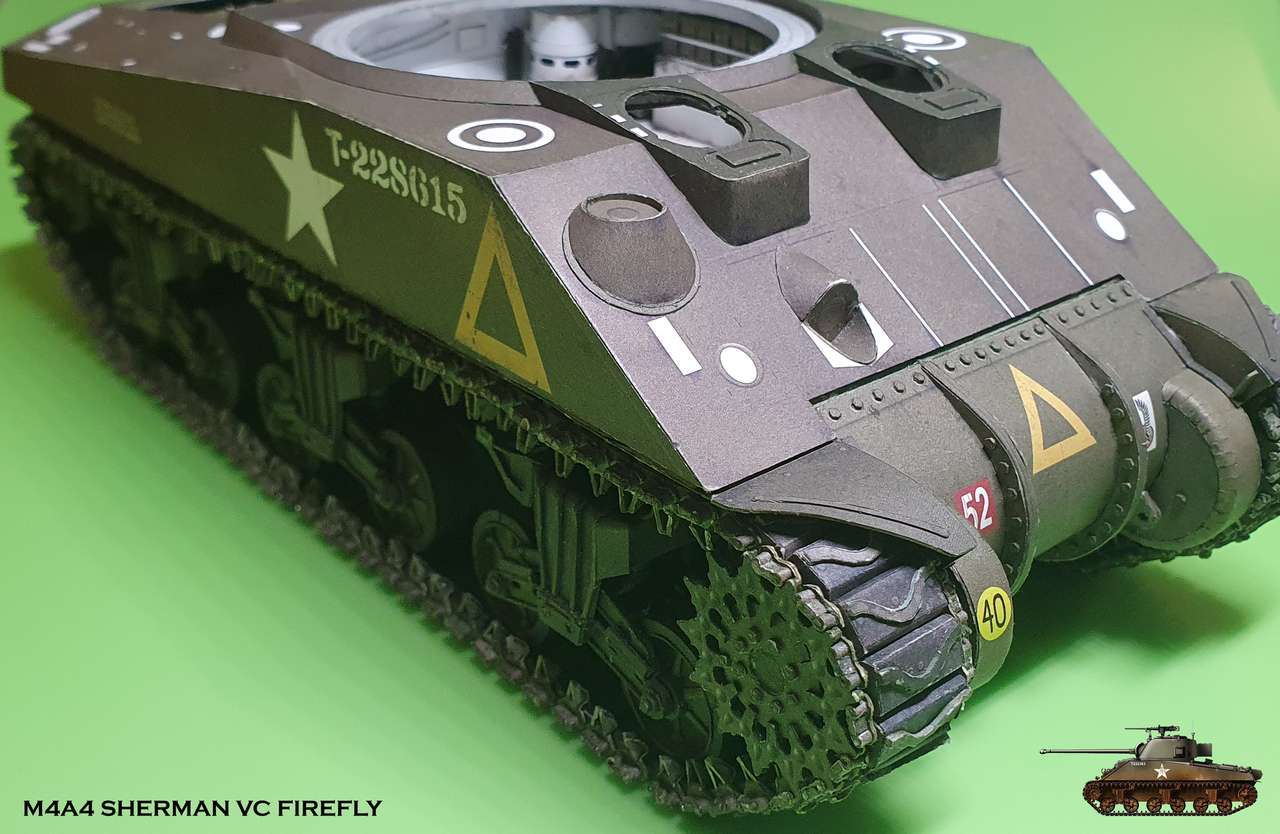
Wheels are attached to bogies.
Suspension is ready!
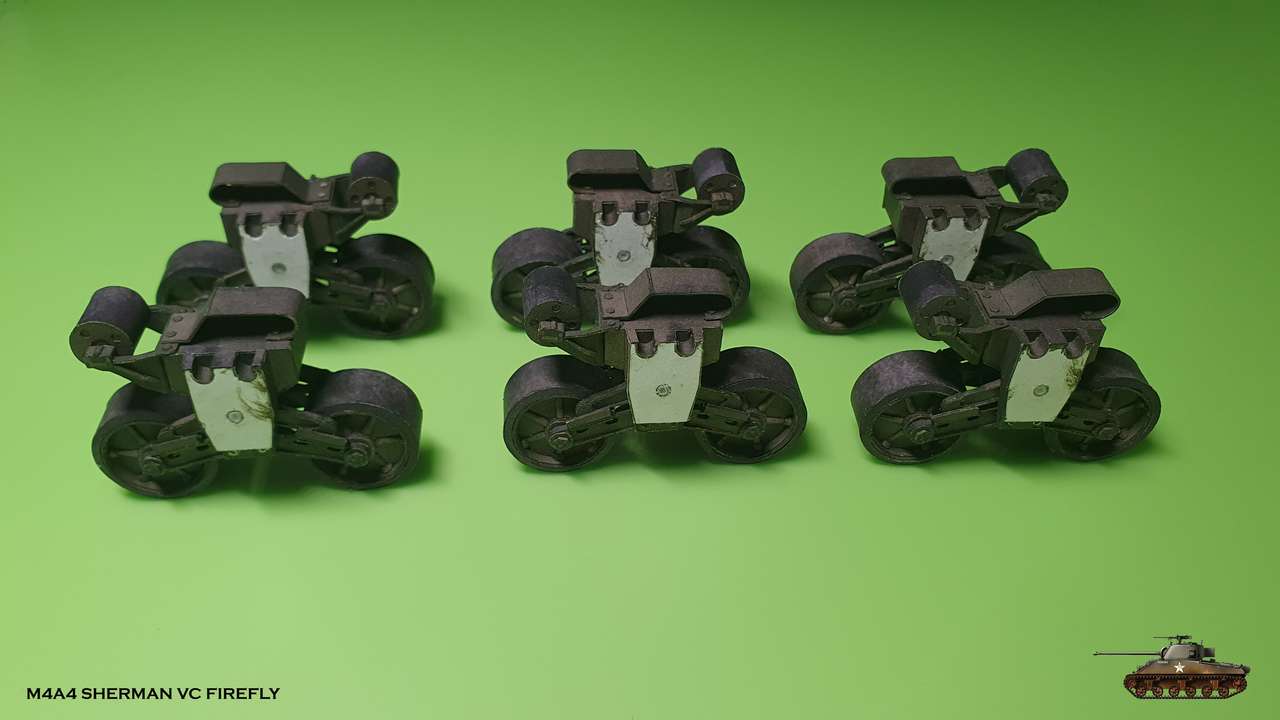
Now, find a difference
Frankly, I'm disappointed by the designer - how could he omit joining bolts between rubbing plate and suspension arm... Nah, just kidding!
The detailing is as always top notch! Almost like a real thing.
And after a long period with no visible progress, suddenly there is a huge change in a model.
It stands on it's feet!
Despite a complex suspension assembly, it attached to the body very easy and tank stands straight.
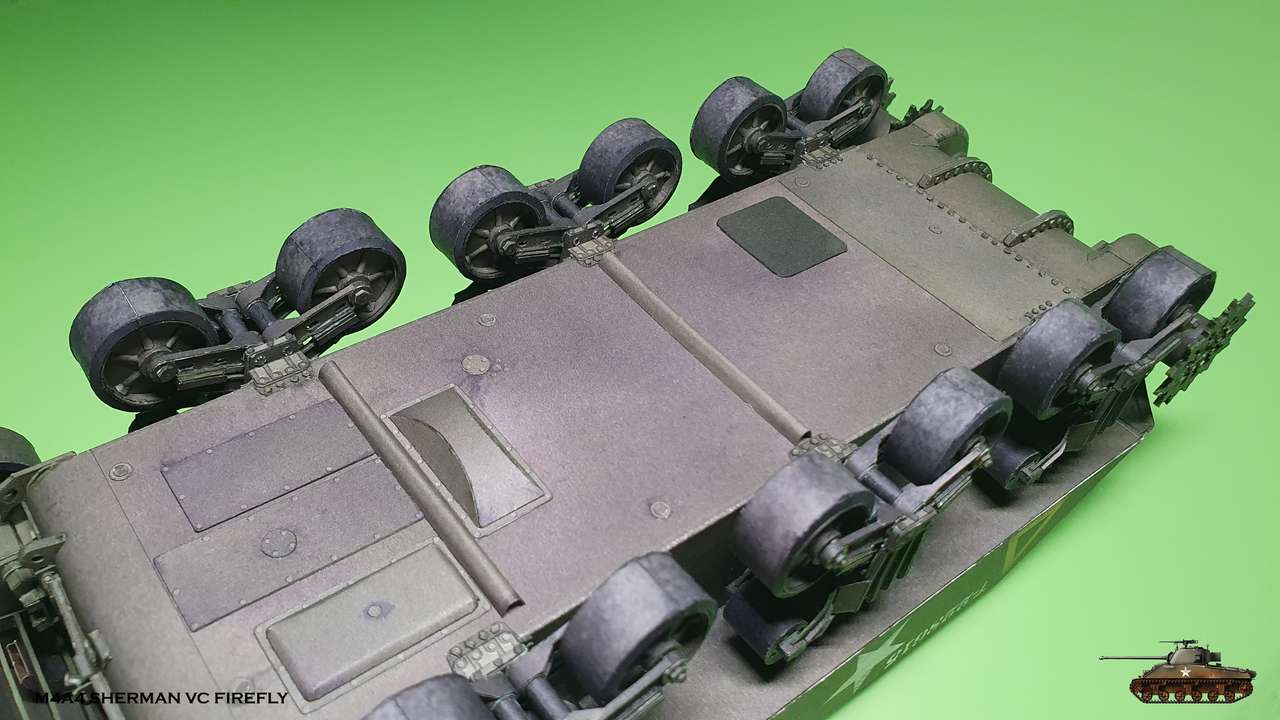
Remained to connect those already prepared links in a chain...
Stay tuned!
Suspension is ready!
Now, find a difference
Frankly, I'm disappointed by the designer - how could he omit joining bolts between rubbing plate and suspension arm... Nah, just kidding!
The detailing is as always top notch! Almost like a real thing.
And after a long period with no visible progress, suddenly there is a huge change in a model.
It stands on it's feet!
Despite a complex suspension assembly, it attached to the body very easy and tank stands straight.
Remained to connect those already prepared links in a chain...
Stay tuned!


Snake, I am beginning to run out on WOWs.
Looks awesome, as usual
Looks awesome, as usual
I ran out of WOWs a long time ago on this build.Snake, I am beginning to run out on WOWs.
Looks awesome, as usual
Snake is doing a truly outstanding job on this build.
Thanks!
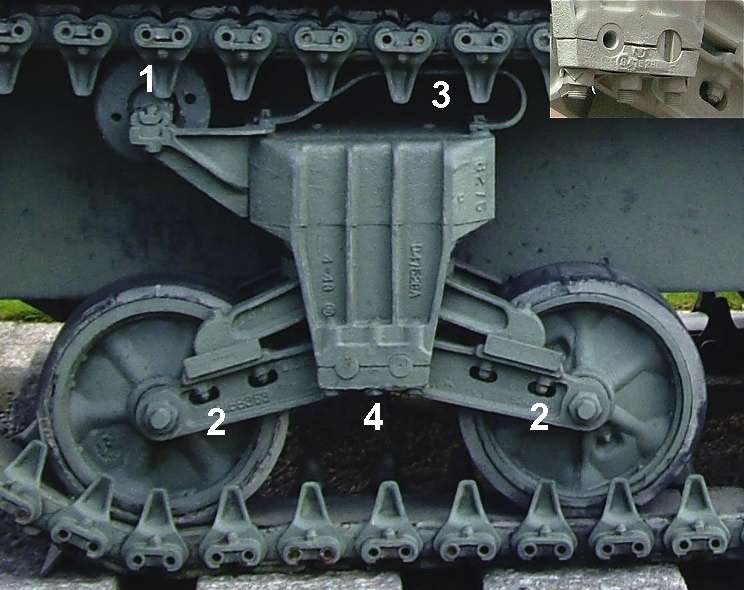
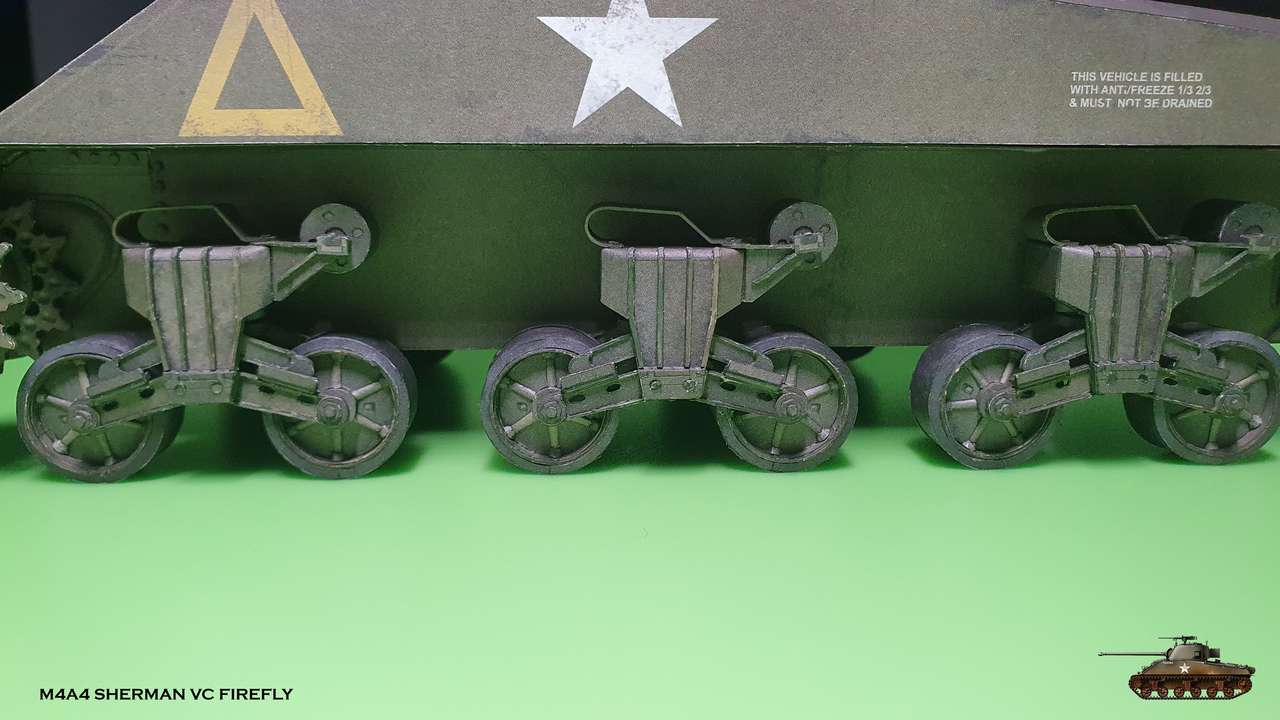
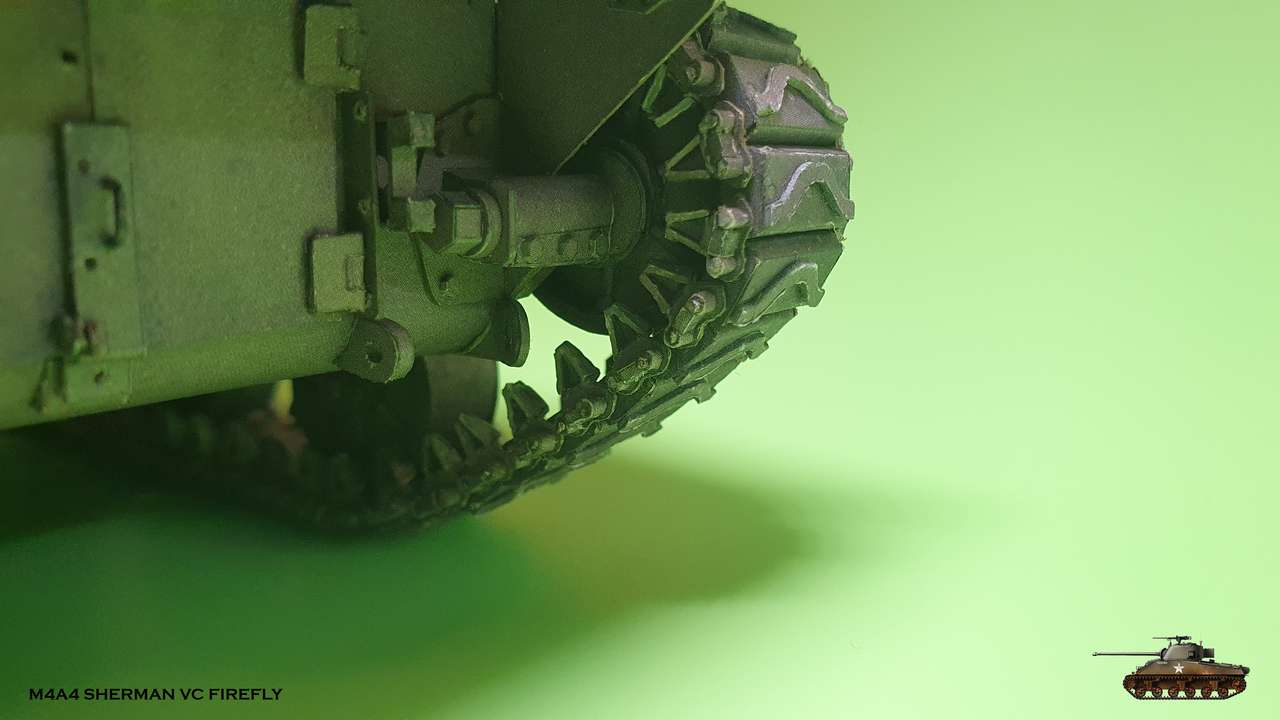
Before i continue i want to add to the last step - you must pay attention when you assembling wheel disks. There is rear and front. Front is with drawn housings and bolts. Also, when wheels attached to bogies - put it with front outside.
Now, back to the links.
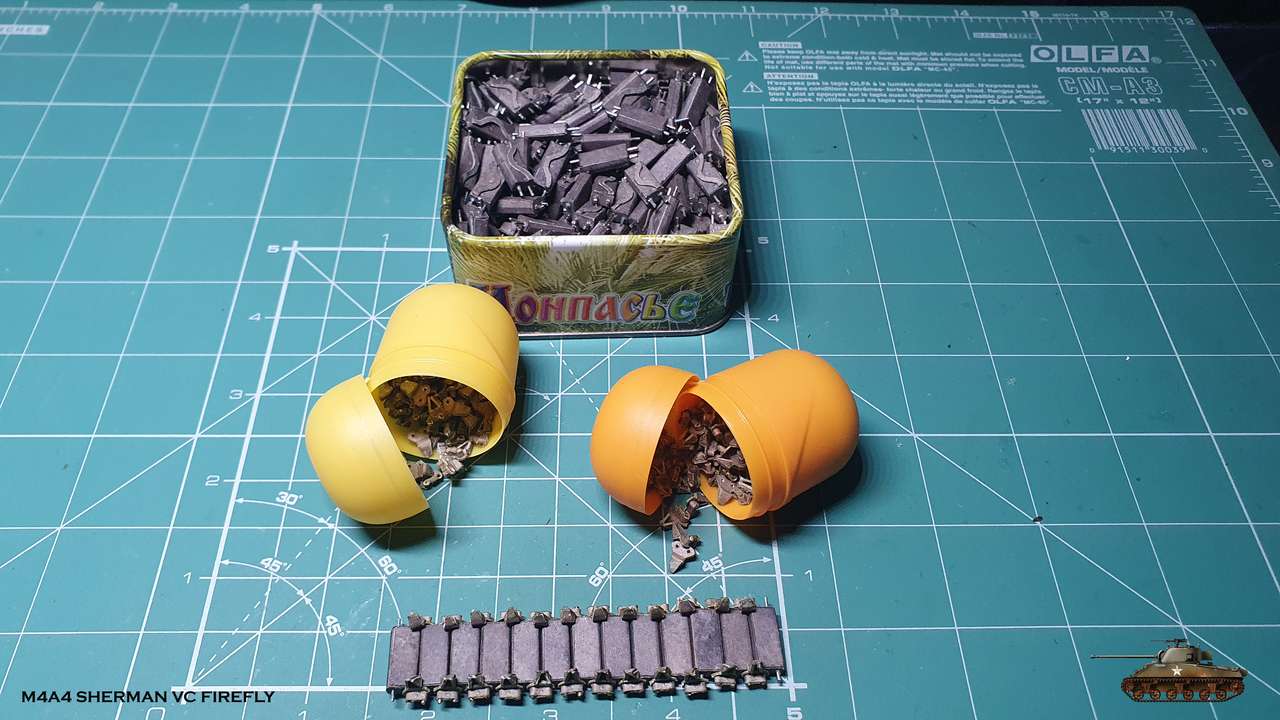
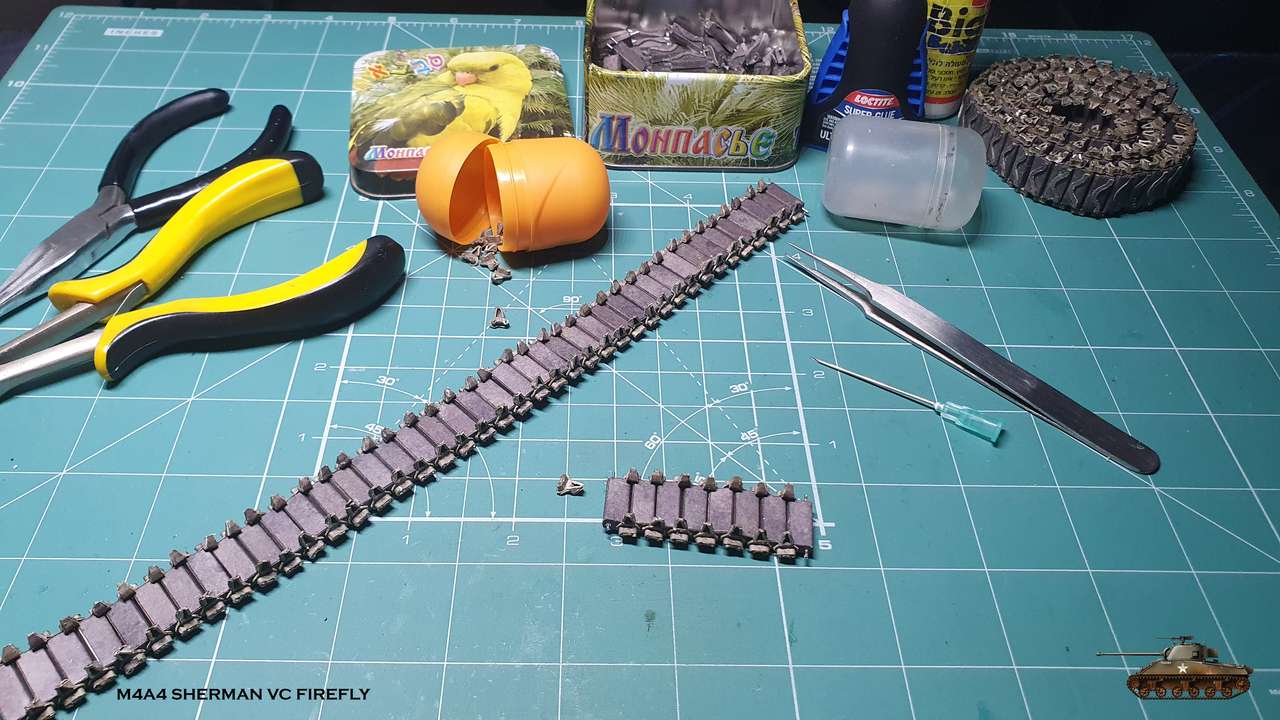
If you follow my thread from the beginning, you know that first of all i assembled links, because i decided that this is the hardest part in this model.
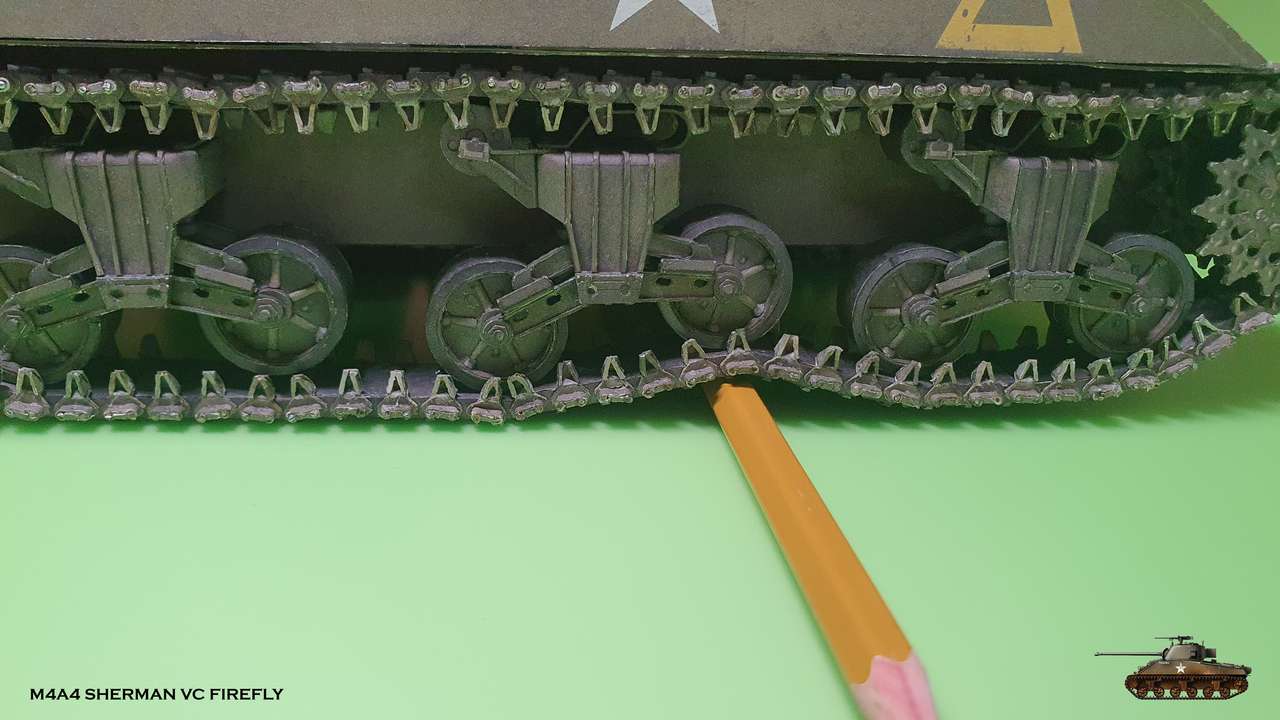
So now all the remained is to to connect them in a chain. Two track pads joined by one end connector each side.
and more...
and a little bit more...
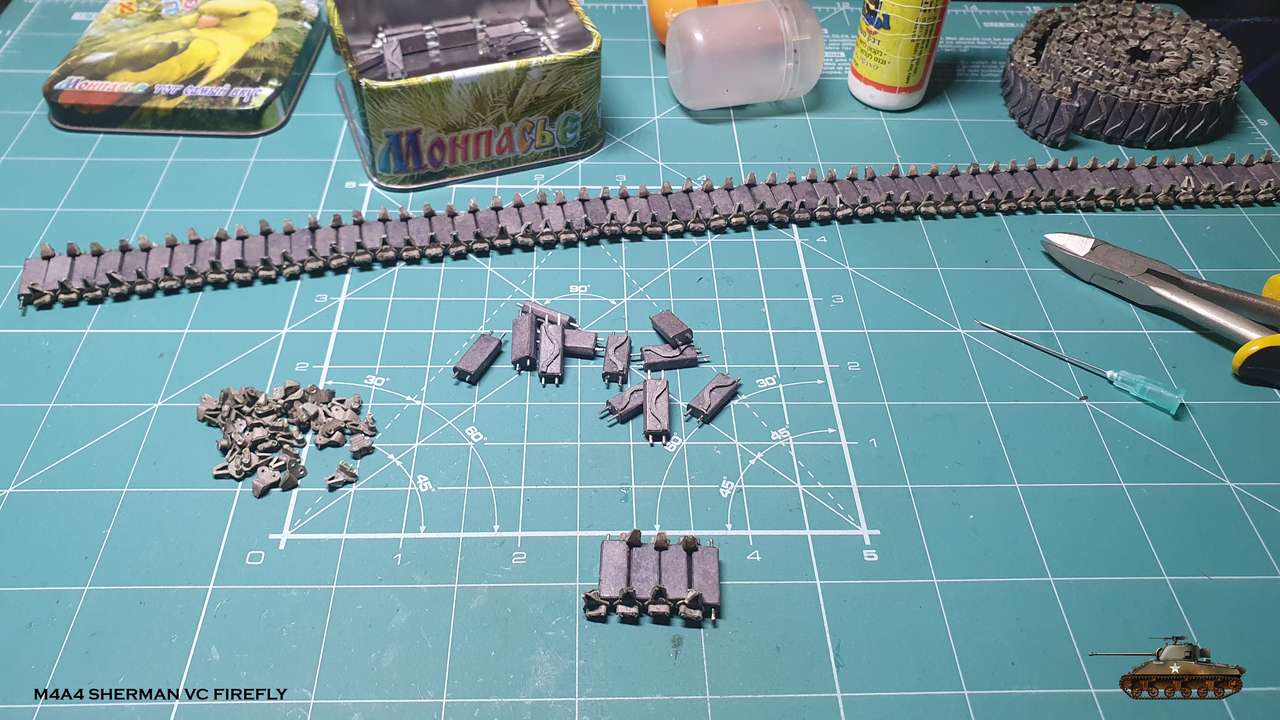
Done


Dressed it on chaises and connected together.
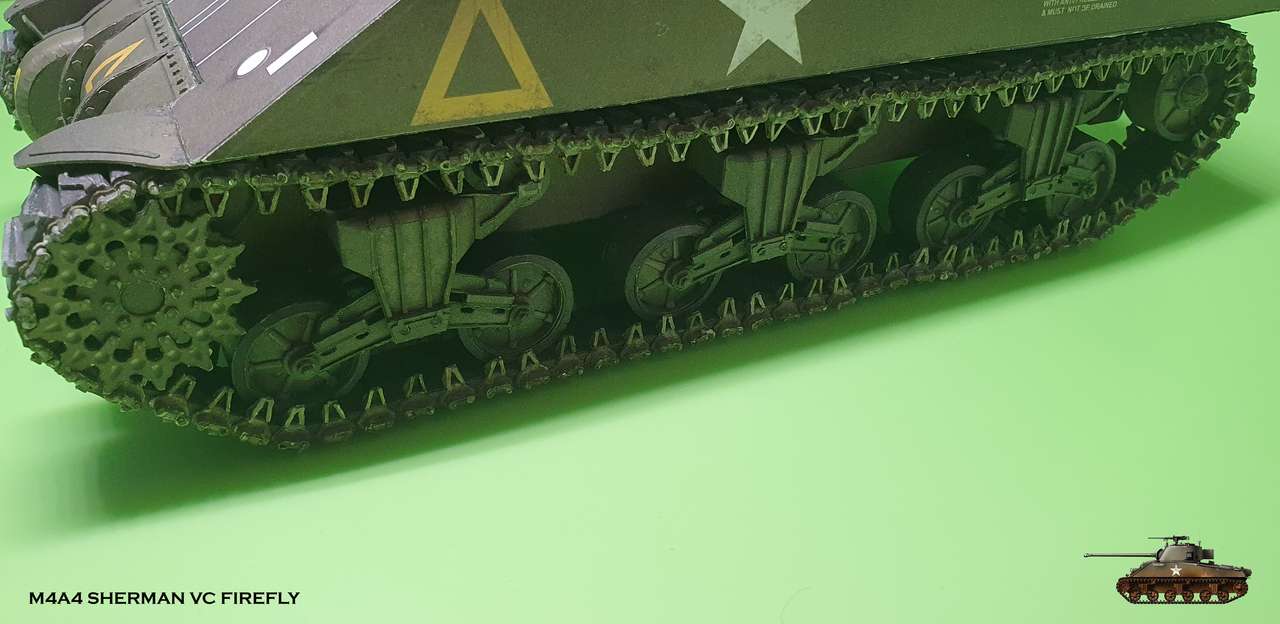
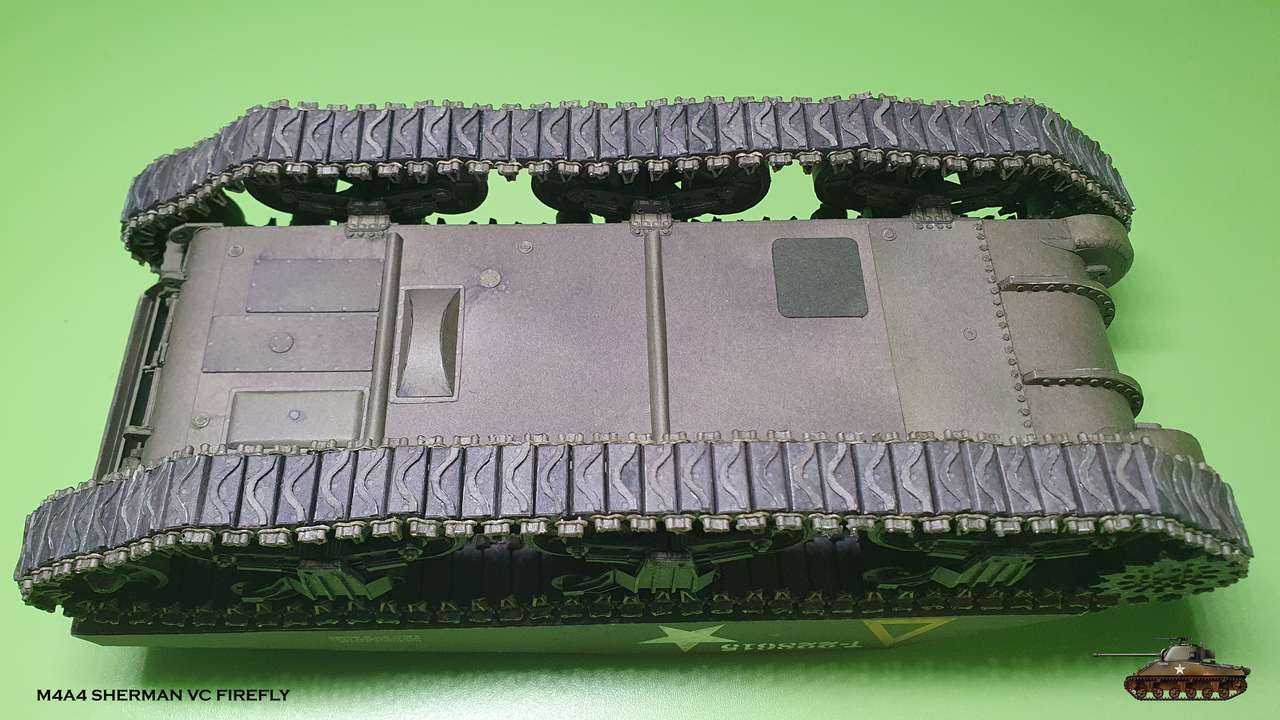
The fact that i left idler wheels not glued help me to stretch chains as i wish, like on a real thing. Then i fixed it in desired position.
I can confirm that you need only 81 links for each side
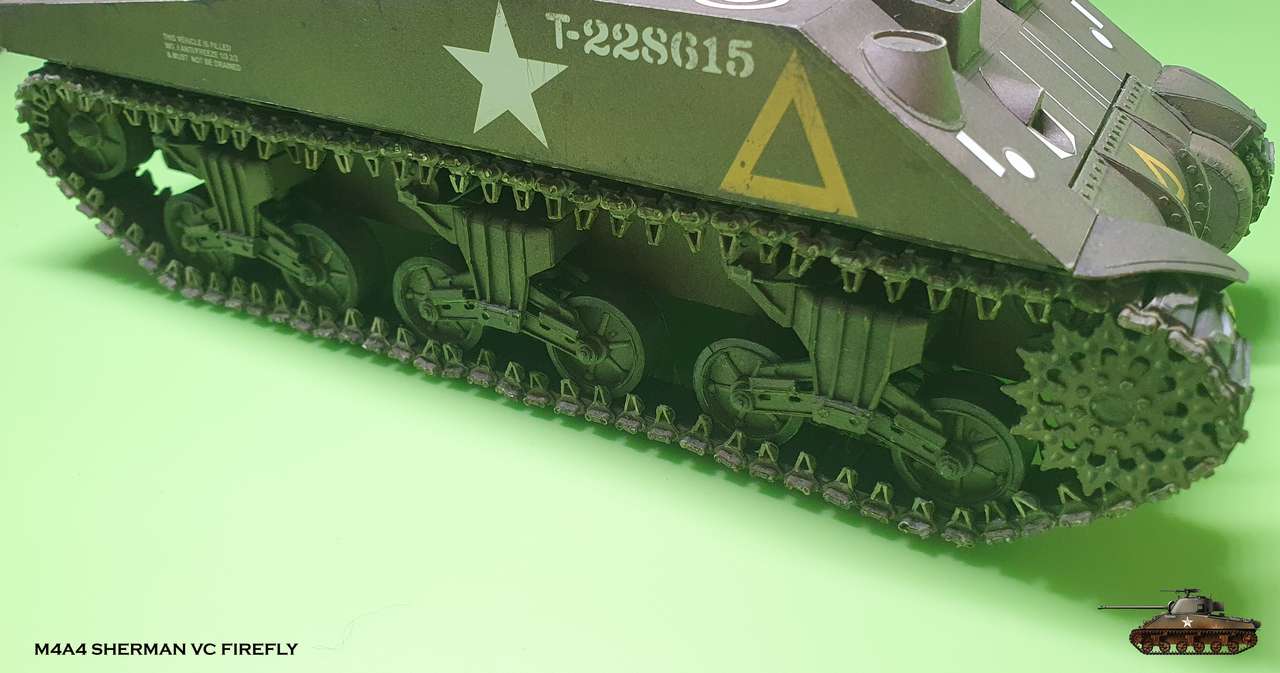
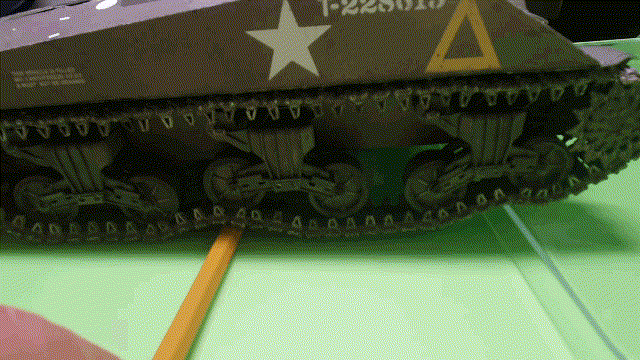
And... a little surprise. Suspension is live! Works like on a real things. I could do this due to specific design of Sherman bogies.
It is the end of another stage in this model and end of two years of building.
Thanks for following and stay tuned
Before i continue i want to add to the last step - you must pay attention when you assembling wheel disks. There is rear and front. Front is with drawn housings and bolts. Also, when wheels attached to bogies - put it with front outside.
Now, back to the links.
If you follow my thread from the beginning, you know that first of all i assembled links, because i decided that this is the hardest part in this model.
So now all the remained is to to connect them in a chain. Two track pads joined by one end connector each side.
and more...
and a little bit more...
Done
Dressed it on chaises and connected together.
The fact that i left idler wheels not glued help me to stretch chains as i wish, like on a real thing. Then i fixed it in desired position.
I can confirm that you need only 81 links for each side
And... a little surprise. Suspension is live! Works like on a real things. I could do this due to specific design of Sherman bogies.
It is the end of another stage in this model and end of two years of building.
Thanks for following and stay tuned
Last edited:
 rinks:
Thanks, guys! 
Now back to the fun, nonrepeatable stuff
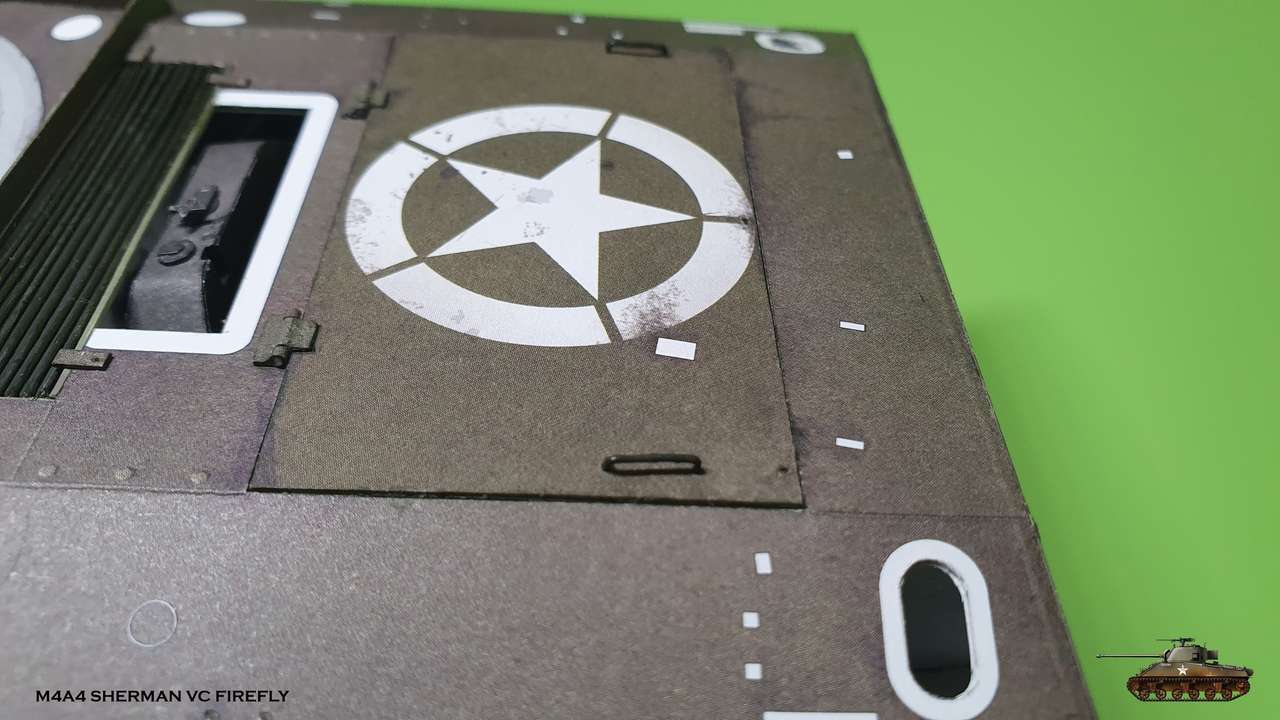
Engine hatch door
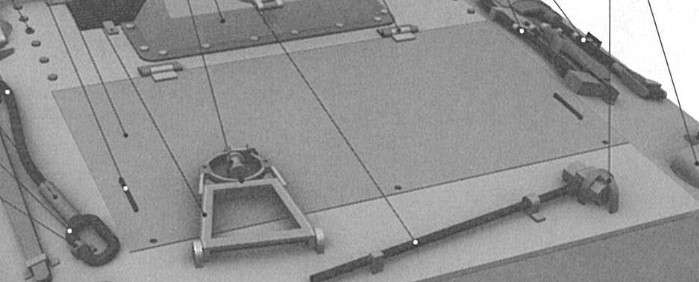

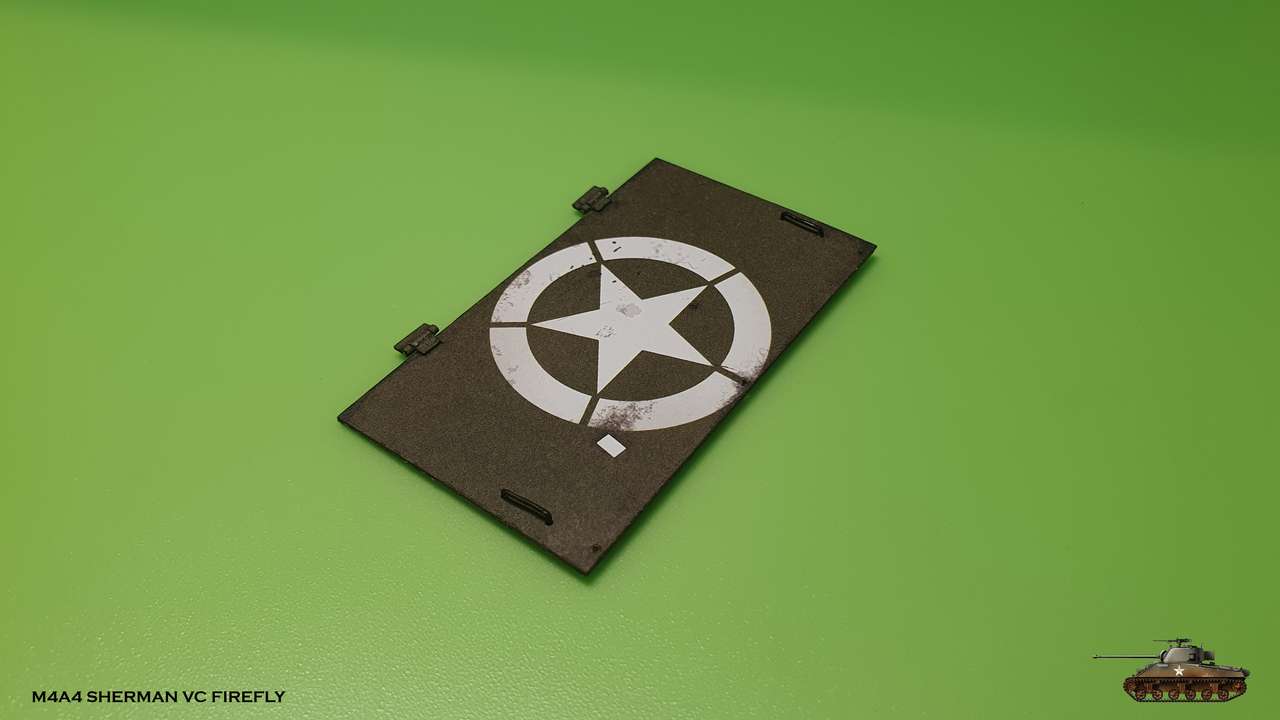
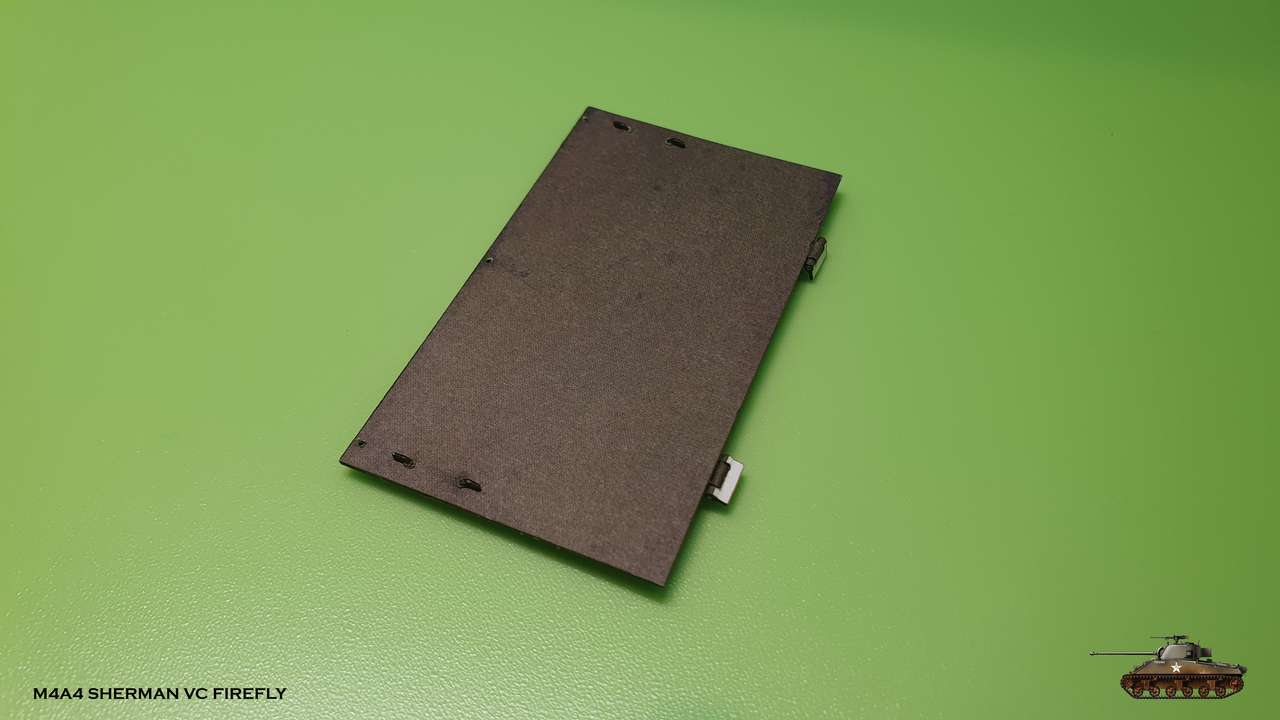
Simple, but you need to pay attention with hinges and dry fit the door, before gluing.
Also, there is interesting thing with handles. They not supposed to be glued on top, but rather inserted through holes and secured from inside.
When door is closed - they are hidden. When you need to open - just pull the handle and then the door, like on Tesla")
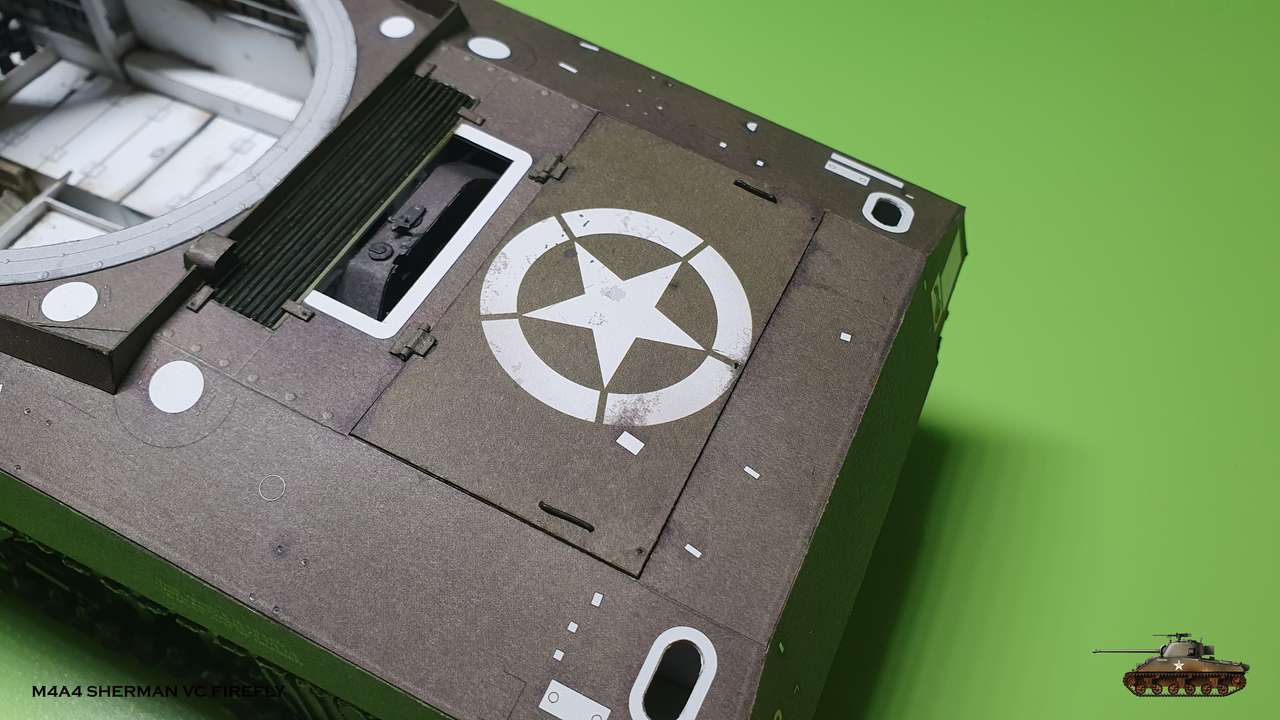
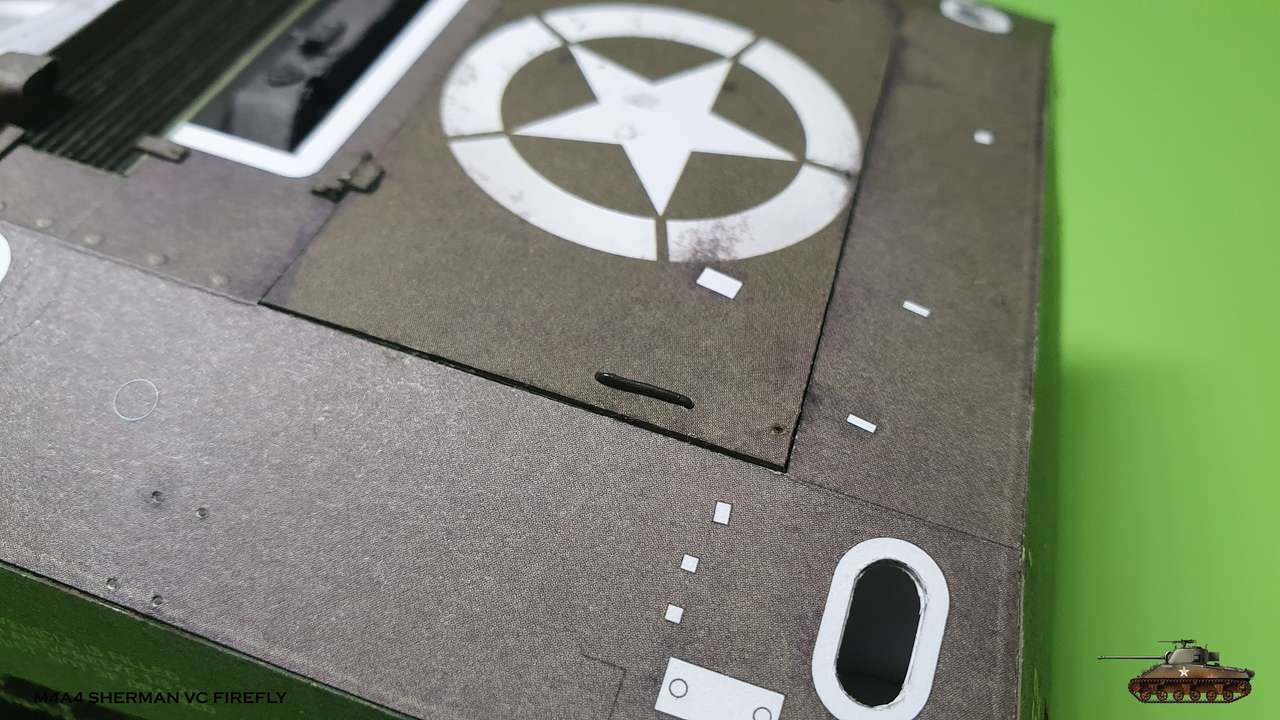

Handle pulled
Now back to the fun, nonrepeatable stuff
Engine hatch door
Simple, but you need to pay attention with hinges and dry fit the door, before gluing.
Also, there is interesting thing with handles. They not supposed to be glued on top, but rather inserted through holes and secured from inside.
When door is closed - they are hidden. When you need to open - just pull the handle and then the door, like on Tesla
Handle pulled