Fiat 508 "Balilla"

zathros

*****SENIOR ADMINISTRATOR*****
Staff member
Administrator
Moderator
Tonino, I am at a loss of words!! It's so strange the way this all came together. Thank you for letting me be a very small part of it. I have started working on a rudimentary frame. The way this car was designed, your body will set right on it. :)
 

Tonino

Well-Known Member
John, you wasn't a small part of it; you was the one who caused this to happen! ;)
I had just started another BIG project (Castel del Monte) but - after having seen the Balilla - I suddendly put it in pause to jump straight in this one (it was love at first sight!!!) :violin:

So I have to say tank to you for having found this little rough diamond waiting to be cut :D
 

Tonino

Well-Known Member
I had a little incident on my build. I was so depressed with it that I was very close to trash my work in progress and start over from the beginning... But let's go in order.
DSC07478.JPG
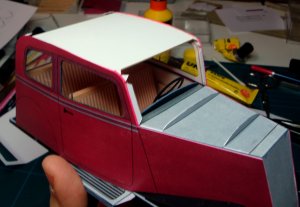
This is the heavy cardboard piece that closes the ceiling giving shape to the roof of the car.

DSC07480.JPG
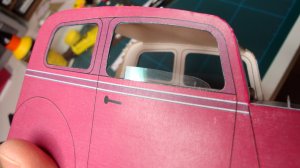
The original piece had no color, it was not printed. I decided to paint it because it's clearly visible from the windows.
DSC07475.JPG DSC07477.JPG
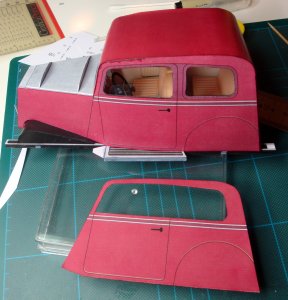
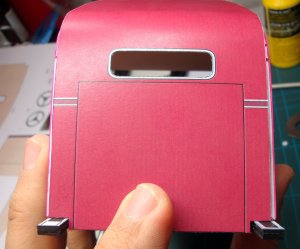
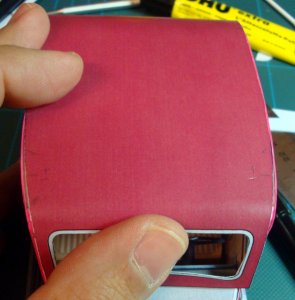
...and here is the problem. The upper bodywork piece doesn't fit with the existing sidewalls. There is more than a millimeter at every side in the rear wall and other gaps in the front part as you see.
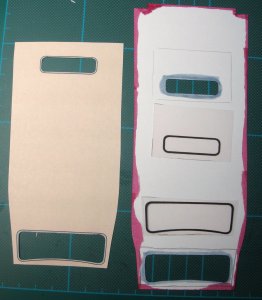
I redraw the piece leaving something more than needed to be able to trim the excess once the part is in place (melius abundare...)
DSC07481.JPG
Redrawn the ceiling with the new shape.
Prepared the "glass" pieces for windshield and rear window.
Prepared an inner sheet with interior colour to be glued to the underside of the ceiling.
DSC07482.JPG
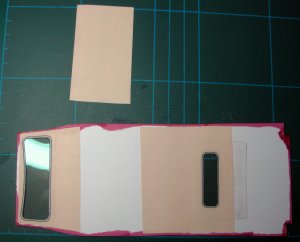
The parts are now glued togheter.
I cut the central section (not visible under the heavy cardboard seen above) to concentrate my attention to the windows (I prefer to glue only one window at a time).
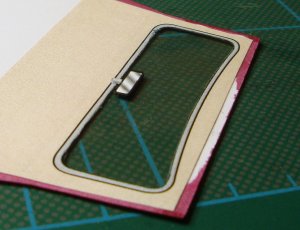
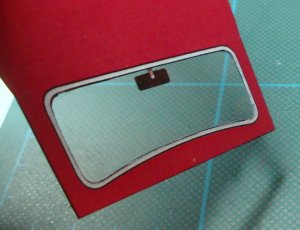
DSC07486.JPG DSC07487.JPG
Prior to place the ceiling I glued the rearview mirror to the inside. Nice detail!
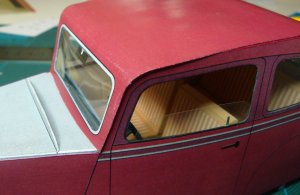
DSC07492.JPG
Now this edge is not flush with the side wall. I tried to cut the excess with scissors and ... TRAGEDY!!!!! The scissor blades scratched away big sections of ink from the parts.

Conclusion: NEVER USE LASER PRINTER FOR YOUR CARDMODELS ! ! ! ! I swear I'll not do it nevermore!!!
I choose laser print to have a more "glossy" look, I thought it would be better for a car.
But the laser pigment has very low "grip" on the paper. Only touching it with fingers changed the color of the bodywork.
Now the scissors have produced big white scratches.
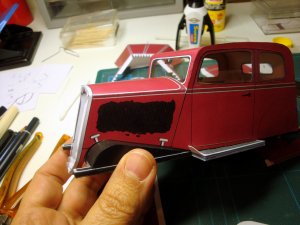
I have ruined my car. I tried to retouch the scratches with a felt tip pen but the result is a disaster!!!
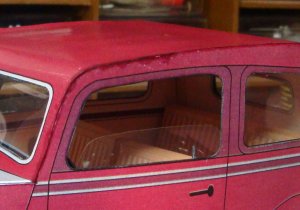
DSC07493.JPG

...continues...
 
Last edited:

Tonino

Well-Known Member
... I waited one day until I cooled off...
Now I can think to some walkaround.

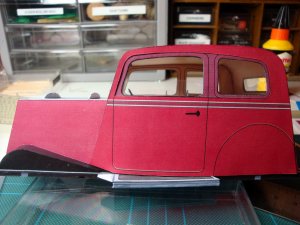
I printed other copies of the side walls on thin paper (photocopy sheets) to add only little thickness
DSC07496.JPG
Carefully placed it over the ruin
DSC07497.JPG
Much better. See how the color of the old part, under the new, was changed only touching the model with fingers (see on the left).
Laser print is not reliable at all.

DSC07498.JPG DSC07503.JPG
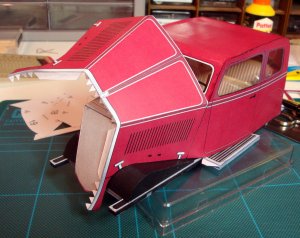
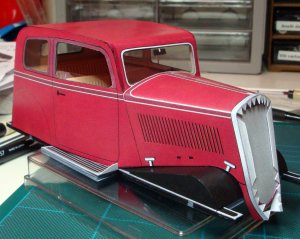
Now I can place the engine hood and start to think about the radiator grille...
 

Rhaven Blaack

!!!THE MAN BEHIND THE CURTAIN!!!
Staff member
Administrator
Moderator
I like how this is coming together.
The only change that I would make, would be to add real louver parts for the side of the hood (if you have not thought of it yet).
 

Tonino

Well-Known Member
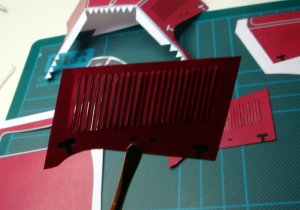
Yes RB, I considered it. Really my first thought was to cut the louver and fold outwards the paper to give it a perfect look but, after my recent ink problems... I gave up. I'm afraid I'm going to have color falling away from all the hood if I cut it the way I was planning to do.

Your question, however, re-ignited my interest on this part of the car so I wanna give it a try. I'm going to print a copy of hood side walls on thin paper, I'll print also some red on the rear side (so I won't have to use pen on it). I'll cut and fold it... and let's see what happens...
 

zathros

*****SENIOR ADMINISTRATOR*****
Staff member
Administrator
Moderator
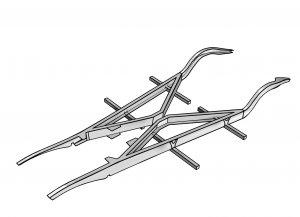
I have found a frame and under carriage for this car. It will take me around two probably much more, days to make it "construct-able", but it's all there. Keep working on what you are doing, if you body doesn't drop right down on it, it will only take a few cut on the flat bottom to make it fit. :)
 

Tonino

Well-Known Member
:) Thanks John, I'm very happy to hear it and I'm very curious to see how it will came out.

Anyway, to be completely honest :angelic: I'm not sure I like very much the idea of cutting away the body of my model from the frame.
I'm afraid the operation couldn't be done without some danger for the upper structures.
I'll have to consider it well. It would be better to do some fitting tests before trying to put the hands on the body.

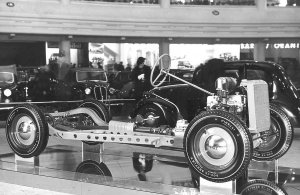
If the frame is detailed enough - I'm writing as I'm thinking - it could be presented as a stand-alone subject side by side with the completed car.
Something like the situation depicted in one of the photos in your previous post:

1100_bn6.jpg

This solution - however - should require a complete - and detailed - engine... Is your 3D model complete of engine?

And - another important question - do you have also the wheels? The ones included in this model are a little too "square" in my opinion. It would be nice to find a possible alternative.
 

zathros

*****SENIOR ADMINISTRATOR*****
Staff member
Administrator
Moderator
Actually, I think you will be able to cut the frame up and glue it to the bottom! :)
 

Tonino

Well-Known Member
:surprise:
I'm afraid my bodywork is not good enough to sit on this frame! We are going to create a whole new model!
I cannot wait to see the engine!
:animated:
 

zathros

*****SENIOR ADMINISTRATOR*****
Staff member
Administrator
Moderator
You Body work is fine, we'll just adjust what is necessary for this to bolt to the frame, and YES, You and I will have created a whole new model!! :)
 

Tonino

Well-Known Member
@Rhaven Blaack this is for you!

After all I couldn't ignore your suggestion...
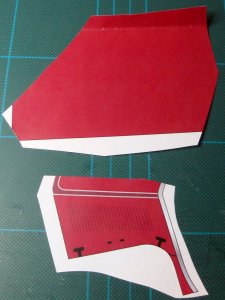
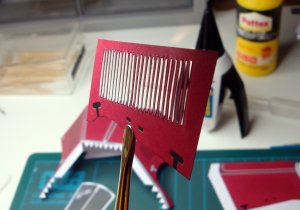
I printed a copy of the hood on thin paper
DSC07511.JPG
Really this is a first try.
Then I noticed slots were not aligned and misplaced.
I redraw them and printed again.
I also printed red the backside to avoid some white surface to be visible from rear.

DSC07504.JPG DSC07505.JPG
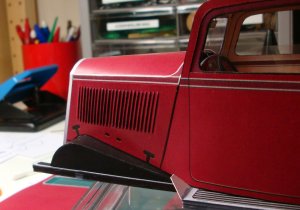
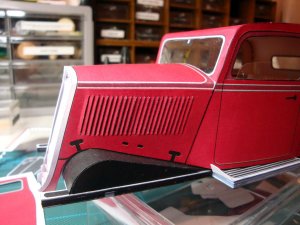
This looks much better than the black printed louver.

A touch of black pen to the underside
DSC07508.JPG

DSC07510.JPG DSC07509.JPG
And this is the new hood side in place!
:D
 

Rhaven Blaack

!!!THE MAN BEHIND THE CURTAIN!!!
Staff member
Administrator
Moderator
The louvers give it a more realistic look!
I like the technique that you used for it.
KEEP UP THE GREAT WORK!!!
 

Tonino

Well-Known Member
This is the great value of a place like this! I wouldn't ever placed my blade on that hood without RB's words.
... ... ... and, after all, I wouldn't ever started this thread without a certain gift I received... ;)
 

Rhaven Blaack

!!!THE MAN BEHIND THE CURTAIN!!!
Staff member
Administrator
Moderator
This is the great value of a place like this! I wouldn't ever placed my blade on that hood without RB's words.
... ... ... and, after all, I wouldn't ever started this thread without a certain gift I received... ;)
I am glad that I could be of help to you. thumbsup
I really like how this is turning out!
 
Top