Dr Tetrode's Valkyrie build.

dr_tetrode

Active Member
Sudsy, thanks for the info and pictures. Attempting to build it with the full cut out of the frames, except the bottom layer with the tape on it.

OK, artistic license in effect. Laminated 4 pieces of 110 together (With UHU ;-) ), and cut into strips and then cut chunks off and glued to the roof. Gun camera and IR sensor, that is my story and I am sticking to it.

20190626_103821.jpg 20190626_123205.jpg 20190626_130335.jpg
20190626_130355.jpg

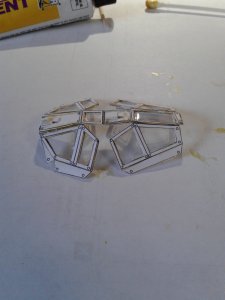
Now the final cut out of the taped and top frames for the canopy.

20190627_115146.jpg 20190627_123542.jpg 20190627_123903.jpg


Now, testing my glues with my packing tape. I put packing tape on wood block and used 3 different glues to see what would stick. I put a couple of cutouts on the each. This was after trying PVA, which pulled right off. The contact cement was best, the other tube is clear and actually worked, but was slower to grab. and Titebond II did not work. See 3rd picture in this set. I proceeded with contact cement.

20190627_125244.jpg 20190627_125631.jpg 20190627_133002.jpg


Reinforce the roofs of the canopy, so that bends are easier, and to test the handling of the contact cement.

20190627_133756.jpg 20190627_133803.jpg 20190627_134325.jpg


Now we cut the top frame apart into it's flat surfaces, with a few miss cuts, that will be glued down. Attach frames to middle frame with titebond II.

20190627_141705.jpg

Now we cut apart the middle frame and attache to bottom taped frame with the contact cement. One piece at a time.

20190627_141713.jpg 20190627_154007.jpg 20190627_155340.jpg

Now is the time for the cockpit to go in. Needed to make a firewall, in the front to hide the hole, so that was glued in, then cockpit was glued in.

Ooops, ran into the 20 pictures in a message limit.

Scott ;-)
 
Last edited:

dr_tetrode

Active Member
Thanks, now further adventures in canopy.

20190627_154007.jpg


Adding the frames to the canopy. This is where I should have used a clear glue, but, chose the contact cement for its quick grab. I don't have to hold it and get my finger prints all over!

20190627_155340.jpg 20190627_161747.jpg 20190627_161747.jpg


Gluing sides to roof. Used contact cement, and did each of the 4, one at a time. Had to sand a bit to get it to fit.

20190627_175514.jpg 20190627_175523.jpg 20190627_203851.jpg
20190627_204005.jpg 20190628_093415.jpg


Final with the canopy. Next time, use clear glue for attaching frames to the base.

20190628_093551.jpg


On to fitting on fuselage. Anybody know how this canopy would be hinged? Both seats under one canopy that would rise from the front? Or, two separate canopies, one for pilot and one for gunner? Just thinking ahead for the next build.

Have fun!

Scott
 

Attachments

  • 20190627_163054.jpg
    20190627_163054.jpg
    471.1 KB · Views: 0
Last edited:

zathros

*****SENIOR ADMINISTRATOR*****
Staff member
Administrator
Moderator
I would think such a canopy would detach with the front glass staying in place, and hinged on the rear (hinged in the center), and the rear opening done the same way. I think of this as any other method for ejecting would not allow the canopies to clear the fuselage . I don't know the craft well enough though, maybe someone else could chime in.

If this is the finished side to the canopy, cut it apart, and glue it again with much less glue, it should come apart easy, gotta watch those gaps!! :)

152512-e2db6ded4f228573ca8bea813b575b20.jpg
 

dr_tetrode

Active Member
Agree on the gaps, that comes from 2 layers of frame added to the bottom layer and then bent / folded, with only the bottom layer actually bending.. If this was colored model, I would fill them in and sand smooth.

Ejection, hmmmm... does that happen in Warhammer? This aircraft ha 2 jet engines just above the canopy. Open in flight and anything that comes out will ingested.... Not sure if that would be a good idea.

This is my very first attempt at a canopy, and a lot of things have been learned about handling, cutting, and gluing. Still learning how to get the fingers to work! ;-)

Now trying to decide which section to complete next. Some parts do not show up on the drawings, I have just discovered. Probably going to attack the jet engines, next. Something round....

Scott
 

zathros

*****SENIOR ADMINISTRATOR*****
Staff member
Administrator
Moderator
I think Warhammer pilots fate is tied to their ships. I don't know it well enough to determine that. I would have built that canopy section in individual pieces, then there would be no gaps, as each piece could be fit as you go, not gluing until everything was flush. Bending allows for too much accrued intolerance. Looks good though. ;)
 

Sudsy

Well-Known Member
Agree on the gaps, that comes from 2 layers of frame added to the bottom layer and then bent / folded, with only the bottom layer actually bending.. If this was colored model, I would fill them in and sand smooth.

Ejection, hmmmm... does that happen in Warhammer? This aircraft ha 2 jet engines just above the canopy. Open in flight and anything that comes out will ingested.... Not sure if that would be a good idea.

This is my very first attempt at a canopy, and a lot of things have been learned about handling, cutting, and gluing. Still learning how to get the fingers to work! ;-)

Now trying to decide which section to complete next. Some parts do not show up on the drawings, I have just discovered. Probably going to attack the jet engines, next. Something round....

Scott

I think Warhammer pilots fate is tied to their ships. I don't know it well enough to determine that. I would have built that canopy section in individual pieces, then there would be no gaps, as each piece could be fit as you go, not gluing until everything was flush. Bending allows for too much accrued intolerance. Looks good though. ;)

40k is Grimdark gothic (as in the pale kids with black fingernail polish, AND medieval architecture) for a reason. Life expectancy is rather short, especially for Guardsmen... So, armor is meant to keep the vehicle together while the wash out the squishy goo while awaiting the next aircrew to show up to the flightline. Ejection seats might be installed, but more for psychological comfort than actual use.
 

zathros

*****SENIOR ADMINISTRATOR*****
Staff member
Administrator
Moderator
I think your pictures we hosted somewhere else, or they would be here, could you let me know?
 

dr_tetrode

Active Member
I think your pictures we hosted somewhere else, or they would be here, could you let me know?

Understand what you are going through. Not upset in any way. After 2 minutes on this new site, am navigating just fine.

Admins, this is tough situation! No bones about it.

Thank You! to the new host!

Pictures. since this is a hobby, I don't plan on restoring the previous post's pictures, I can, and if someone wants to see something, I will hunt them down and try to put them up. Time is limited and I prefer to build, if I can. Will get back into posting, soon.

Glad we are back up and running!

Scott ;-)
 

zathros

*****SENIOR ADMINISTRATOR*****
Staff member
Administrator
Moderator
Thanks Scott, and YES, this is a Hobby!! thumbsup
 

dr_tetrode

Active Member
OK, sorry I have been not building or able to spend the time to enjoy this. Real Life, has struck. Now with the the quarantine going on, I have a little time to put towards a little fun...

Continuing the build.

Small but useful, the engine mounting frames. They needed to be cut a little bigger in the flat side, opposite the curve, to allow some place to glue the spacing blocks.

I had glued the engine assemblies together, but, did not document. I will post completed engines in next post.

20200322_173009.jpg20200322_173021.jpg

Starting to have fun, again....

Hope everyone is well and in good shape with this COVID-19 going on. This hobby will help keep me sane at home....

Scott
 

spaceagent-9

Right Hand Man and Confidant
Moderator
off note here, almost all the photos are ''x''d out when I click on them, is this due to the site switching?
 

dr_tetrode

Active Member
I am sorry to say, yes, most photos were lost with the site change. I am slowly going back and finding them, I now have a list of file names, so I can maybe put them back.

Admins, question, how do I attach photos in older posts that lost them? I think I have them with the same names as showing in these posts.

Scott
 
Last edited:

Rhaven Blaack

!!!THE MAN BEHIND THE CURTAIN!!!
Staff member
Administrator
Moderator
I am sorry to say, yes, most photos were lost with the site change. I am slowly going back and finding them, I now have a list of file names, so I can maybe put them back.

Admins, question, how do I attach photos in older posts that lost them? I think I have them with the same names as showing in these posts.

Scott
You can copy the text from each post and the go through each post and edit them by deleting all of the old stuff first. Then uploading the pics like you did before, then insert the text.

If you have any problems, send me a private message and I can help you!
 

Gandolf50

Researcher of obscure between war vehicles...
Staff member
Moderator
I am sorry to say, yes, most photos were lost with the site change. I am slowly going back and finding them, I now have a list of file names, so I can maybe put them back.

Admins, question, how do I attach photos in older posts that lost them? I think I have them with the same names as showing in these posts.

Scott
I had to do it for several build threads and I did it a bit differently than @Rhaven Blaack 's way...
and that was to just edit the post > and delete the references to the attachments ( PIX) upload the new Pix and then..set cursor in the location pix should be and then add as thumb or full size. One at a time.
 

dr_tetrode

Active Member
OK, Yeah! got all of the pictures that I own, back on the site!!!! ;-)

Not as bad as I thought, they were still all on the tablet. I just had to have a duh! moment and hook up the tablet to the PC and it was easy to transfer! Emailing was failing... Oh well, lesson learned, just hook them up!

Been a long evening, happy cutting everyone!

Scott
 
Top