Great attitude! I am my own worst critic, but I have been known to talk myself into sidelineing a project. Just have to try to put them back in front of me. In my work as a plumber, I have been known to redo a double 45 offset 2 or 3 times to get it just right. Drove my helpers batty cause I wanted those connections just right.
1/12 Apollo Command Module
- Thread starter Kolokolnikov
- Start date
-
- Tags
- apollo command module
You are using an out of date browser. It may not display this or other websites correctly.
You should upgrade or use an alternative browser.
You should upgrade or use an alternative browser.
I tried several times to assemble in parts as Ken did, I did not like this installation. Assemble all panels and walls into one large piece.
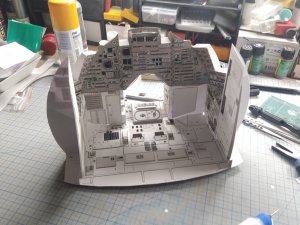
While I put it on dry.
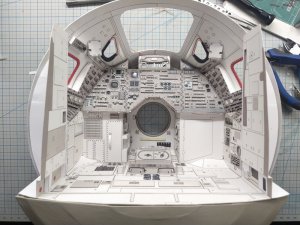
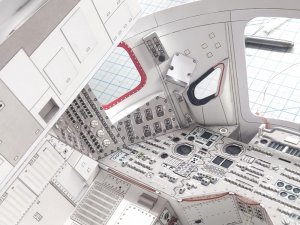
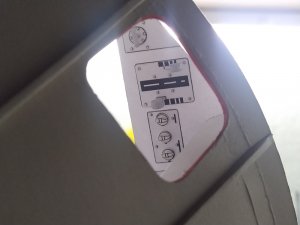
The outer side of the skin had to be painted, because bandings appeared during printing.
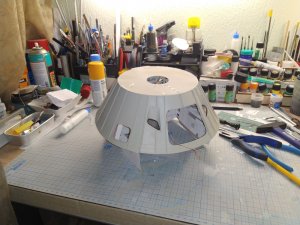
4 smd 5050 LEDs in the main panel are installed on the front and lits the rear internal wall, this gives a more uniform diffused light. The back wall is also painted in skin color, since the glow temperature of these LEDs is too cold, and gave off a blue tint. After changing the color of the back wall, the light became more warm and not so blue.
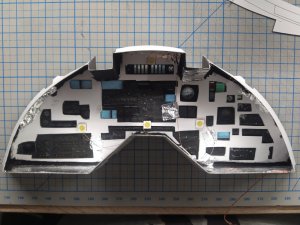
And of course, how could it be without a lighting test! Here you can see the temperature difference between the LEDs, they were from the same batch, and were in a row in the package, if it works out, I will replace it, if not, I will leave it like that. But this difference is not visible with the eyes, so I'll still think about whether it is worth changing one LED.
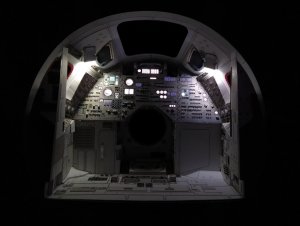
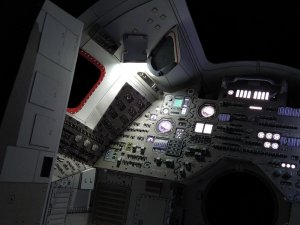
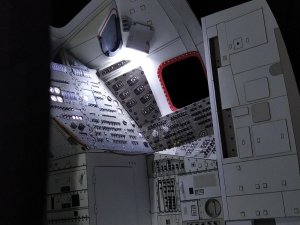

While I put it on dry.


The outer side of the skin had to be painted, because bandings appeared during printing.

4 smd 5050 LEDs in the main panel are installed on the front and lits the rear internal wall, this gives a more uniform diffused light. The back wall is also painted in skin color, since the glow temperature of these LEDs is too cold, and gave off a blue tint. After changing the color of the back wall, the light became more warm and not so blue.

And of course, how could it be without a lighting test! Here you can see the temperature difference between the LEDs, they were from the same batch, and were in a row in the package, if it works out, I will replace it, if not, I will leave it like that. But this difference is not visible with the eyes, so I'll still think about whether it is worth changing one LED.


- Apr 5, 2013
- 13,876
- 10,216
- 228
Wow this looks like the real model, no no no it's even better looking then the real model.
It's amazing what you are doing.
It's amazing what you are doing.
A small update, I decided to reinforce the arch with cardboard. The result is a 6-layer sandwich from 2 layers of paper, 2 layers of 0.5 cardboard and 2 layers of 1 mm cardboard. just the required thickness of the part is 3.5mm. Also assemble all the elements of this part.
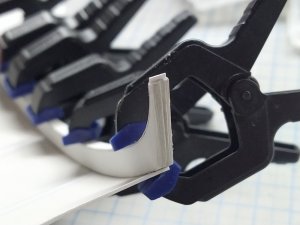
Now I'm waiting for the glue to dry.
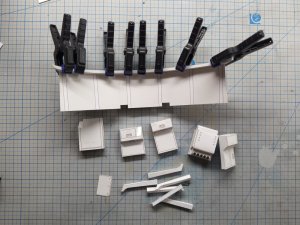
And I still do not understand where this part is installed.
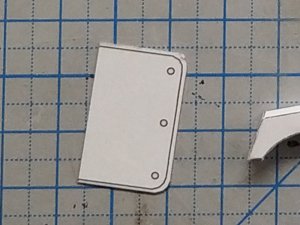

Now I'm waiting for the glue to dry.

And I still do not understand where this part is installed.

- Apr 5, 2013
- 13,876
- 10,216
- 228
Good idea. You want this model to last. If you put it in a sealed small fish tank, filled with Argon gas, just enough to replace the air, it doesn't have to be pressurized, in will make the many things that destroy paper models inert, as the gas itself is inert. I use Argon a lot when I use my Tig Welder. The model deserves an awesome display, and really big pictures when you are done!! 
Good idea. You want this model to last. If you put it in a sealed small fish tank, filled with Argon gas, just enough to replace the air, it doesn't have to be pressurized, in will make the many things that destroy paper models inert, as the gas itself is inert. I use Argon a lot when I use my Tig Welder. The model deserves an awesome display, and really big pictures when you are done!!
I probably won't bother so much. But the stand will definitely have to be made.
Well, I have no storage space for such a large model. And what was in the room of the youngest son, already take the shuttle Tydirium on a scale of 1:50.
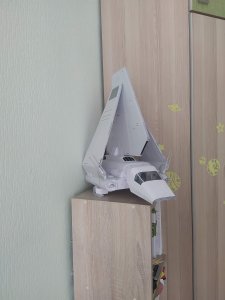
- Apr 5, 2013
- 13,876
- 10,216
- 228
Every person I gave a model too still has it, either on a shelve, or book case. One is 15 years old, and still looks good. A Lotus Europa. 
That is the main reason why I make so many models for my colleagues. 
In some cases I'm interested to know how they look in reality and how they compare to their plastic counterparts, like the AT-AT. The test builds of my own creations already eat up quite a bit of space and I was already asked if I could imagine to exhibit them somewhere. Basically that would not be a bad idea but to fully flesh out an exhibition I would need many, many more models in order to turn the visit into an enjoyable and unforgettable experience. That in turn would require a whole garage to store the models, and who would pay for that.
The fact that you can print and assemble as many paper models at any time is the most versatile point about papercrafting. For this reason the plans are much more important to me than the build itself. My colleagues barely want to touch the finished ones but I keep on saying they are easily repaired if needed, so there is absolutely no reason to worry.
But I agree, please protect your model. It goes way beyond the original plans, so it deserves being kept (and preserved). There is another guy at the raumfahrt-forum who is building the complete STS launch system in 1/144 scale. He mixes the Revell Space Shuttle with Boosters with the Educraft launch pad and accurizes EVERY DETAIL, no matter how tiny it is, to create THE most authentic STS LS model in 1/144 ever. It is absolutely breath-taking and I already told him to take actions to preserve it. There are quite a few fellow modelers who have created similarly detailed builds (looking at you, @Tonino and @DanBKing ) and I am so grateful that they have shared their exciting adventures here.
  rinks:
In some cases I'm interested to know how they look in reality and how they compare to their plastic counterparts, like the AT-AT. The test builds of my own creations already eat up quite a bit of space and I was already asked if I could imagine to exhibit them somewhere. Basically that would not be a bad idea but to fully flesh out an exhibition I would need many, many more models in order to turn the visit into an enjoyable and unforgettable experience. That in turn would require a whole garage to store the models, and who would pay for that.
The fact that you can print and assemble as many paper models at any time is the most versatile point about papercrafting. For this reason the plans are much more important to me than the build itself. My colleagues barely want to touch the finished ones but I keep on saying they are easily repaired if needed, so there is absolutely no reason to worry.
But I agree, please protect your model. It goes way beyond the original plans, so it deserves being kept (and preserved). There is another guy at the raumfahrt-forum who is building the complete STS launch system in 1/144 scale. He mixes the Revell Space Shuttle with Boosters with the Educraft launch pad and accurizes EVERY DETAIL, no matter how tiny it is, to create THE most authentic STS LS model in 1/144 ever. It is absolutely breath-taking and I already told him to take actions to preserve it. There are quite a few fellow modelers who have created similarly detailed builds (looking at you, @Tonino and @DanBKing
Last edited:
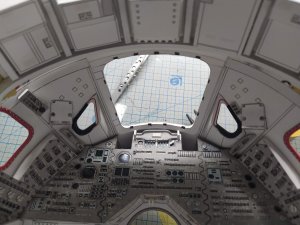
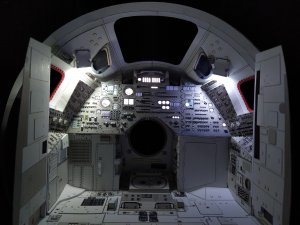
Slowly I continue to assemble, almost everything is ready to glue all the panels into the skin. I also took a chance and decided to replace the LED. Everything turned out without damaging the details.
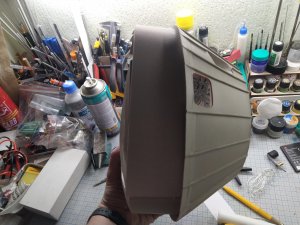
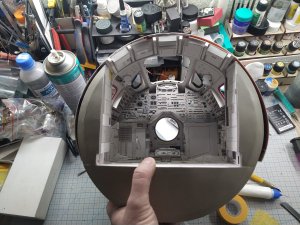
Assembled hatch inner frame. The detail itself is very complex, so sorry guys I got carried away with assembling it and did not take a photo of the assembly process.
After LED Replacement
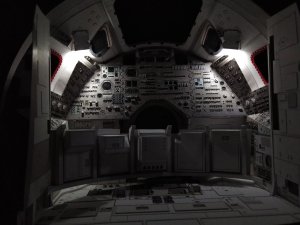
Before LED Replacement


Assembled hatch inner frame. The detail itself is very complex, so sorry guys I got carried away with assembling it and did not take a photo of the assembly process.

After LED Replacement

Before LED Replacement

- Apr 5, 2013
- 13,876
- 10,216
- 228
You know what this means, right? Disassemble and assemble again - with pictures taken inbetween! :Grin:Assembled hatch inner frame. The detail itself is very complex, so sorry guys I got carried away with assembling it and did not take a photo of the assembly process.
This is mind-blowing! :Bravo::Bravo::Bravo:


