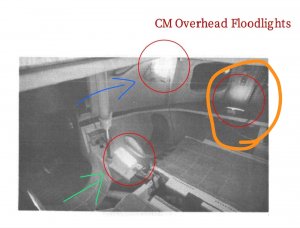
1/12 Apollo Command Module
- Thread starter Kolokolnikov
- Start date
-
- Tags
- apollo command module
You are using an out of date browser. It may not display this or other websites correctly.
You should upgrade or use an alternative browser.
You should upgrade or use an alternative browser.
Huge thanks to @Revell-Fan for help in unroll 3d model of this part, which I got from the scanned module that was discussed recently. I redid the unroll to fit the size and tried to fit it to the real look. It seems like it turned out, what do you say, looks like a prototype?
This is still a test version, maybe I will be working on it.
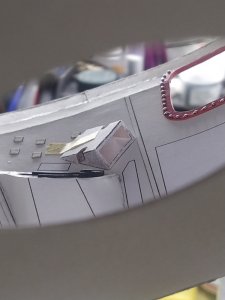
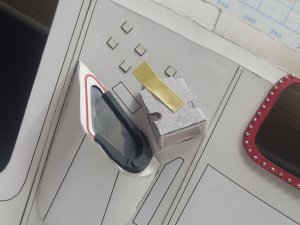
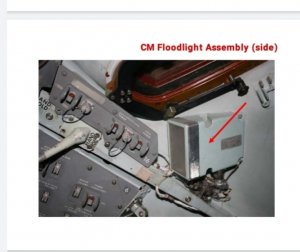
This is still a test version, maybe I will be working on it.


- Apr 5, 2013
- 13,876
- 10,215
- 228
Wow!! You make NASA proud!! You have really improved an already great model. Excellent craftsmanship. Revelle-Fan knows his stuff!! 
P.S. I always tell people they use far to thick wire gauge for LED's, you are showing and using proper wire gauge. It makes for a clean model and allows a real wiring harness to be made, and is easier to work with. Kudos!
P.S. I always tell people they use far to thick wire gauge for LED's, you are showing and using proper wire gauge. It makes for a clean model and allows a real wiring harness to be made, and is easier to work with. Kudos!
I like the LED. I also like your the work that you do! It is very clean, clear and crisp!
Truly Master level work here. And 1/12th will show any error. None are visible
This is really good looking, so nice to see this cockpit with the lights good job. 

(with the voice of a mad scientist who has just put together a creature made of spare parts: )
IT'S LIT UP!!!
 rinks:
 rinks:
 rinks:
Absolutely fantastic!
IT'S LIT UP!!!
Absolutely fantastic!
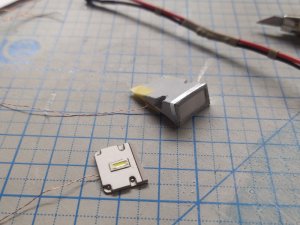
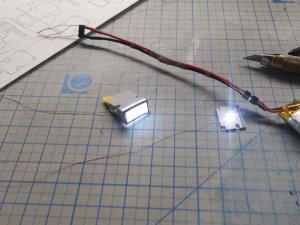
I decided not to paint them, but to print them in the same color as Ken suggested. At first glance, the parts are not very difficult to assemble, they consist of only 5 parts. They are assembled very quickly without lighting. But! I had to tinker with the lighting, as they shone wherever possible! Just painting them black from the inside did not give a good result, as they glowed at the seams. I had to glue in additional partitions and paint them black, while I also had to cut out a part of the lower part to check before gluing the LEDs if there were any luminous slots left somewhere.
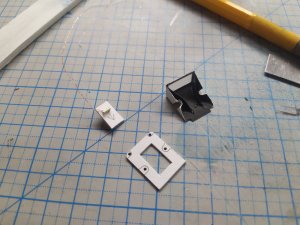
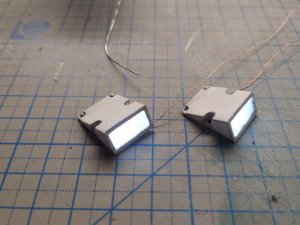
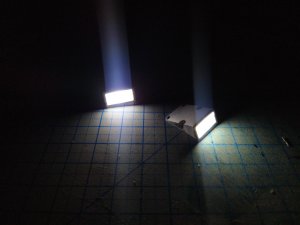
What the hell, it took me 4 hours to assemble these 2 small parts...


What the hell, it took me 4 hours to assemble these 2 small parts...


I decided not to paint them, but to print them in the same color as Ken suggested. At first glance, the parts are not very difficult to assemble, they consist of only 5 parts. They are assembled very quickly without lighting. But! I had to tinker with the lighting, as they shone wherever possible! Just painting them black from the inside did not give a good result, as they glowed at the seams. I had to glue in additional partitions and paint them black, while I also had to cut out a part of the lower part to check before gluing the LEDs if there were any luminous slots left somewhere.
View attachment 193206View attachment 193207View attachment 193208
What the hell, it took me 4 hours to assemble these 2 small parts...

Sometimes it's not the build that is time consuming, it's the modification needed to make it the way you want.
I'm not in a rush, I'm just surprised that I spent so much time on such simple detailsfor me.Take your time, this is not a race.
Please do not flog yourself either. Sometimes it is necessary to spend extra time on a component to get it the way that you want it. I have done that many times myself. I have had to go through and completely rebuild a simple components several times, just because it did not turn out exactly the way that I wanted it to. It is the nature of this hobby.I'm not in a rush, I'm just surprised that I spent so much time on such simple detailsfor me.
Please remember that you are your own worse critic. We on the other-hand, think that you are doing an AMAZING JOB!
KEEP UP THE GREAT WORK!!!
Don't worry, too much praise isn't good either.Please do not flog yourself either. Sometimes it is necessary to spend extra time on a component to get it the way that you want it. I have done that many times myself. I have had to go through and completely rebuild a simple components several times, just because it did not turn out exactly the way that I wanted it to. It is the nature of this hobby.
Please remember that you are your own worse critic. We on the other-hand, think that you are doing an AMAZING JOB!
KEEP UP THE GREAT WORK!!!
In general, for me, self-criticism is the best way to improve my work. I use this method in my main work as a commercial photographer, trying to analyze and improve my work every time, only I fully understand where I could have made a mistake, and next time I try to avoid it. Also, since I am very lazy, I constantly try to optimize the time spent in order to do a similar job in the same high quality but faster.
I know the feeling. I do the same thing with my work.Don't worry, too much praise isn't good either.
In general, for me, self-criticism is the best way to improve my work. I use this method in my main work as a commercial photographer, trying to analyze and improve my work every time, only I fully understand where I could have made a mistake, and next time I try to avoid it. Also, since I am very lazy, I constantly try to optimize the time spent in order to do a similar job in the same high quality but faster.
I know. The devil is always in the details!I'm not in a rush, I'm just surprised that I spent so much time on such simple detailsfor me.


