PBY Catalina Consolidatrd Vultee Flying Boat

MAC99

New Member
Dec 10, 2010
77
3
8
69
West ST Paul Minnesota USA
First thread, I have not built a bunch of these so I will fumble
All of my models including kits to be built and all materials were lost in a fire

So I asked a friend if he would ask around and see if some one would be willing to bring some cereal boxes......... Well he hung a bag with a sing cereal boxes needed

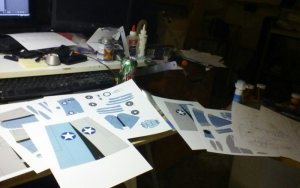
After a mountain of boxes, what do you do with them what do they look like
we want pictures so no more reasons not to post a thread
first thing I need to figure out the pic thing
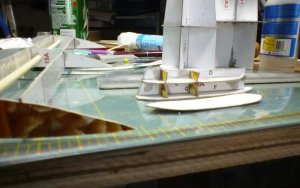
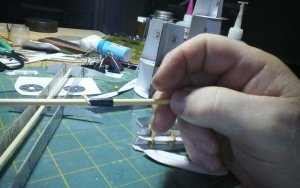
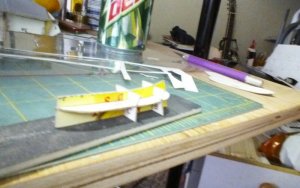
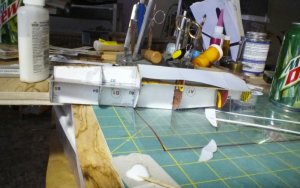
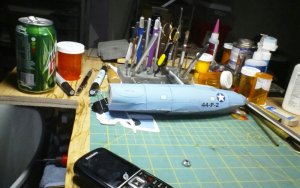
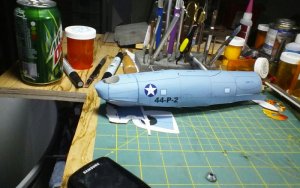
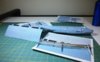
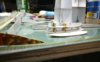
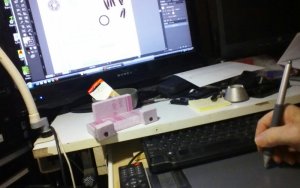
I am all ready started with some pic they look a litile weard I am trying to show them how the boxes are used
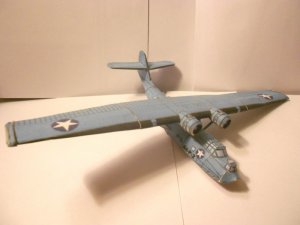
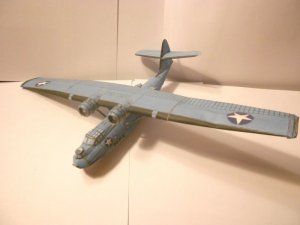
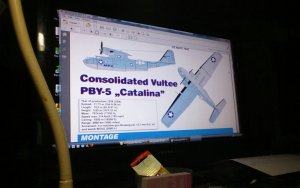
this is a 1:50 Marek model down loaded from the emodels site
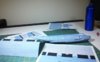
I like to print things that need to be bubbled on 20lbs paper so if aloud I move them to a new page after loading into adobe Illustrator then you can use the print capabilities of adobe also
 

Attachments

  • Camera(6).jpg
    Camera(6).jpg
    104.1 KB · Views: 114
  • Camera(9).jpg
    Camera(9).jpg
    109.5 KB · Views: 126
  • Camera(12).jpg
    Camera(12).jpg
    102.7 KB · Views: 132

zathros

*****SENIOR ADMINISTRATOR*****
Staff member
Administrator
Moderator
Apr 5, 2013
13,502
9,559
228
I go to Micheal's Crafts Stores and I found out the cannot sell their scrap paper (from their picture frame services). They have given me 50 lbs. or so of top notch paper up to a mm think and some 3' foot x 3 ' foot in size. I showed the manager of that department what I was doing with it (I also had a car full of supplies I was building, and he loaded me up, free or charge. :)
 
  • Like
Reactions: DaveyBoy

Bhelliom

Member
Jun 20, 2009
197
5
16
Parma Center NY
I'll be following this one with interest. This model was one of my first paid downloads, a few years ago. I have it printed, but just never got around to building it.


Zathros, I'll have to ask about scrap stock next time I take my daughter to Michaels for college art supplies. Thanks for the suggestion, it might work for her, too.


Scott K.
 

MAC99

New Member
Dec 10, 2010
77
3
8
69
West ST Paul Minnesota USA
so off the street to a free load up that is grate
is it the soft easy like the cereal boxes or the harder more like the mat board

If it the soft as soon as I am off driving restriction Medical reasons
that could be a never ending supply

I have taken the driving restriction as an affront and mental challenge
some body walk up to you takes your wallet and sates no more driving until
we decide other why's


MAC
 

MAC99

New Member
Dec 10, 2010
77
3
8
69
West ST Paul Minnesota USA
It would be nice if you could start it you mite be able to keep me on the right trake

I am building the frame work in what looks to be the sections that would shaping or skinning I guess you guys say panels when I work on the planes we said skins
in the pics are some of the sub frames you can see that I am using skewers
these are the larger ones. I use a Japaneses paper punch and I fount you can hold just the 2mm one in your hand it is easy to push and turn the skewer thought it sharp end first,in pic found my daughter nail sander foam middle fine on one side and a little courser on the other It works grate to flatten or shape and even up. The little thing is a bead ream meant for the center holes in glass beads very good on paper sharp enough to clean cut paper, also at michael s
 

Attachments

  • Camera(19).jpg
    Camera(19).jpg
    116.8 KB · Views: 54
  • Camera(20).jpg
    Camera(20).jpg
    123.9 KB · Views: 48
  • Camera(16).jpg
    Camera(16).jpg
    132.1 KB · Views: 53
  • skewer punch.jpg
    skewer punch.jpg
    125.4 KB · Views: 54

zathros

*****SENIOR ADMINISTRATOR*****
Staff member
Administrator
Moderator
Apr 5, 2013
13,502
9,559
228
I tried to build one of these and failed miserably. I was quite young, but it's utter failure marked me for life. Maybe it's time to overcome that. I love these airplanes and yours is coming out really nice! :)
 

MAC99

New Member
Dec 10, 2010
77
3
8
69
West ST Paul Minnesota USA
zathros Thank you I have never heard that about any of my models before
is that past board or mat you are getting

this one seems to be a good one to build it is only $3.00 on ecardmodels
That big read meat ball that always seemed to be in the way is gone I must have not been the only to email about it

see in pics I have some of the hull skins panels on I did falter and got some glue on the surface

But the blunder the wing is mounted above the fuse with a cool looking coulmb it curves up in the front to fit the wing profile looking say right to left
from it should pointy in front and rounded in the rear
see pic I built the internal parts to be rounded in the front

there seems to be many parts not shown on the plane
Maybe some can let me know the channels to designer permission to add to the plan view
 

Bhelliom

Member
Jun 20, 2009
197
5
16
Parma Center NY
Nowhere near as good as yours will be, but here's a couple of pictures of the one I built 11 years ago. All I had were thumbnails from the site it was being sold on back then. No idea then how to translate the site, or buy the model. As soon as Dewayne Barnett made it available, I bought one.

This one used card for the frame, and regular copy paper for the skin, and it shows. Never did finish the fine details.


Scott K.
 

Attachments

  • Dscn0202.jpg
    Dscn0202.jpg
    98.6 KB · Views: 56
  • Dscn0203.jpg
    Dscn0203.jpg
    96.3 KB · Views: 63

MAC99

New Member
Dec 10, 2010
77
3
8
69
West ST Paul Minnesota USA
I think I have seen that model it has about 6 liver I wounder if copy paper would do the trick and shrink every you used glue I was thinking I bite work if rubber cement was used, it would be plenty fragile in any case I think


This model is only $3.00 on ecard models Did I just repeat my self

Let me know how you gys think the pics are looking. I am using a Kindle Fire HD it does not have a view finder I have to lean forward and look at the screen the best I can and hold it and snap the pic with the other hand
 

MAC99

New Member
Dec 10, 2010
77
3
8
69
West ST Paul Minnesota USA
Bhelliom yours and this one have the same numbers

well here we are with total profe that I am unable to build any more
I think I am at the round file
I have many prismacolors but they bled badly
I have a full set of water colors pencils but cant it on the edge of the paper
order of assembly was off I did hull frist but hull goes over the hull plating
The worst transgression in the fight to get skins under hull I forget how to work with clean hands and....glue every
If I could figure out how to use watercolor pencils I would give it a second go
Info should be some where
 

Attachments

  • Camera(23).jpg
    Camera(23).jpg
    143.2 KB · Views: 45
  • Camera(22).jpg
    Camera(22).jpg
    151.9 KB · Views: 48

Bhelliom

Member
Jun 20, 2009
197
5
16
Parma Center NY
Looking good, Mac. Sorry if I wasn't clear before, mine is the same kit. I just built it from slightly enlarged thumbnail pictures. The smaller bits were almost too fuzzy to use, that and my fat fingers are why it still isn't done yet.


Scott K.
 

vbsargent

Member
Apr 16, 2008
175
3
16
MD, USA
I agree with Bhelliom, it looks pretty darn good to me. I use an inexpensive set of watercolors that I got at the craft store, or Walmart, I can't remember which. It has 36 different colors, and you can mix these within a hair of pretty much anything. I use a 10x0 brush that allows me to be very exact with the placement of my pigments.

Don't give up, if nothing else look at it as a practice model, but I think that it looks quite good.

vbsargent
 

MAC99

New Member
Dec 10, 2010
77
3
8
69
West ST Paul Minnesota USA
Thank You for your support

I have remembered thread a very good one about mixing to match another color I don't remember if it is on zealots or paper moderlers
It was very well done by swampfox

a little searching and it will turn up
I will do a little reading and practices and be back it is a learning model I just hope I can remember what that I learned


I WILL NOT FAIL

MAC
 

MAC99

New Member
Dec 10, 2010
77
3
8
69
West ST Paul Minnesota USA
Help with wing building

I have been back about 3 weeks from a hospital stay and I would like to finish this Plane. I have built the simple wings with no ribs but this one is the devil.

I printer and tried-printed and tried- you get the Idea What is the sequence
when i glue the trailing edge I cant make it tight to the ribs or glue the inter ribs. When I try to glue to the bottom and pull the skin over the to the trailing does not line up and the panel is wrinkled same thing starting with the top panel

It has been some time from the last post I hope some one is still looking in

I will have go back to the hospital 2 more times I want to finish the PBY
this time I will be able to bring some small models FG stuff
 

Attachments

  • P B Y_5 Wing build 1.jpg
    P B Y_5 Wing build 1.jpg
    121 KB · Views: 42
  • PBY-5 Wing Build 3.jpg
    PBY-5 Wing Build 3.jpg
    116.8 KB · Views: 55
  • PBY_5 Wing build 2.jpg
    PBY_5 Wing build 2.jpg
    102.7 KB · Views: 41

zathros

*****SENIOR ADMINISTRATOR*****
Staff member
Administrator
Moderator
Apr 5, 2013
13,502
9,559
228
I would recommend the "sock" method. Glue the trailing edges together, or, tape them with a very light holding tape, the kind that is mean to be removed, then slip the assembly in there. You will start with the smallest wing rib, when it fits, the add the next wing rib. Eventually, you will have trimmed it to shape and it will fit snug, then you glue. Of course, shape the wing roughly to the shape you need, if you make sure the ribs and spar are strong, and it should fall into shape, (laminate the spares if you must, just remember that you may have to sand or cut any outer lamination a bit, not much, smaller as you work your way to the tip. If you find any to be too small, a strip of paper around the wing rib will bring it back to spec, and give a greater gluing area. Excessive glue will assure a strong wing. This is not an easy plane. The fuselage looks great by the way.

I am sorry you are in the Hospital so much. I hope all is well. Please keep in touch. Recover with all Godspeed! :)
 

MAC99

New Member
Dec 10, 2010
77
3
8
69
West ST Paul Minnesota USA
Thank you for the well wishes

zathros

When you said trim a little did you mean the trailing edge or ribs?
I do like your method I will use it for the wing tips.

the BIG problem(in my mind) I can't .... is with the center section which is strait. I match up the trailing edge and glue this is after shaping first.
After sliding the rib spar ass amble the skin is not down tite to the ribs in the middle and there is no access to glue.

This is a long section maby if I use rubber cement and slide the ribe and spar assamble in before it is totally dry it will only open up to what it needs, hmmmm this mite work, This is grate if I keep talking to you guys with all the info and start my thinking I will have it. This mite work with out wrinkle the skin
 

zathros

*****SENIOR ADMINISTRATOR*****
Staff member
Administrator
Moderator
Apr 5, 2013
13,502
9,559
228
I would keep the main spare where it should be. Start with the smallest, outer rib only, when that lines up, by either trimming, or adding onto the rib, then add the next rib, and continue the process till the whole unit slides in and fits. Then remove and add glue to each rib, and tops and bottom of main spar, and slide into sock/wing. It will hold, and you will have a nice fitting assembly that supports but does not give a "skeleton" effect. If you post a picture with the center section in relation to the wings, I can tell you how to do that, I suspect you will glue the main spars and skin afterwards.:)