Won't say what it is till later...ooops too late now!
- Thread starter Gandolf50
- Start date
You are using an out of date browser. It may not display this or other websites correctly.
You should upgrade or use an alternative browser.
You should upgrade or use an alternative browser.
Start with black, and use dry-brushing techniques for high-lites....... The Citadel artists can give you many pointers...
Thanks Dan, I know the process it just looks terrible on such a small scale and with the dark grey paint...all metallics tend to look like glitter! I have a few more ideas from 40 years ago I may try on some scrap and will post progress, or just tell that OCD part of me to "shut-it" !!
Got some more work done during a break..actually can't sleep so doing some stuff at 2 am... no guarantees to what it will turn out like! And foggy brains make building slow.. not to mention the parts keep getting smaller and smaller!
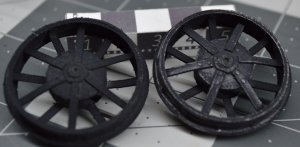
First off wheels.. front to be exact... I have no idea how many but there's a bunch of tiny < less than 1mm bolt heads on these things!! Tend to vanish a bit under a coat of flat black..but should pop back with some weathering!
Left one bare flat black, Right burnished on sections no weathering yet!
Next up..the gearing and controls.. got some work done on that also..as well as cut down to proper size.. Don't remember now, but there was an additional piece that went on the end of the base, that had the tiniest slivers of material down the sides.. long story short..tossed it..as the thing is .5mm thick..added a BIG chunky section all around, trimmed to fit the body and the slight overhang it called for and then trimmed the sides.. worked out way better for me, was a bit goofy the way it was, sort of like cutting a circle the adding a second arc to it.. just should have been there to begin with!
..thing is ..it doesn't even show as it is all smoot anyway? or I read things wrong and ..oh well too late!
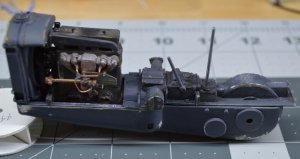
next up..parts on the engine.. putting a fan belt on this was a bit tricky.. but not to bad.. since once I fire the motor it will rip anyway!
a sized strip of card... well burnished and rubbed and colored with a black sharpie..and sanded lightly with 900 grit... glued at the bottom,, brought around to meet itself, marked, cut, and glued at the bottom! Added in the starter crank as it was time to do so!
( you have got to TEST EVERYTHING) and read ahead!!! or you are gonna start something over I guarantee it!!
Got further since these pix..and will update ASAP...working on back wheels and a thousand more bolt heads!!
Firewall is in..fuel tanks built and supports... was just testing fit this AM.. without glue..looks like it will be just fine.. one of those things on the firewall I thought was a small hole turns out to need the choke line and 3 fuel lines run through it..gonna need to be bigger..wish I had found that one a bit sooner!! See I told you.. read ahead!! l8ers
First off wheels.. front to be exact... I have no idea how many but there's a bunch of tiny < less than 1mm bolt heads on these things!! Tend to vanish a bit under a coat of flat black..but should pop back with some weathering!
Left one bare flat black, Right burnished on sections no weathering yet!

Next up..the gearing and controls.. got some work done on that also..as well as cut down to proper size.. Don't remember now, but there was an additional piece that went on the end of the base, that had the tiniest slivers of material down the sides.. long story short..tossed it..as the thing is .5mm thick..added a BIG chunky section all around, trimmed to fit the body and the slight overhang it called for and then trimmed the sides.. worked out way better for me, was a bit goofy the way it was, sort of like cutting a circle the adding a second arc to it.. just should have been there to begin with!
..thing is ..it doesn't even show as it is all smoot anyway? or I read things wrong and ..oh well too late!

next up..parts on the engine.. putting a fan belt on this was a bit tricky.. but not to bad.. since once I fire the motor it will rip anyway!
a sized strip of card... well burnished and rubbed and colored with a black sharpie..and sanded lightly with 900 grit... glued at the bottom,, brought around to meet itself, marked, cut, and glued at the bottom! Added in the starter crank as it was time to do so!
( you have got to TEST EVERYTHING) and read ahead!!! or you are gonna start something over I guarantee it!!
Got further since these pix..and will update ASAP...working on back wheels and a thousand more bolt heads!!
Firewall is in..fuel tanks built and supports... was just testing fit this AM.. without glue..looks like it will be just fine.. one of those things on the firewall I thought was a small hole turns out to need the choke line and 3 fuel lines run through it..gonna need to be bigger..wish I had found that one a bit sooner!! See I told you.. read ahead!! l8ers
Last edited:
Brilliant thread. Thanks for sharing so much information and your trials and tribulations.
The time and effort is obvious with the quality of the pieces you produce.
Very inspiring.
Thanks
Steve
The time and effort is obvious with the quality of the pieces you produce.
Very inspiring.
Thanks
Steve
Slow and steady, wins the race? More like drives you nuts... Like I have said, the parts keep getting smaller. Updates, slow to a crawl. There is progress,
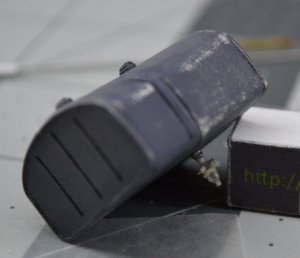
Double tanks, end joined and filler caps... and started with the plumbing, ie: fuel filter, by using a small piece of clear sprue, from an old plastic kit, and fine sanding to shape. was going to use very fine wire casing for the fuel lines, but the smallest I could find ( ribbon cable from an old PC) looked like a firehose, so had to switch to some .3mm copper wire and weather it later ( if I can find it that is), about the size of a human hair to my eyes!
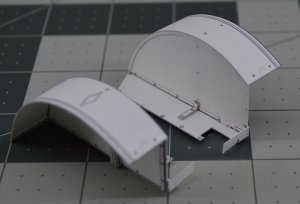
Worked on the rear fender assembly, that is cut and glued it! Still, have to add it the bolt heads and such.
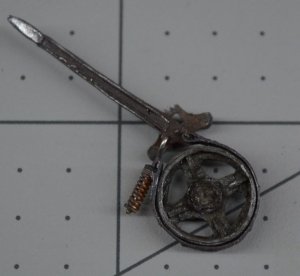
Here is the brake arm assembly... This was just a bit rough to get together, as I pinned the parts with wire, so it ( if it were a brake assembly ) actually work, which just made more work, and took way more time than I had thought... Pick of it newly made, some parts reprinted in a thinner card as my regular was too thick.
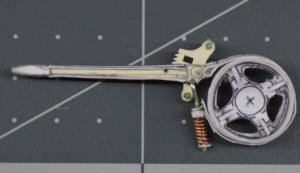
and with some paint slapped on!
I made up the steering column but had to change the size of the wire rod, as it was a bit too short to clear the rear finder in its original size ( as shown here) and before you ask this one does not drive the front wheels, way too small to gear up! With younger eyes and steadier hands, IT COULD, just in a size I was not going to deal with!
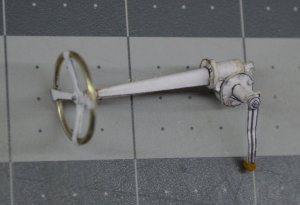
The wheel is made with 1 mm vinal covered copper wire, rolled into the circle and I will see if a fine round file will add the finger grooves on the back side before a paint job!
Here is a front to back, test fit of all the parts, so far. Minus the wheels of course...
It was also when I discovered the steering column was a bit too short, but adding a new longer wire fixed that!
Here is a view of the left side, pre brake installation as well as all the wiring, lights, and umpteen hundred more test fits!
Going to stop here and it has been a long day, week, month...

Double tanks, end joined and filler caps... and started with the plumbing, ie: fuel filter, by using a small piece of clear sprue, from an old plastic kit, and fine sanding to shape. was going to use very fine wire casing for the fuel lines, but the smallest I could find ( ribbon cable from an old PC) looked like a firehose, so had to switch to some .3mm copper wire and weather it later ( if I can find it that is), about the size of a human hair to my eyes!
Worked on the rear fender assembly, that is cut and glued it! Still, have to add it the bolt heads and such.

Here is the brake arm assembly... This was just a bit rough to get together, as I pinned the parts with wire, so it ( if it were a brake assembly ) actually work, which just made more work, and took way more time than I had thought... Pick of it newly made, some parts reprinted in a thinner card as my regular was too thick.

and with some paint slapped on!

I made up the steering column but had to change the size of the wire rod, as it was a bit too short to clear the rear finder in its original size ( as shown here) and before you ask this one does not drive the front wheels, way too small to gear up! With younger eyes and steadier hands, IT COULD, just in a size I was not going to deal with!

The wheel is made with 1 mm vinal covered copper wire, rolled into the circle and I will see if a fine round file will add the finger grooves on the back side before a paint job!
Here is a front to back, test fit of all the parts, so far. Minus the wheels of course...
It was also when I discovered the steering column was a bit too short, but adding a new longer wire fixed that!
Here is a view of the left side, pre brake installation as well as all the wiring, lights, and umpteen hundred more test fits!
Going to stop here and it has been a long day, week, month...
Last edited:
OUTSTANDING WORK!!!
I always enjoy watching your threads. The amount of detail that you put into your models is astounding!
I always enjoy watching your threads. The amount of detail that you put into your models is astounding!
Some more in the struggle to hold on to stuff!
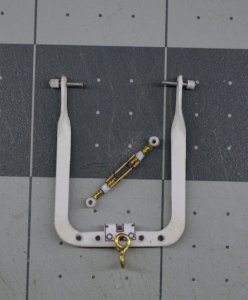
Here are the rear hitch and turnbuckle, for towing (maybe a hint there) or farm work. Turnbuckle gave me a bit of clutz-finger as I had a very hard time getting the parts aligned to glue up.
I gave up on using the brass on the side louvers, just to small and hard to cut slots, for me anyway. So tried the original which takes a cutout, and replaces it with a glued-in louver. It was just too messy, and the back looks like a botched job, so I re-printed and used my old tried and true method of a single slot, then burnish and form the louvers with a burnishing tool. Not as rigid as the glue-in method, but a far better louver to look at!
Original...
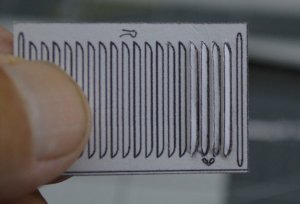
My modified version...
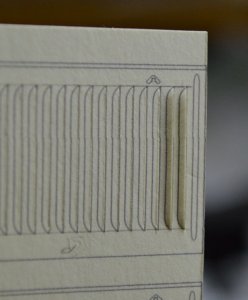
and the other direction... very clean and REAL, as that is how they are made, to begin with!
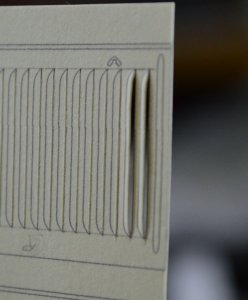
Headlights have a story all there own!
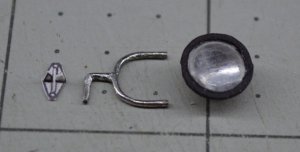
I'll mention the bracket, shortly. I am going to replace the lens and trim ring, just too bulky and thick. Not sure how as yet, hand-cut trim ring this small, is going to be a problem, no matter what. When I figure it out, I'll share it!
The metal bracket, in its original form, was the curved part and then straight sections CV glued on! There was no part to fix to the mounting bracket, and the whole thing was flimsy!
So, I took the wire bent the curved part, then added the 90 degree part, and figured solder was the way to go! I was right, the problem turned up in the form of magnetized wire! Every tried to solder two pieces of very tiny wire together and find it attach itself to the iron? What a pain! Took the better part of an hour to align, solder, remove from iron and try to re-align before the solder solidified! There is an old saying, about a monkey and a football, enough said!
Here are the rear hitch and turnbuckle, for towing (maybe a hint there) or farm work. Turnbuckle gave me a bit of clutz-finger as I had a very hard time getting the parts aligned to glue up.

I gave up on using the brass on the side louvers, just to small and hard to cut slots, for me anyway. So tried the original which takes a cutout, and replaces it with a glued-in louver. It was just too messy, and the back looks like a botched job, so I re-printed and used my old tried and true method of a single slot, then burnish and form the louvers with a burnishing tool. Not as rigid as the glue-in method, but a far better louver to look at!
Original...

My modified version...

and the other direction... very clean and REAL, as that is how they are made, to begin with!

Headlights have a story all there own!

I'll mention the bracket, shortly. I am going to replace the lens and trim ring, just too bulky and thick. Not sure how as yet, hand-cut trim ring this small, is going to be a problem, no matter what. When I figure it out, I'll share it!
The metal bracket, in its original form, was the curved part and then straight sections CV glued on! There was no part to fix to the mounting bracket, and the whole thing was flimsy!
So, I took the wire bent the curved part, then added the 90 degree part, and figured solder was the way to go! I was right, the problem turned up in the form of magnetized wire! Every tried to solder two pieces of very tiny wire together and find it attach itself to the iron? What a pain! Took the better part of an hour to align, solder, remove from iron and try to re-align before the solder solidified! There is an old saying, about a monkey and a football, enough said!
Last edited:
- Apr 5, 2013
- 13,876
- 10,216
- 228
You are in a league of your own. I honestly think you are one of the most brilliant modelers I have ever known. You are among a select few, and your ability to age and weather your parts, well, I have not seen anyone make paper look like rusty steel. Fast becoming beyond words, as to my ability to express fascination.
I was thinking to some way to adequately express my feelings about your skill... no word seemed right to me. Then Zathros posted his comment and, here it is, THAT is exactly what I wanted to say, I totally agree with every word in the previous post! Gandolf50, you are THE master!
After all that blushing I had to do... :hide: I have a small update... ( got to stop saying that... everything is small)! Anyway, first off I started to work on the wires and fuel lines... this is hard as all get out! getting into place, getting CV glue to hold and just getting it done! There is a start though!

Like I said somewhere in this, I had to change out the headlamp lens, and while taking a break from fuel / electrical lines, worked on that!
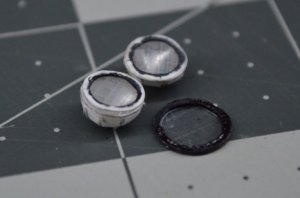
Getting to the point that my camera is having a hard time getting into focus.
Still, need to finish the forming and sanding on these, but reflector and lens are in the new rings, that I ended up cutting by hand.
Work started on the tractor seat, needs some more and a trim wire around the edge to give it the rolled effect. Sanding? I have to build a 3/4 inch sander first!
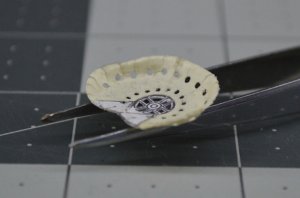
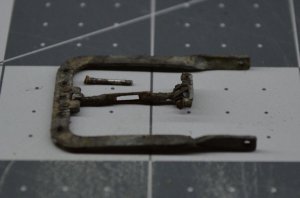
Did a little weathering on the tow-hitch while on break!
I also finally got back to the front suspension and made the rest of the parts for it!
The wooden part on the bottom is the tip of a round toothpick! Lathed into shape with a needle file!
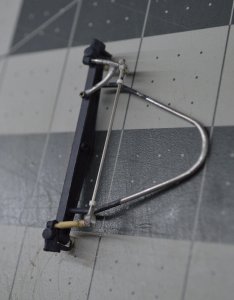
Oh yeah< it functions by the way!
Till next time...

Like I said somewhere in this, I had to change out the headlamp lens, and while taking a break from fuel / electrical lines, worked on that!

Getting to the point that my camera is having a hard time getting into focus.
Still, need to finish the forming and sanding on these, but reflector and lens are in the new rings, that I ended up cutting by hand.
Work started on the tractor seat, needs some more and a trim wire around the edge to give it the rolled effect. Sanding? I have to build a 3/4 inch sander first!

Did a little weathering on the tow-hitch while on break!

I also finally got back to the front suspension and made the rest of the parts for it!
The wooden part on the bottom is the tip of a round toothpick! Lathed into shape with a needle file!

Oh yeah< it functions by the way!
Till next time...
Last edited:
I greatly enjoy seeing your work. The level of detail that you put into your work borders on the edge of realism!!!
Truly great work.
What is your painting technique this small? Airbrush and acrylics?
Thanks for sharing.
You are very welcome! As it stands, for now, the only parts that have been airbrushed is the main body. The engine and wheels sprayed with a cheap can of Flat Black waterbased acrylic, Walmart special. Everything else is with fine camel hair brushes .25" flats and slants, then several very small round brushes and what is called a "single hair brush", about the size of a pinpoint! In the beginning, I talked about how I came up with the paint for this and I would ask that you search back and find that, as it is an interesting story, with links!
I am right at this time, working on the "snorkel" for this thing... when I get to uploading the pix, you will see some interesting card bending!
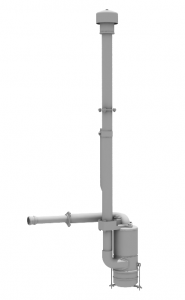
Gonna be fun!!
Last edited:
oops... I got into building the snorkel and while assembling, had to paint parts... and next thing I know... it was finished... Sorry... but I will say this it was created using the paper roll from cotton swabs, wrapped with typing paper for the thickness, built on a .5mm wire lots of cursing and trying to find the fiddly bits I kept on dropping. There is a U bracket still around here somewhere but it TOTALY disappeared after being dropped for the umpteen time! Someone will find it someday, but I looked for 2 hrs and still didn't find it!
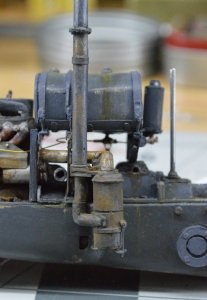
NOT glued in as there are far too many parts to add beforehand!
If someone REALLY wants to know HOW I built this ... I can do a small tutorial ... just have to ask for it!

NOT glued in as there are far too many parts to add beforehand!
If someone REALLY wants to know HOW I built this ... I can do a small tutorial ... just have to ask for it!
Last edited:


