

her's a tip I found ot a while ago: MICRO-MARK sells a blue, rubber masking tape in 2 different widths. Depending on your guage, the tape is great for covering rail tops before you paint track. Since it's rubber, it bends easily around curves.
You are using an out of date browser. It may not display this or other websites correctly.
You should upgrade or use an alternative browser.
You should upgrade or use an alternative browser.
- Status
- Not open for further replies.
another tip that I saw in MODEL RAILROADER once, way back around 1980 or 81: to make a track bumper that is virtually invisible, stick 2 small peices of music wire or 2 pieces of a straight pin with the head cut off, into the roadbed or the layout surface, sticking straight up, and paint them flat black. If they're short enough, they'll be virtually invisble to viewers.
Or, if you have an unused siding track in a yard, glue a truck or a wheelset to the rails (or even an old car) to also serve as a bumper.
Or, if you have an unused siding track in a yard, glue a truck or a wheelset to the rails (or even an old car) to also serve as a bumper.
When tracing out track centerlines on a foam surface, I end up drawing a lot of lines perpendicular to one another, to locate curve centers, parallel lines, etc.
To make this easier I found a piece of clear plastic (acetate?), like they print overhead projector presentations on. I taped it to a piece of pegboard and used the peg board holes to locate the points of a right triangle, then used a pin to poke holes in the plastic at the points. I then drew circles around the holes, just to make them easier to see. The triangle was as large as would fit on the plastic.
To use it, I already have one line drawn on the foam. I put a pin through the hole that's at the right angle of the triangle, then push it into the foam into the line where I want the perpendicular to intersect it. I then rotate the plastic around the pin until one of the other holes is also on the line, and put a pin through that hole into the foam as well. Then I use a marker pen with a fine point to mark the foam through the remaining hole, remove the plastic, put a straight edge along that mark and the intersection point, and draw the perpendicular.
Antennas and such
Here's an old one from the "static" side of modelling, usually used for military vehicles and such.
In order to make long, thin "rods" such as antennas, take a piece of plastic sprue from any polystyrene kit. Heat the middle of the piece over a candle or oil lamp while holding both ends. As it softens, slowly pull it apart. It'll stretch like taffy.
here's one I discovered years ago, when I was into plastic modeling: in order to put a small dab of paint on a surface, like for the eyes or buttons on a figure, a rivet or nail on a car or structere, etc. just use the pointed end of a straight pin. Then, you can clean it by just wiping it on a rag, paper towl, etc. (back when I first dicovered it years ago, I used to use my shirt!).
Another one: test leads from Radio Shack, or any electronics store, can be used to hold small parts while you paint them, then just hang it on a nail, coat hook, etc. while they dry.
Another one: test leads from Radio Shack, or any electronics store, can be used to hold small parts while you paint them, then just hang it on a nail, coat hook, etc. while they dry.
F
Fred_M
Inkjet signs
Inkjet signs seem to bright and new looking for me, so I weather them by hanging them in a window that gets direct sunlight and watching them fade until they suit me. It takes several weeks so plan ahead. Lighted signs can be made by printing on inkjet overhead projector film and cemented to white styrene. When backlit they look like the plastic molded signs that lots of businesses use. Quick signs can be printed on inkjet return address lables and then cut and stick. Inkjet iron on transfer paper can be used for signs on some materials and finishes, but don't stick to well to bare styrene. Use your greeting card program to print big block letters on card stock, cover with clear package tape, cut out and glue to wood frames for rooftop signs from yesterday.
Inkjet signs seem to bright and new looking for me, so I weather them by hanging them in a window that gets direct sunlight and watching them fade until they suit me. It takes several weeks so plan ahead. Lighted signs can be made by printing on inkjet overhead projector film and cemented to white styrene. When backlit they look like the plastic molded signs that lots of businesses use. Quick signs can be printed on inkjet return address lables and then cut and stick. Inkjet iron on transfer paper can be used for signs on some materials and finishes, but don't stick to well to bare styrene. Use your greeting card program to print big block letters on card stock, cover with clear package tape, cut out and glue to wood frames for rooftop signs from yesterday.
Attachments
N
narrowsteam
Easy weathering for stripwood
To weather scale stripwood for scatch building in mass, use an old glass jar with a lid (like a tall mason or pickle jar. )
For the weathering wash you need the following:
Jar with lid
Isoprop rubbing Alcohol from Wall-greens or your drug store ( Costs about $.89)
Tech-pen ink (It must be 100% black and waterproof, no cheap fountain pen ink..it costs about $3.00 and comes in a small plastic dispenser)
Add a bottle of alcohol to the jar...do not fill it completly full...leave some room for the wood, the mix should almost come to the top. Add a few drops of ink to your jar and mix until you get a black-ish semi-transparent mix. Do not put too many drops in...or your wood will be black. Test with a piece of scap scale wood to test the color. Drop wood in, shake jar...let it soak for a few minutes or over-night, remove wood - set it on paper towels to completely dry (do not put it on anything important!!! The wash will stain other things while wet). Check color, it should be a nice gray-ish sun drenched old wood color. If it is too light add more drops of ink to your mix and test again.
To get an even more wood grain weatherd look wipe your wood with a steel grill cleaning brush, this gives it more grain - texture and then drop it in your weathering wash shake. When the scale wood it is stained and completely dry, get some cheap acrylic craft Applebarn brand paint from Hobby Lobby ( barnwood, or light gray) and lightly dry brush the planks of wood. Choose about half of the satined and dry brushed planks and use a paint brush to brush on some of your wood weathing wash on it. this gives the planks an uneven futher weathering just like the real thing. Let them dry and mix with the other planks. No two planks of wood look the same. Then assemble your model with this wood.
Hint if you are going to weather more than one size of scale wood you can put a loose rubberband on each different size and drop it in the jar and soak it overnight. This keeps your wood sorted and not mixed up....it can even be dried this way but might take longer to dry.
Cheers....
N
narrowsteam
Weathering strip wood tech pen ink
P.S. .....Tech pen ink can be purchased at Hobbly Lobby at the art counter or at art supply or drafting stores
P.S. .....Tech pen ink can be purchased at Hobbly Lobby at the art counter or at art supply or drafting stores
Coupler Springs
Holding down those pesky little springs while fitting the rest of the knuckle coupler together can be a pain. Just when you think you've got everything in place the spring jumps out and flies away never to be seen again.
Run a foot of thread through the spring first. This keeps it in place and prevents flyaway. When the coupler is assembled pull the thread out. Works every time. (Found this posted on another board and is too useful not to pass it on here)
Dollar store supplies
I was in the local Dollar Store the other day, and noticed at this time of year (Christmas 2003 for all those who read this later) that there are many, many accessories for the Christmas Village available. Some might work better for larger scales (S, O, Garden, Lionel, LGB) but many could be used "cross-scale" like trees, snow, mini-lights, and so on.
Andrew
fifer
Active Member
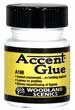
Woodlands Accent Glue
Just thought i'd pass this on for those who have dismissed this as a non-essential.This is a truely different glue , it is somewhere between Elmers and liquid latex.
This is the perfect glue for semi permanant placement of ,auto,people and the like.
I have been a modeler for 30 years and this stuff is GREAT.
Mike
Attachments
Affordable Skirting
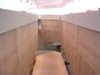
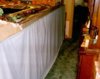
Most of us would like to put a skirt around the frame of our layouts. Looking at various materials, I figured it would be too expensive when I would rather spend the money on train stuff. I was browsing through the Building Box the other day. The Building Box is just like Home Depot. In the garden section, I came across rolls of a product called Terra Tex , made from natural jute and is used to protect trees and shrubs from snow and ice.
A 50 foot roll 3 feet wide sells for $8 so was certainly affordable.
Here is what it looks like.
Attachments
Robin, nice looking layout room. That garden center did you right! the Jute and the color of the facia is nice. I'm sure you have been asked this before, but how high is the top edge of the facia from the wooden platform, ...and the floor?
Drew
Drew
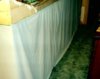
Following Robins idea for a skirt. I took an old light green sheet, cut it in half and hemed the cut edge. Then cut little velcro squares, hot glued them to one edge of the sheets, held them to the side of my layout and marked where to glue the other half of the velcro. It hides all the junk under the layout.
Attachments
Thats a good way to do skirting Dick.
Drew the colour of the fascia is warm shadow from St. Clair paint and wallpaper.
The top of the fascia is 59 inches from the raised floor. The raised floor is 15 inches above the concrete floor.
Drew the colour of the fascia is warm shadow from St. Clair paint and wallpaper.
The top of the fascia is 59 inches from the raised floor. The raised floor is 15 inches above the concrete floor.
F
Fred_M
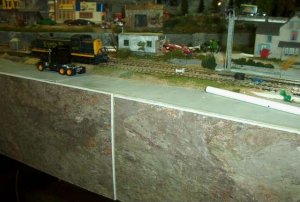
Now that you guys did the cart, here's the horse. Facia... Go to Lowes or whatever and buy some vinyl tile and some floor adhesive. The tile will not stick to bare wood so I use the adhesive to prep the wood, then cut the tiles in 1/2 and stick em on. They are cheap at $1 each so 4 foot costs $2 and change. Looks better than bare wood, or painted wood, or raw foam... FRED
Facia... Go to Lowes or whatever and buy some vinyl tile and some floor adhesive. The tile will not stick to bare wood so I use the adhesive to prep the wood, then cut the tiles in 1/2 and stick em on. They are cheap at $1 each so 4 foot costs $2 and change. Looks better than bare wood, or painted wood, or raw foam... FREDAttachments
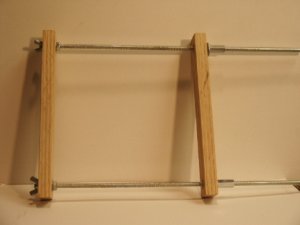
Folks I needed a clamp bigger than the small I had and smaller than my heavy large ones so I made my own. I've attached a photo if anyone want more specifics just ask but I think the picture says a thousand words worth. I plan on routing a slot in the center and with nuts and bolts add an L bracket on all four sides so things can be clamped on four sides at once.
Attachments
For those of you retired folks out there with alot of time and no money, here's a slow and easy weathering technique for you. Place the piece you'd like to have weathered out in a favorite outbuilding on your property, ensuring that all manner of birds, snakes, rodents and other creepy crawlies have unfettered access. Remove anything that impedes the free flow of rain, snow and other weather related discomfort. Then wait...for six years or so. Bring it in, dust it off, add new trucks and couplers to replace the ones that got et up by the passage of time and---Woo Hoo!!!--- a bonified weathering job that would put the mighty Southern Pacific to shame. Whuddayathink?
Attachments
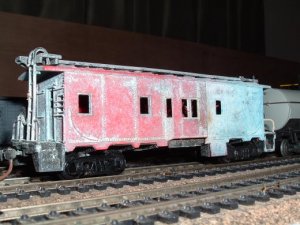
Well to me shaygetz
it looks like you just recovered it from the depth of the seas. Did you forget you even had it?
it looks like you just recovered it from the depth of the seas. Did you forget you even had it?
- Status
- Not open for further replies.