Sputnik-1 - 1:20

Kolokolnikov

Well-Known Member
Jan 17, 2021
240
1,060
75
41
Almaty, Kazakhstan
Last weekend in an art store I saw wooden balls, and I thought, can I assemble a Sputnik-1 model?
I decided to do it. I studied the drawings of very poor quality, a bunch of photographs, and drew mounts for the antennas.

The most difficult thing was to mark the ball for the installation of all the elements.

Assembled from materials: wooden ball 30 mm, copper capillary tubes, steel wire, aluminium type, and of course paper where can we go without it.

IMG_20210117_003613_1.jpg

IMG_20210117_003656.jpg

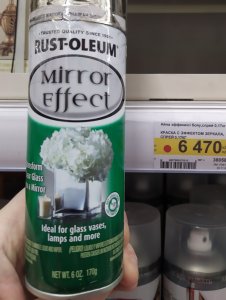
At the moment, I am preparing the model for chrome plating. While covered with primer and black paint, and I'm waiting for it to dry.

IMG_20210118_134345_1.jpg
 
Last edited:

zathros

*****SENIOR ADMINISTRATOR*****
Staff member
Administrator
Moderator
Apr 5, 2013
13,498
9,550
228
Wasn't that what the Russians thought? :rolllaughing:

Your Sputnik really came out great. Really simple looking models can be the trickiest to pull off, and you did it. Those 4 wires that the Russians used to stabilize the space crafts flight actually ended up being used in their ejection seats, and Russia makes some of the best ejection seats in the world (they have too!).

K-36seat.gif
 
  • Like
Reactions: Revell-Fan

Kolokolnikov

Well-Known Member
Jan 17, 2021
240
1,060
75
41
Almaty, Kazakhstan
Since I'm not happy with the previous build, I decided to rework the ball marking system. Made a new construction, in which the ball is fixed very rigidly, which prevents its rotation. This made it possible to make the markup as accurate as possible.

These are all paper parts needed to assemble the Sputnik-1 model.
IMG_20210120_091252.jpg


IMG_20210119_215430.jpg
IMG_20210119_215625.jpg

After marking, I drilled holes for the antennas, made fasteners from a capillary tube with a diameter of 1.3 mm, and reeled up paper to simulate the part.

IMG_20210119_221633.jpgIMG_20210119_225019.jpg

The new design of construction for marking, helped to position the antennas quite accurately.

IMG_20210119_230921.jpg

Then I glued all other details and rivets. So far, only the mounts are not ready, which will hide the hole and part of the tube.
IMG_20210120_005920_1.jpg
 

zathros

*****SENIOR ADMINISTRATOR*****
Staff member
Administrator
Moderator
Apr 5, 2013
13,498
9,550
228
Kolokolnikov You've got "balls'! I think the 1st one came out great, I guess this one will be fantastic!! :)
 
  • Like
Reactions: Kolokolnikov

micahrogers

Moderator "Where am I, and how did I get here?"
Staff member
Moderator
Jul 12, 2012
3,773
4,643
113
Shannon GA
`look for a product called "Molotow Liquid Chrome" I don't know what the equivalent will be over there.
 
  • Like
Reactions: zathros

micahrogers

Moderator "Where am I, and how did I get here?"
Staff member
Moderator
Jul 12, 2012
3,773
4,643
113
Shannon GA
There is another project called 'Liquid Mirror' that is supposed to be as close to a paint on mirror as you can get, but I haven't had the chance to use it myself. The Molotow makes a very believable chrome finish, but the surface being painted has to be perfect, because the chrome shows every blemish.
 

Kolokolnikov

Well-Known Member
Jan 17, 2021
240
1,060
75
41
Almaty, Kazakhstan
There is another project called 'Liquid Mirror' that is supposed to be as close to a paint on mirror as you can get, but I haven't had the chance to use it myself. The Molotow makes a very believable chrome finish, but the surface being painted has to be perfect, because the chrome shows every blemish.

I have something like a liquid mirror effect in a spray can, bought in Leroy merlin. I painted the first version wit this paint. But this spray is good for painting glass surfaces from the inside. If you cover it from the outside, it looks more like a silver paint, but not like a mirror.
 

Attachments

  • 1611207186637.jpg
    1611207186637.jpg
    419.8 KB · Views: 0
  • Like
Reactions: micahrogers