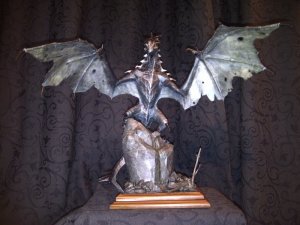
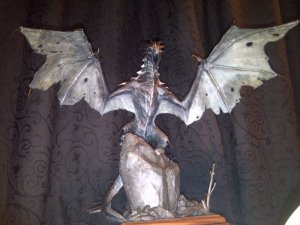
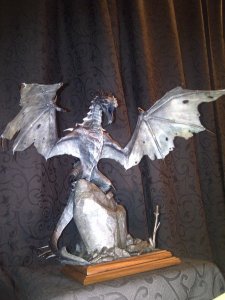
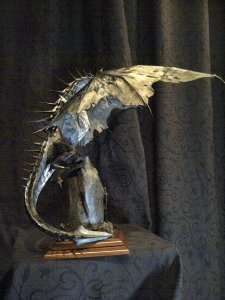
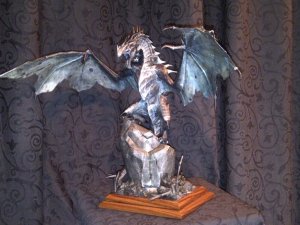
Model Of The Month: Daishi's Frost Dragon by DanBKing

DanBKing

Dan the Man
Shake that Ass! ~ Eminem

But...!

Ok, no butt jokes, please.

But, it is a butt..... Or, the bits of the butt..... :p

001.jpg

So, the bits of the butt are built....!
And the upper side pieces are made ready..

012.jpg

The upper side pieces were attached and the earlier assembled legs were then attached. I want to make sure that the feet sit correctly on the rock, so as I said earlier, this part is crucial to get right, as the angles and attachment points of the internal armature, where it connects between the legs and upper body needs to be accurately aligned.

So, a quick test fit........

028.jpg
027.jpg
034.jpg

The feet and claws all seem to be 'gripping' correctly on the rock. I'm pleased so far...
I still have to add more pieces to the hips to stabilize the structure before I align the leg armatures ready for attachment to the upper body armature....
A few twists and bends required here, obviously.... :rolleyes:

026.jpg


I eventually motivated myself to finish the repairs of the upper body and attach the wing.

I extended the cut off wing armature, using a piece of stiff wire and binding it with thinner wire, then dropping a few drops of CA clue to hold it all together..

016.jpg

Once the replaced wing pieces were glued to the body, the extension piece of the wing armature was attached back onto the main armature in the body with thin wire and CA glue, as before.

020.jpg

I am not happy with my execution of attaching the body to the wings, I found it a hellish nightmare to achieve. I have a few small repairs still to do, but, the main construction is done. But, LOTS of colour touch-ups still to do though. Also, all the damaged spikes I will repair at the end of the main construction.

022.jpg

And at least I can now show you the LAST PIECES of this draconian jigsaw puzzle, cut and edge coloured, ready for assembly.........bounce7
029.jpg

I think, if all goes well, my next instalment will be all about bondage.....

Bondage of the upper to lower assemblies.....:mrgreen:

But there might be a sting in the tale..... But there again, you need a tail to sting.......:rolleyes:

CU!

:wave:
 

Rogerio Silva

Active Member
So, the butt bits are built? Beware: butt bits bite! HOHOHOHOHOH...
Sorry, couldn't miss the (bad) joke... But (here we go again...) your work is great, you've totally surpassed the dreadful happenings and your model is becoming a masterpiece!
 

Revell-Fan

Co-Administrator
Staff member
Administrator
Moderator
:cool: Holy moly! :cool:

Good to see that you are kickin' in the butts...! :mrgreen:

I can't believe that you are indeed assembling the FINAL parts of this monster. Good luck with them! I'll stay tuned! :thumb:
 

DanBKing

Dan the Man
Do I look fat in this .....?

The tab for tab tediousness of attaching the lower and upper assemblies at the waistline, has begun...........

019.jpg

Oh, and a now finely tuned leg armature has been tested for final fitment. As you can see, the rock has no structural purpose any longer. The internal armature now takes all the weight....

006.jpg

I am not going to rush this part, so bear with me. My frustration levels are rather high already at this point.
Figuratively speaking: I can see the seashells on the seashore, but the rip current is keeping me from beaching. :rolleyes:

But, I have a large oar........... :mrgreen:


Try drinking ten beers and saying this:

She sells sea shells by the seashore.
The shells she sells are surely seashells.
So if she sells shells on the seashore,
I'm sure she sells seashore shells.

sign1

:wave:
 

DanBKing

Dan the Man
The Hips Don't Lie ~ Shakira

The back is finally attached.......

005.jpg

Because the alignment of the internal armature is critical for structural integrity, after every tab or two, I needed to cross check everything; twisting, forming and bending all materials, to suit the rock and the base plate and also the dragons alignment to the rock and of course the dragons stance as a whole.........

It has been a constant reforming routine of the internal armature since the beginning. As you know, the armature had to be formed within the model as I went along, this has hindered the build work and time, because you have to work around a long rod when you attach each piece of the model, also to ensure accuracy, the wire/rod can only be bent to the correct angle as each part of the paper joint is formed.
Luckily, I have needed to use glasses as my age has increased, because if I hadn't of been wearing them, I would have come close to, or actually lost, an eye. :cry: I was working on one of the legs, concentrating on attaching the tabs, turned the leg and the end/point of the armature wire hit the right lens of my glasses. I can still see a faint mark on the glass. I don't think my eyeball would of withstood that.

So, maybe a subtle warning to anybody following my technique of this build: USE EYE PROTECTION WHEN WORKING WITH WIRE ARMATURES!!


But, anyway, to pique Zathros' interest again: Back to bondage........:mrgreen:

Once the back was correctly formed, I started forming the thighs.......:rolleyes:
(I am going to get in trouble here, I can feel it...... But, isn't innuendo fun....!! :p :twisted: )

Once the legs were spread the required amount,.... I took my wire and snugly bound the three armature rods together. I wanted to keep them slightly loose for further manipulation if required. Once everything is perfectly aligned, the binds will be adjusted, tightened and super glued. The lower body/hip cavity is going to be filled with foam to firm it all up and bond everything permanently in place. But that will be tomorrows job.
To be honest, when binding the wire, it felt more like surgery.......sign1

010.jpg

It is now just after 1AM here. I gotta get up for work in 5 hours.... I'm going to bed.

Nite Nite

:wave:
 

DanBKing

Dan the Man
Talk about dedication !
After seeing your work, I'll need to crunch up my skill level a lot more before ever attempting to build this model ...

Dedication ? My girlfriend says: Obsession ......sign1

If you have never done this sort of paper modelling before, I would recommend something smaller to begin with, unlike I did. This is my first paper model of a figure. I jumped in at the deep end, so to speak. All my other builds are of spacecraft and trains, which are more linear and the parts more square. The dragon has triangular polys and the technique of modelling this form is very different than normal. You almost have to mould the paper into shape with your fingers as you go along. Spacecraft modelling is all about straight folds and keeping everything square.

If there is anything I can help you with in the future, don't be afraid to ask.

:wave:
 

Rogerio Silva

Active Member
You're getting close to the end, Dan, and soon you'll get that marvelous "misson complete" feeling. I'm already on the edge of my seat!
 

DanBKing

Dan the Man
The tail is coming to an end......!

Leaving off from my previous build post:

I finalized the armature joints, binding and ca gluing them into place. The thigh and underbelly sections, leading to the tail, were closed up. Once I got to the beginning of the tail, I then filled the lower body and hip cavities, with expanding foam to firm the whole thing up and hold everything where it should be.

020.jpg

While this was drying I started the final sub-assembly of the whole model, the end of the tail.
The pieces were prepared and the tip of the tail modelled..

007.jpg
013.jpg

And the final pieces to make up the end of the tail...

015.jpg
019.jpg

Once everything was dry, I attached the end of the tail to the main assembly.

The model is now a sealed cocoon of foam, wire, paper, blood, sweat and tears........ :rolleyes:

All that is left to do now, is finalize the base/rock attachments, repair all the damage still remaining, fit all the spikes still outstanding, do lots and lots of colouring in and then the final coats of sealing varnish.

I will leave you all in peace for a few days while I undergo the finishing touches. When I return, I will have some final pictures of this 7 month old beast.

But, for now, a few low quality teasers......... (And yes, there is a long wire sticking out of the left wing. I'll explain why in my next instalment.)

056.jpg
058.jpg
057.jpg
059.jpg

See you all soon!!!! :mrgreen:

:wave:
 

Revell-Fan

Co-Administrator
Staff member
Administrator
Moderator
This is magnificent! Without the base the dragon appears to be frozen in midair. I'm looking forward to seeing the final pics... Maybe somewhere outside? :rolleyes::rolleyes::rolleyes:
 

DanBKing

Dan the Man
Schade .......

Just to give you all an idea of the damage that has been repaired, or about to be....

One of the "thumbs" broken off....

035.jpg

Spilt seams and lifted areas on the wings and other parts of the body and tail...

037.jpg
042.jpg

The wire that you saw in the previous post, sticking out of the wing, was added for strengthening. The reason this was needed was that the expanding foam did not reach far enough down the part and the top half of the wing was drooping forward, The section circled in red on the photo, shows the weak spot, and the resulting creases/splits. I couldn't get in there to add more foam, but to be honest, I did not want to take the chance of blowing the wing apart if I used too much foam. So, I made a small hole and pushed a length of wire through the hollow section and into the hardened foam further up the arm (the orange line in the photo shows this.) The point where the wire enters the knuckle was hardened and strengthened with ca glue and the wire nipped off. Now that it has been coloured black, you can hardly see the repair and the wing is now firm and correctly positioned.

043A.jpg

Lots of edges and badly jointed seams needing colour repair. It is this that is taking the most amount of time.
Everything is being coloured with water-colour pencils and then blended with a damp thumb/finger tip.

039.jpg

A visit to the dentist is still required. That will be the last thing I repair before I seal the whole model

041.jpg

Most of the horns/spikes need repairing on the tips...

047.jpg

...or, the whole spike/s.........:curse:

046.jpg

Still some areas damaged from foam soakage and mishandling.

049.jpg

And a terrible finish on the upper section of the tail. I'm not sure what went wrong there. I am hoping I can salvage it, otherwise I will have to re-build the tail ....wall1

052.jpg

Final photos soon!!! ('studio' and 'nature' shots. (Nature shots as requested by Revell-Fan. ;-) ))


:wave:
 

zathros

*****SENIOR ADMINISTRATOR*****
Staff member
Administrator
Moderator
You could always paint with watered down paint, the seams up to the next shade. I think some of those uneven surfaces give a realism to the model. To my eye anyways. I would suggest going to a welding store and getting .040"or thinner, I forget how thing they sell it, Tig welding wire sticks. This stuff is strong. You can also use piano wire from a hardware store. The trick is with thin gauge wire, is you tire one end to a fixed surface, the tire the other end to a wood dowel, and gently and firmly till the wire is extremely tight, keep pulling and it will all of a sudden pull out and you have in effect, hardened the wire. The small pieces you cut will be stiff, like a pin. This allow the use of small diameter wire and hide it into the part. :)

http://www.beadinghelpweb.com/basics/hardening-wire/
 

DanBKing

Dan the Man
You could always paint with watered down paint, the seams up to the next shade. I think some of those uneven surfaces give a realism to the model. To my eye anyways.

I use very wet tips of the pencils, the effect is the same.


I would suggest going to a welding store and getting .040"or thinner, I forget how thing they sell it, Tig welding wire sticks. This stuff is strong.

Precisely what I am using.... :mrgreen:
 

DanBKing

Dan the Man
Yyyyeeeeeesssssssss!!!!!!

Ladies and Gentlemen,

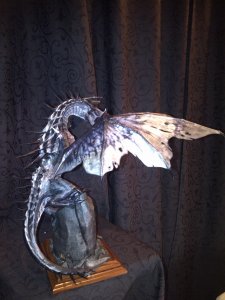
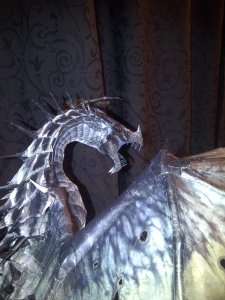
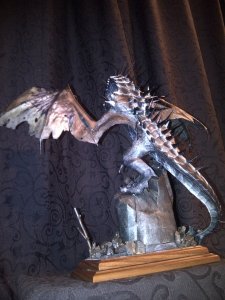
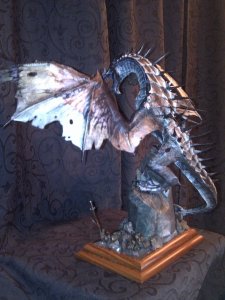
IT IS DONE!!!!!!! :mrgreen::mrgreen::mrgreen::mrgreen:

I have taken nearly 390 photos with my SLR last night. I still have to process the RAW picture files and convert them to JPG. I just couldnt keep my eyes open anymore last night to do them, so I will process the files tonight instead.
These pictures will also include 'nature shots,' to satisfy those wanting ......:mrgreen:

In the meantime, here are a few pictures I took with my phone camera last night.

ENJOY!!!!!

IMG-20130721-02437.jpgIMG-20130721-02439.jpg

IMG-20130721-02440.jpgIMG-20130721-02443.jpg

IMG-20130721-02446.jpgIMG-20130721-02447.jpg

IMG-20130721-02449.jpgIMG-20130721-02452.jpg

IMG-20130721-02457.jpg

I will see you all later on tonight with more.

:wave:
 

daishi

Well-Known Member
Ok that's .... SERIOUSLY COOL!

I think that's about my favorite built so far (mine are excluded cuz im partial :p)

But seriously I love how it looks: that stand is very cool, the colors on the are very cool, also everything else is is very cool too.

Congratulations!
 
Top