

Yes, figures are among the most difficult works on paper. My figure is one of the few I have where the face is split, all the others you only need to glue 2-3 times on the forehead and round, it's easier. Of course, in my inexperience with figures, I had to start with a complicated top. But I'll get there, for the time being I'll keep my distance from Miruku...
MIKURU - Animefigur
- Thread starter Walter2
- Start date
You are using an out of date browser. It may not display this or other websites correctly.
You should upgrade or use an alternative browser.
You should upgrade or use an alternative browser.
I can understand and feel how it is to give up or pause on things where you tried and tried and it will not work out for you. For me it comes with frustration, exhaustion or laziness. I have many ideas or beginnings for short stories, songs, drawings etc.The squirrel eats with difficulty... Almost impossible without a ‘third hand’. I don't understand why these figures have to be square?
Just wanted to say, that head in post 11 already looks good and on the whole finished model flaws may not be that much apparent anymore

Thank you for your encouragement. I owe it to you, so an hour ago I decided to start all over again, I just can't get any peace. I'm going to replace it with thinner paper, which I'll stick to the back - I've already tested it and found it to be good.
When I worked on the Tie shere I have switched to use label stickers. These are very thin and easy to glue.
- Apr 5, 2013
- 13,876
- 10,214
- 228
Water form the cut facial piece with a damp sponge, using a rounded edge dowel the appropriate size. Fit each piece to the next, till it meets your requirement. When glued and dried, the face can be touched up from the back side the same way, though be careful with water soluble glues. If you use a lot of strips, you may be able to do it dry, if the paper shreds a little on the backside, who cares, a dollop of glue will strengthen again. You will need, maybe a mouse pad thick piece of rubber to put the outside face against, so you don't go too far. Dragging works better than pushing, though an Almond shaped dowel could do a whole forehead. My 2 cents worth. Another method would be to start with very thin paper for the face, build up the interior, Gluing the strips to each other, but not to the face. The sand the "buck" face, Moisten the final cover, and lay it onto your finished buck, Gently use a tissue, also slightly moistened to get the 2d paper to take the compound curves. I tried this method, and had good results, it would have taken me a couple more to master it, but it was just sitting on a neck in a R/C aircraft. At 60 mph, you could not make out details, and the plastic canopy covered much.
")
Last edited:
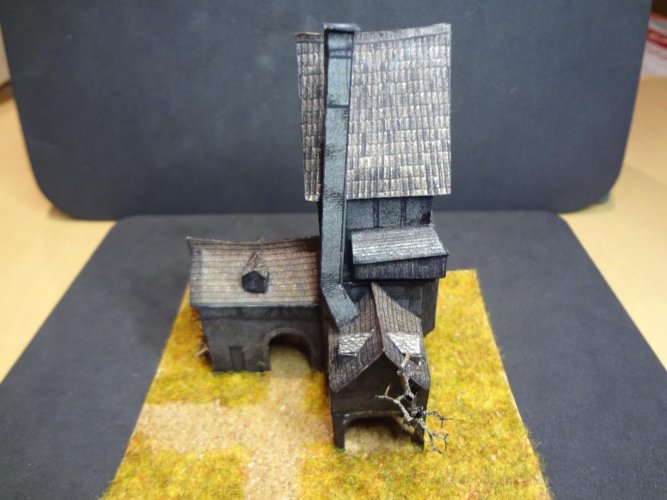
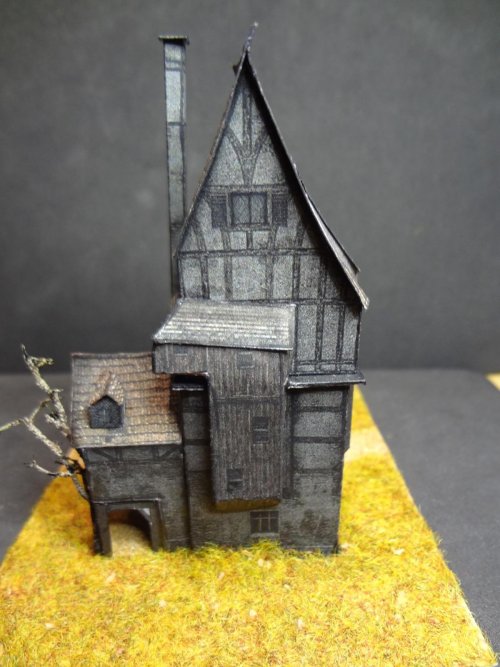
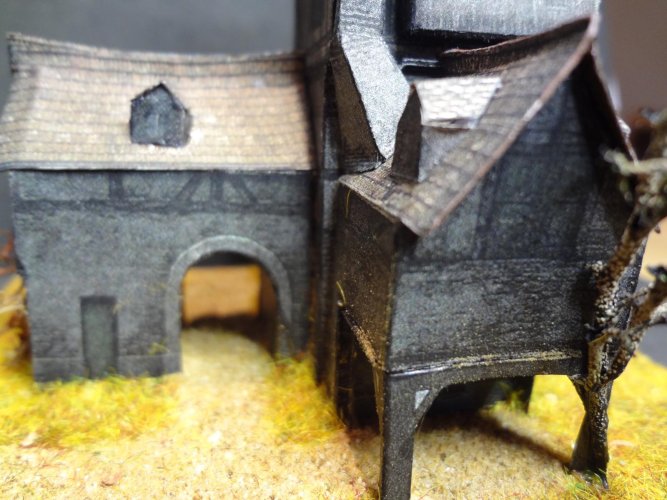
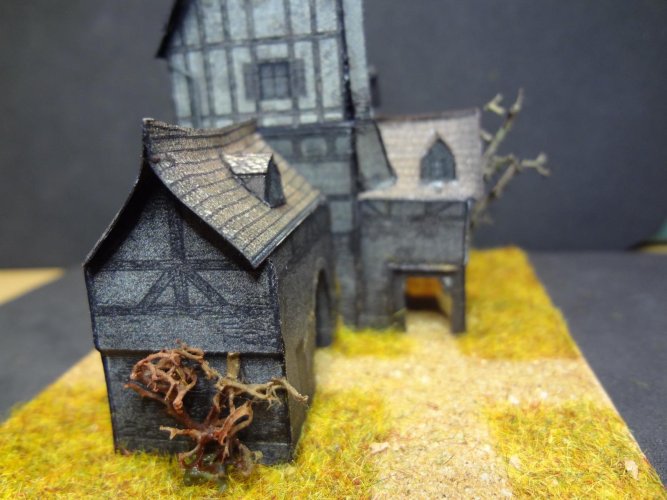
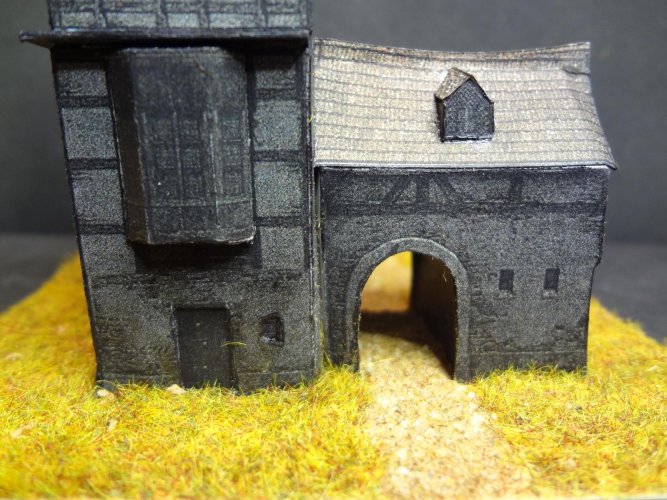
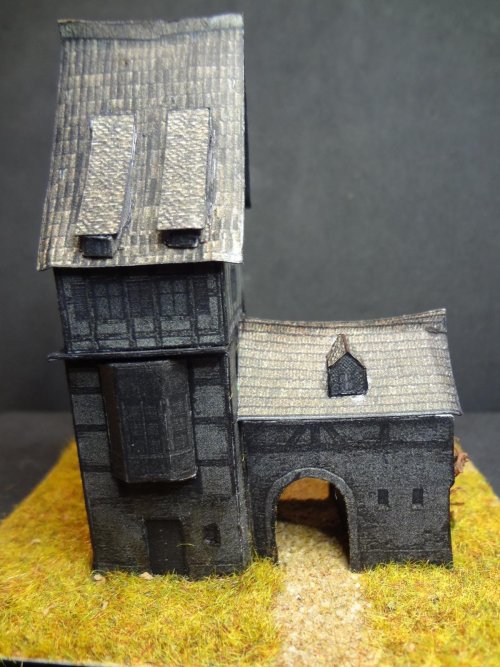
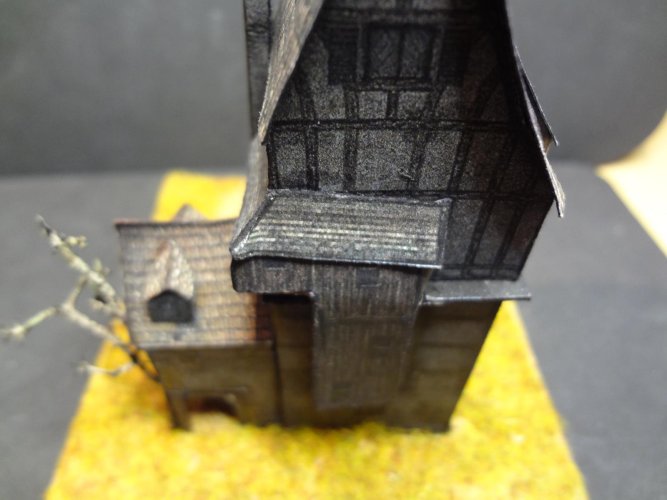
I had to take a short break from my figure - it's killing me. To relax in between, I finished off the “old forge”. Now I'm starting again with the figure - but from the bottom up, face to the end.
Attachments
-
 K1600_DSC05359.JPG186.4 KB · Views: 4
 -
 K1600_DSC05360.JPG243.4 KB · Views: 4
 -
 K1600_DSC05361.JPG269.6 KB · Views: 3
 -
 K1600_DSC05362.JPG238.8 KB · Views: 4
 -
 K1600_DSC05363.JPG218 KB · Views: 4
 -
 K1600_DSC05364.JPG350.4 KB · Views: 4
 -
 K1600_DSC05365.JPG343.4 KB · Views: 4
 -
 K1600_DSC05366.JPG160.7 KB · Views: 4

That's what you can achieve when you forge on ......I had to take a short break from my figure - it's killing me. To relax in between, I finished off the “old forge”. Now I'm starting again with the figure - but from the bottom up, face to the end.
")
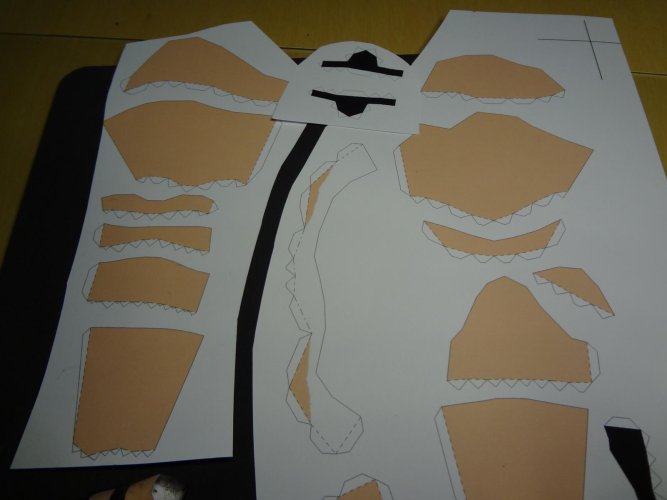
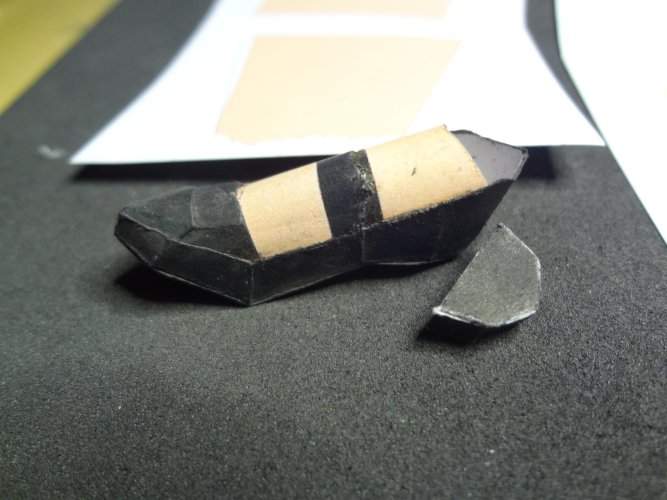
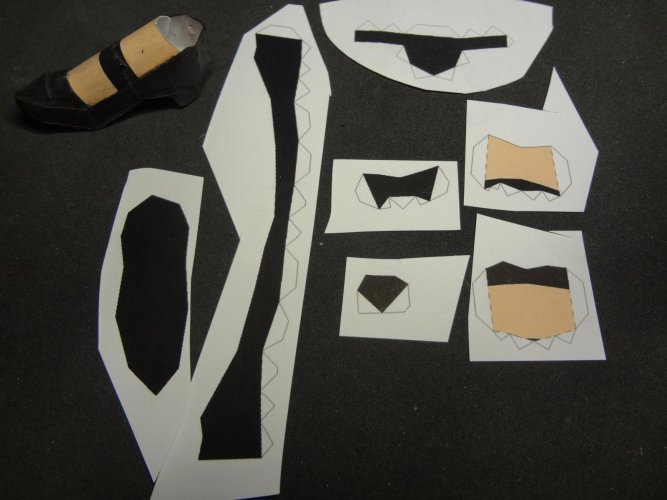
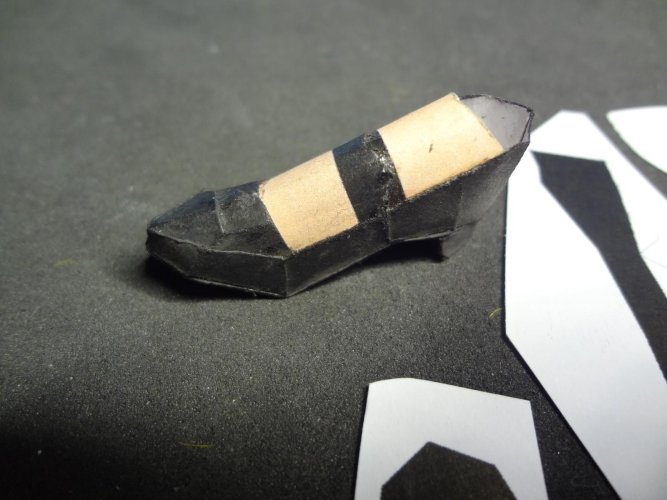
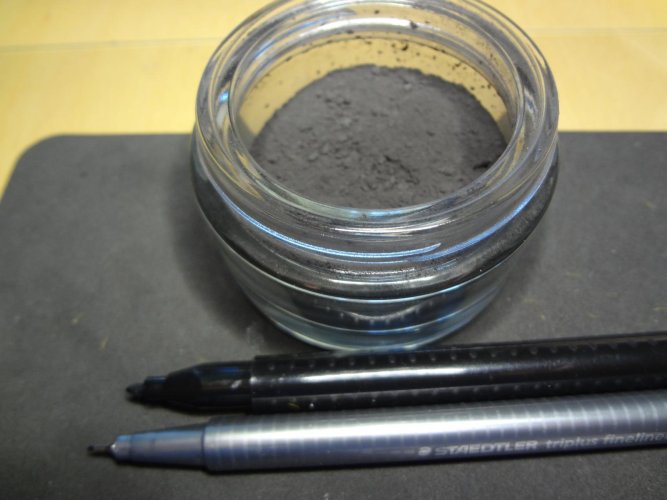
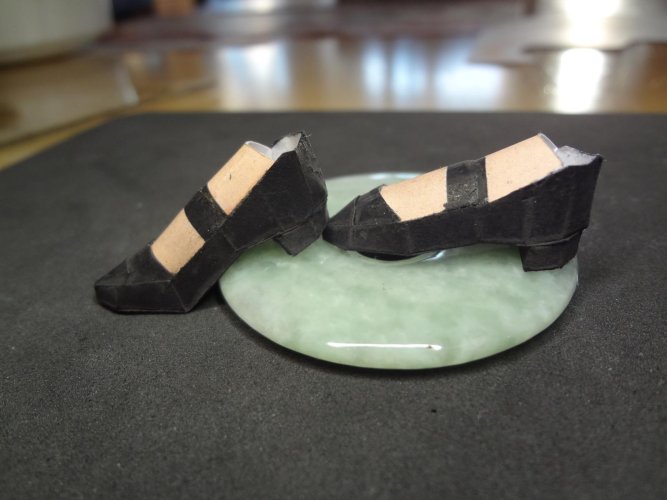
the shoes are finished, but they are not the same (see picture of the figure in the second post). thought I had made a mistake. I continue with the legs...important helpers are finereader and pastel crayon powder.
Attachments
-
 K1600_DSC05367.JPG126.4 KB · Views: 2
 -
 K1600_DSC05368.JPG111.8 KB · Views: 2
 -
 K1600_DSC05369.JPG106.9 KB · Views: 2
 -
 K1600_DSC05370.JPG213.6 KB · Views: 2
 -
 K1600_DSC05371.JPG184.3 KB · Views: 2
 -
 K1600_DSC05372.JPG189.6 KB · Views: 2
 -
 K1600_DSC05373.JPG160.4 KB · Views: 2
 -
 K1600_DSC05374.JPG165.4 KB · Views: 2
 -
 K1600_DSC05375.JPG163.2 KB · Views: 2
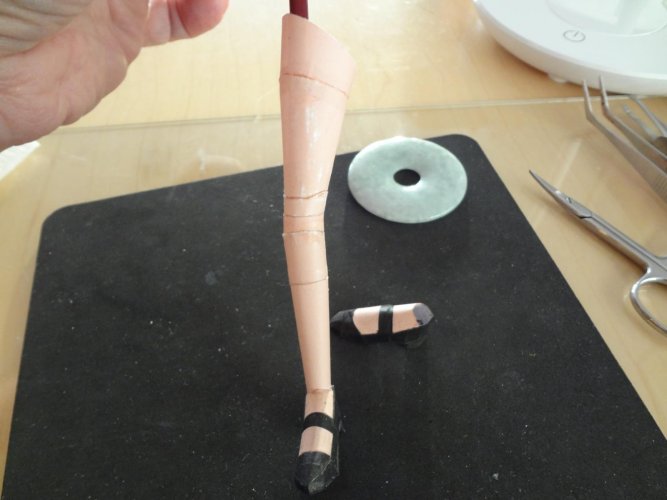
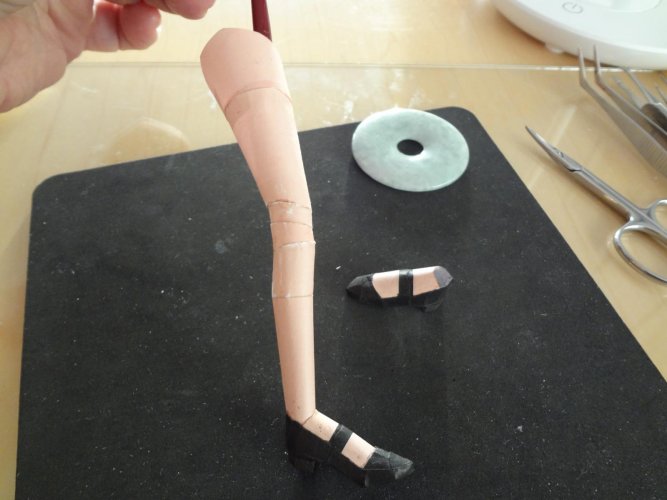
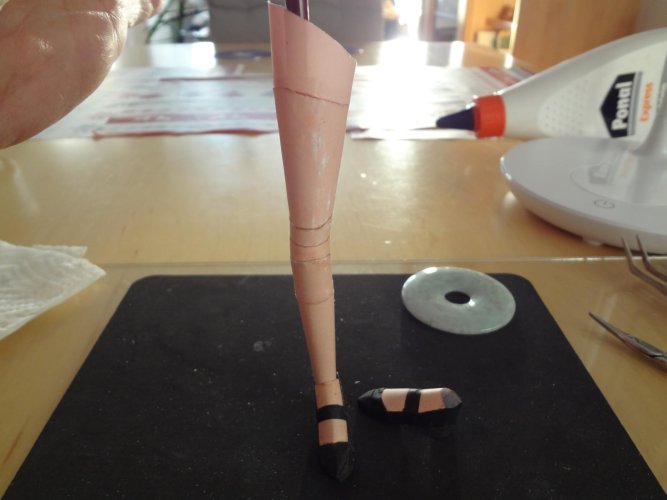
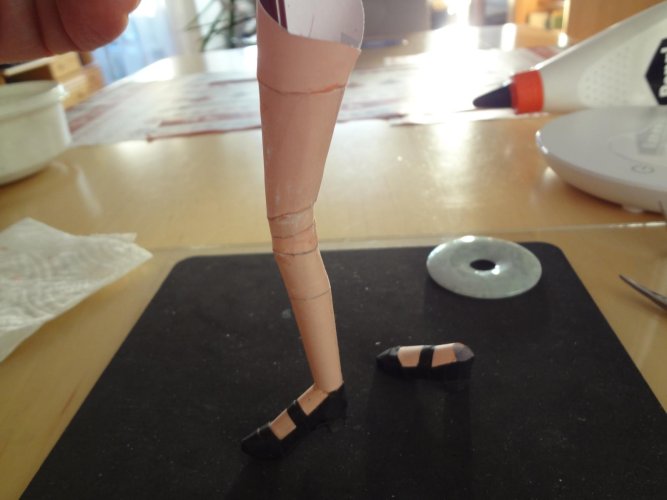
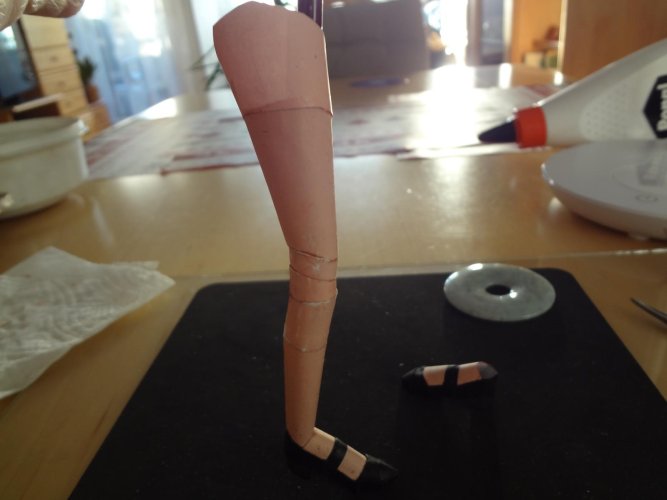
right foot ready. Don't be irritated by the sanding work, unfortunately it is essential despite having your own adhesive folds. The figure will be airbrushed with new skin color after completion.
Continue to the left foot...
Continue to the left foot...
Attachments

wait until you see the other one... 
By the way, the figure is 23 cm (0,82021 ft) high
By the way, the figure is 23 cm (0,82021 ft) high
Last edited:
I hear a ZZ-Top song playing in the background somewhere..... 
Nice leg(s)!!
Nice leg(s)!!

Yesterday we watched "A Private Function" starring Michael Palin. Your leg reminds me of the scene in which the inspector drew a line on the back of the leg of his crush to pretend she was wearing silk stockings. Ok, I know it's not "your" leg, but technically it is. ... I'll better stop writing now... 

well, what can I say - I haven't managed any better and the accuracy of fit also leaves a lot to be desired. But I hope it will look better after a bit of sanding and airbrushing.
I give up - Pepakura cannot be used for such figures. Since you never know exactly where to “fold”, nothing fits together over time. The glue joints look horrible. The program is ok for other models, but not for such demanding figures. But I still have a lot of figures in stock as pdf. I will return to my “normal” models for the time being, as I have a large selection.

I'm sorry to hear you have to stop building the figure you started so good.
So now I'm looking forward to see what your next build is going to be.
So now I'm looking forward to see what your next build is going to be.
- Apr 5, 2013
- 13,876
- 10,214
- 228
When (if) you get to the head again, consider cutting out the eyes, printing another set, sand the edge of the holes in the edge so that they are smooth. Place a film of "Saran Wrap" or an plastic cling film over the new eyes and mount them inside the head. It makes the eyes look real. You could go all out and do the pupils too. I did this once, it felt like the head was looking at me.