M4A4 Sherman VC Firefly, Halinski 1:25

micahrogers

Moderator "Where am I, and how did I get here?"
Staff member
Moderator
Okay, now how do I bookmark this video. or find his referenced videos?
 

zathros

*****SENIOR ADMINISTRATOR*****
Staff member
Administrator
Moderator
If you use the Videodownloadhelper plug in, in "Firefox", you can download the video. :)
 

snake7

Well-Known Member
Incredible work!

Figured this very long video is relevant to this subject... I'm listening while I'm work, but I'd listen while I built models too!


All about the Sherman... What a tank!

Thank you Sudsy. Watched it all - very interesting discussion!
And thanks to all.

Back to simple stuff.
Storage boxes. Big one has a rack for MG ammunition.
I've build all 12 ammunition boxes. 6 go to this rack and another 6 to rack on the other side.
Also little boxes one on each side.

sViYT1.jpg


OeWTgN.jpg


xRQEOF.jpg


sqO3Zi.jpg


RYMPlt.jpg


ZsPxNc.jpg


7FdE8t.jpg
 

snake7

Well-Known Member
Thanks again!
Sudsy - yep, already saw this walkaround :)

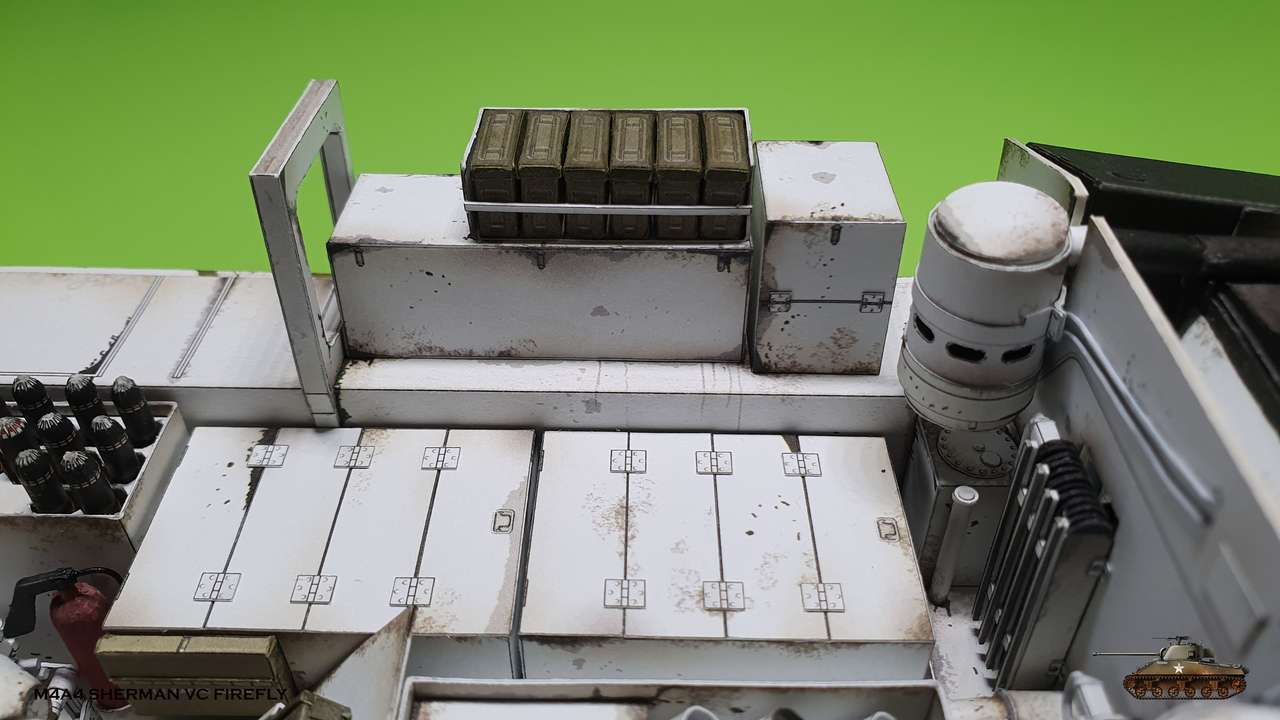
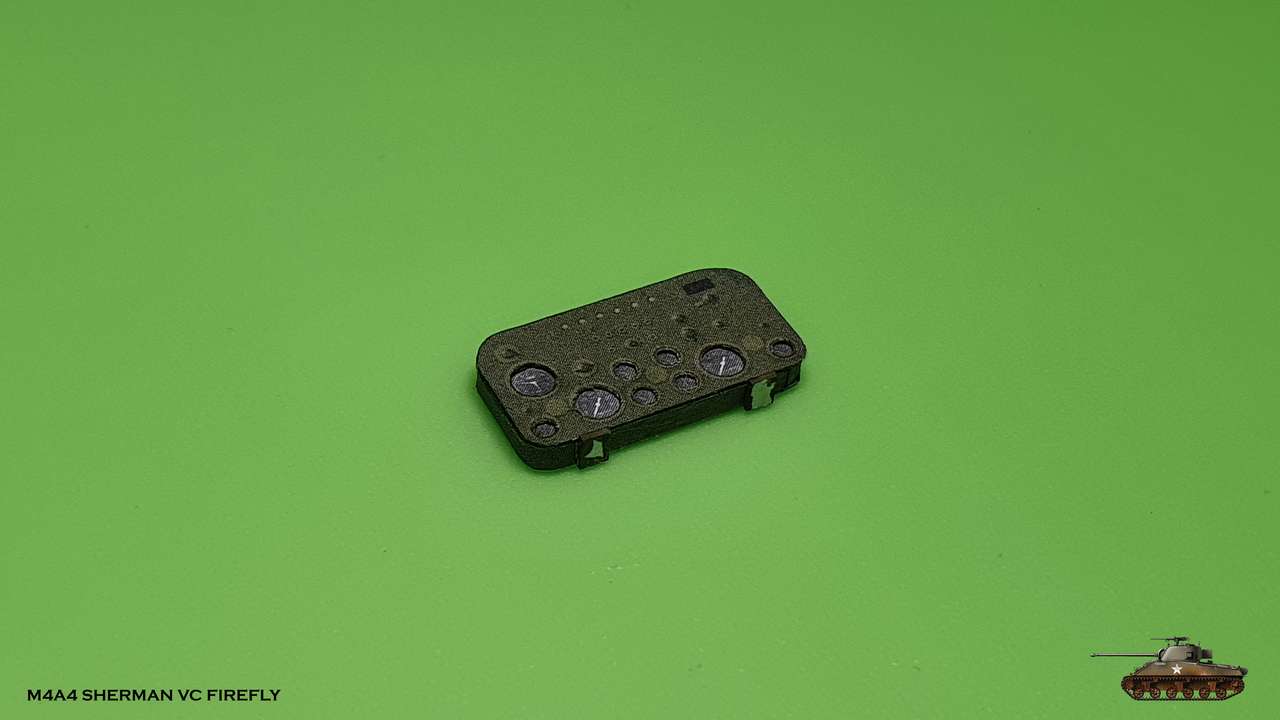
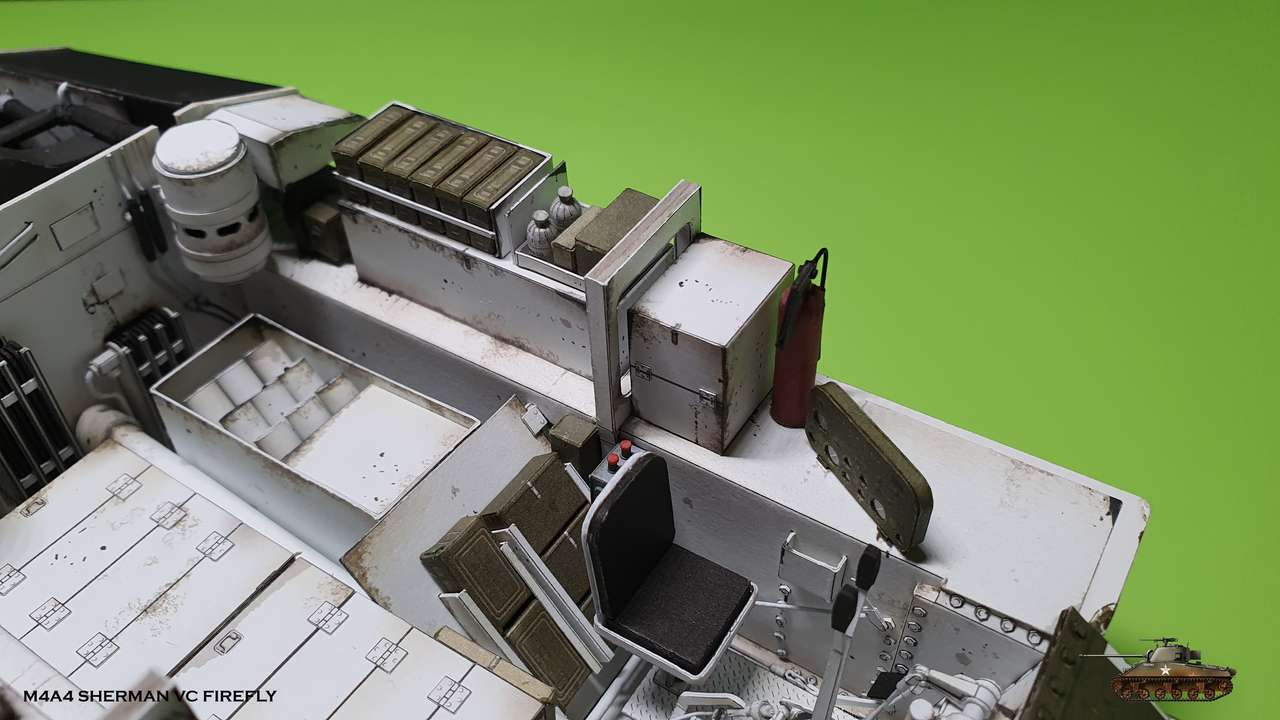
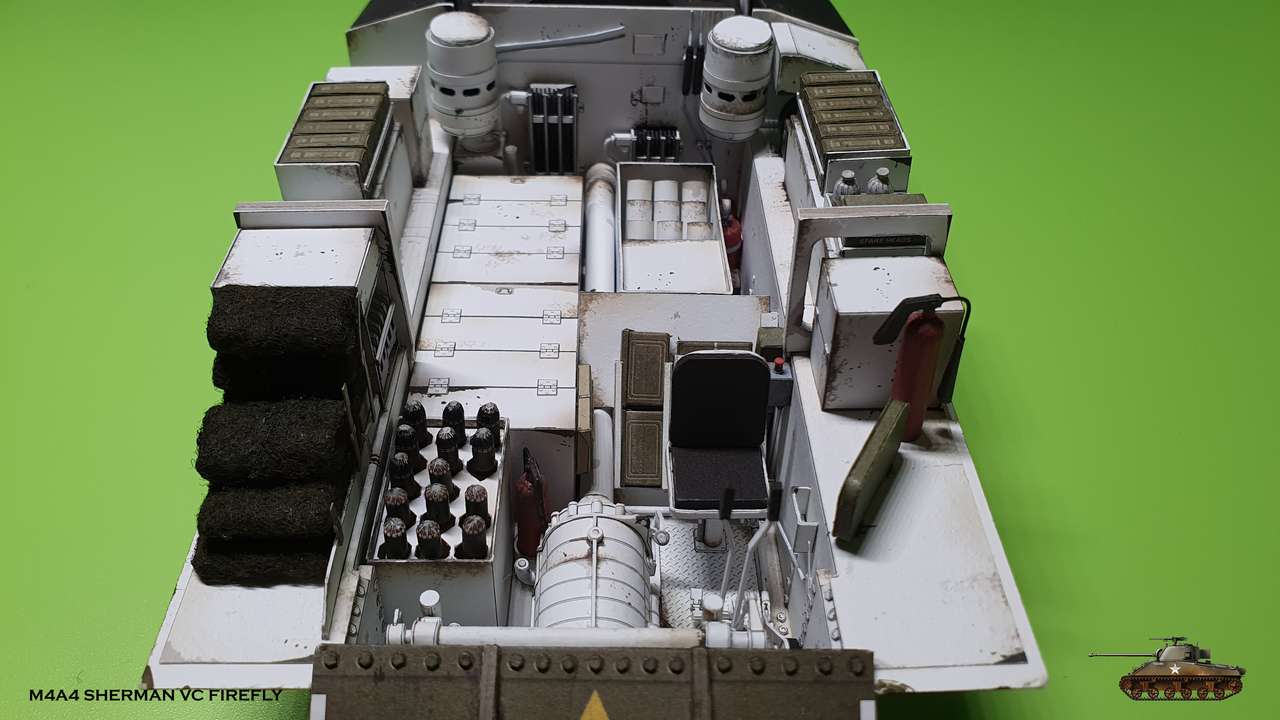
I found nice info about all the staff in there, so remember the first box near the firewall of engine compartment - it contained vehicle tools: wire, fuel tunel stand, replacement bulbs, lamp etc.

Continue with right upper side.
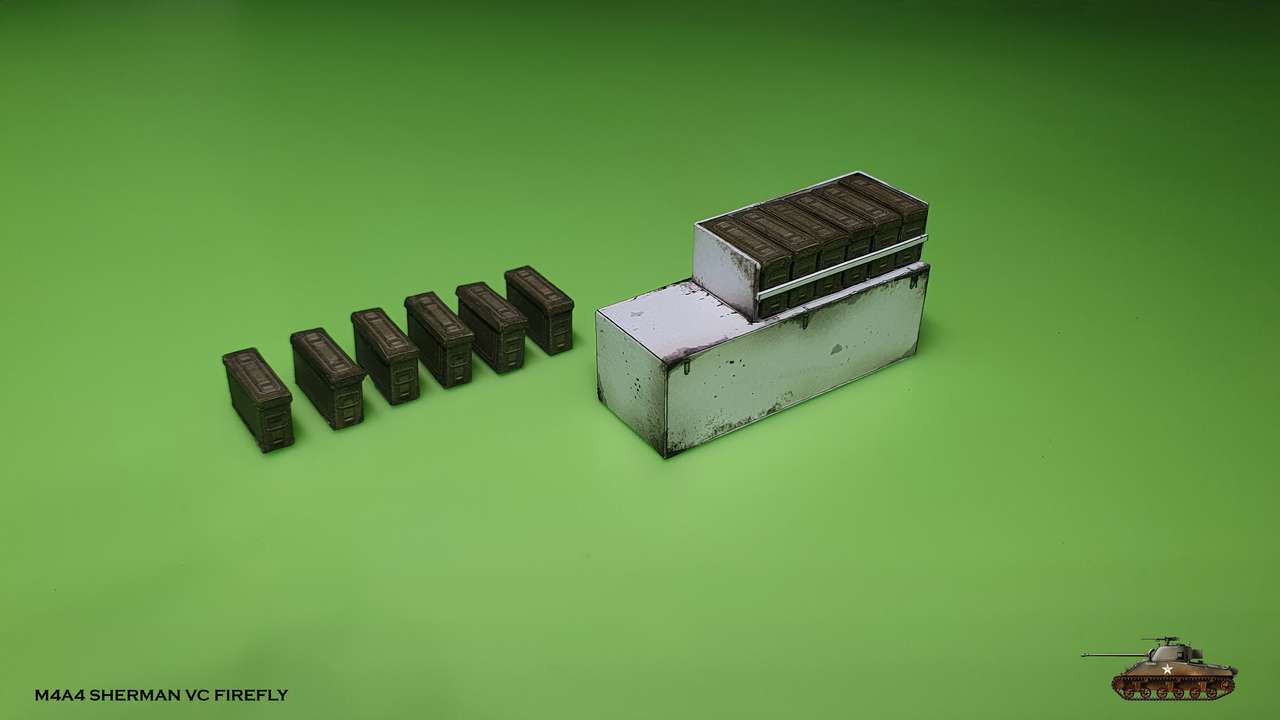
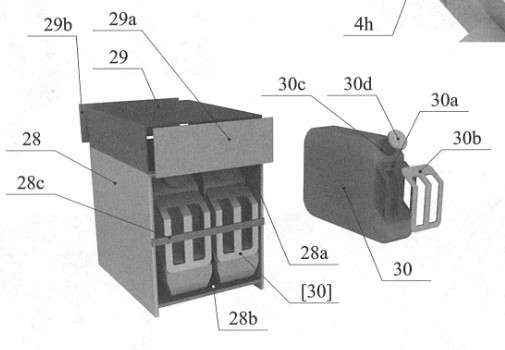
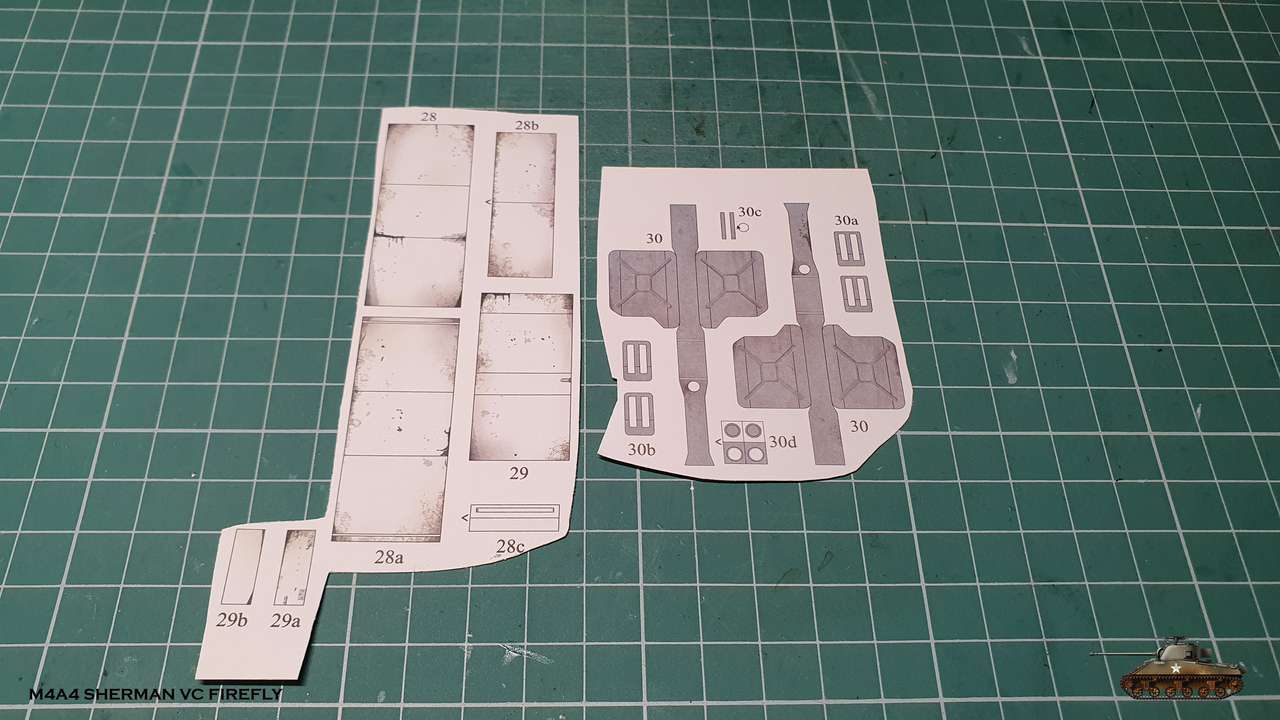
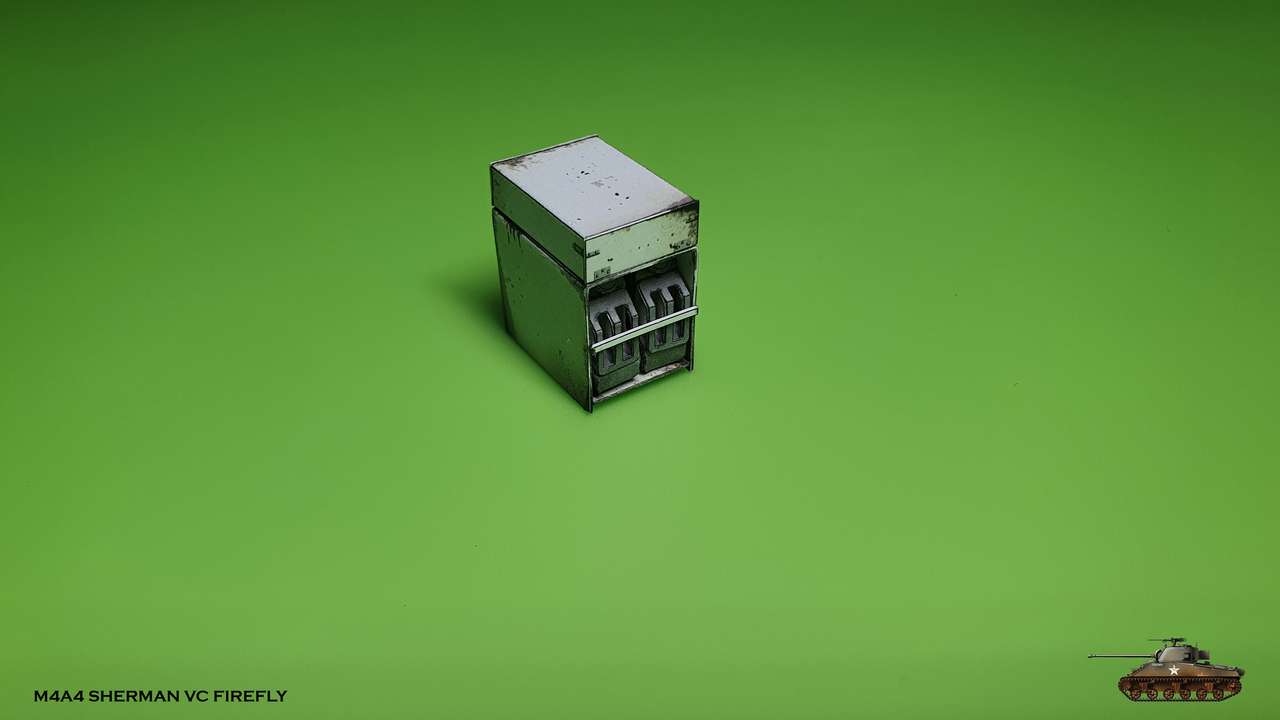
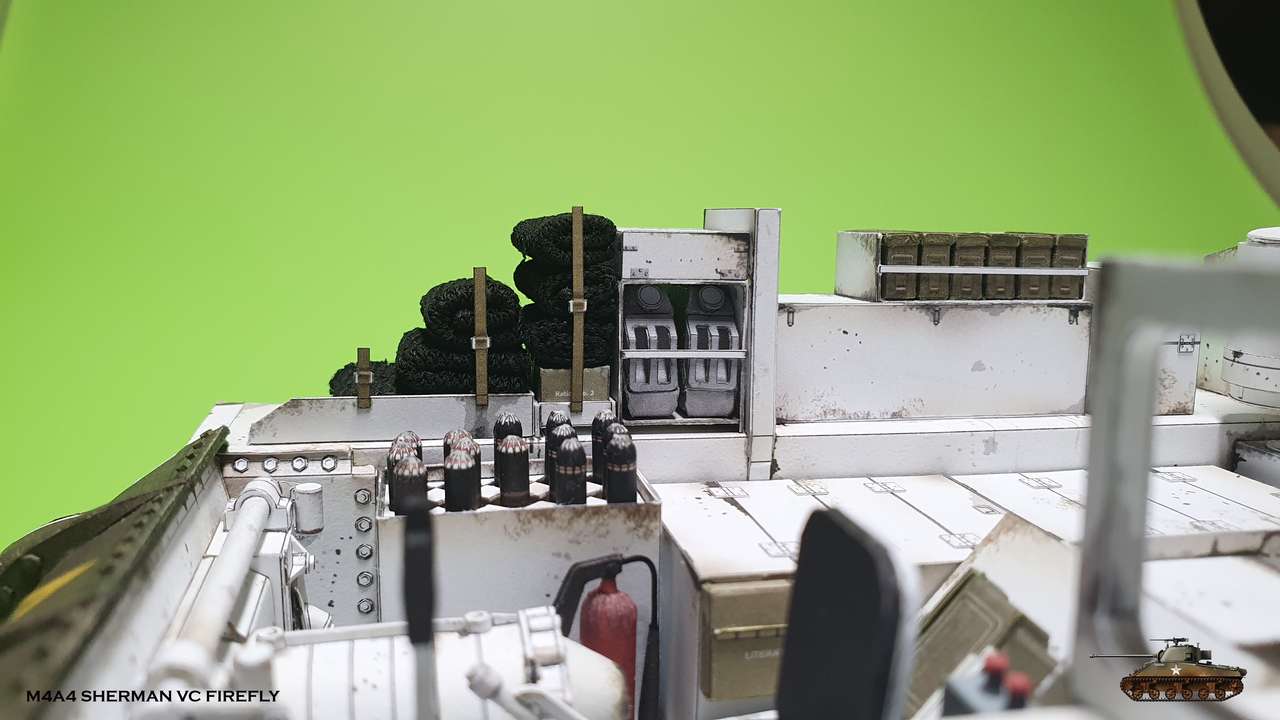
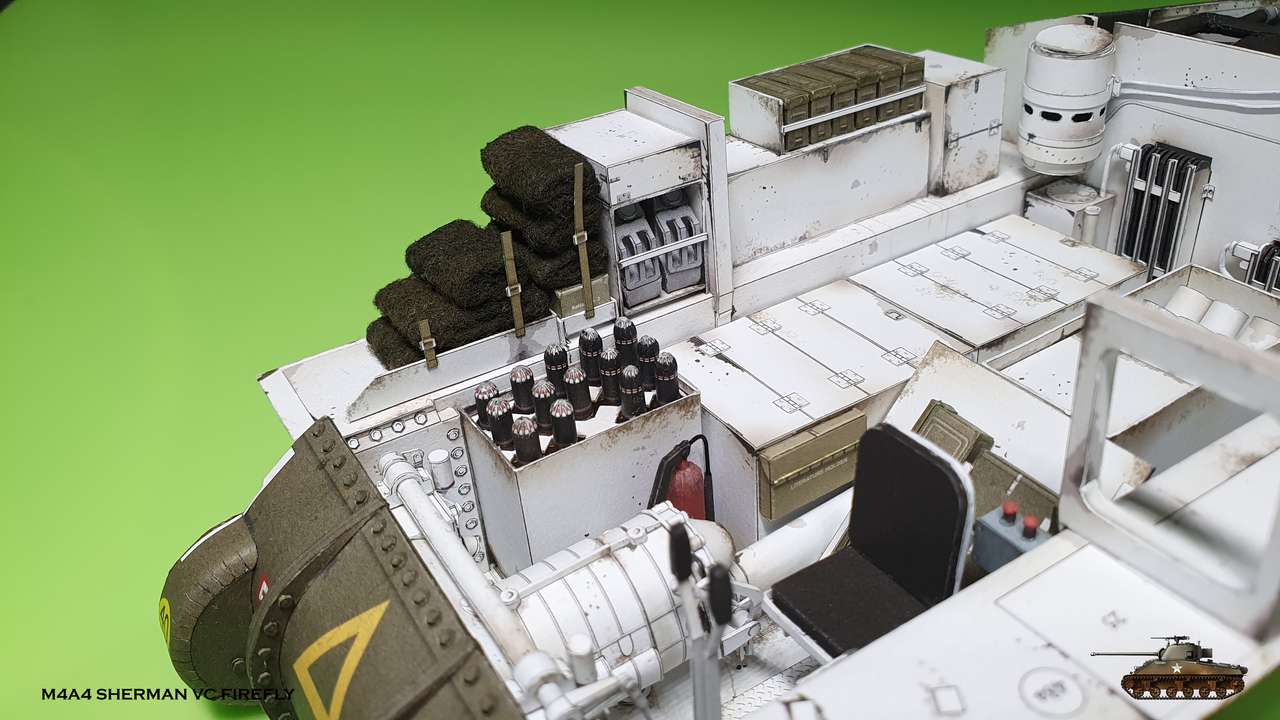
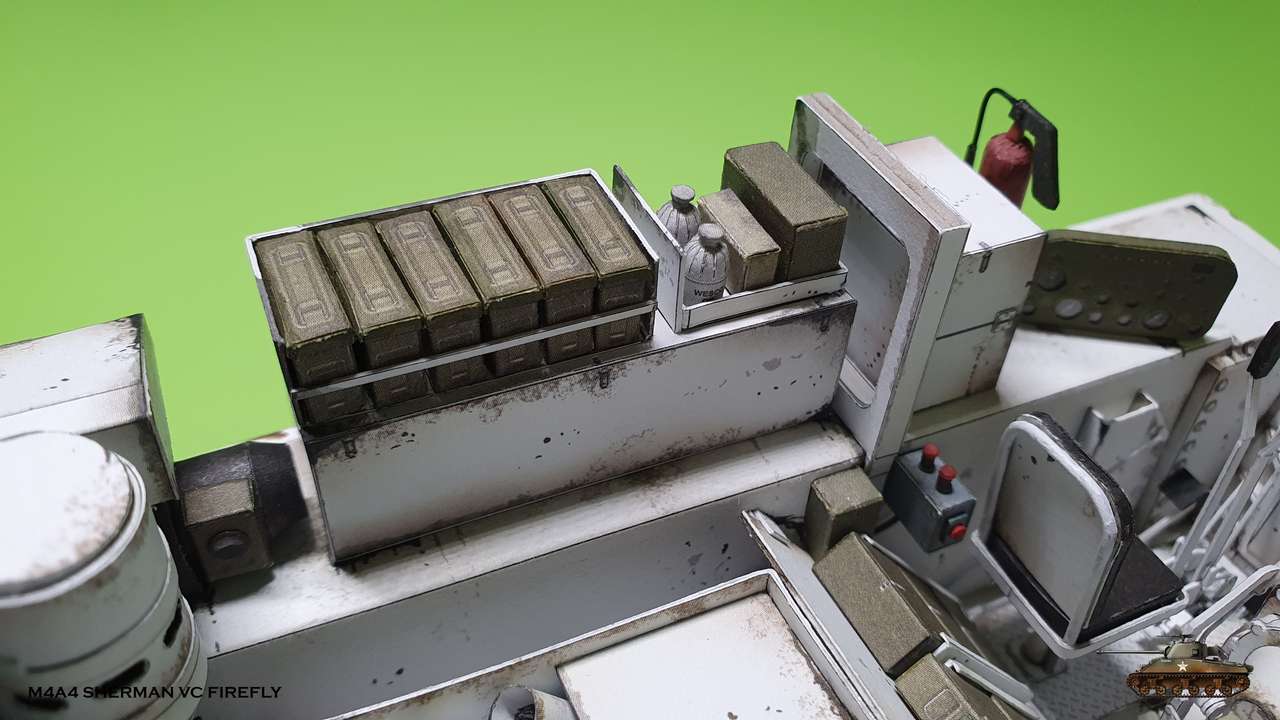
Rack for two water jerrycans and a little shelf with biscuits (realy!)
Fun Fact: jerrycan name came from World War II. Germans first introduced this design for fuel cans. When Allies saw the can they called it Jerry Can, because german soldiers were nicked Jerries. Latter everyone copied this design and so it became jerrycan. :)


xmyqqm.jpg


PjNadK.jpg


qmnNqs.jpg


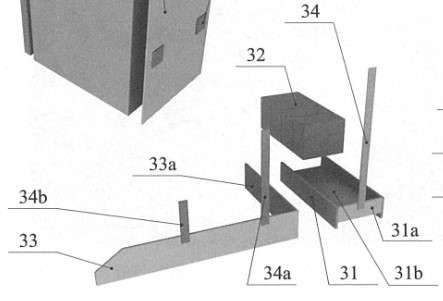
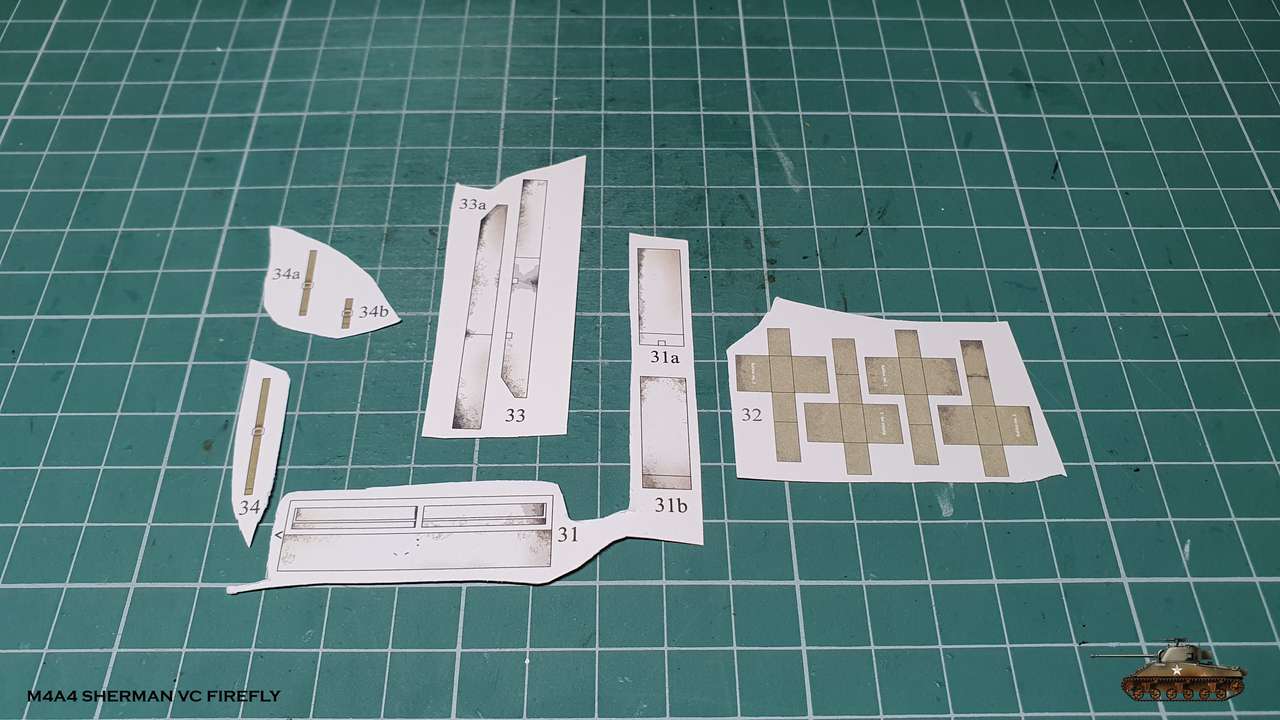
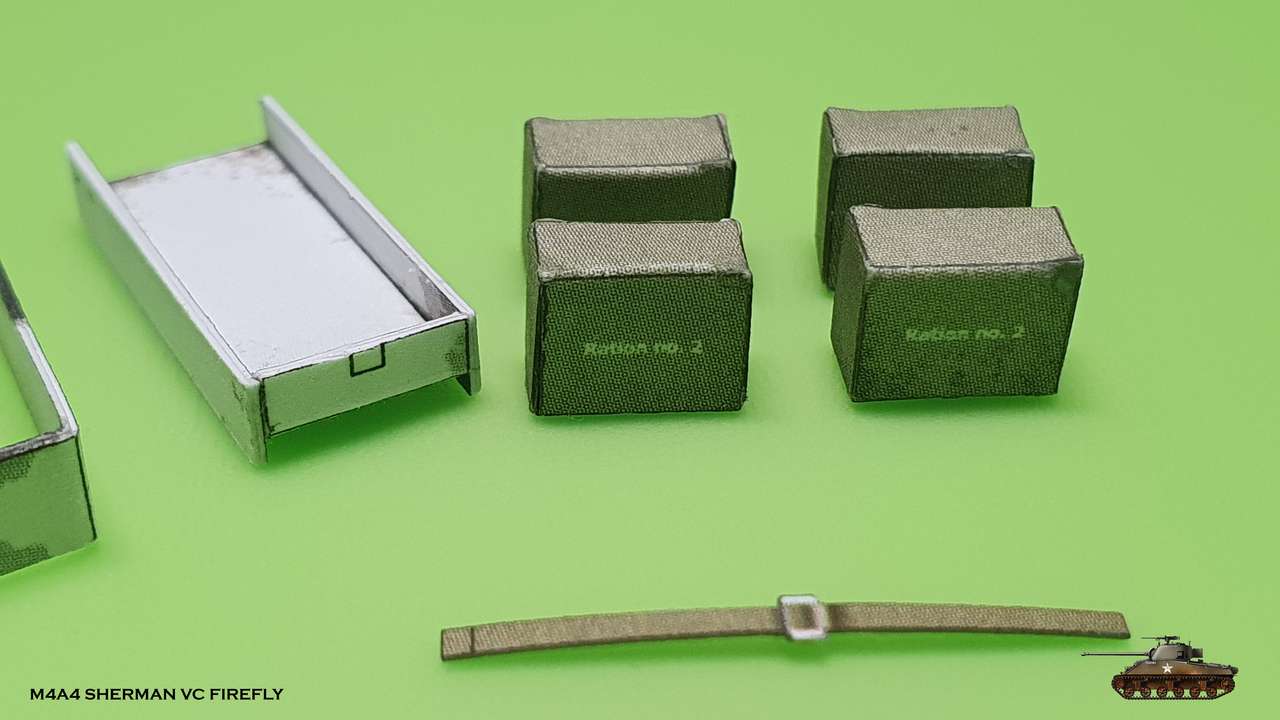
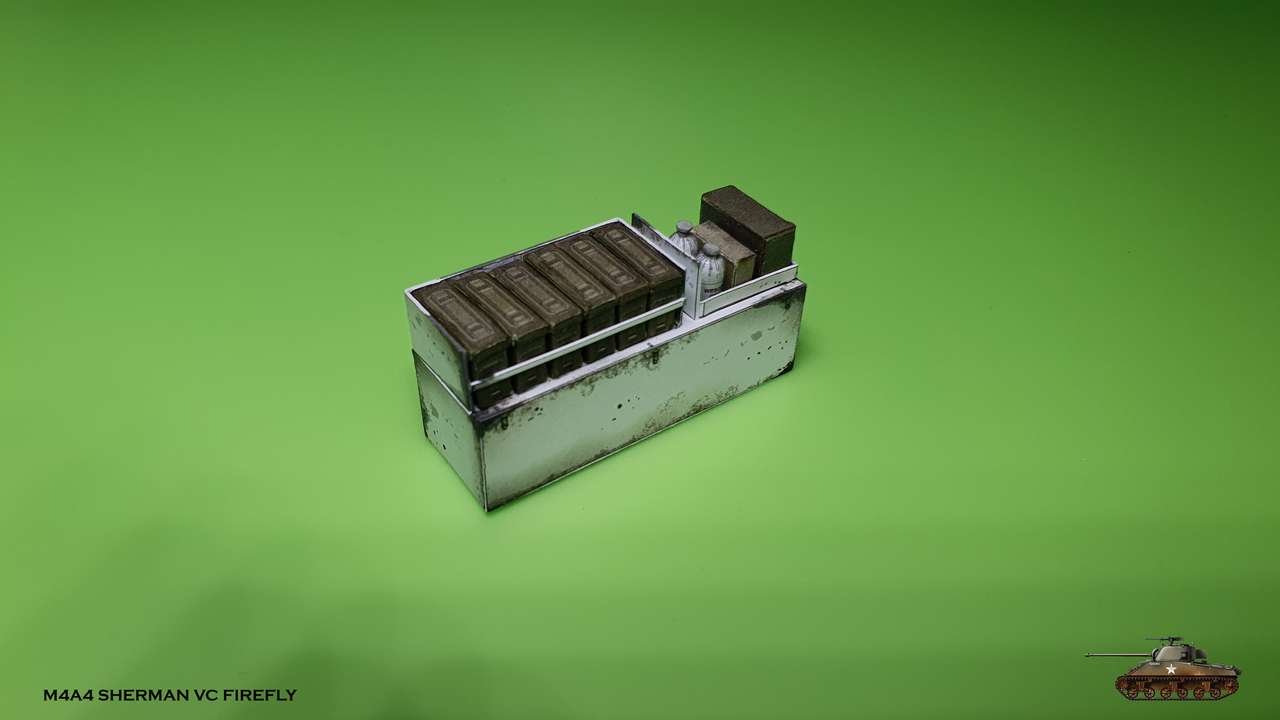
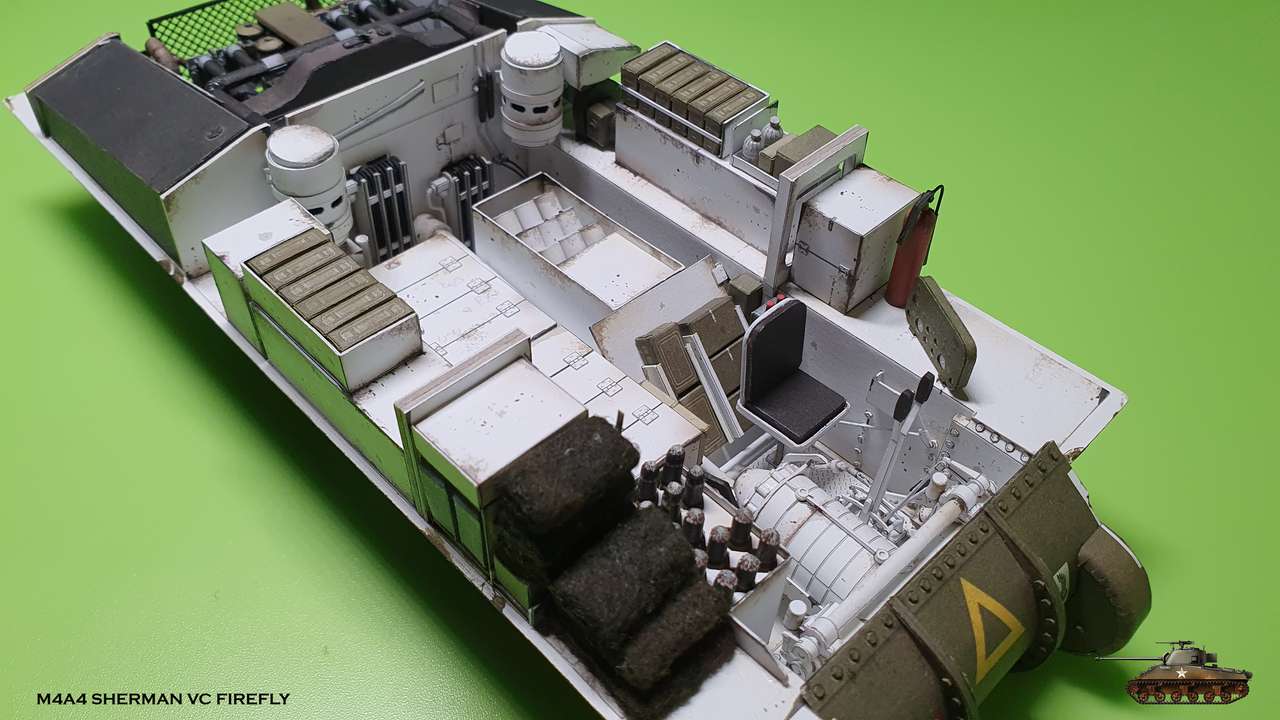
Next is shelf for 4 boxes of food Ration #2 and a lot of blankets.
I did them from old sock and painted dark green.. Sorry, but on the picture it slided to more dark almost black. The straps are ok, they do not need to overlap the blankets. Upper end was attached to upper plate. That way they prevented blankets falling from shelf.
I assume this was the favorite corner for all crew - food and warm blankets ;)

QHbdDS.jpg


OVPe2w.jpg


e2PF1N.jpg


FW3Q50.jpg


xa2A12.jpg


4xjTN6.jpg


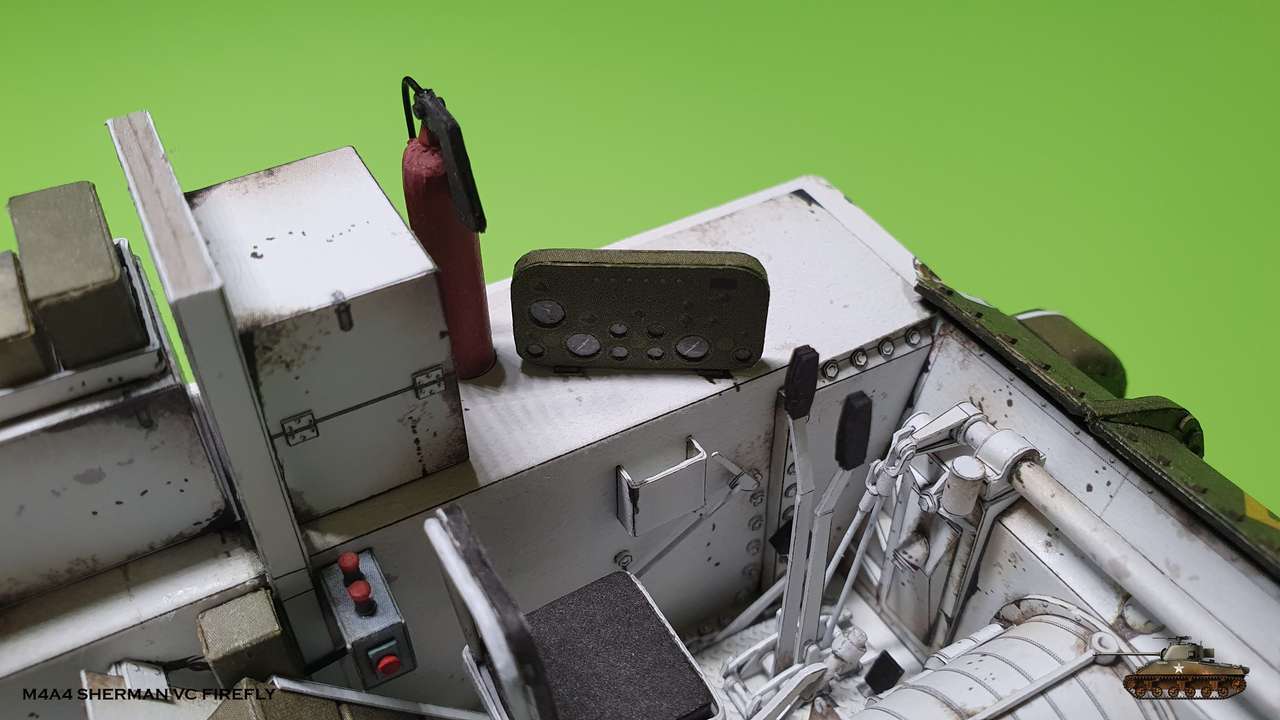
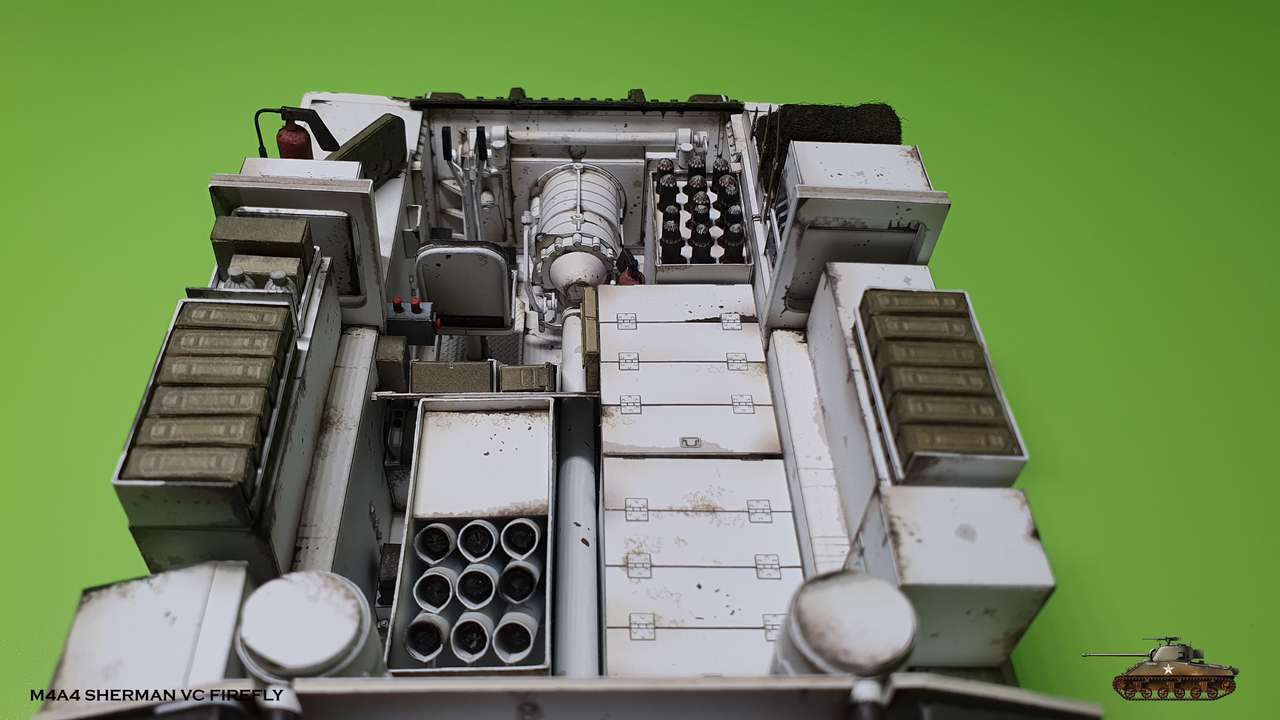
That's all with right side.
 
Last edited:

zathros

*****SENIOR ADMINISTRATOR*****
Staff member
Administrator
Moderator
This good easily be displayed in a mlitary museum. Make an Argon filled glass box, with U.V. protection. You only need enough gas to displace the air, and the model will last a very very long time. It so awesome. :)
 

snake7

Well-Known Member
After criticism and advices on other forum, I changed material of blankets. Now it is from kitchen cloth, that in my opinion looks like wool.
I'm more than satisfied with the result.

EbRW8I.jpg


And back to left side - auxiliary generator unit.

CF5xNz.jpg


Vvj51X.jpg


Here i met another interesting solution to make assembler's days easier.
There is a need to assemble spherical part. It comes with spare strip.
You cut it all together and then it is easier to roll and glue the part.
After you glue the sphere itself you must to remove the strip.
When i cut the detail from book - i drew along a line weakly with knife and that give me easy start to remove the spare strip after.

9y6RGK.jpg


BprCE0.jpg


zUfOQF.jpg


Then i assembled the rest of the generator parts and glued it to place, where exhaust pipe was already awaiting to join :)

zlDp2k.jpg


O9q8Yb.jpg


xvPWiI.jpg


55eaBI.jpg
 

Rhaven Blaack

!!!THE MAN BEHIND THE CURTAIN!!!
Staff member
Administrator
Moderator
Everything is so very clean, crisp and clear! This is really coming together beautifully!!!
 

snake7

Well-Known Member
Thanks Rhaven

Well, continued with another big storage box for spare parts and rack for remaining MG rounds. Also there are 2 oil cans and one spares and tools pauch + one periscope spare heads box.
In addition i assembled instruments panel. Added transparent film between layers, to imitate glass.

8YB6dF.jpg


pI4aBw.jpg


JhUkrW.jpg


tgWoKv.jpg


ud5WOV.jpg


Other parts for left side were already been assembled (tools box and extinguisher), so this side filled up fast

WuhyK4.jpg


pnuaah.jpg


eNVIJt.jpg


And suddenly all the interior for now was finished, as also another big step in assembling!

wokuEr.jpg


oUTivd.jpg


LEFdSo.jpg


cWwo60.jpg


Next step is to close the "stern" and then to assemble upper hull part
Stay tuned...And a little bonus, as usual ;)
 

snake7

Well-Known Member
After completing big stage , I let myself to take a little brake. Morevore it appears to be that i completed one year of building (not including tracks, which time i still will keep in secret ;)). I suppose I completed third of a model by now.

Shell we continue?
Engine bay rear doors. Simple, with great design of hinges.
Only after gluing those on body I noticed that I forgot the handle. Mounted it on site :)
Of course they can be opened. And when closed - sit tight in the hatch.

PvJYn2.jpg


KWfW5t.jpg


GDJphz.jpg


YtwBNB.jpg


APQRUu.jpg


CxmiDA.jpg
 
Top