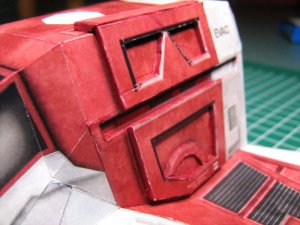
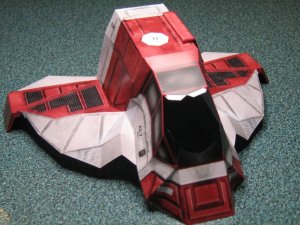
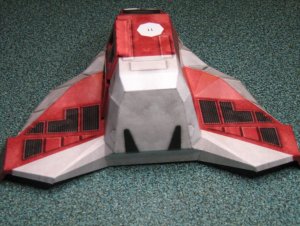
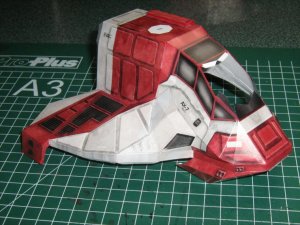
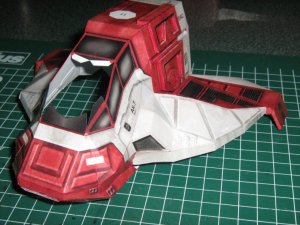
BSG MedEvac Raptor.

DanBKing

Dan the Man
This is a teaser post, so you can see what I'm also up to.

When I saw Rhaven Blaacks superb build of this version from Revell Fan, I instantly fell in love with the model.
I downloaded it, and went to the print shop the same day.
When I saw the printed pages, well, I fell in love with it even more!!
My respect to the both of you, for your consistant excellent works.:thumb:

I have got this far today......

IMG-20120928-00679.jpg

Not much, but a start. I'll post more pics of the build after the weekend.


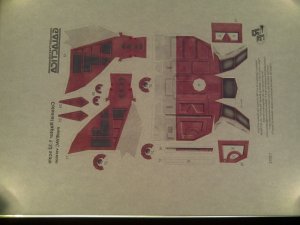
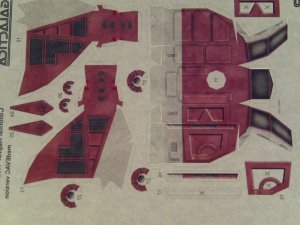
Now, who can tell me what your are seeing in the next two pics....

IMG-20120928-00673.jpg
IMG-20120928-00675.jpg

I'll leave you to ponder.....

See you in a few days.

:wave:
 

vbsargent

Member
The only reason to print backwards that I can come up with is 1) you are making an iron on T-shirt of the parts of a MedEvac Raptor, or 2) detailing an interior that would be painted just like the exterior with the same contours etc. But this doesn't make sense to me as the interior would be painted and detailed differently from the exterior.

Of course it also looks like the tow copies are on poster board. Maybe a couple of extra large Raptors?

So basically- you got me! Color me befuddled.
 

silveroxide

Senior Member
when you start building, check the fit of the parts first with this model. The sections are a tight fit and deviations will tend to throw connecting parts off kilter. When doing the fuselage/cabin. Check with Terinecold and or my thread on the fuselage build. The plans do not reflect that you need some internal support for it. The internal support will give it some rigidity so that it can be handled without the fear of crushing. Enjoy and hope to see the build or the model soon.
 

DanBKing

Dan the Man
@ Silveroxide: Thanks for the advice, I'll keep my eye on my jointing :thumb:

@ Dnalor: The parts pictured under construction, were cut from the very same page you see in the two pictures in question. The print quality is perfect, as stated in the introduction. :cool:

@ BullDogOwner: It is not a mirror image, but it is backwards :twisted:

@VBSargent: Interesting concept for T-Shirts, I wonder if they would sell.. :rolleyes: Also, this is standard 'out of the ink cartridge' build, as it comes, so no interior. It is printed on 160gsm A3 sheet done at the local copy shop. No poster board involved.

So, what do you think you are seeing, with the above information now included.????

Look carefully at the last picture. Look at the fold lines on the main cabin part ........

I'll leave you to ponder...... :wave:
 

vbsargent

Member
Hmmm . ..fold lines highlighted as if reflecting light. Maybe printed on acetate or mylar. Printed on a transparency film? Not sure to what end this would be done but . . . . . . unless to insert a light inside for a MedEvac Raptor nightlight. Now THERE's an idea!
 

DanBKing

Dan the Man
And so....

I had an idea. I had the idea designed and developed. The idea is in the 'end of prototype' stage.
This idea came from this hobby. This idea was given to me on THIS website!!

The best way to score a mountain fold is from the back of the printed image. I wondered the best way to do that. So, looking around this site, I noticed the popular technique of pin-holeing the paper, then aligning the pin holes from the back of the print and then scoring the line. Works great for straight lines, I used the technique with great success, when building the modules for the Discovery's spine.
But what about complex curves and tiny, intricate fold patterns? Then this technique does not work very well, as in a lot of cases, your intricate fold pattern looks like a target at the rifle range after a busy day.
I asked questions on other techniques, and the general reply was "Just hold it up to the light". Great, but how are you going to score it, holding it up to the light?

And THAT is exactly the reason my idea shone its own light!

So, after many months, I am now using the protoype of my idea.

What you are looking at in the last two pictures of my first post is as follows: The printed page in the pics, is the actual high quality print of the model, used in this build. The page is A3 160gsm. The reversed image is due to the fact that you are looking THRU the paper/cardstock. (The printed side is facing down!)

The camera does not show it very well, but the reversed image is so clear you can see all the fold lines perfectly through the paper.

The paper is laying on a special, optically enhanced, damage resistant, strengthend plate glass.
Beneath this glass, enclosed in a super-reflective casing, lie some of the newest and most advanced LED technology to date.
This LED technology allows me to see THRU paper and CLEARLY see the print on the other side, even up to 280-300gsm!!!!!!!!!
The glass plate is strong and damage resistant enough to allow me to cut, score, burnish, and do almost anything on its surface, without fear of breakage or damage. It even withstands my No.11 and scalpel blades.

The light power is controlable so that you can look thru different weights of paper. You don't want to use the same power setting for 200gsm paper on 80gsm paper, you'd need sunglasses!:cool:

The 'highlighted' fold lines are created when you score the back of the page at the fold line. The compressed paper fibers allow more light.

So, I can now score my mountain folds for all my model builds without using the 4 step process of pin-holeing or guess work. I simply place the sheet on the glass, and score the lines. No marking, nothing. One step, replaces four!!!! Now that is progress!!:thumb:

The unit when completed will be about the size and thickness of a 17" laptop.

Anyway, I am using the prototype to build the Raptor, as a stress test.

True, there are light tables around, but can any of them see through the thickness of paper than mine can??? The abilities of my design go far over the top of existing light tables.

So, what do you think? If there is enough interest, I might even manufacture and market them!!!:mrgreen:


On to the build.....

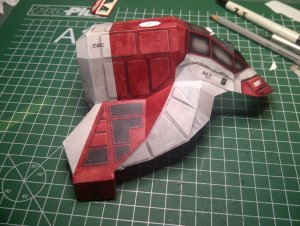
A bit more built last night, not much, as I am busy in other parts of life at the moment.

The main body shell is complete, including the recessed section across the door.
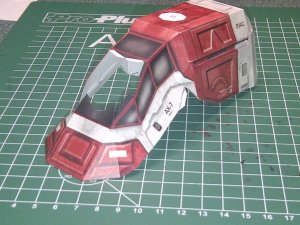
IMG-20121008-00720.jpg

The main sections of the starboard wing are made up and attached to the body.
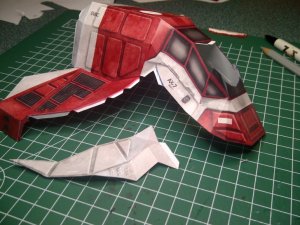
IMG-20121008-00725.jpg
IMG-20121008-00729.jpg

Gonna try to get the portside to this stage later tonight...

:wave:
 

Rhaven Blaack

!!!THE MAN BEHIND THE CURTAIN!!!
Staff member
Administrator
Moderator
That is a very interesting technique.
Your build is starting off on a really good foot.
So far, everything looks REALLY GOOD!!!

I will be following this thread.
 

RagDaddy

New Member
Where I work, when we want to examine any of the thin parts coming into the factory in detail, we use a 'light box'. Basically it's a hollow box with 5 solid sides, slightly larger than A3, about 4 inches in depth with a perspex top. The perspex top is coated with a diffuse layer, which still lets light through, but spreads it so there is no bright spot, just a uniform level of illumination across the whole sheet. Inside the box is a light source (LED, so no heat to worry about) and when the light source is switched on you have a uniform light akin to 60 - 100 watts, which I dear say would allow you to see 'through' anything up to and beyond about 160 g/m2 paper, allowing you to trace whatever you wanted onto the reverse of a drawing before scoring.
 

DanBKing

Dan the Man
Sorry guys, I wasnt finished, and hit 'Submit' instead of 'Preview'...:eek:ops:

The post above is now complete.
 

RagDaddy

New Member
If it's as good as you say, and as portable, then you may not just have a market with modellers, I hear commercial markets calling!
 
Z

Zathros

I use a 5000 watt halogen bulb. I can't see anything anymore, but for around 2 minutes, it worked great! :p


.
 

bulldogowner

Destroyer of Spam
Moderator
The Sun and a clean window is what I always used... I never cut on the glass, just scored the paper... Neat idea though... thought of it a few times, but always went back to the window.....
 
Z

Zathros

The Sun and a clean window is what I always used... I never cut on the glass, just scored the paper... Neat idea though... thought of it a few times, but always went back to the window.....


To be honest, I believe the Sun really does show imperfections better than any man made light can, just my opinion. Of course, in New England, the Sun only shines 2 times a year! :)
 

micahrogers

Moderator "Where am I, and how did I get here?"
Staff member
Moderator
Lotsa people forget the the designer of the Mk I Eyeball had true sunlight in mind when he designed the thing :p
 

Revell-Fan

Co-Administrator
Staff member
Administrator
Moderator
WOW (the third time for today:mrgreen:)!

A great start! I'm looking forward to seeing more! :thumb:
 

DanBKing

Dan the Man
A bit of progress...

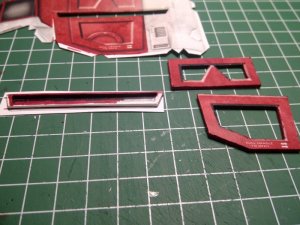
Door frames attached....

047.jpg

Main sections of both wings done...

027.jpg

Bum on...

028.jpg

Front wing and nose sections on......

001.jpg
003.jpg

More soon...

:wave:
 
Top