

And awayyyyyyyy we go!
- Thread starter Mrs.Mac
- Start date
You are using an out of date browser. It may not display this or other websites correctly.
You should upgrade or use an alternative browser.
You should upgrade or use an alternative browser.
Mrs. Mac:
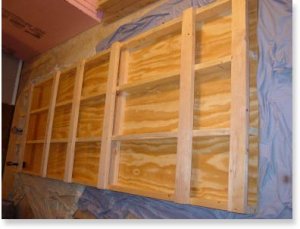
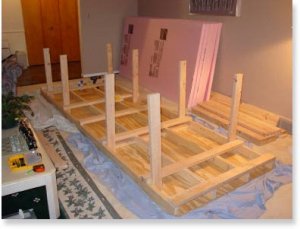
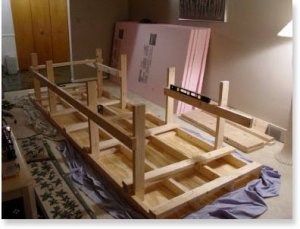
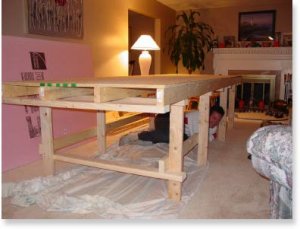
That is outstanding work. I love the design of your benchwork! It looks like you'll have some nice storage space under the layout too! I notice that you seem to have "Mr. Mac" stored under there in the 6th photo.") Will you have sufficient access to the back of the layout? I would be sure to leave at least some space between the wall and the rear portion of the layout for track cleaning and re-railing equipment.
Will you have sufficient access to the back of the layout? I would be sure to leave at least some space between the wall and the rear portion of the layout for track cleaning and re-railing equipment.
You are off to a great start! Keep us posted as to your progress. We never get tired of progress photos.
Eric
That is outstanding work. I love the design of your benchwork! It looks like you'll have some nice storage space under the layout too! I notice that you seem to have "Mr. Mac" stored under there in the 6th photo.
Will you have sufficient access to the back of the layout? I would be sure to leave at least some space between the wall and the rear portion of the layout for track cleaning and re-railing equipment. You are off to a great start! Keep us posted as to your progress. We never get tired of progress photos.
Eric
Hi there!
That is some sturdy and well built benchwork! Nice carpentry! You're going to make the layout a piece of your livingroom? Cool! I take it from your track plan that you most enjoy long continous runs, two train operation and probably have a large collection of locomotives (?). Looking forward to updates!
Ralph
Nice benchwork, you could have a brawl on one end and not even derail a car on the other Great work.
Great work.You heavily insured Mr. Mac and your hoping building and moving the benchwork will do him in??????????????
Well, I managed to get a ton accomplished over the long weekend.
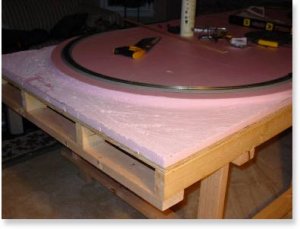
I got the lower loop of track laid, and about 1/2 of the upper loops. I have to visit my LHS for some more track and stuff before I can finish. All that time waiting for the liquid nails to dry gave me alot of time to start painting the lake and the river/waterfall areas.
I took pictures throughout the process and will be posting them soon.
Here's to an operational and partically sceniced layout by Christmas when family visits.
Cheers!!
Holy moly!
Any chance of help..? I have been at this for a while now (it's kind of embarrassing how long) and I haven't permanently attached anything to anything else!
Good work!!
Andrew
Any chance of help..? I have been at this for a while now (it's kind of embarrassing how long) and I haven't permanently attached anything to anything else!
Good work!!
Andrew
")
Progress has come along way. Only that progress on the layout has stalled the process of getting the pics from the camera to the computer to here. But they do exist.
Let's see. Since my last post, I'm completed laying the main line and trolly levels. Yeah!!! I'm working on the wiring and control panel now. The layout is functional with the exception on the 2 reversing loops. Can't power those until my control panel is done.
I built a Faller 2-track bridge for over the waterfall area so I won't lose any locos into the river.
I hooked up my new Digitrax system last night and ran my BLI GG1 around the track a few times. I love it!!! The joys of getting all those sounds are all worth the expense. My stable may become mostly BLI one day.
Anyway, I have the mountain partially constructed and glued down. Need to finish painting the interior walls before putting the ceiling layer on and enclosing it (with the exception of several access panels).
The Christmas tree layout is painted and awaiting track and a tree as well.
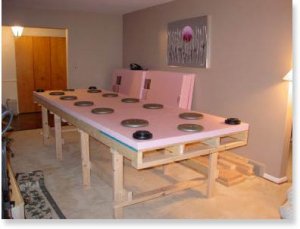
pomperaugrr, The layout will be about a hand width or so from the wall to allow access for derailments and cleaning.
I'll hopefully get to work on the Christmas tree layout tonight and get that done, so I can concentrate on the main layout. Although I'm supposed to be going to the grocery store, but alas I'm stuck at work because Mr. Mac is still at work and we carpooled today.
See you all tomorrow.
Let's see. Since my last post, I'm completed laying the main line and trolly levels. Yeah!!! I'm working on the wiring and control panel now. The layout is functional with the exception on the 2 reversing loops. Can't power those until my control panel is done.
I built a Faller 2-track bridge for over the waterfall area so I won't lose any locos into the river.
I hooked up my new Digitrax system last night and ran my BLI GG1 around the track a few times. I love it!!! The joys of getting all those sounds are all worth the expense. My stable may become mostly BLI one day.
Anyway, I have the mountain partially constructed and glued down. Need to finish painting the interior walls before putting the ceiling layer on and enclosing it (with the exception of several access panels).
The Christmas tree layout is painted and awaiting track and a tree as well.
pomperaugrr, The layout will be about a hand width or so from the wall to allow access for derailments and cleaning.
I'll hopefully get to work on the Christmas tree layout tonight and get that done, so I can concentrate on the main layout. Although I'm supposed to be going to the grocery store, but alas I'm stuck at work because Mr. Mac is still at work and we carpooled today.
See you all tomorrow.