1945 Scammell Pioneer SV2S
- Thread starter Gandolf50
- Start date
You are using an out of date browser. It may not display this or other websites correctly.
You should upgrade or use an alternative browser.
You should upgrade or use an alternative browser.
Wow! I just found this thread and am overwhelmed at the quality of this build.
Amazing...
Would it be possible for you to share the Studio file for the tire treads? That would be an excellent reference file for me to study. I have a Curio cutter and would like to practice making some tires.
Amazing...
Would it be possible for you to share the Studio file for the tire treads? That would be an excellent reference file for me to study. I have a Curio cutter and would like to practice making some tires.
Wow! I just found this thread and am overwhelmed at the quality of this build.
Amazing...
Would it be possible for you to share the Studio file for the tire treads? That would be an excellent reference file for me to study. I have a Curio cutter and would like to practice making some tires.
Thank-You..that always means a lot to hear!
Tell you what...the Studio file will not do you much good in making a tire..as it is only the outer tread... which you can have a jpeg of no problem..but you will have to all ready have a tire to place it on! You will also have to do the sizing and tracing in studio ( personally do as I did..import the jpeg select trace area ..all the treads...set your controls so that all the treads fill with yellow...trace outer edge...then pick the best one...edit it to clean it up and fit all the inner curves better and delete all the others...copy and past over the rest..and you can then print and cut or just cut...what ever you plan on....same way to resize....measure the circumference in mm and adjust the trace file till it is that size..cut a single tread to check and if its short add a bit/ a little long can sometimes be ok!
Attachments
More updates!!!!! Moving at a fast clip now//like a snail through molasses !!! Got the spare tire carrier finished..minus some bolts...and on the back..and installed the jib as well...starting to look more like a wrecker now...
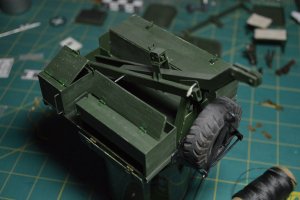
still have a TON of little fiddly bits to do but...it's getting there ( actually avoiding working on the rest of the cab for a time...)
Started...( Actually finished before posting this ) winding the cable on the wench drums and getting them weathered, so it looks like they will be the next step I have to install before the jib and boxes go on...another case of not wanting to do anything resembling "building a ship in a bottle" , if you know what I mean!
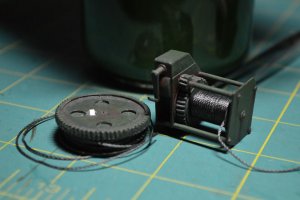
Till next time!!

still have a TON of little fiddly bits to do but...it's getting there ( actually avoiding working on the rest of the cab for a time...)
Started...( Actually finished before posting this ) winding the cable on the wench drums and getting them weathered, so it looks like they will be the next step I have to install before the jib and boxes go on...another case of not wanting to do anything resembling "building a ship in a bottle" , if you know what I mean!

Till next time!!
If I did not know any better and know what to look for, I would not believe that this is made of paper and cardstock!
KEEP UP THE FANTASTIC WORK!!!
KEEP UP THE FANTASTIC WORK!!!
N-other small update leading to things getting done...got the rear wench assembly loaded with cable and in it's frame and mounted to the frame.
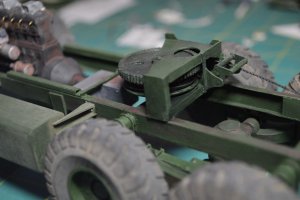
You can also see that I finally took the plunge and mounted the fuel tank..held off as it only hangs from the two brackets, one you can see just above the tire, when the cab is in place ..then I can add brackets to the cab floor..till then I have to be REAL CAREFUL!
Here is an over-all view of the rear frame...
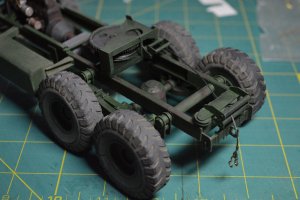
Fuel Tank/Wench/Cable/Rear Pulleys
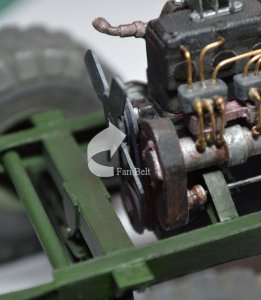
Small details added to the engine as well..added part of the water pump ( to get ready for the radiator), and decided to get the fan belt in place..that was a one time don't mess up bit of construction..wheww!! tweasers and yes...thin strip of card stock blackened with a sharpie! Cutting that was NOT FUN!!
Till next time...

You can also see that I finally took the plunge and mounted the fuel tank..held off as it only hangs from the two brackets, one you can see just above the tire, when the cab is in place ..then I can add brackets to the cab floor..till then I have to be REAL CAREFUL!
Here is an over-all view of the rear frame...

Fuel Tank/Wench/Cable/Rear Pulleys
Small details added to the engine as well..added part of the water pump ( to get ready for the radiator), and decided to get the fan belt in place..that was a one time don't mess up bit of construction..wheww!! tweasers and yes...thin strip of card stock blackened with a sharpie! Cutting that was NOT FUN!!

Till next time...
- Apr 5, 2013
- 13,876
- 10,214
- 228
Till next time..
When you reveal your miniaturization machine!!
Time for a minor update, things have been slow and oyher things ( distractions) get in the way...
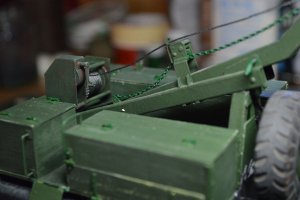
Still working on the box back...getting all the fiddly bits done...hard working with a .5mm salvaged chain from some junk jewelry but looked correct so had to be done and added it to the jip..it is what rolls the jib out to the different positions...
also had to add the door/ladder combo that allows access into the back jib area, it is close to 4 feet off the ground... so again scraped the kit parts and scratch built...
View closed....
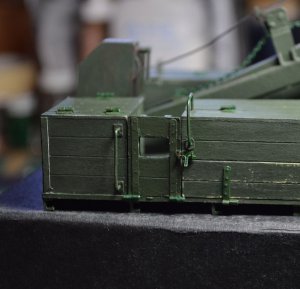
( Had to add a latch to keep it closed !)
And open with ladder dropped...
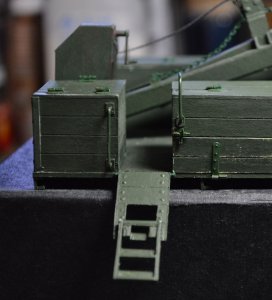
(Ladder folds up against the inside of the drop door)...
and here is an overall view of Box Back stage ? 3-5 ? I lost count...
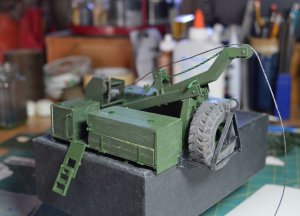
Till next time!! Go cut some paper! (oh yea..added corner braces on the boxes) :Coffee:
Still working on the box back...getting all the fiddly bits done...hard working with a .5mm salvaged chain from some junk jewelry but looked correct so had to be done and added it to the jip..it is what rolls the jib out to the different positions...

also had to add the door/ladder combo that allows access into the back jib area, it is close to 4 feet off the ground... so again scraped the kit parts and scratch built...
View closed....

( Had to add a latch to keep it closed !)
And open with ladder dropped...

(Ladder folds up against the inside of the drop door)...
and here is an overall view of Box Back stage ? 3-5 ? I lost count...

Till next time!! Go cut some paper! (oh yea..added corner braces on the boxes) :Coffee:
The amount of realistic detail that you are putting into this project is MIND BLOWING! This is MUSEUM quality work.
I am amazed. Wooden parts looks wooden, metal parts looks metal. Most excelent. How do you achieve such great and precise wooden look and texture?
I am amazed. Wooden parts looks wooden, metal parts looks metal. Most excellent. How do you achieve such great and precise wooden look and texture?
Thank-You!!
"Mostly being OCD/Retired/Asperger's Syndrome in the Creative Artistic areas, and the more I look at this beast I think partially if not completely mental !!!"
...I do TONS of research and look at all available resources I can. I also, go look for solutions on how to do stuff in the way of tutorials ( actually a few pictures of steps will show me the way)! I can show you everything that I feel is wrong with this build, because I feel there is ALWAYS room for improvement, and I yearn/need to learn how to do it and TRULY ENJOY sharing what I learn. I am getting ready to scratch build the rest of the steering for this beast so I will go through the steps on the build including paint..so maybe that might help a little...
I am getting ready to scratch build the rest of the steering for this beast so I will go through the steps on the build including paint..so maybe that might help a little...
 That would be great to see under your hands like that
Well let me see....First off I realized when I was trying to finish up all the different areas currently ...I never added the drive shafts! and on closer examination...(after all this time!!!) I realized I installed the rear end upside down! So some careful cutting here and there and a turn and flip...it's where and how it should be.... ( On a side note, when working on the cab...I did get ahead of myself..even though I tried to not do so...and attached the rear wall. then discovered , One..I had for got to remove the mask off the side and back windows...and 2 ...I had forgot to paint the new frames around the back windows ...Trying to paint around a corner was no fun!...) Any way...to get the drive shafts in I had to finish off the main unit that drives the wench and jib and so went a tiny bit over kit build in doing so....
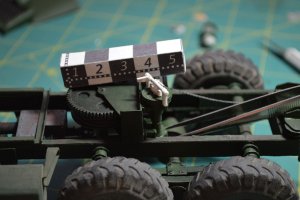
created scratch built "Dog Clutch" and just looking at how the thing works I guess it gets it's name from the way it BARKS when you engage it...This is in NO WAY accurate...but it does give the over all feeling of accuracy for this scale...so...good- s -nuff... ( Tweasers used to test fit in place)!!
I could then add the universal joints and drive shafts after built of course... nothing special here rolled copy paper, and some disk and a few .5mm chunks of scrap make up every-thing....
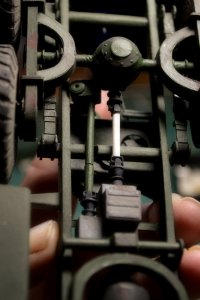
( What really surprised me was the fact after all the other things and all the additions and changes scratch built add-ons ..they actually line up with the transmission!! )
It was about this point and looking at the top I thought !!!!! "What if the Dog Clutch is too tall !!!!) Time for a quick and dirty test fit!!! and that means front to back as it is all related! Tried to judge by holding the suspension with one hand and te clutch with a finger here and there and the box supports with the othe and fingers and things were going all directions...Time for painters Tape!!
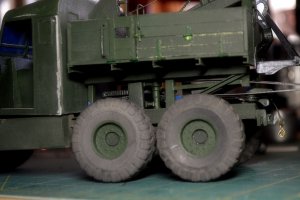
Painters tape/tweasers and the like and I have just enough room for it to fit under the floor of the back box!!
Checked Cab fit compared to radiator/back box...all looks like I might have actually had a plan!!
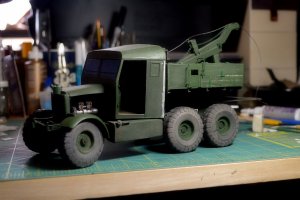
I gave up on adding another layer to the back of the cab..and spend a slow..mm by mm tape and glue session all around the back seam... tore off the rivet strips from the sides and will replace them and add the rest when cab gets repainted..and before camouflage as I have decided to go ahead with it!
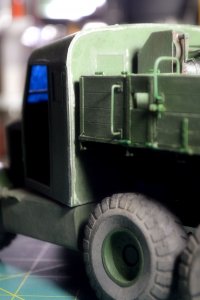
and a final...view from the top to check that as well ...and if I don't mess up something ??!!!
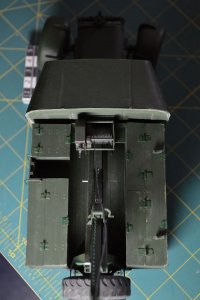
till next time....

created scratch built "Dog Clutch" and just looking at how the thing works I guess it gets it's name from the way it BARKS when you engage it...This is in NO WAY accurate...but it does give the over all feeling of accuracy for this scale...so...good- s -nuff... ( Tweasers used to test fit in place)!!
I could then add the universal joints and drive shafts after built of course... nothing special here rolled copy paper, and some disk and a few .5mm chunks of scrap make up every-thing....

( What really surprised me was the fact after all the other things and all the additions and changes scratch built add-ons ..they actually line up with the transmission!! )
It was about this point and looking at the top I thought !!!!! "What if the Dog Clutch is too tall !!!!) Time for a quick and dirty test fit!!! and that means front to back as it is all related! Tried to judge by holding the suspension with one hand and te clutch with a finger here and there and the box supports with the othe and fingers and things were going all directions...Time for painters Tape!!

Painters tape/tweasers and the like and I have just enough room for it to fit under the floor of the back box!!
Checked Cab fit compared to radiator/back box...all looks like I might have actually had a plan!!

I gave up on adding another layer to the back of the cab..and spend a slow..mm by mm tape and glue session all around the back seam... tore off the rivet strips from the sides and will replace them and add the rest when cab gets repainted..and before camouflage as I have decided to go ahead with it!

and a final...view from the top to check that as well ...and if I don't mess up something ??!!!

till next time....
Small update...been busy trying to get small stuff done..and causing trouble in other areas....but got to a point with the cab I needed to get paint on it and so added camouflage to see... think it will be fine once it is weathered down to the same look as the fuel tank and doesn't look so NEW...
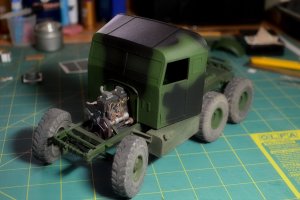
till next time...

till next time...

