[Soviet/Russian] Antonov An-14 -- Build Thread
- Thread starter Awry_Chaos
- Start date
You are using an out of date browser. It may not display this or other websites correctly.
You should upgrade or use an alternative browser.
You should upgrade or use an alternative browser.
Good idea!you could spray paint the pieces from the inside, that's what I used to do.")
With what kind of paint? Krylon? Or another brand?
- Apr 5, 2013
- 13,876
- 10,216
- 228
Rustoleum paint, the kind that etches into plastic. They make a paint for painting plaastic chairs. It allows you to take those one piece chairs and turn them into multi colored nice looking chairs. Not worth it on the cheap ones, but definitely worth it on the expensive chairs. ")


I have used Workable Fixatif too good effect before building, to strengthen the paper.
Thank you!I have used Workable Fixatif too good effect before building, to strengthen the paper.
A little update. I took a brief hiatus from working on this model, an needed break so I could let my subconscious ponder the problems that were in front of me.
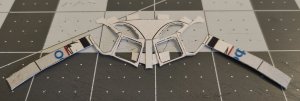
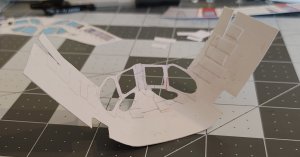
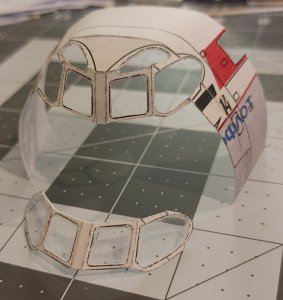
This is the front cockpit section with all the windows cut out. Also, a pretty fragile piece. Part of my trepidation of continuing was being worried that I would somehow ruin this piece or it would get ruined. I'm pleased how this part came out. The internal tabbing (Thanks to @Rhaven Blaack ) using a regular index card for the tabs gave it more a little more strength in the important areas.
This is the front cockpit section with all the windows cut out. Also, a pretty fragile piece. Part of my trepidation of continuing was being worried that I would somehow ruin this piece or it would get ruined. I'm pleased how this part came out. The internal tabbing (Thanks to @Rhaven Blaack ) using a regular index card for the tabs gave it more a little more strength in the important areas.
Attachments

Let's recycle some content here:
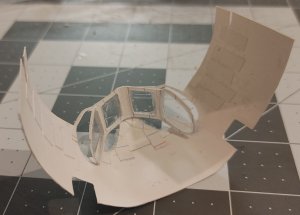
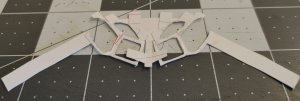
I have the front cockpit section ready to go as shown in the last post. So now the next step is to attach it to the front fuselage section you see in this picture (Antonov_0048). The windows were cut out making everything good to go.
So, do I fail or do I succeed... The next post shall tell...
I have the front cockpit section ready to go as shown in the last post. So now the next step is to attach it to the front fuselage section you see in this picture (Antonov_0048). The windows were cut out making everything good to go.
So, do I fail or do I succeed... The next post shall tell...
Attachments
FRAKKING-A!!!
YYYEEEESSSSS!!!!
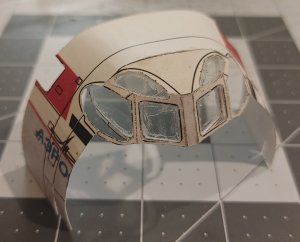
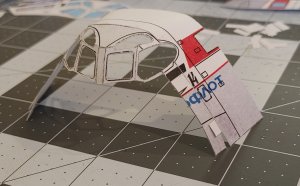
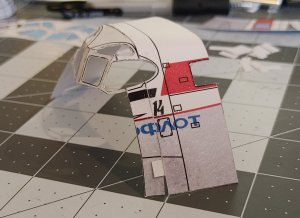
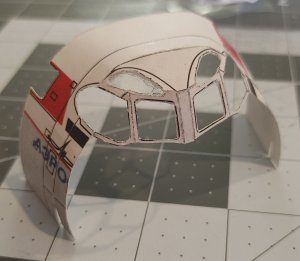
I did it! Now the two sections are attached to each other. This took some careful tabbing and forming, carefully gluing in the right places while I formed the canopy you see here.
I'm now actually at a good point -- I've got a difficult part done, so now I just need to put the windows in and attach this baby to the nose section.
YYYEEEESSSSS!!!!
I did it! Now the two sections are attached to each other. This took some careful tabbing and forming, carefully gluing in the right places while I formed the canopy you see here.
I'm now actually at a good point -- I've got a difficult part done, so now I just need to put the windows in and attach this baby to the nose section.
Attachments

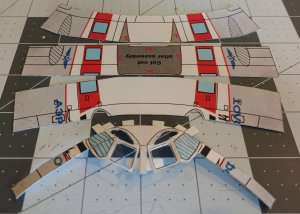
This shows the internal tabbing (Thanks @Rhaven Blaack ) that I have used.
For the tabs I used a typical index card, thinner than regular card stock, and at this size, a bit easier to work with. It also adds a degree of strength to the model. It's amazing how strong a couple pieces of paper glued together can be!
Remember: Patience is a harsh mistress... it's always best to work with her and let her win!
Attachments

Thats a good looking cockpit part, so ypu are now ready to put the windows in it. Good job thumbsup
Thanks Rhaven!You are making great progress! Everything looks really good!!!
- Apr 5, 2013
- 13,876
- 10,216
- 228
Before you attempt to attach any windows, take a nail file and tidy up the inside edges, to that they look squared up and clean!! It will give you a better gluing surface too.
"Z" is full of... Good Ideas, yeah that's it 
But seriously, yes he is right, and it also helps to hide the "step" in the window install, where the cockpit wall is thicker than the "glass"
But seriously, yes he is right, and it also helps to hide the "step" in the window install, where the cockpit wall is thicker than the "glass"
And now time for an update!
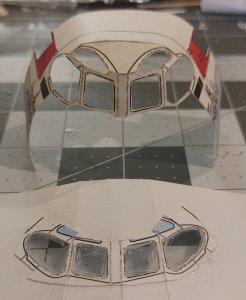
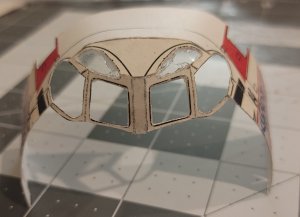
After a bit of struggling and some trial and error, I figured out how to install the windows! Basically I made a frame then cut the windows out of pieces of blister pack I had (I think @zathros made a suggestion to that effect, so I bid him some credit here). Basically it creates a structure that will hold the ''glass'' panes in place and give the model a tad bit more stability and strength in that area. GOOD!
Once I got the windows glued in place I was able to make the necessary score lines and bends in the frama a lot easier!
Attachments
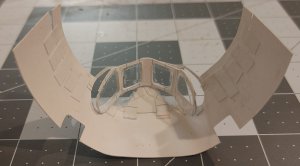
The frame is now cut out and ready to be glued into the main structure.
To glue the windows in place I used the UHU glue:
Which is an all-purpose adhesive from Germany. It is very STICKY and STRINGY and DRIES QUICKLY (but not as fast as super glue/crazy glue)! It's a good glue but you have to watch out for the ''strings'' you get when trying to apply it. It works well for gluing plastic to paper unlike Mod Podge.
Attachments
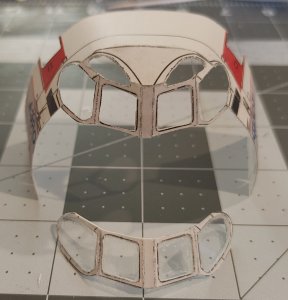
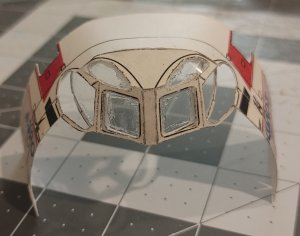
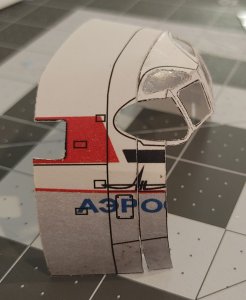
Here I installed the two upper cockpit windows. I cut them out of strips of blister pack plastic, and carefully fit them into place before gluing them in place. The UHU glue worked well for this part, but in the future I'm going to have to learn to manage it better. It's a plus it dries relatively fast though.
Attachments
Here I'm installing (or gluing) the window frame into the main cockpit section. For now I'm back to using the Mod Podge which is great at gluing paper (card) to paper (card). Plus it's easier to clean up.
I'm indebted to @Rhaven Blaack for all of his tips he's given me and his unending support in my paper endeavors, also for helping to keep this forum alive and going! Thanks, Rhaven!
I'd also like to thank @zathros for all of his kind words and encouragement! Thanks, zath!
And to @micahrogers for his good tips! Thanks bud!