

M4A4 Sherman VC Firefly, Halinski 1:25
- Thread starter snake7
- Start date
You are using an out of date browser. It may not display this or other websites correctly.
You should upgrade or use an alternative browser.
You should upgrade or use an alternative browser.

Lately my build speed slowed down, but there are results ")
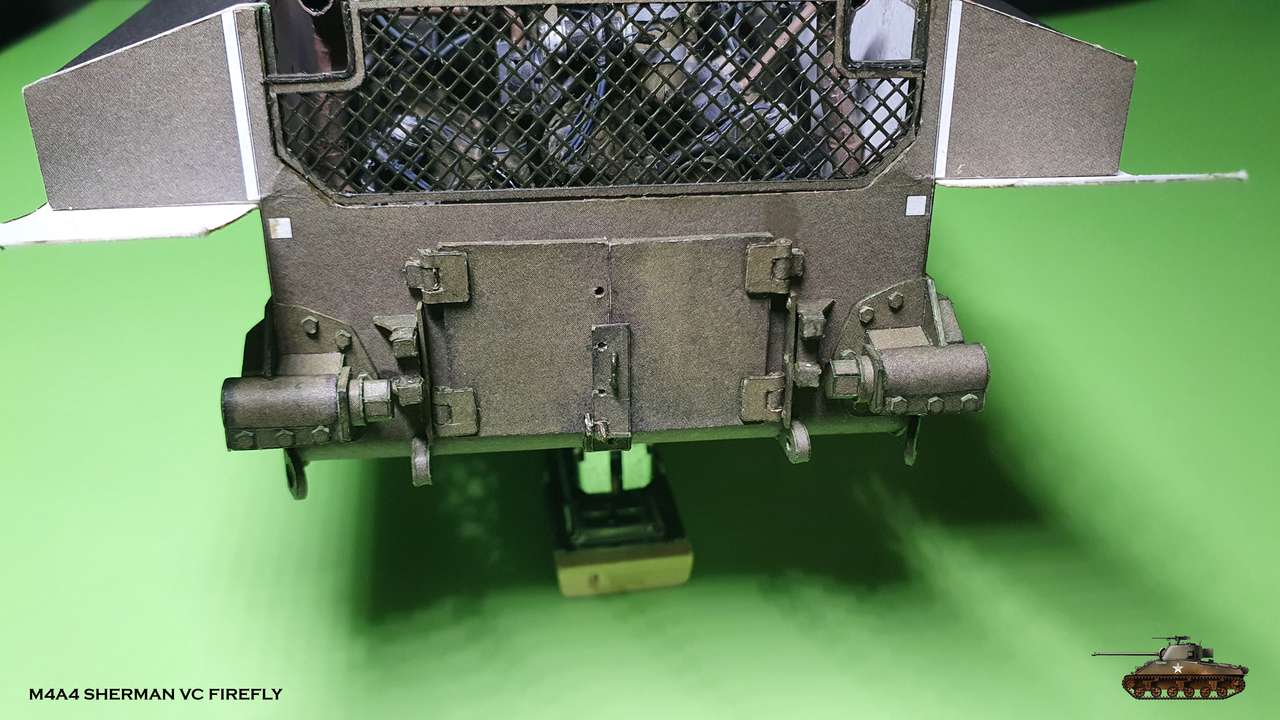
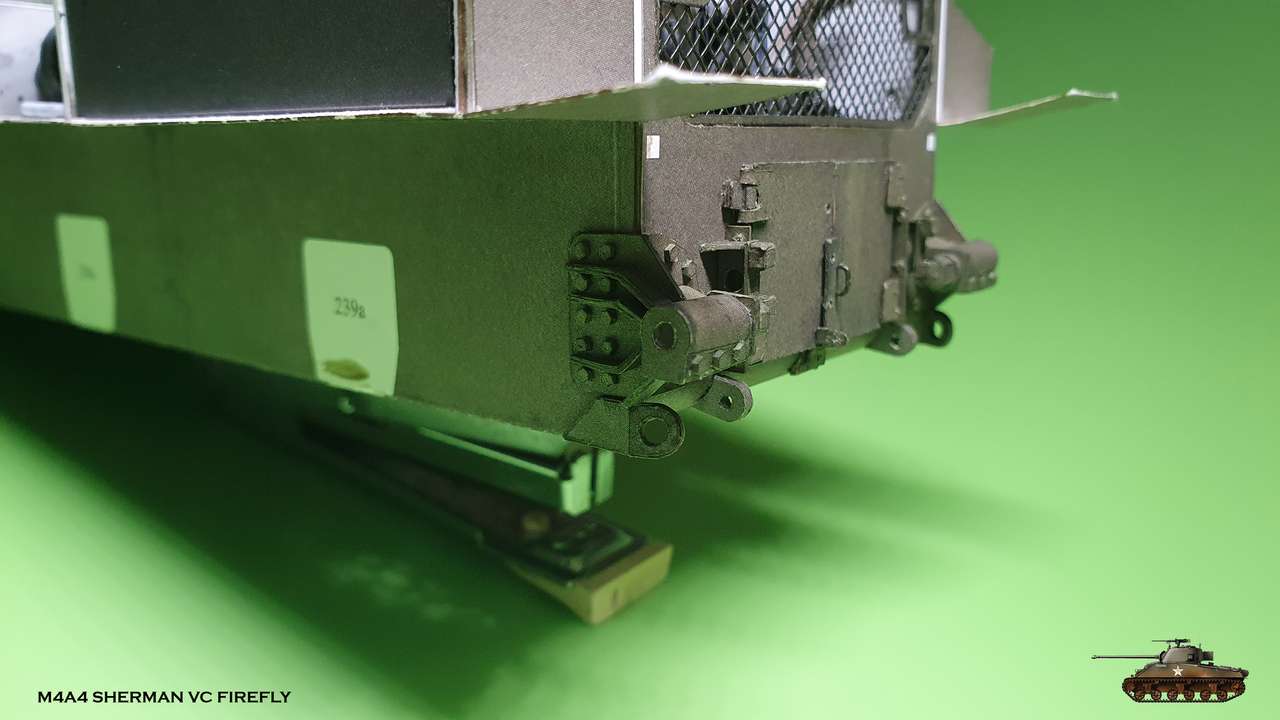
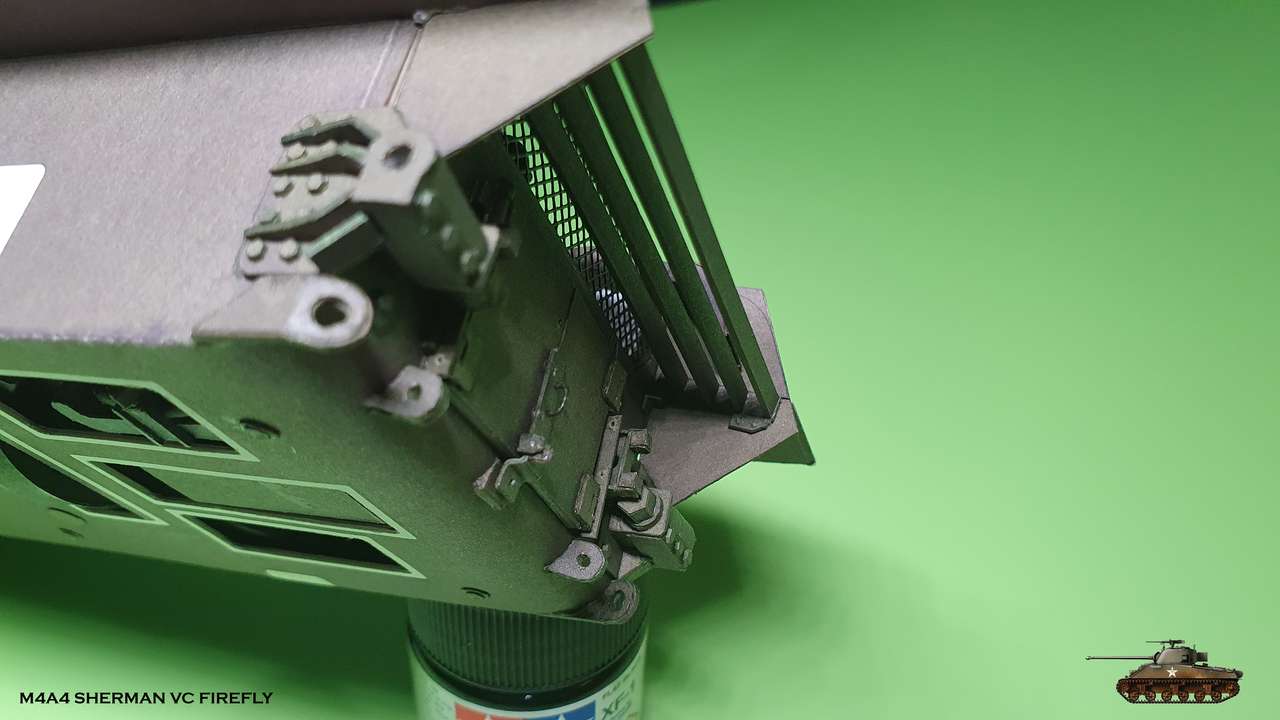
Assembled mounting brackets for the leaf spring towing hook and flanges for mounting deep wading equipment (please someone tell me what it is? )
)
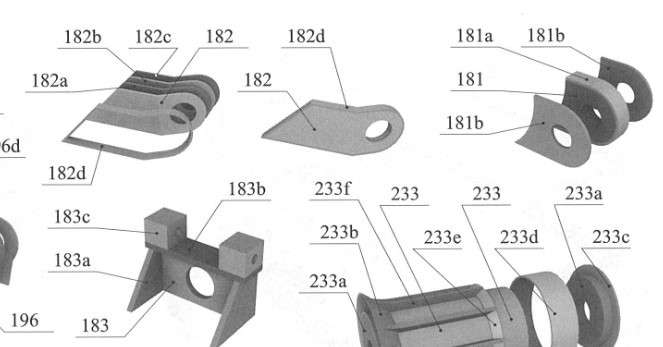

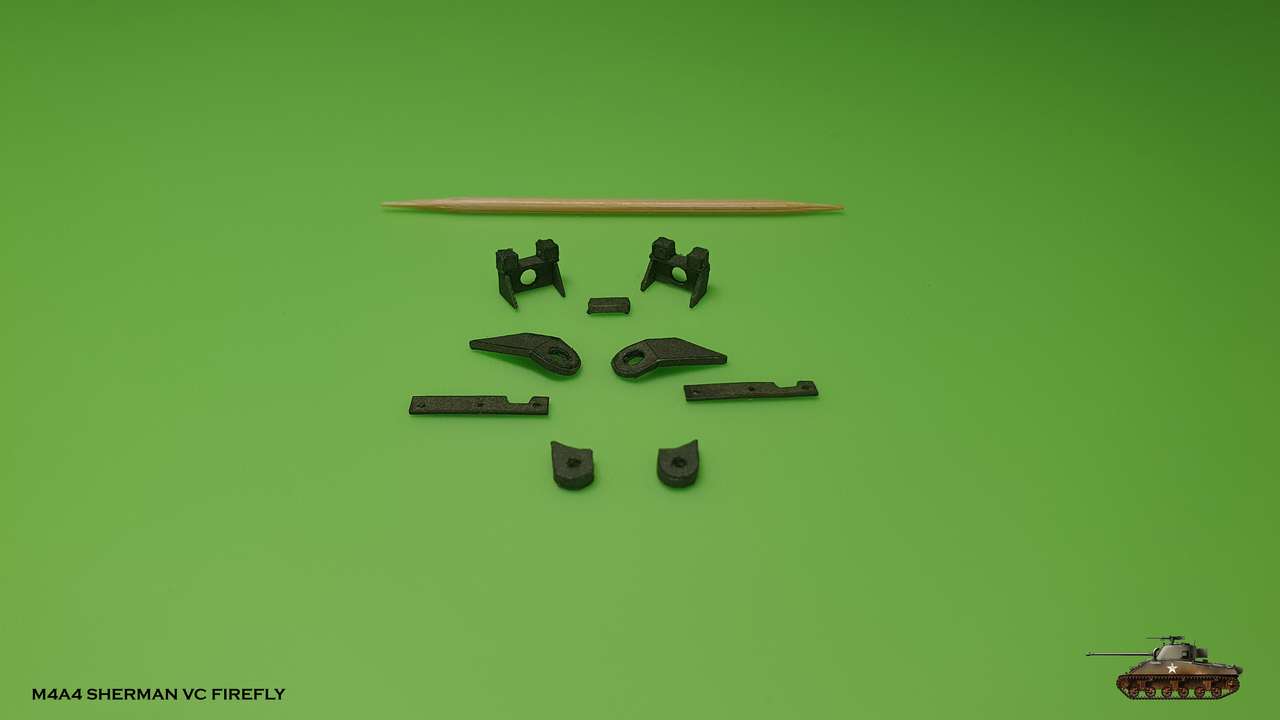
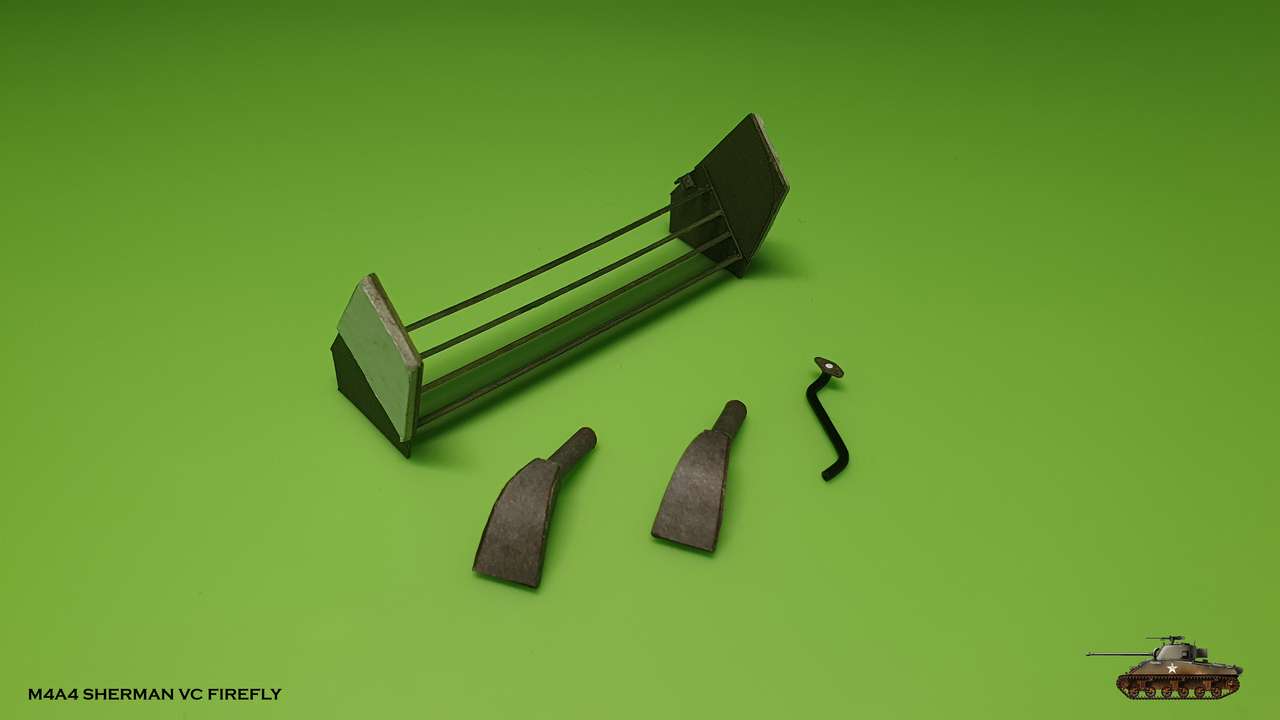
Also assembled tracks tension mechanisms. As usual, the design of parts was thouthfull and it eased a lot in the assembling of whole unit

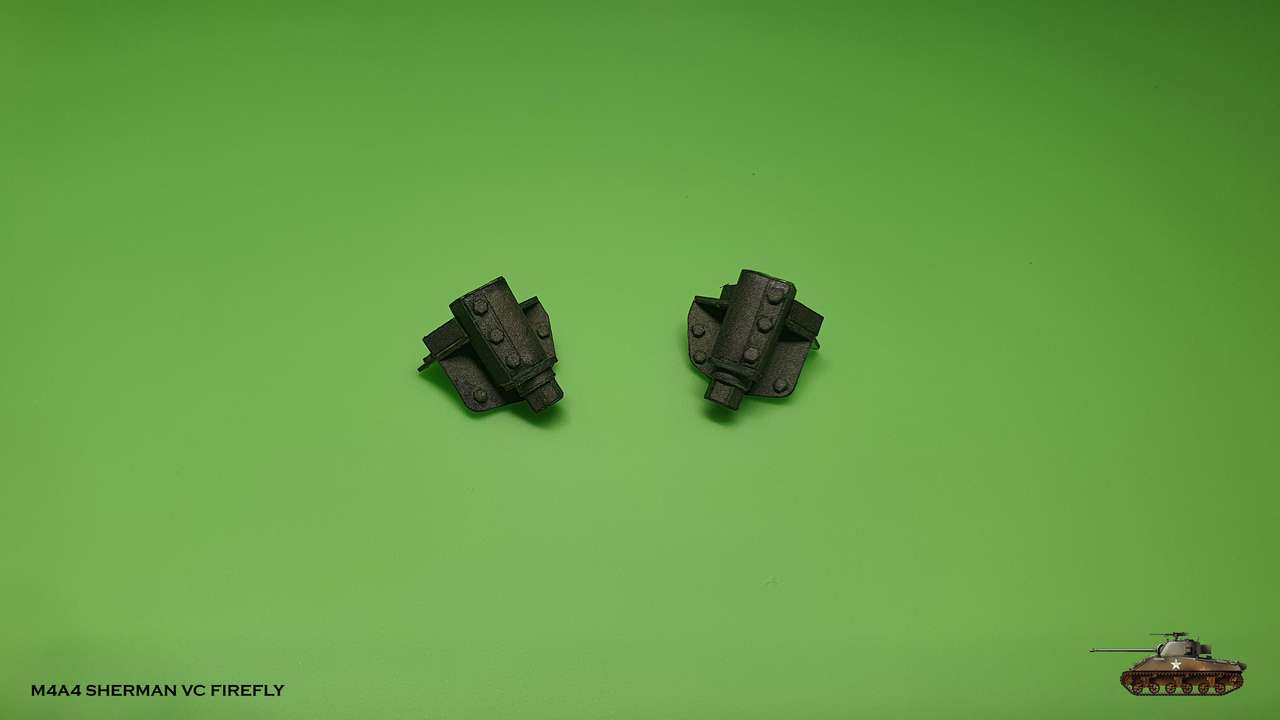
Attached all parts to their places
Assembled mounting brackets for the leaf spring towing hook and flanges for mounting deep wading equipment (please someone tell me what it is?
)
Also assembled tracks tension mechanisms. As usual, the design of parts was thouthfull and it eased a lot in the assembling of whole unit
Attached all parts to their places

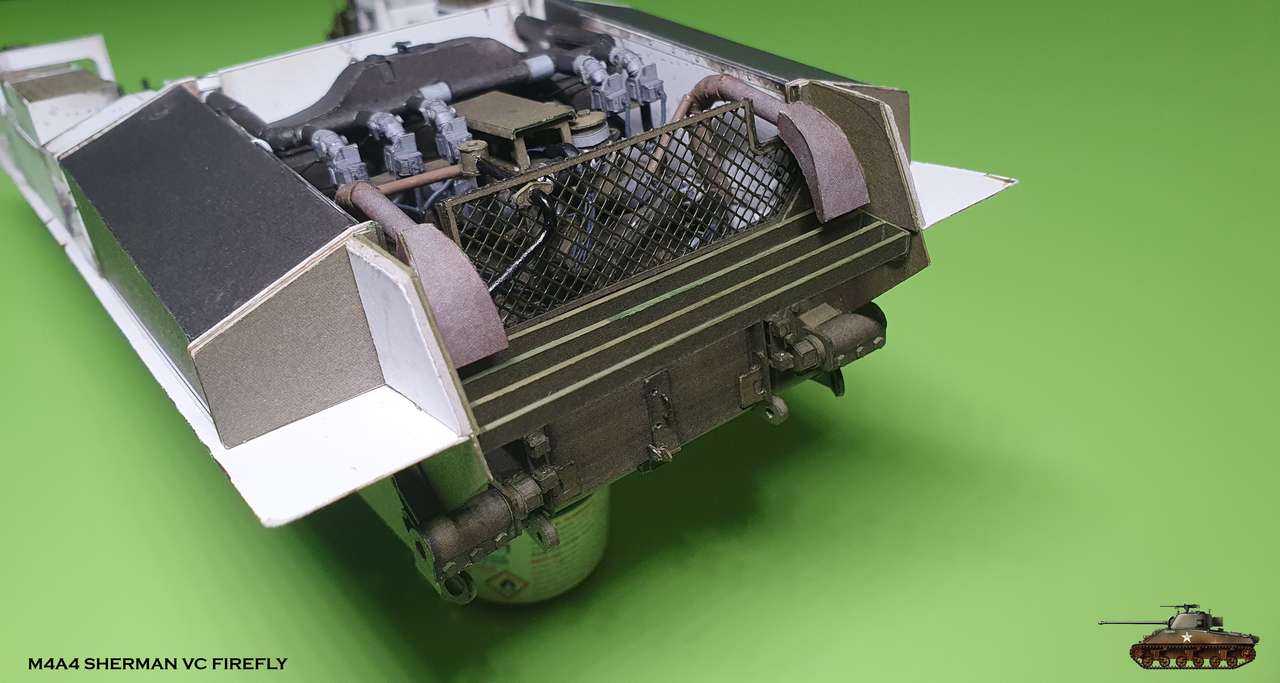
I finished rear part of the hall with exhaust mesh, exhaust pipes endings and extension pipe to crankcase dry breather

And everything installed in place
And everything installed in place

I forgot to mention, that i decided not to glue mesh screen (part 201) that suppose to cover exhaust endings.
I will try to insert it inside the upper hull part in later stage.
That way will give maximum view of the rear and engine compartment, when upper hull will be removed
I will try to insert it inside the upper hull part in later stage.
That way will give maximum view of the rear and engine compartment, when upper hull will be removed
Deep wading gear is an addition to the air intake, and exhaust for the engine, to allow the tank to drives "underwater to the depth of the snorkelLately my build speed slowed down, but there are results
Assembled mounting brackets for the leaf spring towing hook and flanges for mounting deep wading equipment (please someone tell me what it is?
A Pic I found on Wikipedia
_Sherman_with_Deep_Wading_Gear.jpg")
Deep wading gear is an addition to the air intake, and exhaust for the engine, to allow the tank to drives "underwater to the depth of the snorkel
A Pic I found on Wikipedia
View attachment 186480
Thank you Micah! I saw somewhere this picture, but didn't connect to the name.
Last edited:
Thanks Boris!
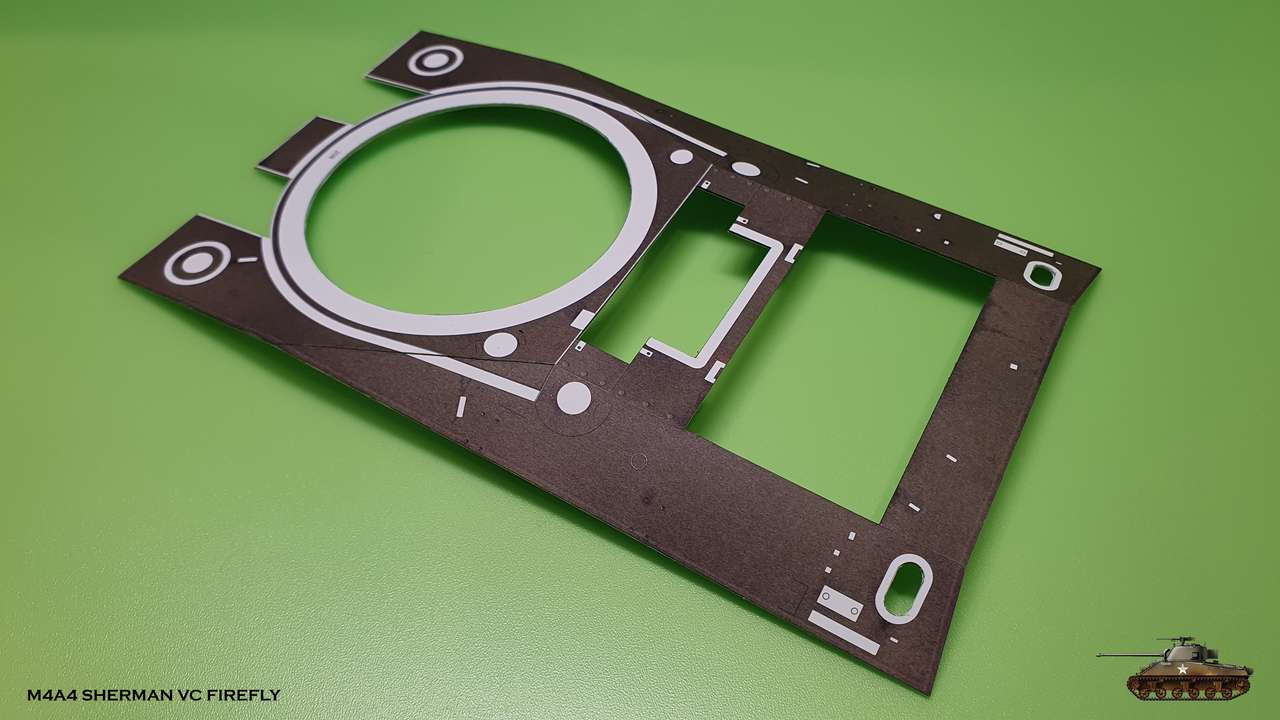
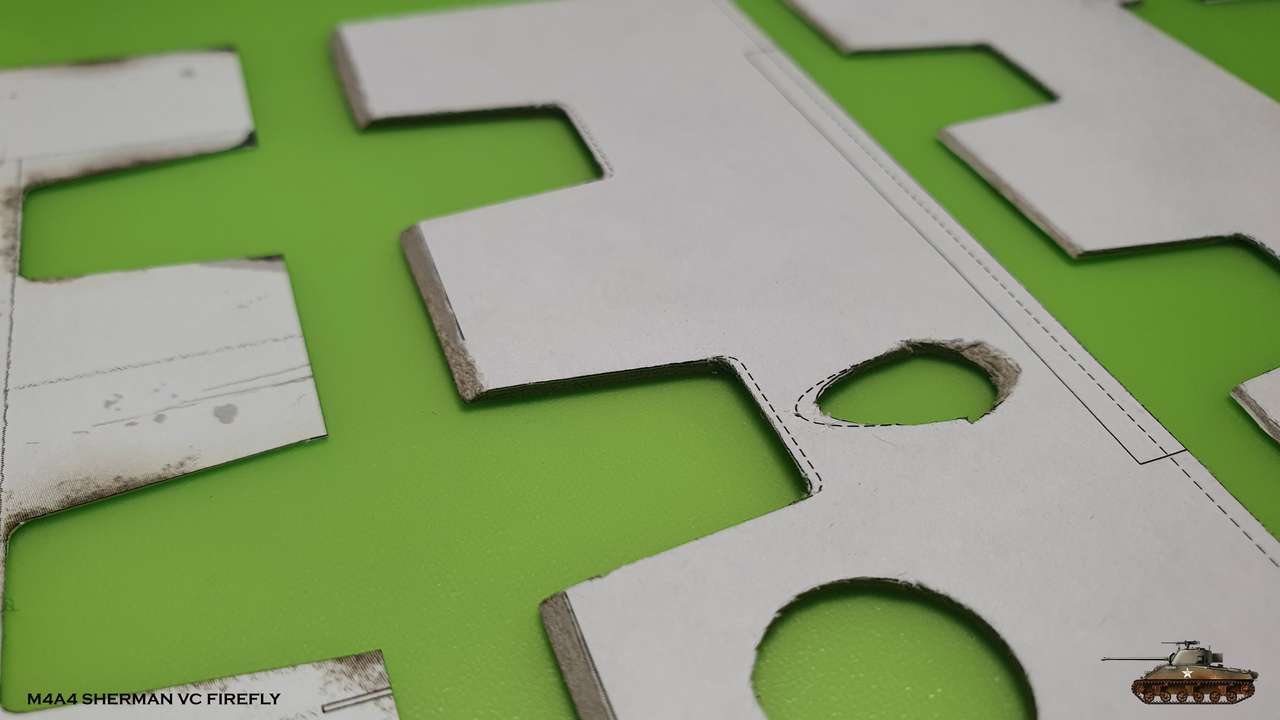
An important stage in the assembly is the upper part.
Development, as always, is excellent and thoughtful - it is assembled in parts.
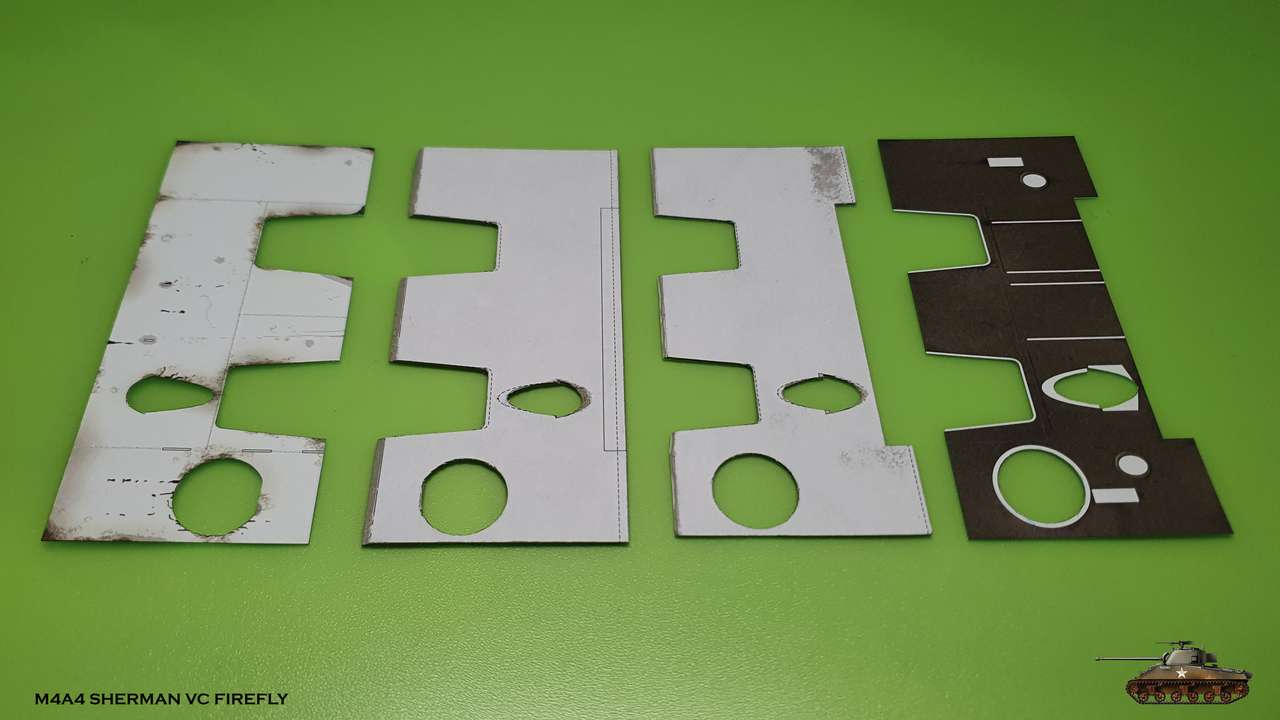
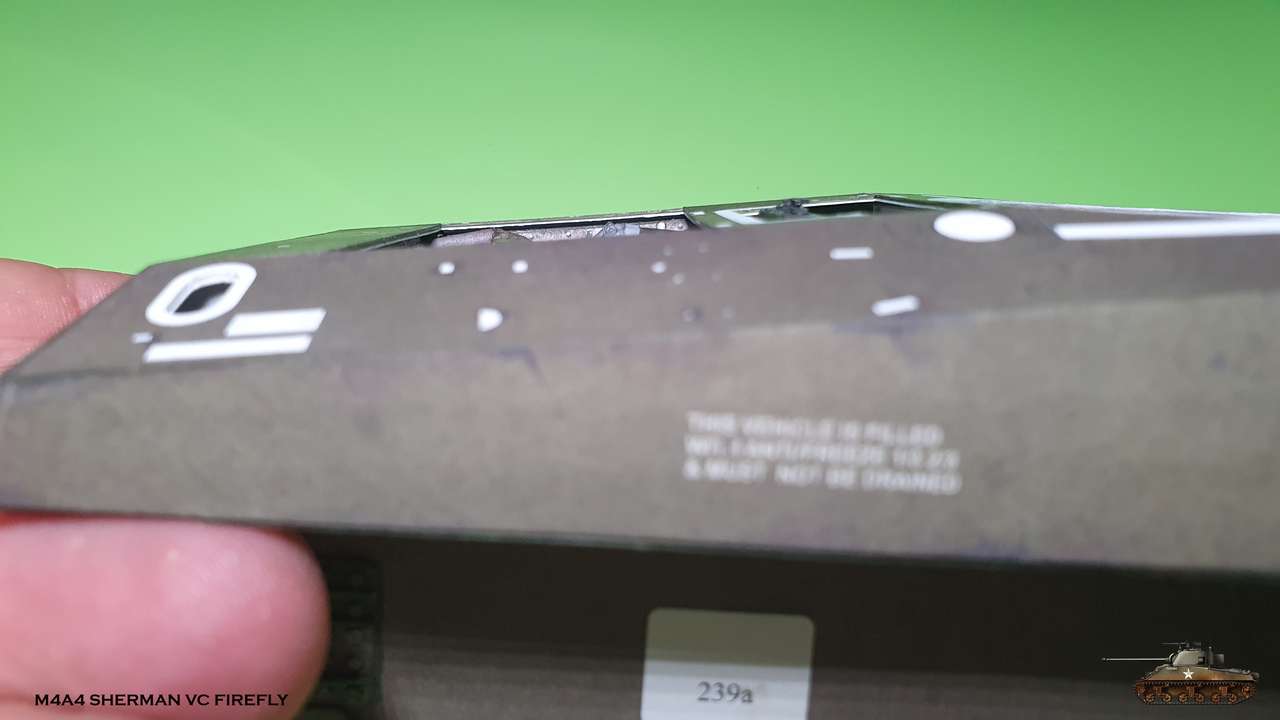
Developer even went further and simulated real armor thickness in 1:25.
Top is the most thinn, side thicker and front is the thickest, almost 2 millimeters in total.
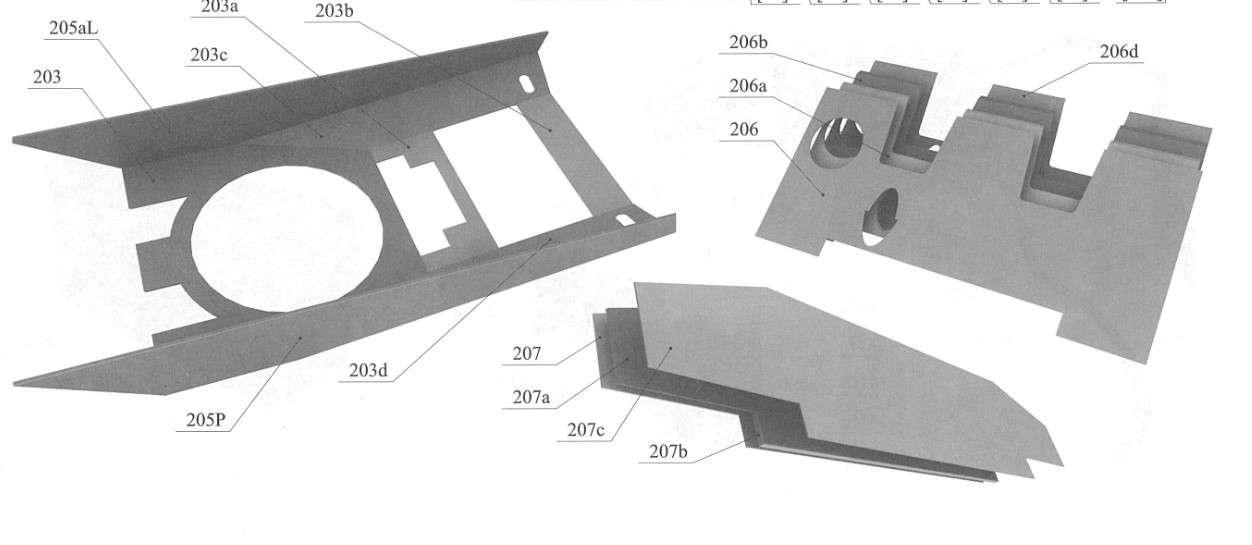
All frame parts are cut at different angles on edges.
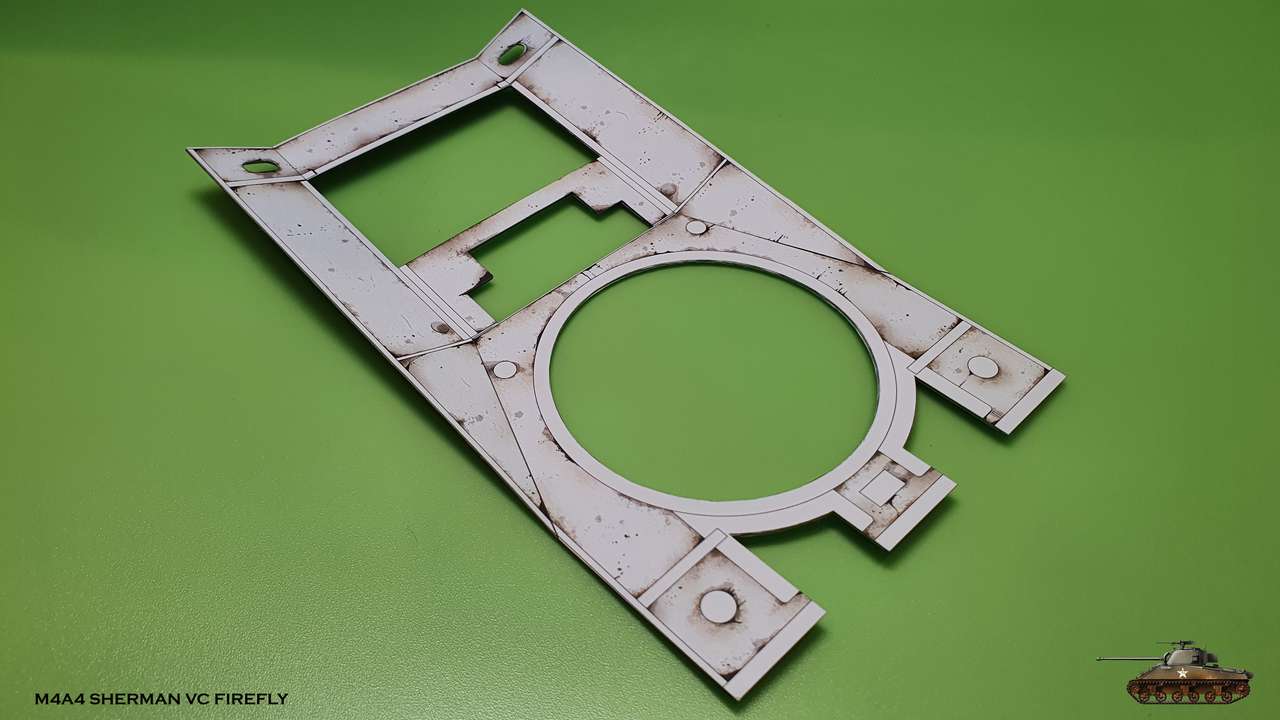
I'll try to describe my method to cut it at angle:
Put a steel ruler to the edge to be cutten. Put knife blade at angle, so the tip of blade will touch the ruler and blade will cut exactly on pointed line. Cut it slowly in pulled move.
If you cut everything precisely and assemble it carefully, the parts fit together perfectly. No mistakes. This is Halinski ;-)
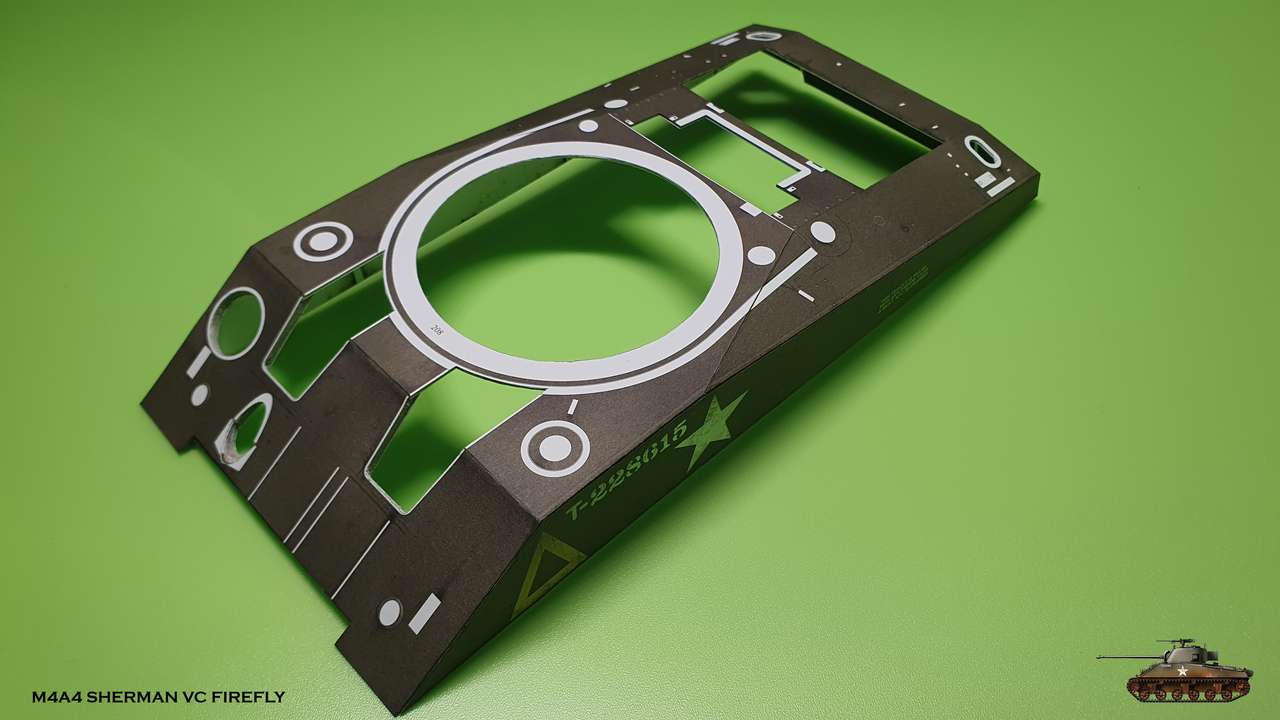
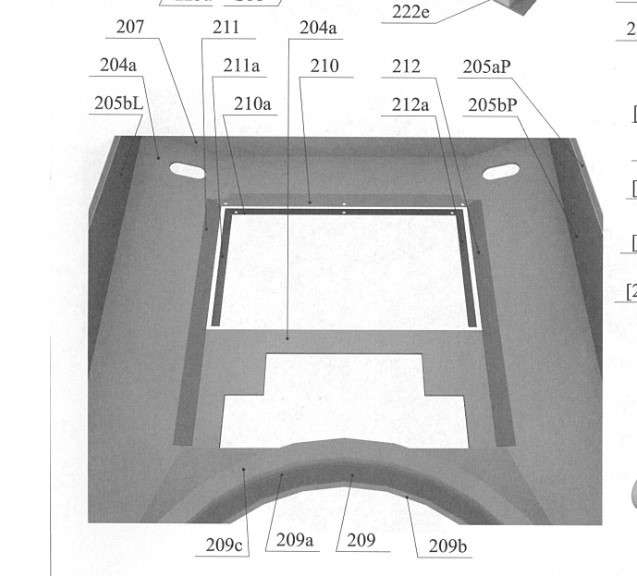
Top is the first. I glued frame parts to outer skin, joined corners and then glued inner one

Then sidewalls. Glued frame parts to inner skin, attached
to the top and only then outer skin.
At the same time added an exhaust pipe shield.

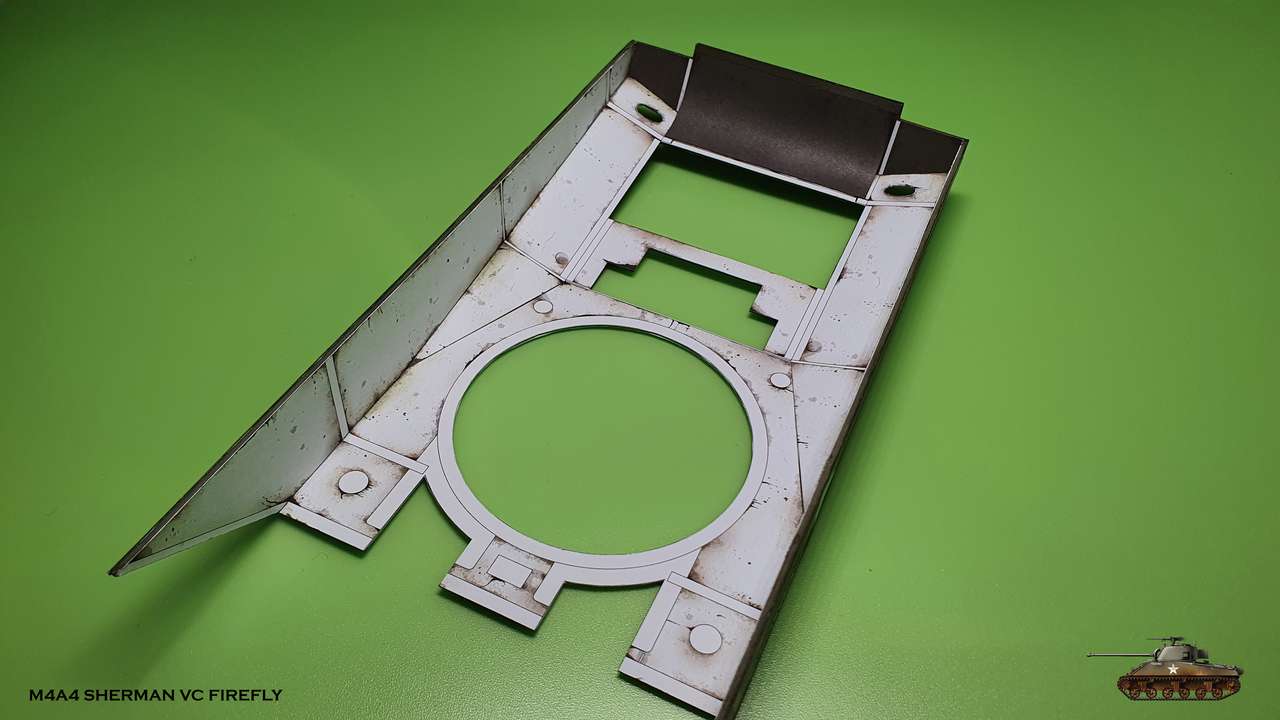
Last is the front part.
I had to remove one of the blankets that interfered with armor and do some little adjustments, but it went good

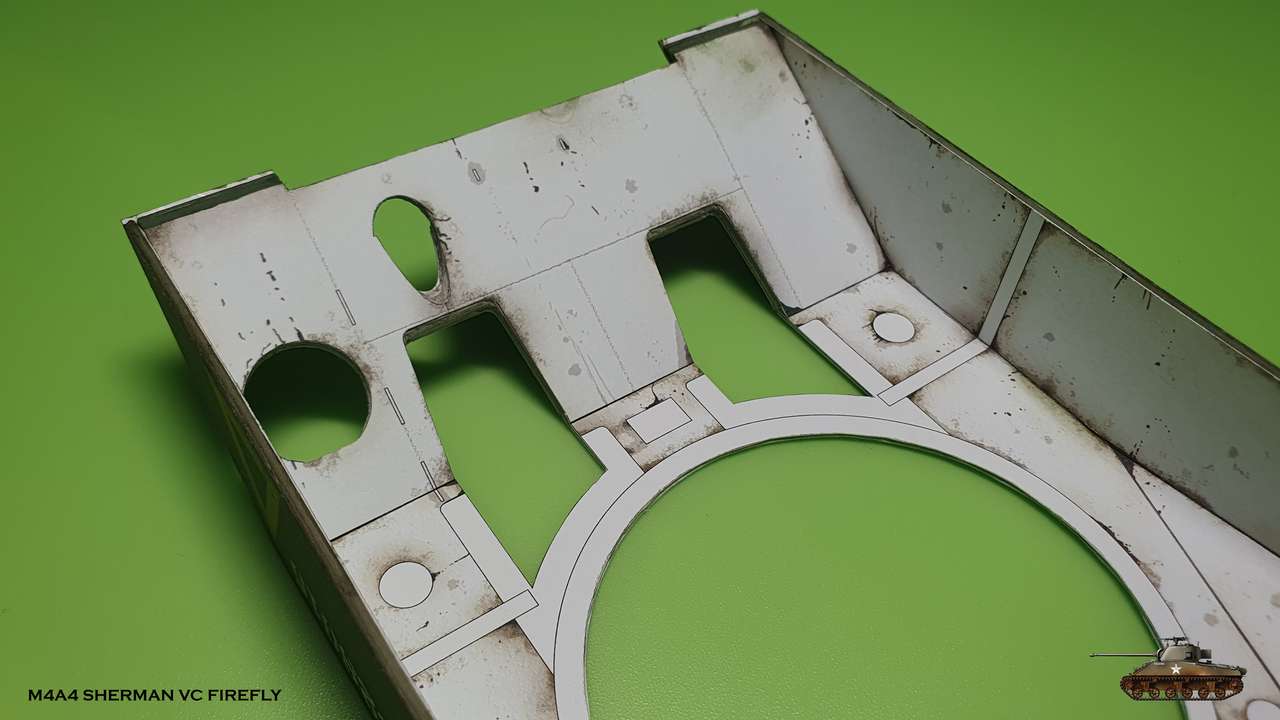
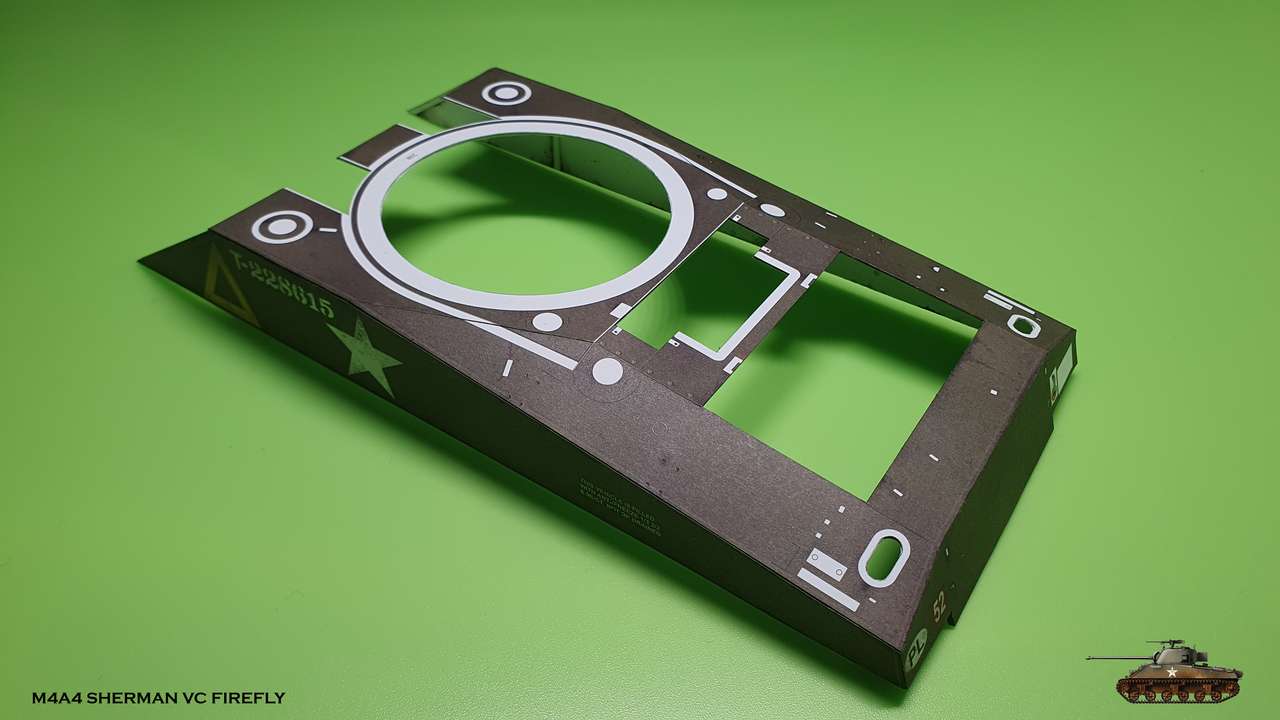
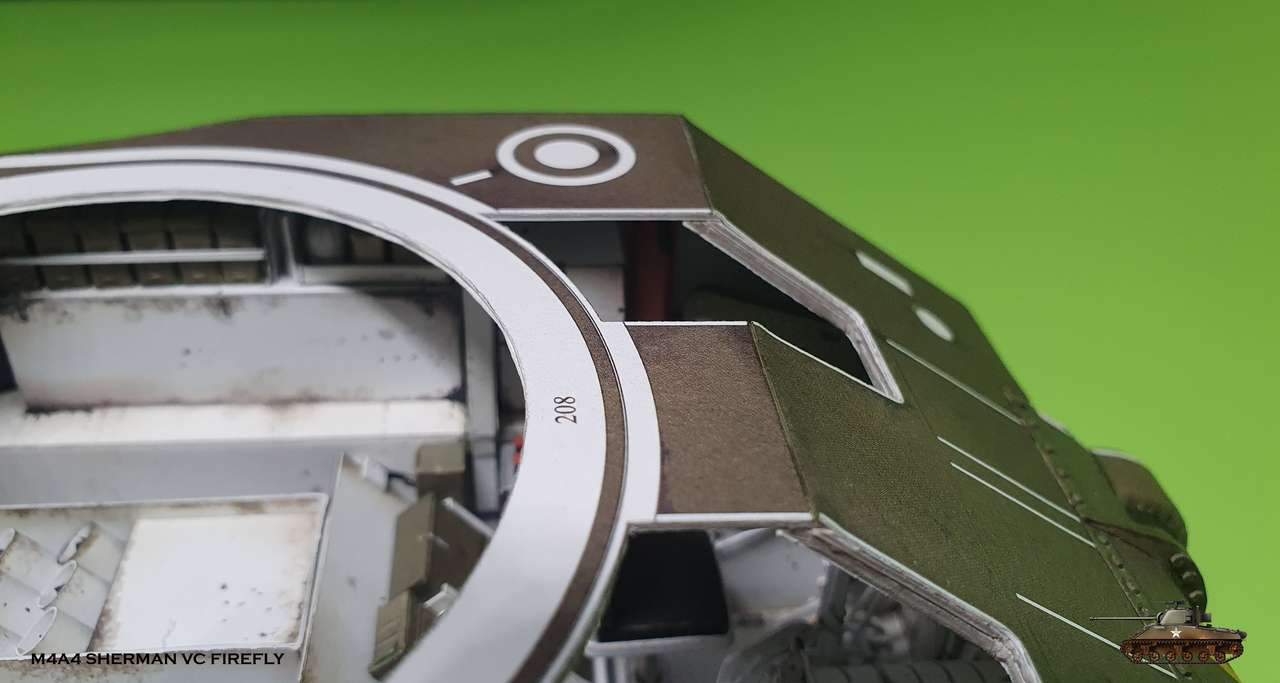
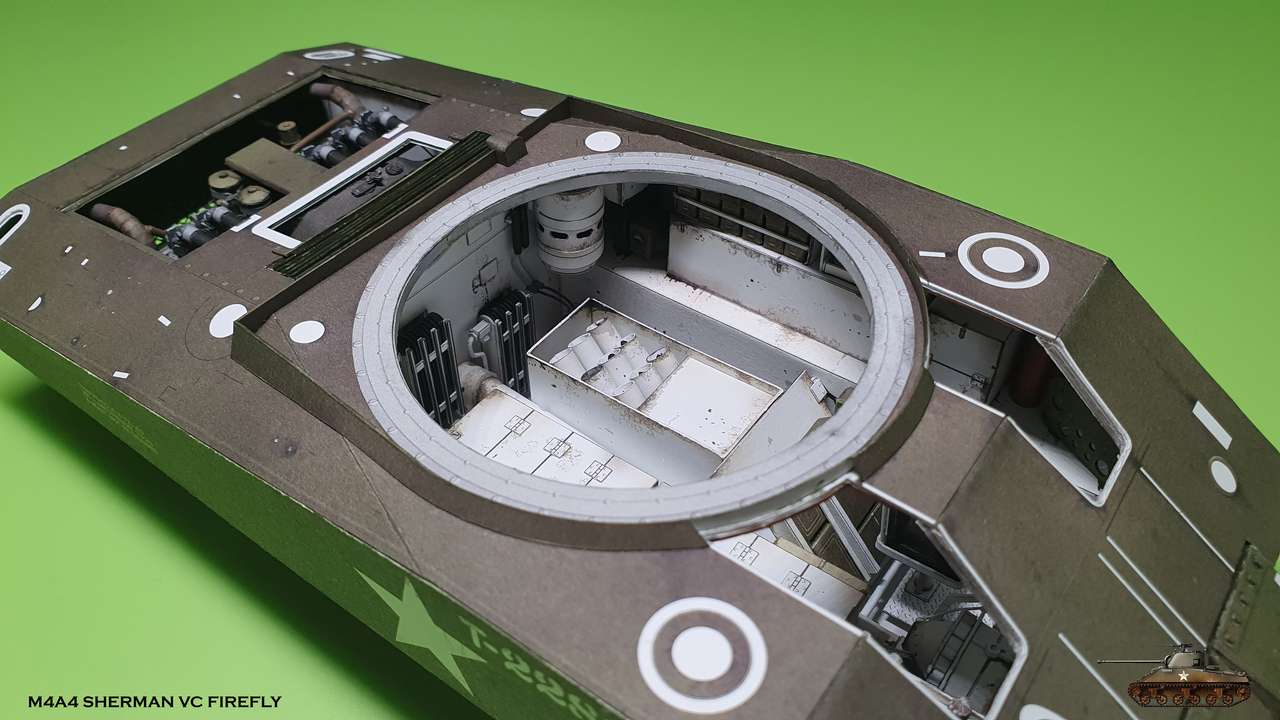
And hurray! My idea can be called a success! The upper part fits nicely and tight over the lower hall, front tab works like a lock. You can take off the top and observe all the delights inside.
About horizontal shelves - everything is relatively smooth and almost no connection is visible.
Honestly, even with closed top it makes possible to clearly see the inside through huge openings


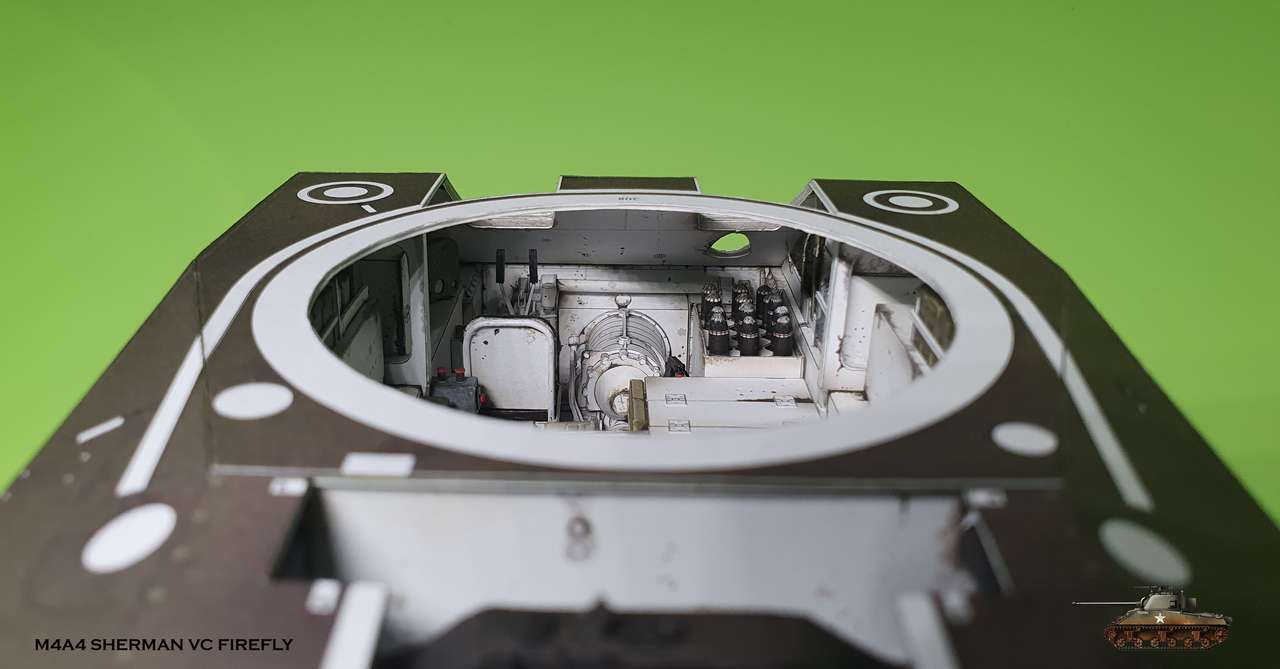
Here you can see how frame part is angled and joins with the rest of the hull.
Also, no engine parts (radiator is excluded and ok) stick over the top, so i am glad fixed that earlier!

An important stage in the assembly is the upper part.
Development, as always, is excellent and thoughtful - it is assembled in parts.
Developer even went further and simulated real armor thickness in 1:25.
Top is the most thinn, side thicker and front is the thickest, almost 2 millimeters in total.
All frame parts are cut at different angles on edges.
I'll try to describe my method to cut it at angle:
Put a steel ruler to the edge to be cutten. Put knife blade at angle, so the tip of blade will touch the ruler and blade will cut exactly on pointed line. Cut it slowly in pulled move.
If you cut everything precisely and assemble it carefully, the parts fit together perfectly. No mistakes. This is Halinski ;-)
Top is the first. I glued frame parts to outer skin, joined corners and then glued inner one
Then sidewalls. Glued frame parts to inner skin, attached
to the top and only then outer skin.
At the same time added an exhaust pipe shield.
Last is the front part.
I had to remove one of the blankets that interfered with armor and do some little adjustments, but it went good
And hurray! My idea can be called a success! The upper part fits nicely and tight over the lower hall, front tab works like a lock. You can take off the top and observe all the delights inside.
About horizontal shelves - everything is relatively smooth and almost no connection is visible.
Honestly, even with closed top it makes possible to clearly see the inside through huge openings
Here you can see how frame part is angled and joins with the rest of the hull.
Also, no engine parts (radiator is excluded and ok) stick over the top, so i am glad fixed that earlier!
Last edited:
Your angle cutting is great. I never succeeded in having the right angle and straight....
Great work!
Great work!

Haha, thanks Zathros
Now it's time to add details to upper armor.

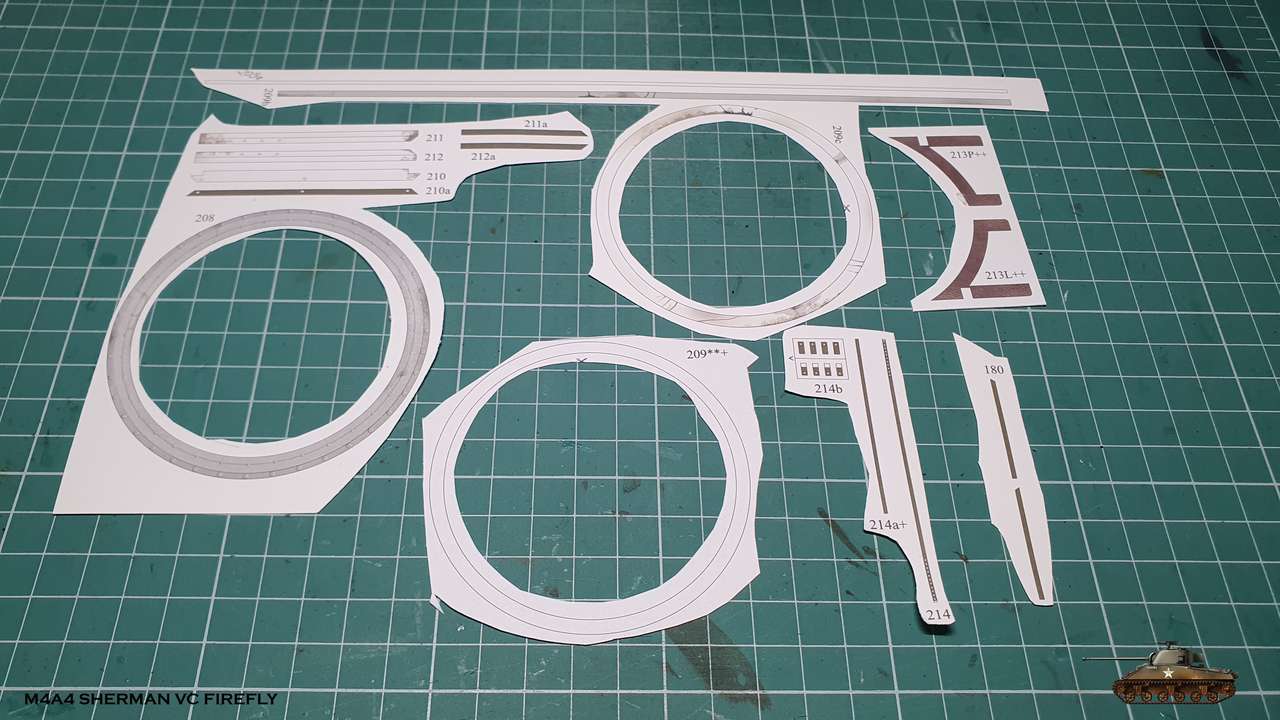
First is the frame to support closed engine bay door
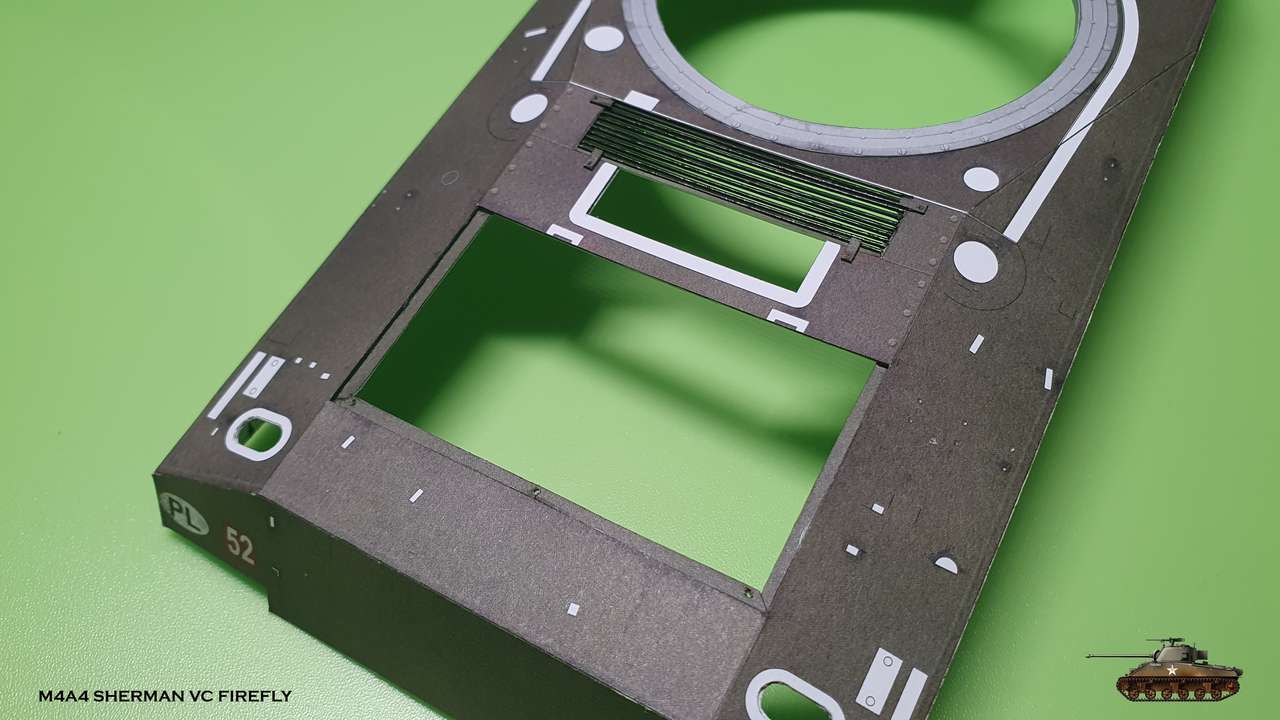
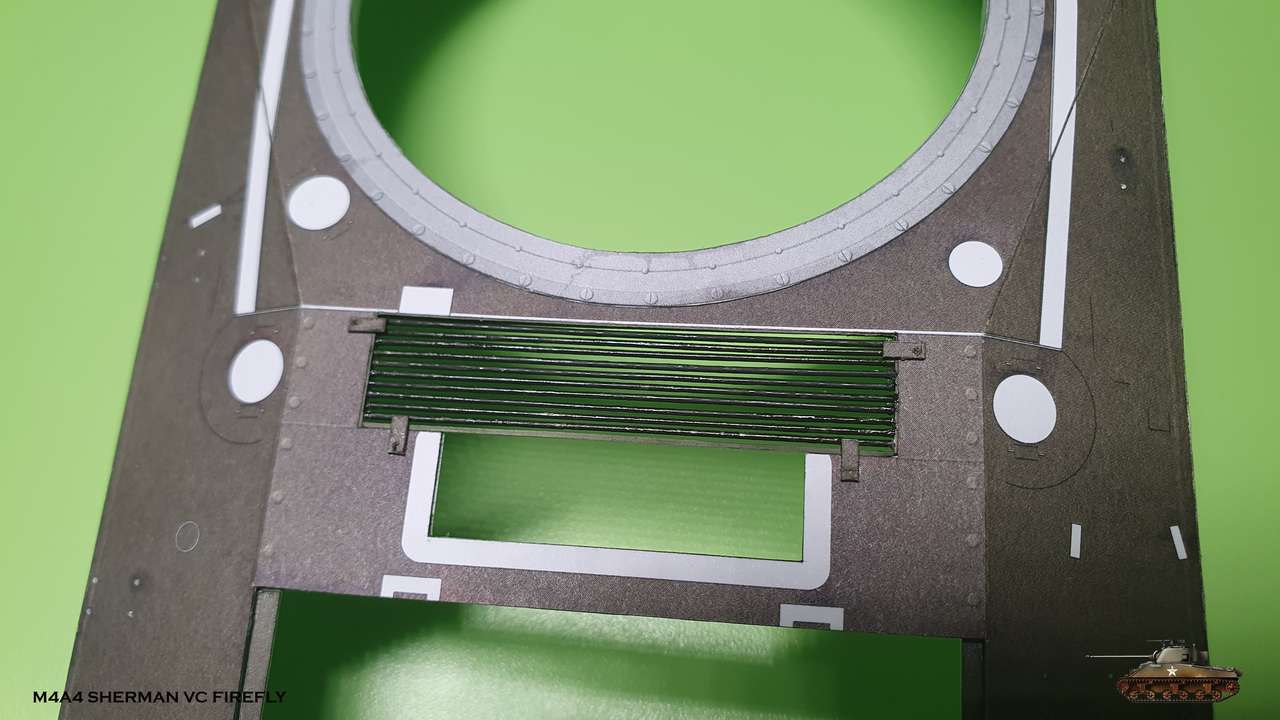
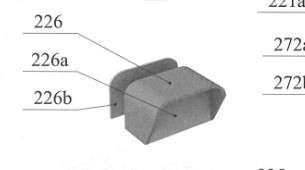
Second is radiator air flow mesh. This was maid from separate rods 0.6 mm,
that glued one by one into the frame.
A little tip: if you want to straighten some rod, just put it on table and put on top steel ruler or some aluminium/steel plate. Move ruler/plate forward and backwards, shifting on length of the rod. You will see magic")
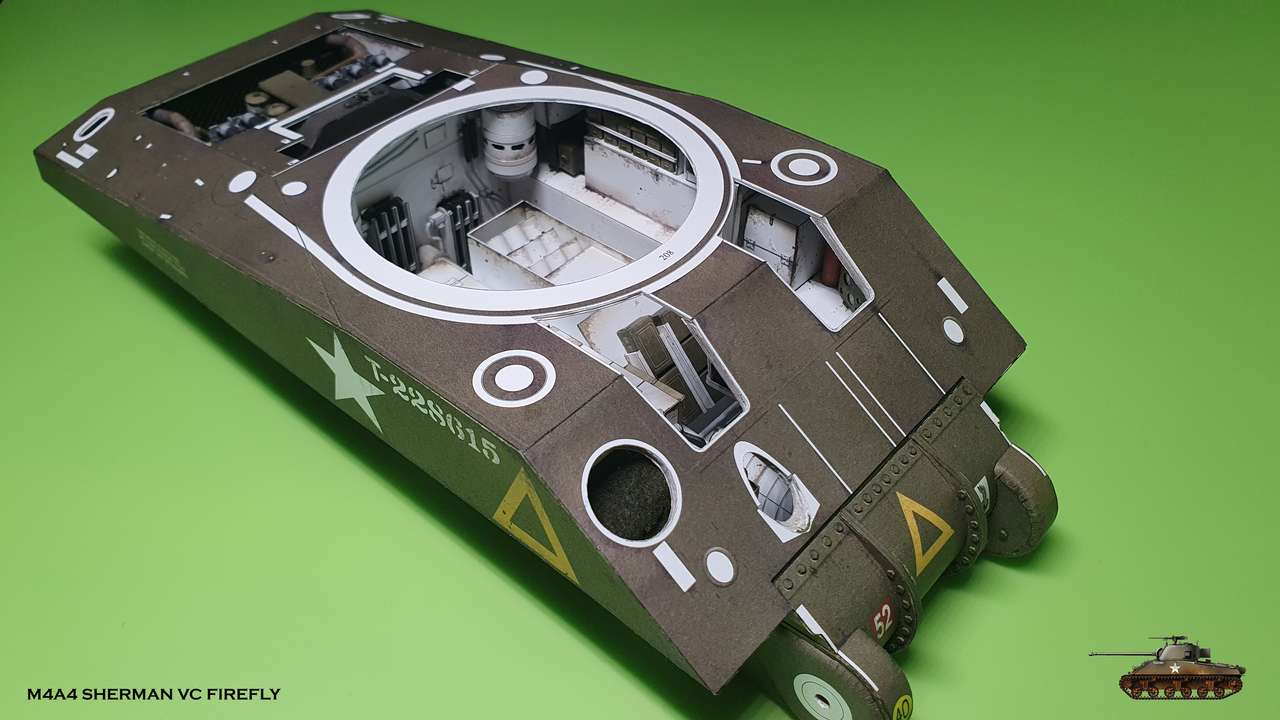
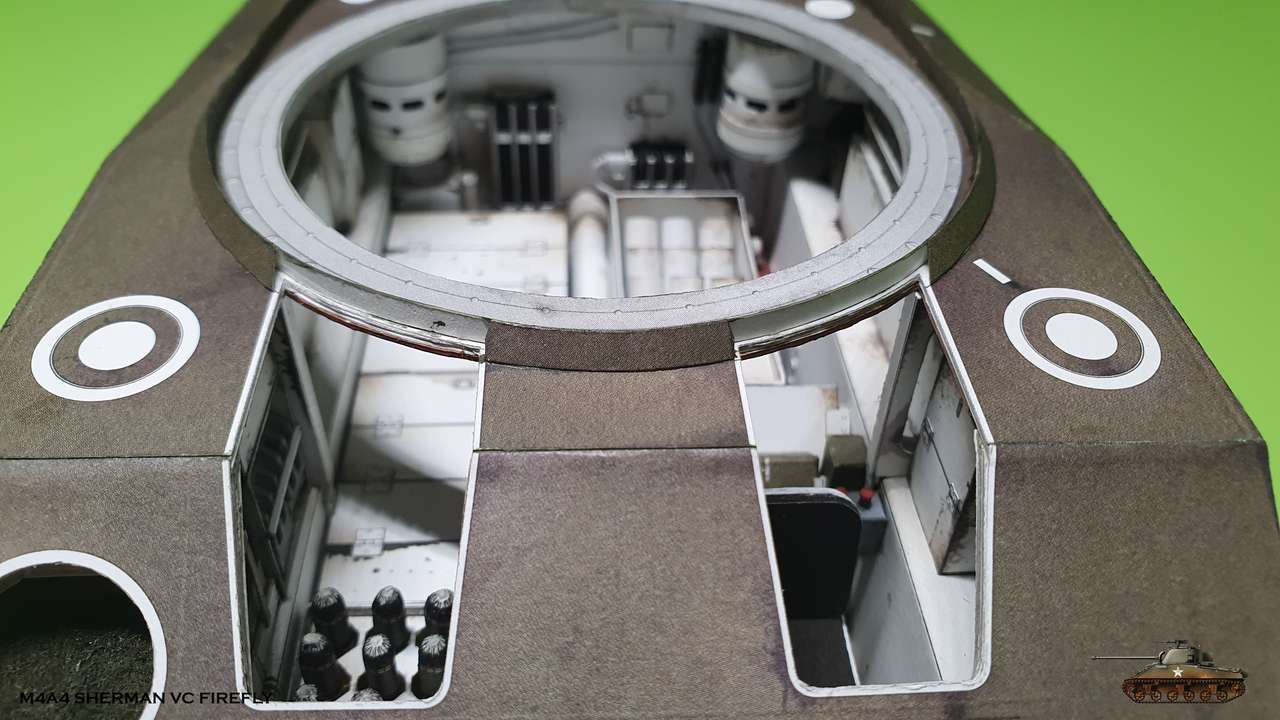
Third is turret ring
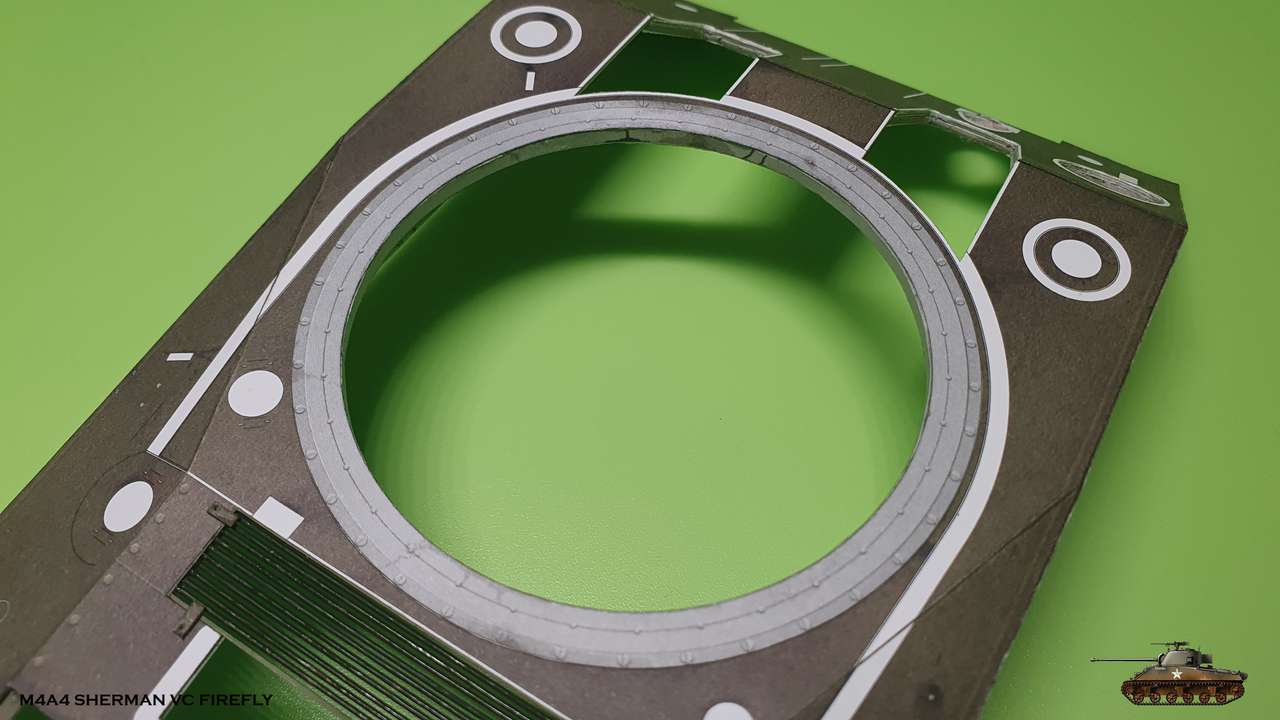
From the inside with last details that are two safety cushions on edges of front hatches

Here you can see radiator through the mesh
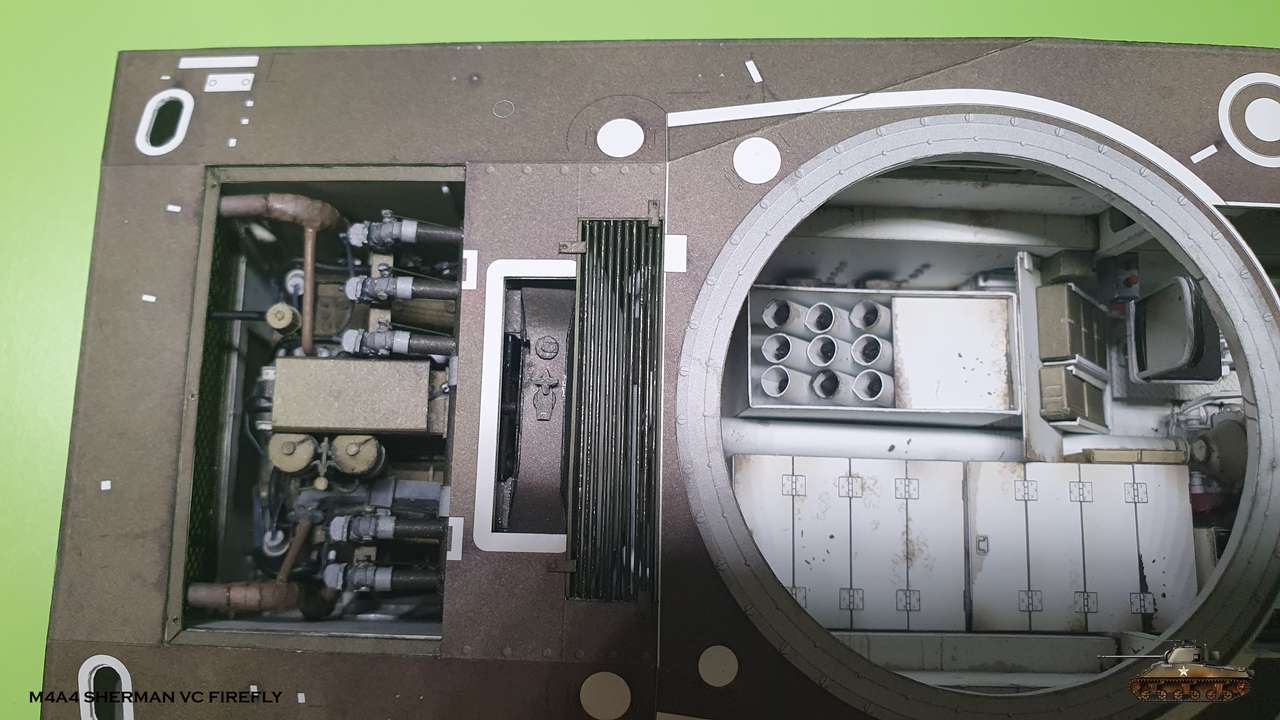
And while I collected parts for this details I found that I forgot about thin strips, that cover side gap between powertrain and hull. So don't forget those - part 180
Now it's time to add details to upper armor.
First is the frame to support closed engine bay door
Second is radiator air flow mesh. This was maid from separate rods 0.6 mm,
that glued one by one into the frame.
A little tip: if you want to straighten some rod, just put it on table and put on top steel ruler or some aluminium/steel plate. Move ruler/plate forward and backwards, shifting on length of the rod. You will see magic
Third is turret ring
From the inside with last details that are two safety cushions on edges of front hatches
Here you can see radiator through the mesh
And while I collected parts for this details I found that I forgot about thin strips, that cover side gap between powertrain and hull. So don't forget those - part 180
I know that i have said this before. However, everything looks so very clear, clean and crisp!
Like you, RB, I have run out of words to describe this. This build is beyond MoM material, this would be Model of the Decade or something.I know that i have said this before. However, everything looks so very clear, clean and crisp!
Thanks mijob, Rhaven and Micha.
Well, what is for sure it will probably take a decade to finish this model
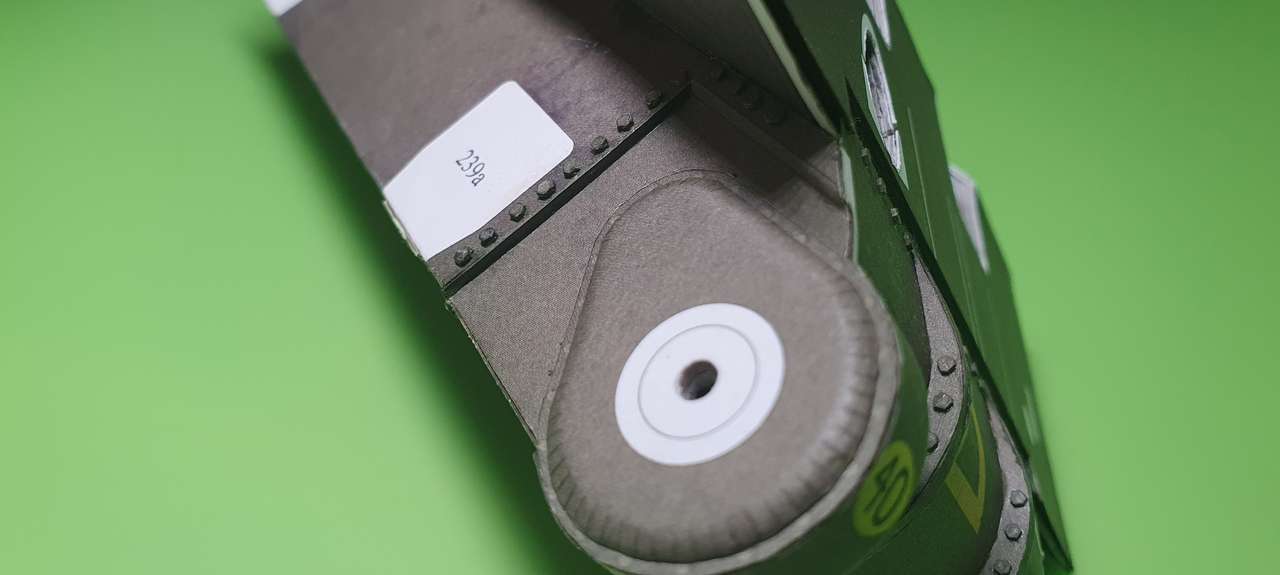
I continue with turret skirt.
Nothing special, but you need to be very accurate to put it in place.
First i glued iner part and then i glued angled outer parts.
Here's a little mistake - part 225g must be trimmed at edges, so it will later aline with hetches cover.
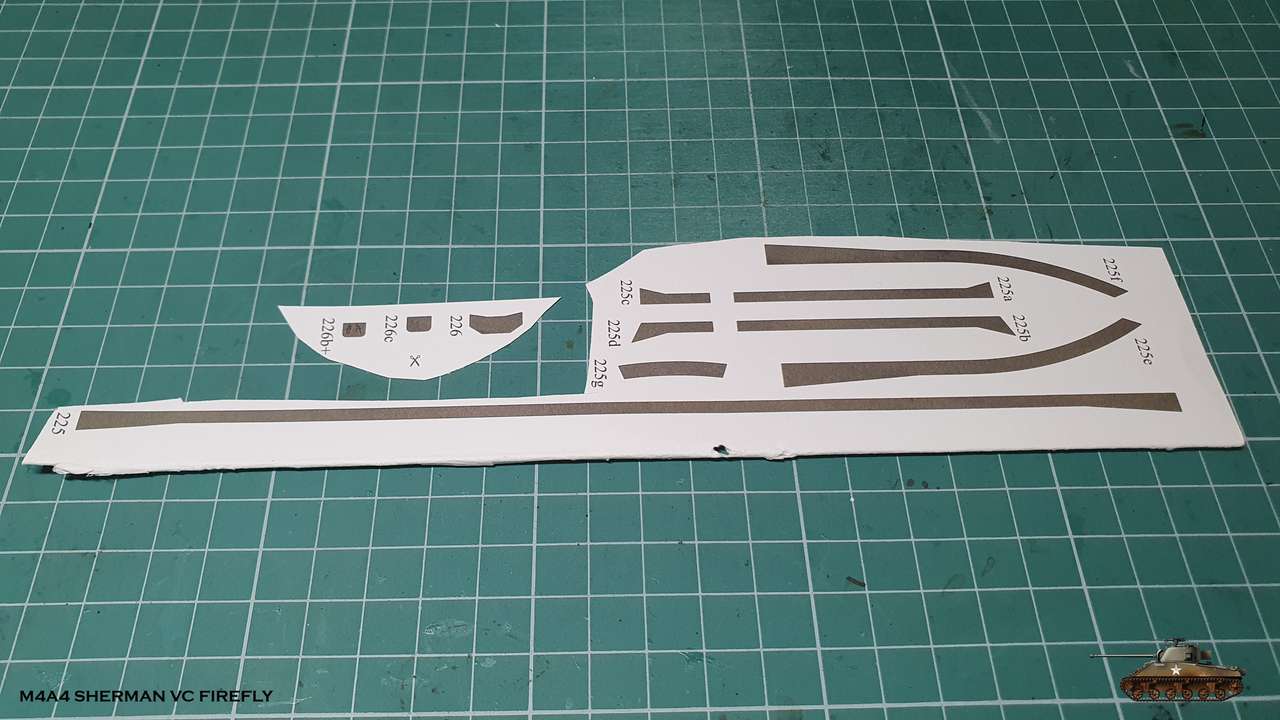
There is one more error here with assembly 226. I seems that this one was not designed under Halinski hat There are three parts: 226, 226b, 226c, but it must be as shown on the drawings - b is a and c is b.
Also part 226a in drawings glued inside the cover making some kind of wisor and it is white from inside with no inner strip provided to cover, so you need to paint it accordingly.
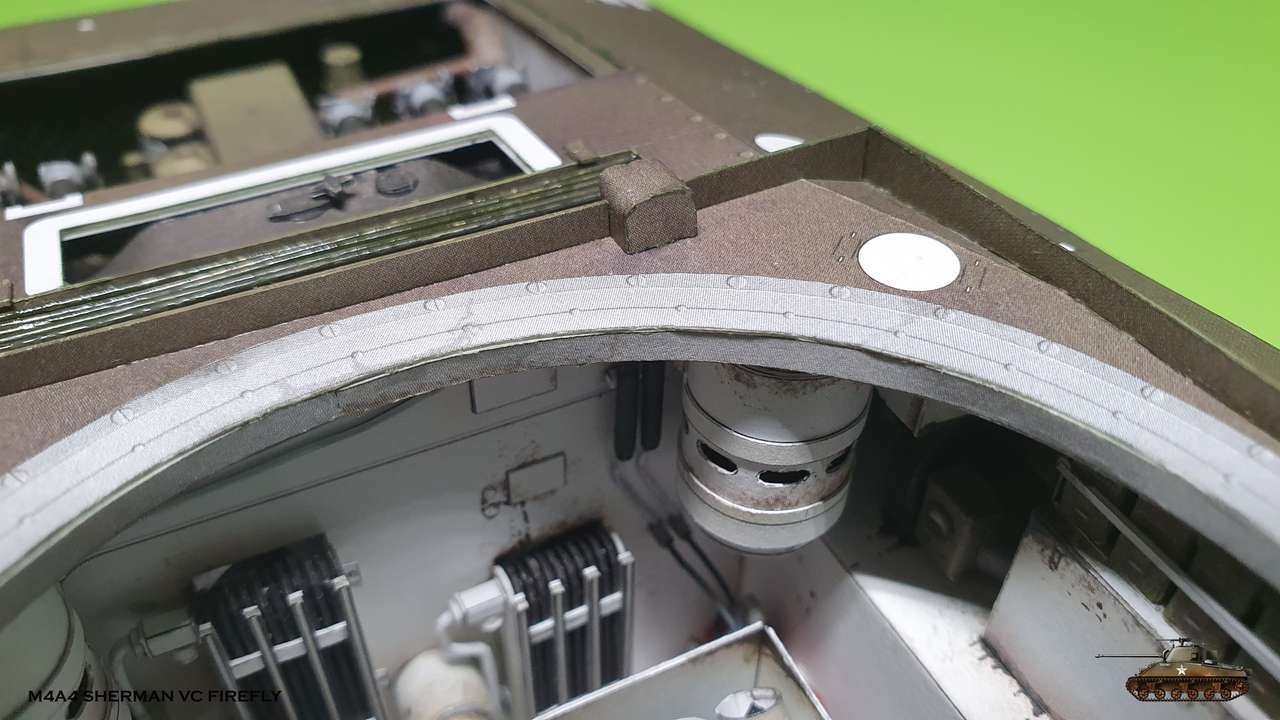
And what is this box you may ask? Well, this box contains two pull handles that operate the twin fire extinguisher system inside the tank.
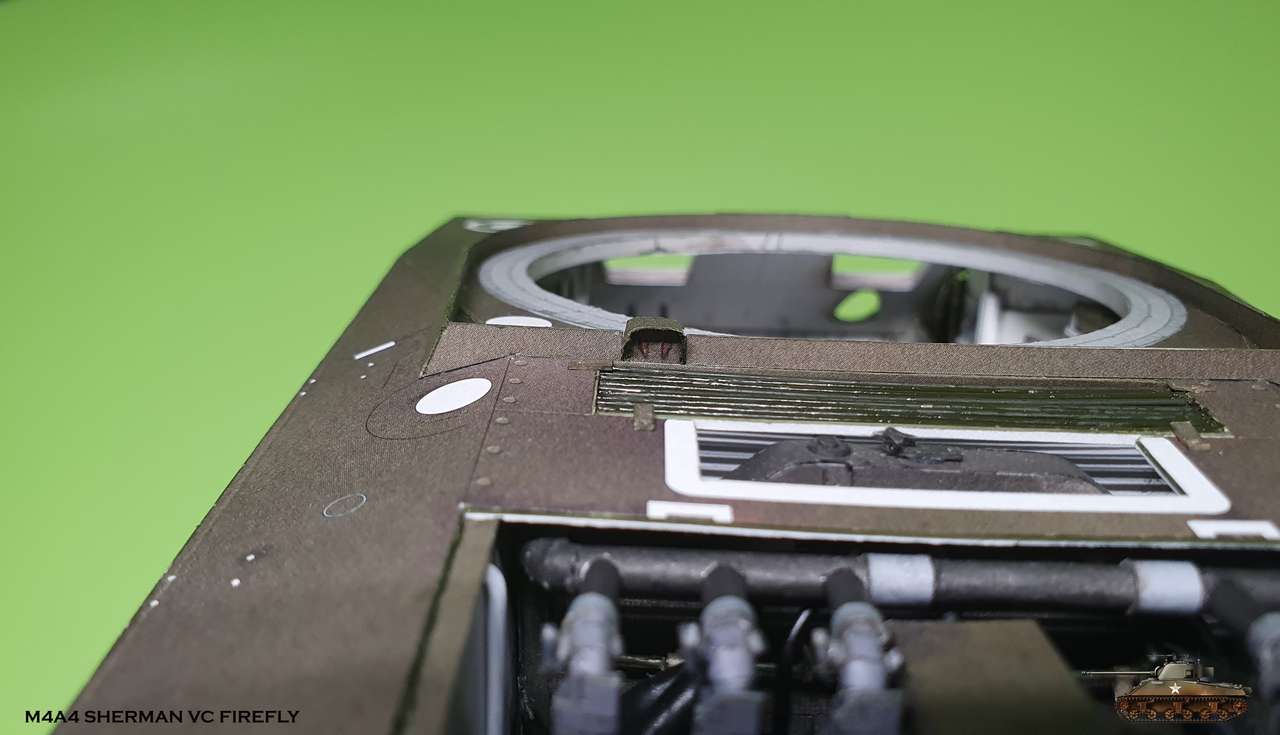
Here you can see how two lines inside go up to connect with pull handles
Like you, RB, I have run out of words to describe this. This build is beyond MoM material, this would be Model of the Decade or something.
Well, what is for sure it will probably take a decade to finish this model
I continue with turret skirt.
Nothing special, but you need to be very accurate to put it in place.
First i glued iner part and then i glued angled outer parts.
Here's a little mistake - part 225g must be trimmed at edges, so it will later aline with hetches cover.
There is one more error here with assembly 226. I seems that this one was not designed under Halinski hat
There are three parts: 226, 226b, 226c, but it must be as shown on the drawings - b is a and c is b. Also part 226a in drawings glued inside the cover making some kind of wisor and it is white from inside with no inner strip provided to cover, so you need to paint it accordingly.
And what is this box you may ask? Well, this box contains two pull handles that operate the twin fire extinguisher system inside the tank.
Here you can see how two lines inside go up to connect with pull handles