

Samaritan build
- Thread starter Mousemuffins1
- Start date
You are using an out of date browser. It may not display this or other websites correctly.
You should upgrade or use an alternative browser.
You should upgrade or use an alternative browser.
- Status
- Not open for further replies.
virajmperera/sneaker: I'll definatly do this, It may have to wait until I've finished this project though. I need to give some thought as to how to make it as clear as possible.
Thank you so much!....mucho appreciated, I lam looking forward to that. :thumb:
On a sour note, I was going to build the Samaritan along with this thread (out of plain ole cardstock of course), but I can not find the file. Can you tell me what the file name is so I can search for it, instead of going through one disc after another. My models are...ahem not that organized yet..wall1
I just did a search for Samaritan papercraft, and soon enough came up with UHU02's blog page, and downloads.
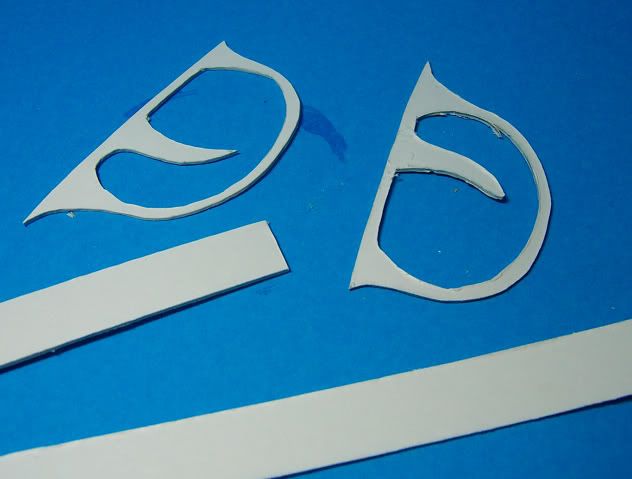
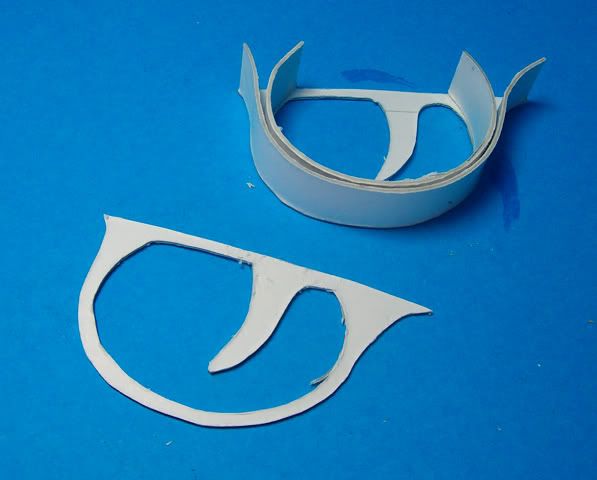
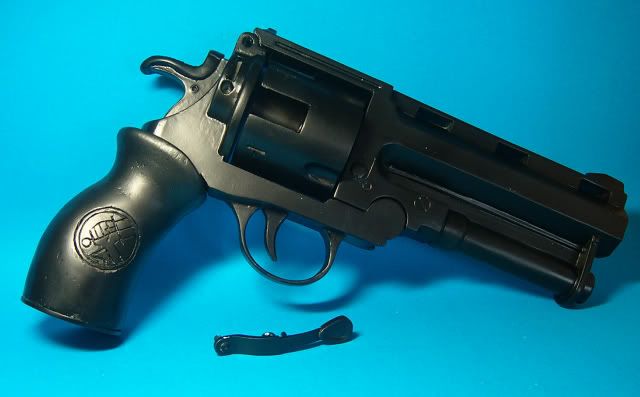
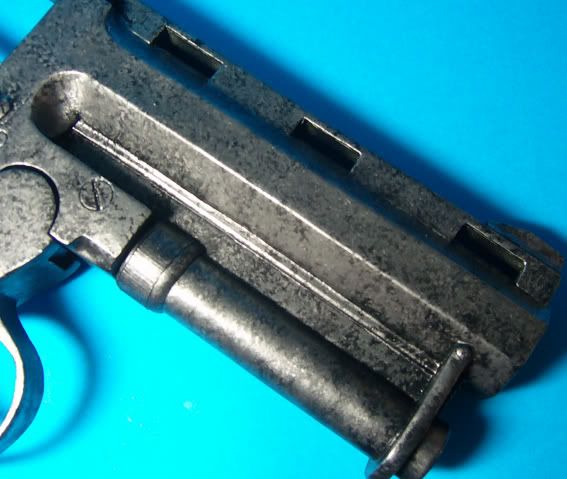
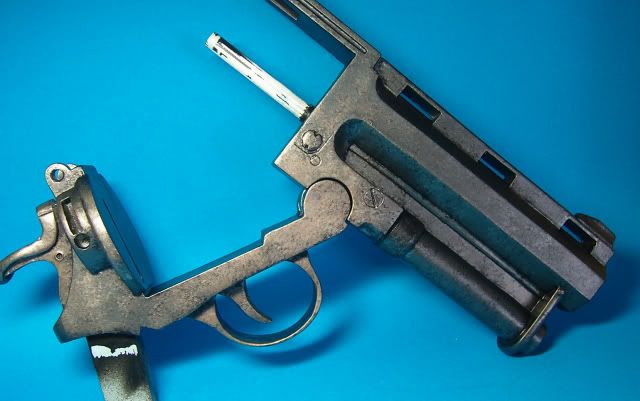
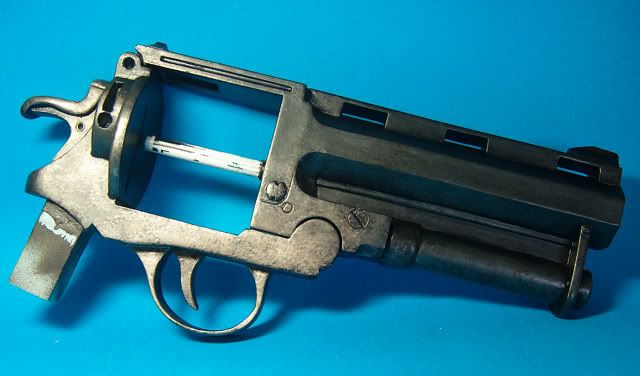
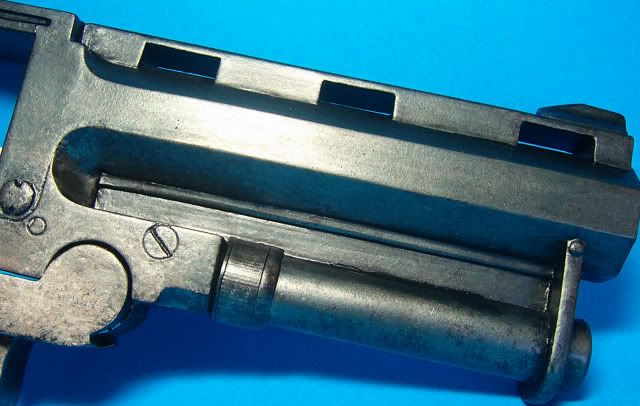
There's a catch: The swivelling arm at the back of the weapon that swings upwards to open the cylinder break is incorrect. Which is shame, 'cos i thought it was cool. But it appears the 'real' gun used the same arm as a more elegant pin lever instead. well, I want a working break, so set about trying to make it work. and, I might add, Succeded!!!
The lever itself is multi layered paper/ superglue, built over a simple form to get the shape right. This method gives an amazingly strong component, much stronger than an equivelent plastic part.
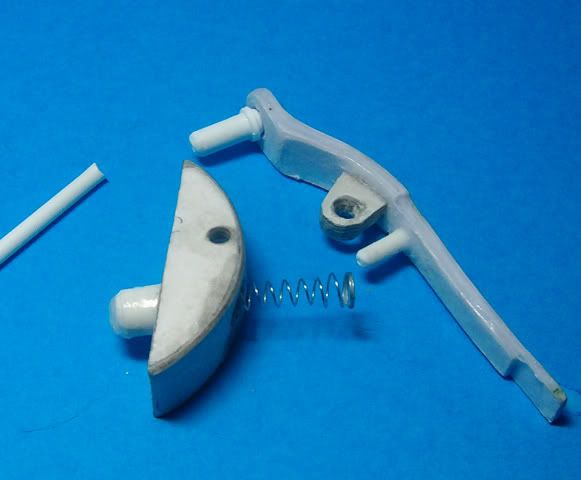
The spring came from a cheap pen.
I have used a small quantity of plastic tubing for this job, as sometimes you just have to use the right material to make something work.
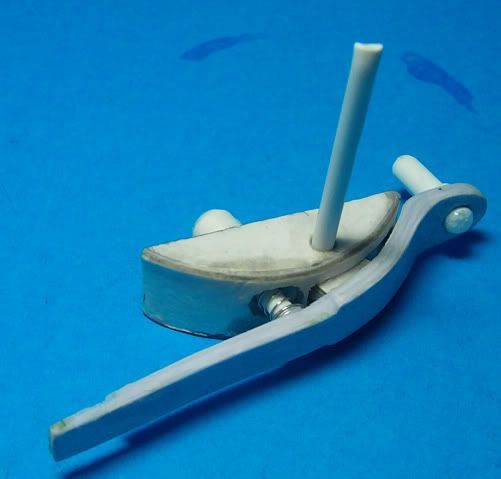
This was quite an engineering feat, and way beyond my normal scope as I'm usually quite happy with non-working replicas. I'm hugely pleased to say it works, when you depress the lever, the pin pulls and the break swings open. Chuffed.
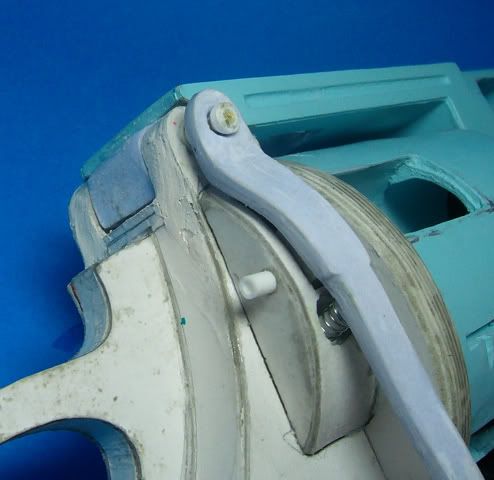
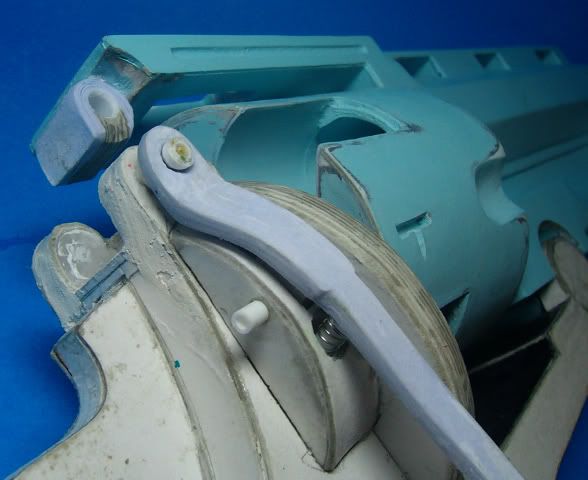
notice the pictures show the gun still very much at the 'Crap' stage, and still need some serious work.
There's a catch: The swivelling arm at the back of the weapon that swings upwards to open the cylinder break is incorrect. Which is shame, 'cos i thought it was cool. But it appears the 'real' gun used the same arm as a more elegant pin lever instead. well, I want a working break, so set about trying to make it work. and, I might add, Succeded!!!
The lever itself is multi layered paper/ superglue, built over a simple form to get the shape right. This method gives an amazingly strong component, much stronger than an equivelent plastic part.
The spring came from a cheap pen.
I have used a small quantity of plastic tubing for this job, as sometimes you just have to use the right material to make something work.
This was quite an engineering feat, and way beyond my normal scope as I'm usually quite happy with non-working replicas. I'm hugely pleased to say it works, when you depress the lever, the pin pulls and the break swings open. Chuffed.
notice the pictures show the gun still very much at the 'Crap' stage, and still need some serious work.
I just did a search for Samaritan papercraft, and soon enough came up with UHU02's blog page, and downloads.
Doh! Thanks Mousemuffins1. Once I saw the web page I was able to find it. I never renamed the files.
This looks great by the way.
sneaker
notice the pictures show the gun still very much at the 'Crap' stage, and still need some serious work.
That being the case, you're doing a great job of polishing a turd. sign1
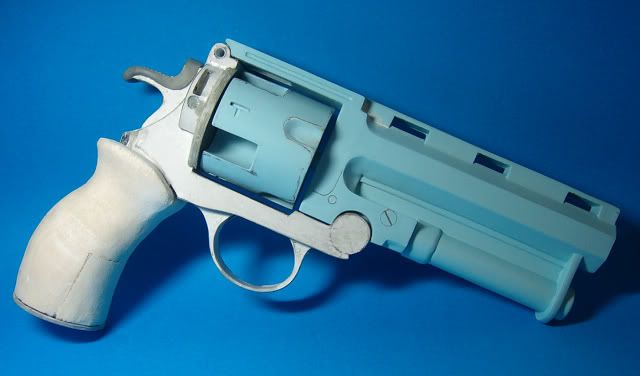
Jumped ahead to the grip. I've altered the method of anchoring the grip because it suited the materials I'm using, not because the suggested method is inadequate.
I've carved the grips from balsa again, as I did with the Colt Navy, and as you can see from the pictures, I made a bit of a mistake and had to add a bit of extra material to the front 'cos I took a bit too much off.
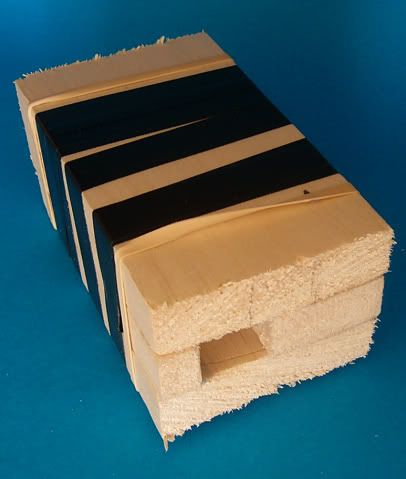
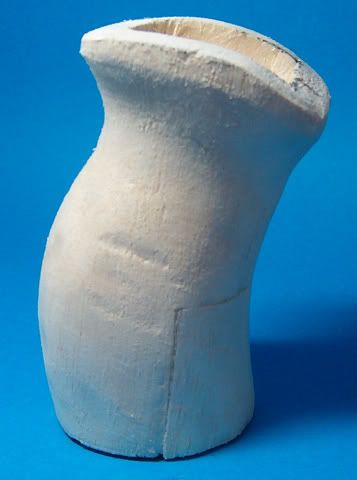
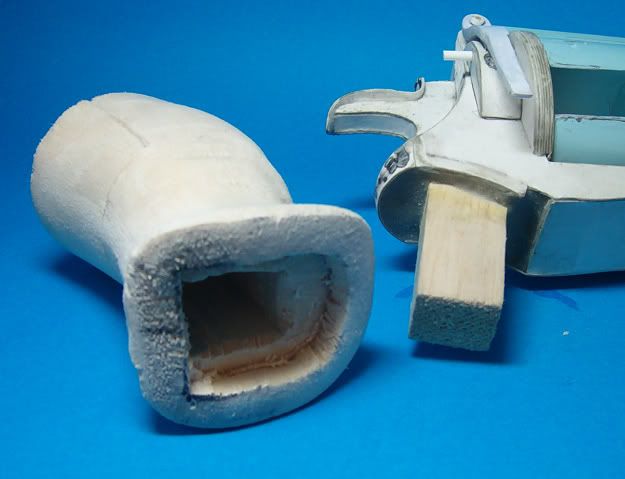
It's really starting to take shape now.
I've carved the grips from balsa again, as I did with the Colt Navy, and as you can see from the pictures, I made a bit of a mistake and had to add a bit of extra material to the front 'cos I took a bit too much off.
It's really starting to take shape now.
thankyou!
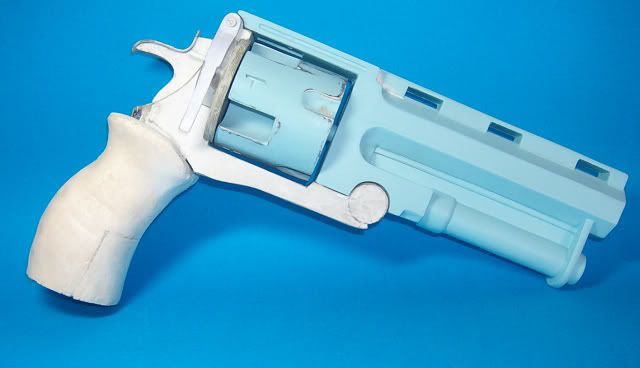
well, it's been a lousy day for spraying, so i've skipper ahead a bit and started adding some details.
The hammer is nearly done, I used a different card for this as it was a bit more flexible than the 1mm stock I use for most things, and it seems to be working well around the bendy bits. I aslo added ribbing on the top of the thumb break.

The trigger guard has also been roughed out. I needed a redesign from the original, as the proper one has a different shape. I've left the top part/trigger bit in place to make sure it all dried in the right shape, but I cut them away before attaching them to the frame.
...and I've started to add some of the details like screws and the like by scribing them into the surface with a very sharp compass. Try doing that with your regular card model!
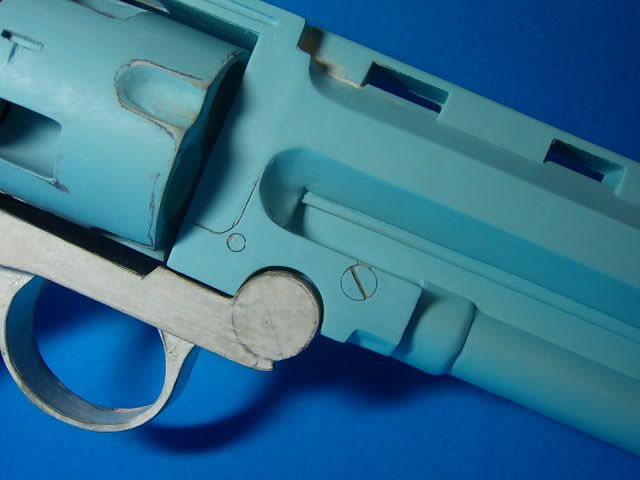
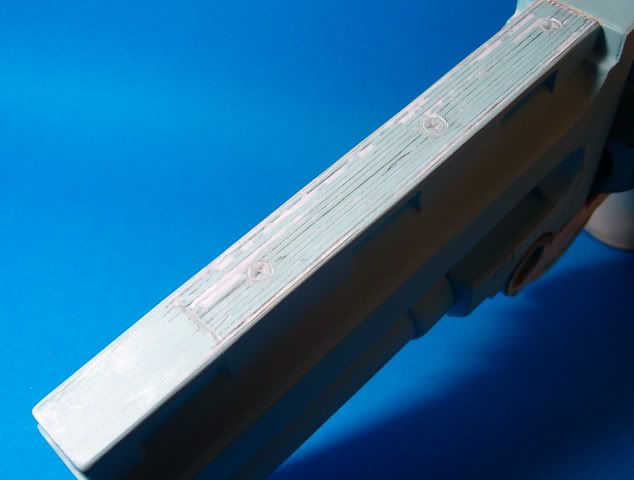
I'm about as far as I can go until the weather clears up a bit. Still, I can start laminating my Thompson. or maybe my pulse rifle....
well, it's been a lousy day for spraying, so i've skipper ahead a bit and started adding some details.
The hammer is nearly done, I used a different card for this as it was a bit more flexible than the 1mm stock I use for most things, and it seems to be working well around the bendy bits. I aslo added ribbing on the top of the thumb break.
The trigger guard has also been roughed out. I needed a redesign from the original, as the proper one has a different shape. I've left the top part/trigger bit in place to make sure it all dried in the right shape, but I cut them away before attaching them to the frame.
...and I've started to add some of the details like screws and the like by scribing them into the surface with a very sharp compass. Try doing that with your regular card model!
I'm about as far as I can go until the weather clears up a bit. Still, I can start laminating my Thompson. or maybe my pulse rifle....
the rain seems to have ceased for the moment, so I'm spraying like mad before it comes back.
I'm working on more of the details today, the BPRD logos on the grip in particular.
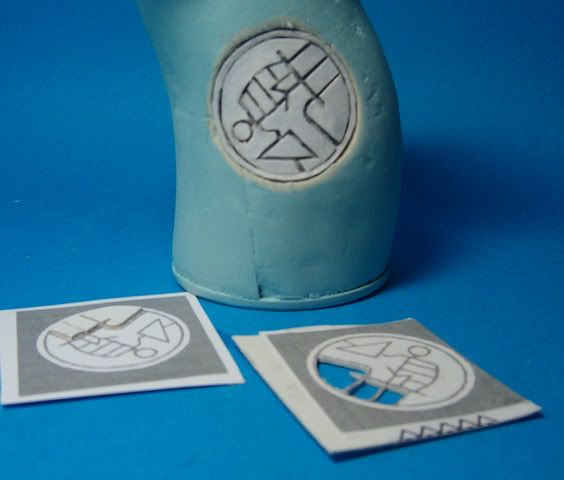
It's a bit like making a jigsaw puzzle, only really small.
I'm working on more of the details today, the BPRD logos on the grip in particular.
It's a bit like making a jigsaw puzzle, only really small.
whoa fella's looks like we have a new sheriff in town.
yet again the bar is raised on model building. Thanks for the thread, I'm watching it with great anticipation.
Sincerely,
Jon
yet again the bar is raised on model building. Thanks for the thread, I'm watching it with great anticipation.
Sincerely,
Jon
And now..... Paint!
Firstly, the major parts, all undecoated black. I use a auto primer matt black ( which dries satin, for some odd reason) because it dries much tougher and more durable than a cheap generic spraycan. It will need a few more coats, though.
The thing you want to acheive when painting a model this size, is not to have the whole thing just one colour. This looks flat and unintresting and not teribly realistic. So the first thing to do is make it look horrible. (bear with me..) I've stippled on a layer a gunmetal colour mixed with Citadel Chaos Black and Boltgun metal.
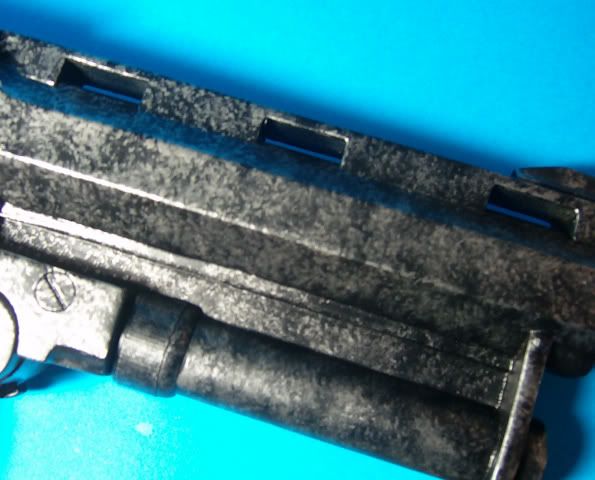
this was followed by a second darker stippling by adding more black to the first colour. you want about midway. The important thing with the stippling is that it be uneven, but consistent. The second layer fills in much of the area not coverd by the first.
Some blue (Regal blue, in this case) and a touch more black was added and the process repeated, a bit less intensly than the first two layers, but evening out the colour a bit more.
A warmer tone was mixed by adding a bit of mid brown with our original colour, and applied around areas of wear, like the hammer, rear and underside of the weapon.
more silver was added in a couple of steps until I had a pleasing worn effect.
These last layers were applied with more of a scrubbing motion and very little paint on the brush. the brush, by the way, is old, largish and looks like a demented spider. useless for proper painting, but great for this job.
Finally, a glaze (a semi-transparent mix of matt varnish, black and blue paint) was slopped on and wipped away untill I was happy with the overall tone.
Next up, I'll be painting the grip and adding some details.
Firstly, the major parts, all undecoated black. I use a auto primer matt black ( which dries satin, for some odd reason) because it dries much tougher and more durable than a cheap generic spraycan. It will need a few more coats, though.
The thing you want to acheive when painting a model this size, is not to have the whole thing just one colour. This looks flat and unintresting and not teribly realistic. So the first thing to do is make it look horrible. (bear with me..) I've stippled on a layer a gunmetal colour mixed with Citadel Chaos Black and Boltgun metal.
this was followed by a second darker stippling by adding more black to the first colour. you want about midway. The important thing with the stippling is that it be uneven, but consistent. The second layer fills in much of the area not coverd by the first.
Some blue (Regal blue, in this case) and a touch more black was added and the process repeated, a bit less intensly than the first two layers, but evening out the colour a bit more.
A warmer tone was mixed by adding a bit of mid brown with our original colour, and applied around areas of wear, like the hammer, rear and underside of the weapon.
more silver was added in a couple of steps until I had a pleasing worn effect.
These last layers were applied with more of a scrubbing motion and very little paint on the brush. the brush, by the way, is old, largish and looks like a demented spider. useless for proper painting, but great for this job.
Finally, a glaze (a semi-transparent mix of matt varnish, black and blue paint) was slopped on and wipped away untill I was happy with the overall tone.
Next up, I'll be painting the grip and adding some details.
The Grips:
Firstly, I painted the whole grip a nice orangey brown

Then I mixed up a glaze of dark purply red brown, and applied it with my trusty demented spider brush in a deliberatly streaky manner
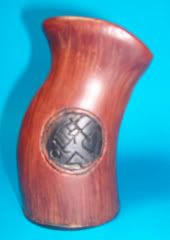
and then I did it again....
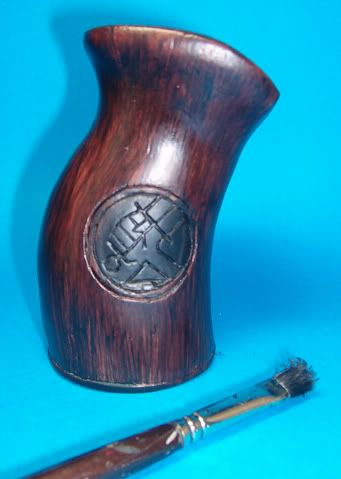
..till looked like a deep walnut.
The BPRD logos were picked out in a dirty silver colour ;
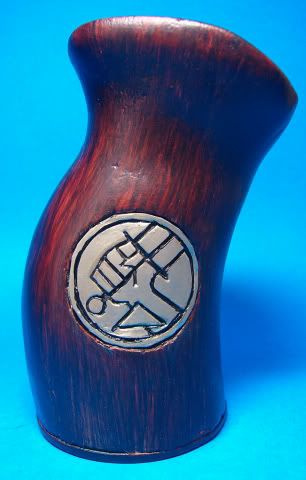
and highlighted and shaded a bit for a bit extra life ;
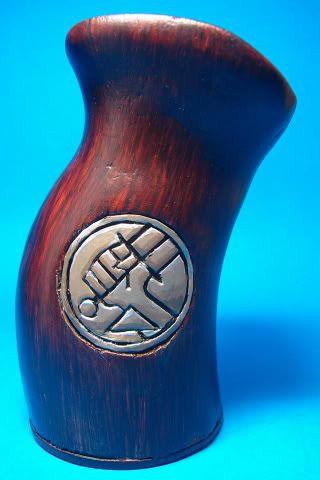
...and then put in place on the gun to see how it all looks..
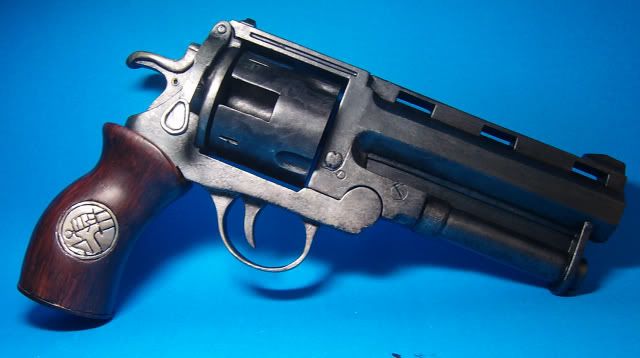
Just a few more minor details to add, and of course I need to make up a handfull of shells to load it with. they'll also add a splash of colour.
Firstly, I painted the whole grip a nice orangey brown
Then I mixed up a glaze of dark purply red brown, and applied it with my trusty demented spider brush in a deliberatly streaky manner
and then I did it again....
..till looked like a deep walnut.
The BPRD logos were picked out in a dirty silver colour ;
and highlighted and shaded a bit for a bit extra life ;
...and then put in place on the gun to see how it all looks..
Just a few more minor details to add, and of course I need to make up a handfull of shells to load it with. they'll also add a splash of colour.
Breathtaking.. An awesome build.. attention to detail is one of my favorite things and you got that nailed down but good.. Congrats and can't wait to see your next project.
- Status
- Not open for further replies.