Samaritan build

Status
Not open for further replies.
Okay, in the tradition of all things card modeling, I'm going to start a new project before I finish the last one (see nothings 1851 colt navy build thread...). you know how it is, Parts all laminated awaiting drying, but I want to build now, D*mnit.

Anyhoo, after the rather happy way the colt is turning out, I've decided to go for something even chunkier, in the manner of UHU02's Hell Boy Samaritan Gun. This puppy's LARGE.

Before I start, is there anyone out there who could direct me to build thread/ slightly more imformative instructions? The suplied single page of photos leaves me with a few questions as to how to proceed.

Back soon,

Mouse.
 
well, the colts finished, so I'm now well into the Samaritan. The techniques used in this thread ore not traditional card modelling techniques, but rather show how I build a card model using the design as basis for a much stronger and hopefully more realistic version.

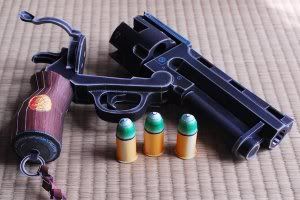
What I hope to do is take a well designed model, which if made "straight from the printer' will look something like this:

b_2.jpg


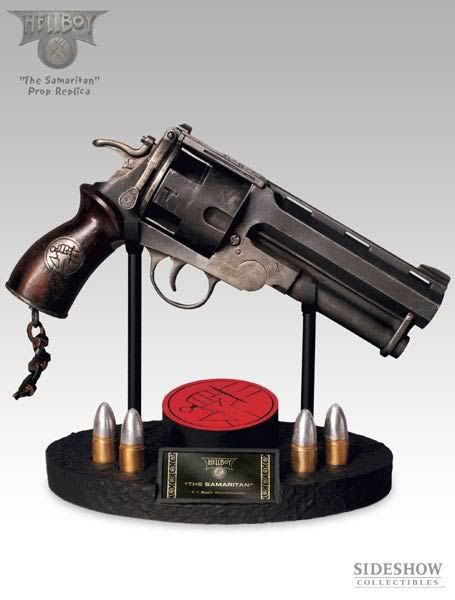
And make it look more like this:

revolver_hellboy.jpg


Requirements: 1mm card. I buy this in large sheets from a stationers. The samaritan will use about 1/2 a sheet.

White glue. Normal PVA. or Elmers for you Americans.
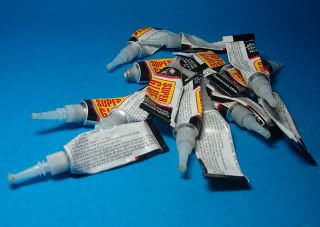
Superglue. CA adhesive. Cheapest you can get. you'll need alot.
Spray primer. I use an auto body primer, beause it dries enough to work with very quickly.
Pre mixed waterbased wood putty. A mate put me onto this stuff, after seeing the struggles I went through getting a couple of the Colt Navys parts smooth using the superglue method. Awesome. a quick wipe and the seams are filled. Great for tight rounded concave corners.
A superglue accelerator is also usful, but not hugely important.
Fine sand paper. I tend to use the wet and dry type.

Next: Starting the frame.
 
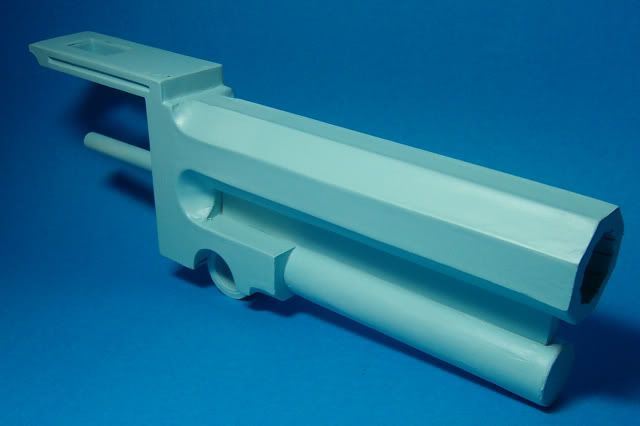
I know I said the frame, but I think this would be more aptly discribed as the Barrel assembly.

First up, Print everything on standard paper in greyscale/text to save some ink. As I'll be painting this thing, print quality is not important, as long as the parts are clear enough to use as patterns. I've glued pretty much the whole lot to 1mm card, just using white glue. I don't seem to have any trouble with warping/wrinkles, just keep the glue well spread out, even, and squish it flat while it dries.

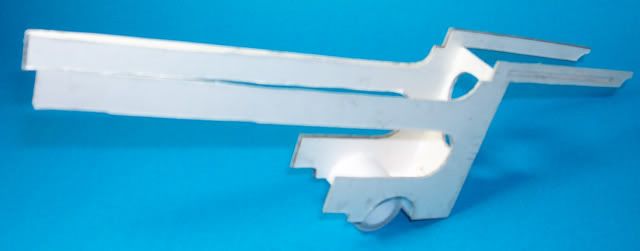
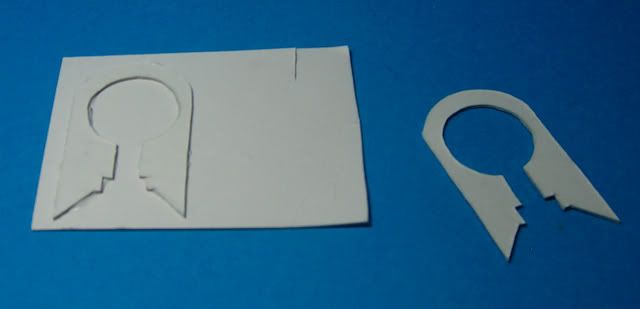
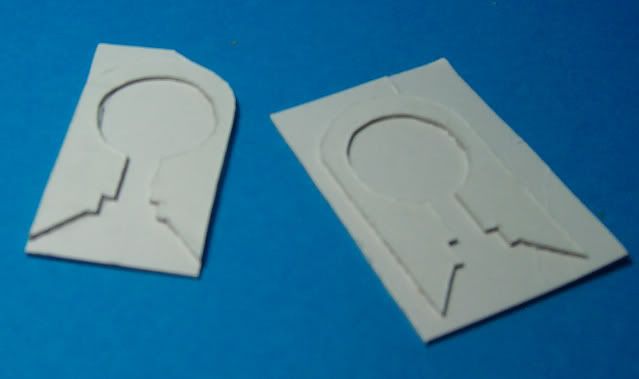
Next trick it to cut out your first pieces, trace around them, cut out the new piece 1mm inside the line, and glue it to the first. this gives a 2mm thick part with a small ledge around the inside edge (make suer it IS the inside..:eek:ops:) This is the basic plan for all parts, but you will need to plan ahead, and subtract a bit from many parts to allow for the thickness of card on other edges. all parts are separated where they would normally have a fold, making for a lot more pieces, but a stronger built overall. Actually, this model is very well suited to this building approach, with all its flat sides and sharp angles, and simple colouring.

100D0444.jpg


100D0446.jpg


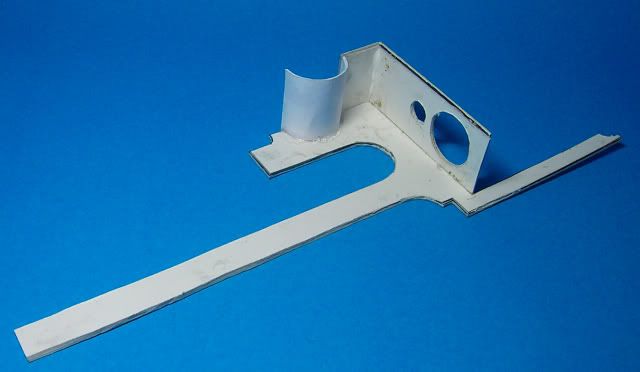
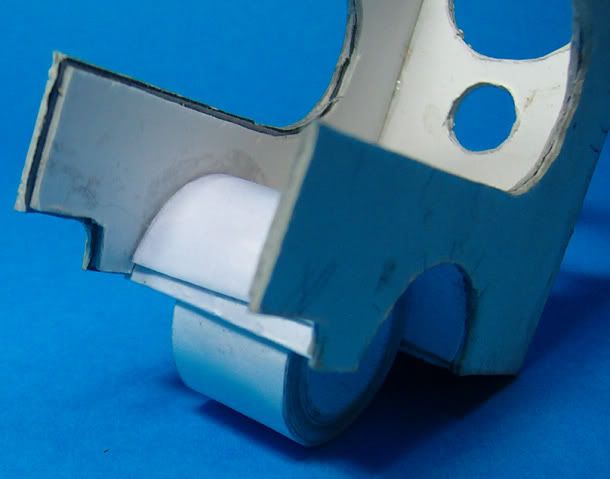
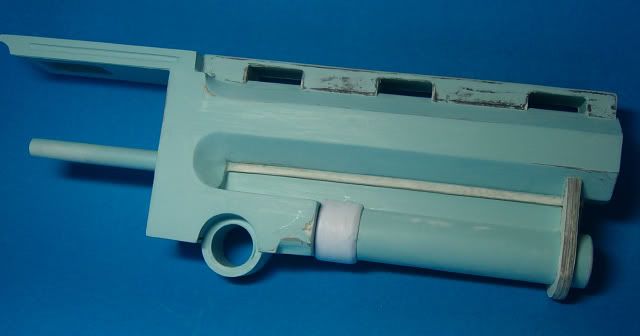
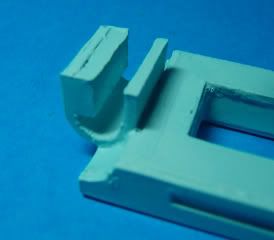
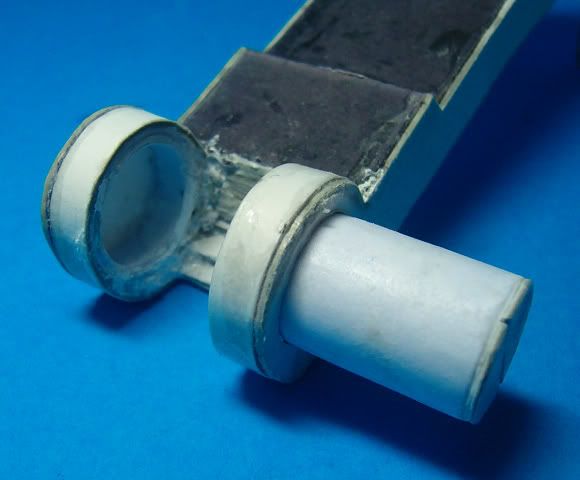
The botom of the barrel assembly has parts to create the swing/opening hinge (part 6 and 7), but unless you wish to able to open and close your Samaritan about twice before catastrophic failure, I suggest strongly the this area be redesigned a bit.

100D0445.jpg


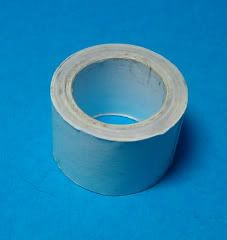
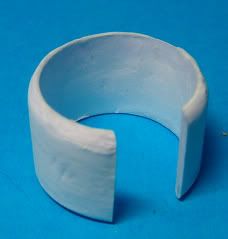
I've made up a ring of paper to the measurments of part 6, made by tightly winding strip of lightly glued paper around a suitably sized former (in my case, a curtain rod), until it reached the required diameter, it then had its ends well soaked with superglue and sanded flat, making a VERY tough ring that should handle fair bit of abuse. The archway in which this was glues was skinned over completly with two layers of well glued card to give a secure anchorage.

100D0448.jpg


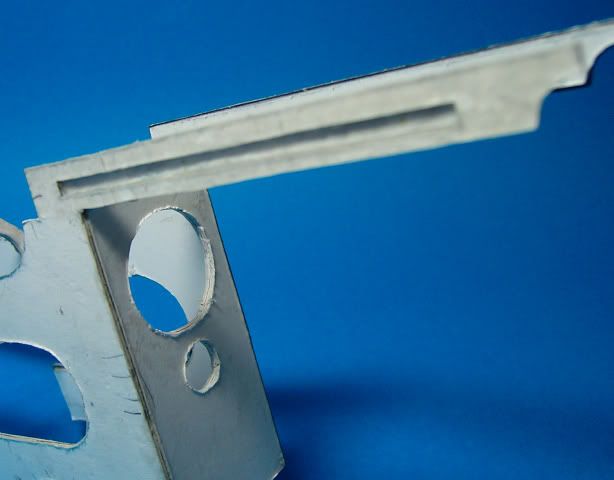
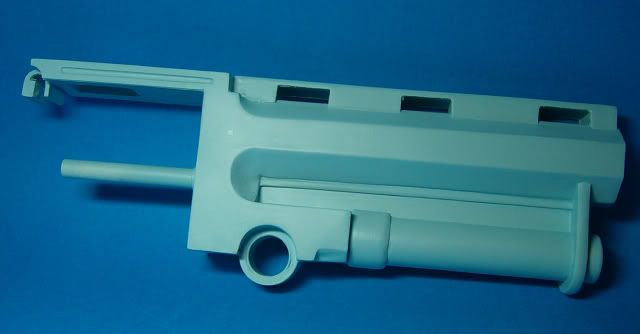
One of the simplest improvement to the basic kit is to cut out the slots on the side of the top strap.

100D0449.jpg


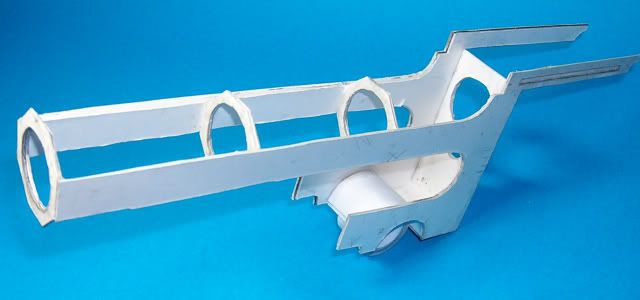
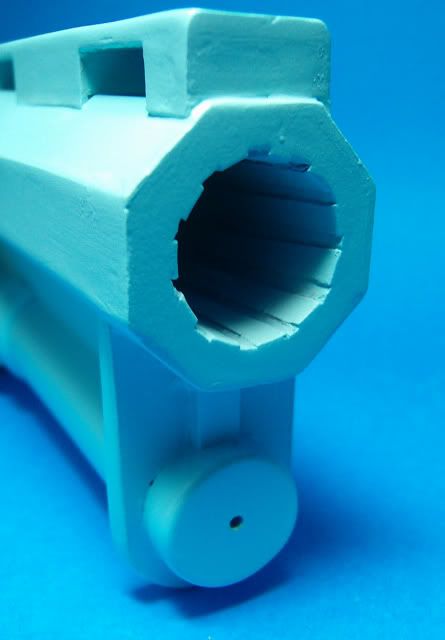
I have added some extra barrel support ring to the barrel to give the sides a bit more to glue onto, But before you do this, BUILD THE BARREL LINER, and check that it fits your holes. :eek:ops: ... I didn't, and now all my wonderful rifling is yuckky at the top where I had to cut 3mm out of the tube...

100D0447.jpg


The rest of the build has gone relatively smoothly so far, don't forget to bevel the edges of the outer barrel pices so they fit nice and tight together.

100D0450.jpg


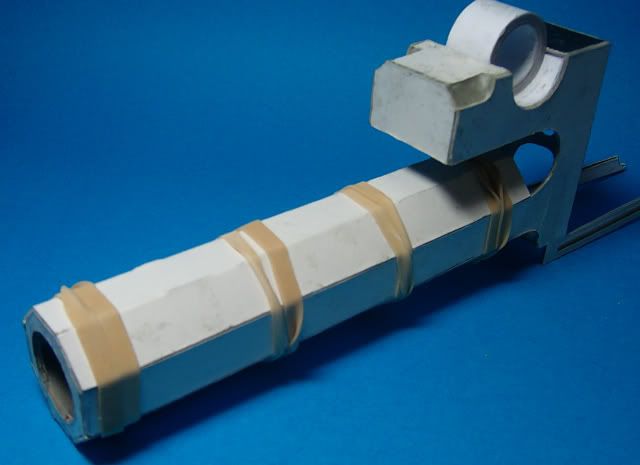
putting in the extra barrel rings made the rubber banding possible, and avoided having to sit and hold the assembly for an hour or so. I left it overnight.

100D0451.jpg
 

SEBRET

Member
I love the originality/resourcefulness you put into your building process. I will watch with interest.
 
thanks SEBRET, I hope I don't dissapoint.

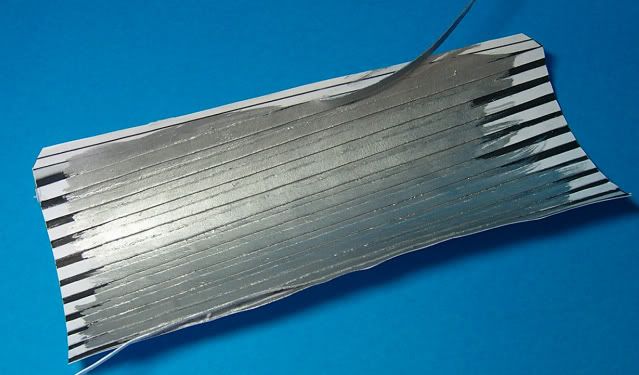
The Barrel Liner: The kit comes with a printed liner, but of course I wanted proper rifling, so I cut some thin card into strips an applied the to the printed part. I the painted most of it silver, as it would be difficult to reach with a brush later on.

100D0452.jpg


This will make it more difficult to roll up, but take your time and all be okay. I've left the ends of the overlapping parts of the rifling loose so the can be glued over the seam when the rest of the liner is dry. (This all fell in a heap of course when I discovered my barrel wouldn't fit. see last post).

The Round 'Recoil damper" is done just like the ring earlier, only longer. more detail will be added to this at a later date.

100D0454.jpg


The huge size of this weapon is really becoming apparent now.

100D0455.jpg


All parts have been given a thourough coating of superglue, before sanding, primering, supergluing a bit more in spots, sanding some more etc etc.

I've gone the extra and moved up to spray putty (a type of thick, heavy build body spray, available from auto parts suppliers) for the main sections, as there's no detail to obscure yet, and it will hopefully make the job quicker.

Smells a bit though.
 
..I think MAGNUMinous is the word you're looking for......


*Clears Throat*


Next picture shows a couple of additions to the basic model, that are aesy to add and easily visible in photo's of the real one.

100D0459.jpg


Firstly, and simply, a couple of bars running down each side under the barrel. a couple of strips of card about 2x3mm fixed this.

Second, a bit of a bulge at the rear of the recoil compensator tube. rolled, like everthing else, from paper with the ends sanded to shape.

100D0456.jpg


I made this as a full tube and cut it to fit.

The barrel clamp was laminated up to 5mm thick, and fixed in place. A trick for cutting such heavy laminations is to cut one layer at a time, stick it to the next layer and use it as a template to cut the next layer.

100D0457.jpg


100D0458.jpg


The next part worries me a bit, as its supposed to support the locking mechanism at the rear. the included pieces seemed wofully inadequate for the job, so I made the whole piece anew from a horseshoe of layers of paper superglued at every layer (no white glue) to basicly make what is a solid plastic part. I'm still not sure it'll be strong enough, but time will tell.

100D0461.jpg


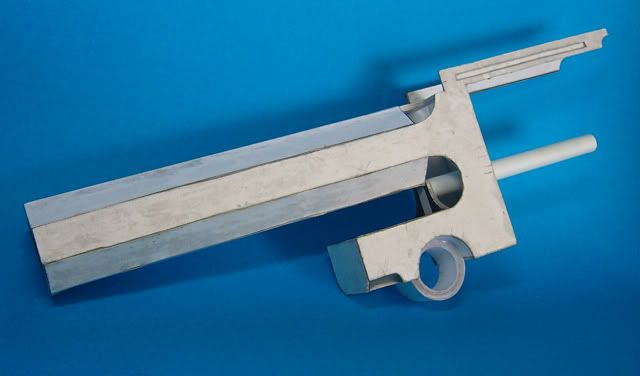
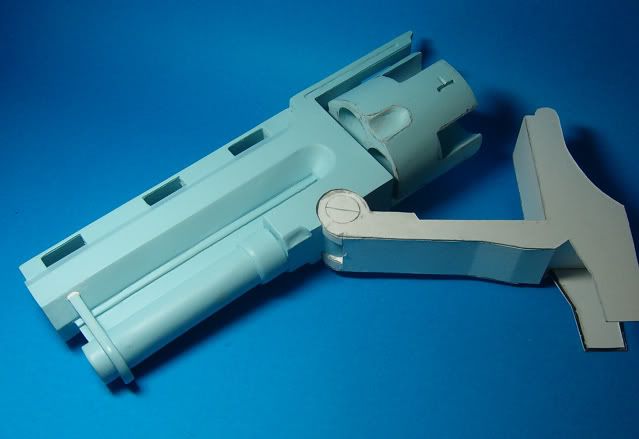
And here it all is again , which essentially completes the barrel assembly with the exception of the sights and screw details.

100D0460.jpg


100D0462.jpg


...Next up: the cylinder. (I really hope it fits past the catch thingy on the back....:confused:)
 
Cylinder Started:

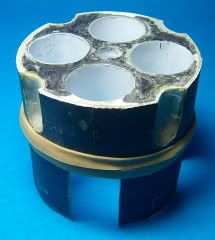
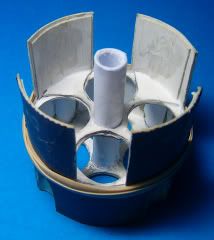
I think I've made this more complicated than nessesary, by asuming that I could build it better than designed, without actually testing to see how the design worked in the first place. So I've added extra rings in the middle, and gone with simple tubes at the front, and horseshoe shapes in the top, but this leaves me with a seam accross the middle of the chambers that the "proper" design wouldn't. Appologies to UHU02, you are not to be doubted.

Anyway, pictures:

100D0465.jpg


100D0464.jpg


sorry no pictures of the offending seams, camera recharging.

Now, I mentioned earlier that large quantities of superglue are required for this type of construction. Here's a picture of the carnage so far:

100D0467.jpg


Mind you, I have a barrel assembly I can stand on now.
 

Kjev

Active Member
What caliber is this thing? From the look of your counstruction, one would think you might actually be able to fire it!

And Glock thought they had something cool with a plastic gun!:mrgreen:
 

armorbimbo

New Member
I love this build technique...it starts off looking like crap ...looking like crap...looking like craps and then BLAMMO IT LOOKS FREAKING AWESOME!

Excellent work, can't wait to see it done!
 
oh, it's only a 22.


22mm! It's puts me in mind of 12 guage shotgun sort of size.

and yes, one of the wonderful thing about this technique is it DOES start looking like crap, but thats no problem 'cos it's going to be sanded and painted, so you can be as messy as you like.
 
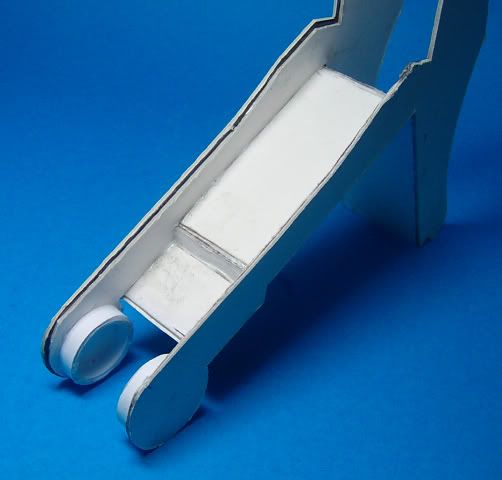
While I'm waiting for the cylinder to set up, I've started on the frame.

the pivot point at the front has to take a lot of stress, so I reinforced the hell out of it.

100D0468.jpg


The whole lower section of the frame right to the back near the handle is pretty much solid laminated cardboard.

100D0469.jpg


Something the instructions would have you do is leave one side of the frame loose so you can fit a retaining pin inside and then close it up. I noticed watching the movie the other night that there's a large screw there, so I'll be going down that route.

100D0470.jpg


...now I've just got get to the blighter out.....:cry:
 

Kjev

Active Member
I have toask, what kind of printer did you use? I have a nHP 5740, and it works okay on 110lb cardstock, but I doubt it could handle 1mm.
 

zealousy

Member
Mousemuffins, can I please ask you for a huge favour on behalf of the community? Or at least newbies like myself who don't really understand the boundaries (or the lack of the same) of paper modeling.....Obviously, the finish you obtained on this build is mind blowing! Can you please (please please please) start a tutorial thread on the technique of using primer/superglue/putty (and what not) in the right way to obtain this sort of result????PS;Pease????:)Thanks in anticipationViraj
 

sneaker

Member
Mousemuffins, can I please ask you for a huge favour on behalf of the community? Or at least newbies like myself who don't really understand the boundaries (or the lack of the same) of paper modeling.....Obviously, the finish you obtained on this build is mind blowing! Can you please (please please please) start a tutorial thread on the technique of using primer/superglue/putty (and what not) in the right way to obtain this sort of result????PS;Pease????:)Thanks in anticipationViraj


Thank You, I was just showing this thread to a co-worker when I made the comment about posting a request on how to accomplish such a feat. And here virajmperera posed the request right from my thoughts. I too would consider it a huge favor, if you posted said tutorial.........:-D
 
Kjev: I just print the parts on standard printer paper and laminate them to 1mm stock with white glue. Nothing special.

virajmperera/sneaker: I'll definatly do this, It may have to wait until I've finished this project though. I need to give some thought as to how to make it as clear as possible.
 
Status
Not open for further replies.
Top