Quinn Ball Bearing

P

philip

:thumb:
Gary, looks like you got it whipped. Great coloring on the brickwork! How big is the footprint?

philip
 

Gary Pfeil

Active Member
May 7, 2001
2,510
0
36
Boonton NJ
Visit site
Thanks Val and Philip, Val, it really wasn't all that difficult to build. I've got a chopper so making all the pieces was easy. Knowledge gained thru the construction of a couple Campbell kits came in handy, specifically making a drawing to aid in assembling items like the platforms. I just drew some lines to guide me i placing the individual strips down spaced evenly and parallel. I put wax paper over the drawing and used a tiny bit of white glue to hold each strip to the wax paper, then glued the angles on and the platform was done. I made six of these, then the hardest part was getting them in their uprights so they were all at the correct height (lined up with doors on the wall, and level. Started messing with the railings yesterday, only had .030 styrene rod, too large. I had to order .010, .015 and .020, will see which looks right when I get them.

Philip, the main building is 6x29. The fire escape, a freight elevator I haven't given any thought to yet and a shipping dock (truck) on one end will be addded.
 

Gary Pfeil

Active Member
May 7, 2001
2,510
0
36
Boonton NJ
Visit site
Well the fire escape is pretty much done, just painted it, a little weathering and its done. Here it is just standing against the wall, not attached yet.
 

Attachments

  • P1010590jpg.jpg
    P1010590jpg.jpg
    63.5 KB · Views: 210

Gary Pfeil

Active Member
May 7, 2001
2,510
0
36
Boonton NJ
Visit site
Heres a shot showing the entire escape. It is sitting on a Rix switch machine which was both handy and the correct height for matching the platforms to the doors. For some reason I cannot get decent photos with brickwork in them, these photos aren't as bad as some.
 

Attachments

  • P1010591jpg.jpg
    P1010591jpg.jpg
    63.6 KB · Views: 205
P

philip

Hey........ u got yer fire escape on my rix switch. :D

Looks like u got that rise, rake, & run down pat! Plus steady nerves!

like the way you attached the spindles :thumb:
philip
 

Gary Pfeil

Active Member
May 7, 2001
2,510
0
36
Boonton NJ
Visit site
Back with another update. I've finished the roof, well just about. A couple things to finish up but now I'm working on the freight elevator. Here's a shot of the roof.
 

Attachments

  • P1010603jpg.jpg
    P1010603jpg.jpg
    19.7 KB · Views: 152

Gary Pfeil

Active Member
May 7, 2001
2,510
0
36
Boonton NJ
Visit site
This end view shows the clock. I still need to install some trim around the opening, haven't thought of how I'll go about it yet. The clock will be lit and is only viewable from an aisle about 5' away, so I don't have to be too concerned with perfection. Good thing!
 

Attachments

  • P1010602jpg.jpg
    P1010602jpg.jpg
    38.3 KB · Views: 148

Gary Pfeil

Active Member
May 7, 2001
2,510
0
36
Boonton NJ
Visit site
This close up of the roof shows the two styles of roofing I used. The prototype has shingles on both roofs, but after doing the top roof I was ready to use something less time consuming, or expensive. I started the shingle roof by cutting strips from sandpaper and then cutting notches every scale 9", but really didn't get too far along with this process. I wore out 3 exacto blades and had only enough material for 1/8 of one side of the roof! The roof is 29" long. So I admitted defeat on this process and went to the LHS to buy stick and peel shingles. $45.00 later I had the top roof done. Not wanting to duplicate that expense. I decided to use masking tape to replicate a tarpaper type roof. I didn't check any actual dimensions but rather figured a logical width of a roll might be 3'. When I checked my masking tape, it was 5.5", so I quickly decided tarpaper roofing was 2'9"! I measured the length of the roof and calculated an overlap that would work and used a square to draw lines to use in applying strips of tape. The tape I used was blue, I spray painted it black and will weather when done. This method was both much cheaper and also less time consuming than the shingle roof, but it is incorrect. Oh well, the prototype isn't called Quinn Ball Bearing either!
 

Attachments

  • P1010604jpg.jpg
    P1010604jpg.jpg
    65.4 KB · Views: 154

spitfire

Active Member
Jul 28, 2002
3,448
0
36
75
Toronto, Canada
www.parkdaleyard.com
Wow, Gary, it looks great!!!! Can't wait to see the building with the roof in place.

You should be able to form some thin Plastruct strip around that clock opening.

And a mix of roofing styles is actually more interesting IMO. Lots of prototypes around for that approach too.

Val
 

RailRon

Active Member
Nov 23, 2002
1,602
0
36
80
Trimbach, Switzerland
Gary, I admire your patience for the application of such an amount of shingles. Are the 'stick and peel' shingles self-adhesive ones?
(For shingles I'm still using the Campbell shingle rolls made out of gummed brown paper - a little messy on the fingers and the tongue, however! :D)

The tar paper roof looks good, even before weathering.

I once had the same situation with a clock in a station gable window and used a 'Robin solution' with cardboard, cutting simply a circular bezel for the clock. For me it looked fine enough...

Ron
 

Gary Pfeil

Active Member
May 7, 2001
2,510
0
36
Boonton NJ
Visit site
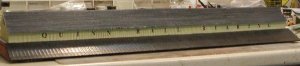
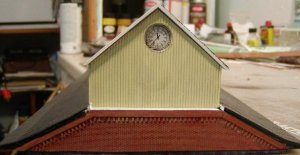
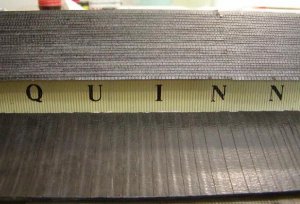
Thanks Val, and Ron. Regarding the trim for the clock, it is such a small opening I'm not sure I'll be able to bend styrene angle, which was my first, and only, thought. The smallest angle I've seen is .060, too big. Hadn't thought of cereal board, can't hurt to try, right? Thanks for the thought. The peel and stick shingles are indeed self adhesive. I've used the campbell ones too (but never licked them!) and they are a fine product, a little bit coarser in its finish than the adhesive paper ones, I like them for smaller wood structures.
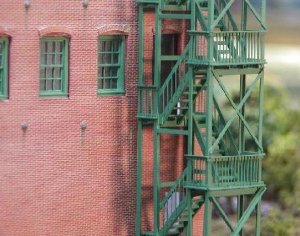
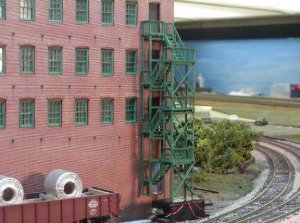
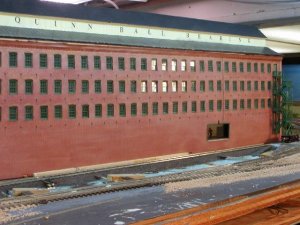
I'm off to go work on the freight elevator now, Val, I'll take a photo with the roof on but I still have the problem of distortion in any photos showing brickwork. I figured when I finish the building and scenic the immediate area, I'm going to get some balanced lights for 35mm film and shoot a roll to scan.

Gary
 
P

philip

amazing!

Gary,

Man it looks wonderful! Can't wait to see the whole thing!

I see you have mastered roofing! nice and straight runs!

Ron suggested a piece of cardboard for the bezel ring. Might also try a rubber o-ring or a escutcheon from some auto or plumbing shop.

Keep it up! :thumb:

philip
 

belg

Member
Apr 28, 2001
861
0
16
63
New Jersey USA
Visit site
Gary I like what you have done with this project and am wondering if you took a tire casting if it would be the right size with a little filing might be just right??? Pat
 

Gary Pfeil

Active Member
May 7, 2001
2,510
0
36
Boonton NJ
Visit site
Thanks for the kind words and suggestions everyone. I messed around with the .060 angle tonight, trimmed both sides smaller and got it bent in a circle and while it looked good, I don't think theres any way the two ends will go together without a kink, just like rail. Then I thought I could use a compass with blade and cut a circle with 5/8" inside diameter, outside diameter of about 3/4". Don't really need the inner part (why I thought I needed to use angle) as I can just paint the edge of the siding. Before I bother with that I'll see if I can find a suitable washer, maybe one from a toggle switch or something.

Gary
 

Gary Pfeil

Active Member
May 7, 2001
2,510
0
36
Boonton NJ
Visit site
Here are a few photos of the building with its roof sitting on it. Still have to finish up the undersides of the roof sections and some other details.
 

Attachments

  • P1010612jpg..jpg
    P1010612jpg..jpg
    66.1 KB · Views: 152