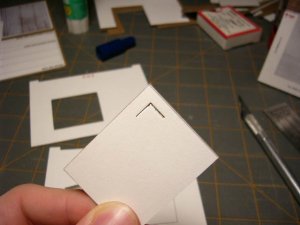
Ocalicreek builds a scalescenes.com card structure!

ocalicreek

Member
May 4, 2005
824
0
16
48
Puyallup, WA
groups.yahoo.com
I am building the FREE download freight house from Scalescenes.com - Download and print realistic model railway buildings in HO scale, and decided to take some pictures to share my progress. I'll also be sharing any tips or techniques I learn along the way. Without further ado, let's get started!
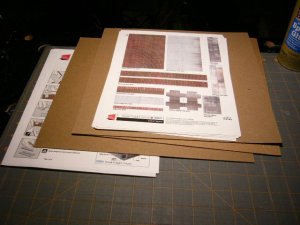
P1040355.JPG

These are the materials. The printouts I made on a heavyweight paper using my HP inkjet printer. It took forever to download this from the website, but that's due to my blazing slow 26.4 dialup connection. The cardstock is from packs of scrapbooking papers my wife has purchased and I saved for that 'someday' project. Well, that day is today! (er, yesterday, actually)
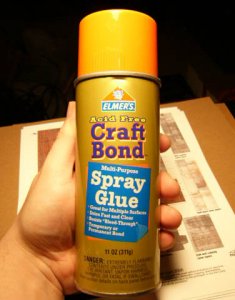
P1040356.JPG

Here's the spray glue I used to adhere the printouts to the appropriate thickness of cardstock. I made 'thick' stock using two sheets of .040 card, medium stock from one sheet of .040 card, and thin stock from a cereal box. (perhaps Robin is up there smiling down on this?)
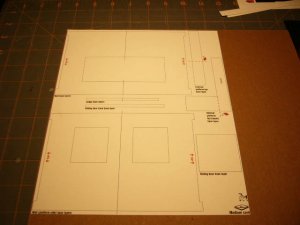
P1040357.JPG

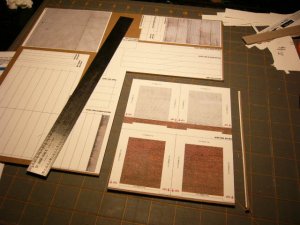
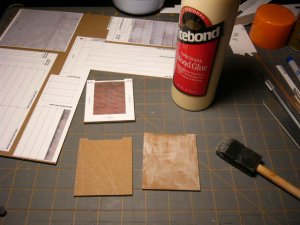
This is the sheet which has been glued to the 'medium' thickness card. The thicknesses are recommended in the instructions (9 pages and VERY thorough). I used a caliper to determine what card was what thickness. It's printed right on the sheet what size card it's to be glued to - very thoughtful.
P1040359.JPG

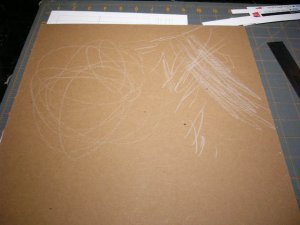
My 2 year old's contribution to daddy's project...it will be forever preserved in layers of card within this humble structure...sniff...of course, this is long before this cardstock was selected to fulfill its ultimate destiny as a structure.
P1040360.JPG

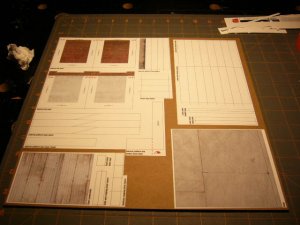
And finally the sections which were attached to the 'thick' .080 card. I cut these out of their master sheets in order to minimize the waste, and since I only had one 'sheet' of .080 stock after gluing the two .040 sheets together.
 

ocalicreek

Member
May 4, 2005
824
0
16
48
Puyallup, WA
groups.yahoo.com
The cutting begins

P1040362.JPG

Here is the small section to be attached to the 'thin' card. The cereal box may be a bit thicker than what's called for (65lb paper)...we'll see.

P1040364.JPG

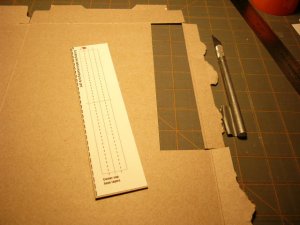
The first major section removed from the 'thick' sheet. I trimmed away the thin bit on the right first, then cut the major wall group away from the larger sheet.

P1040367.JPG

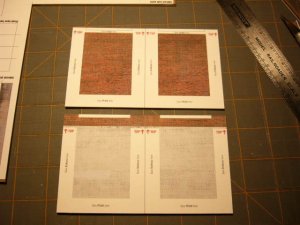
The two side wall sections trimmed and separated.

P1040368.JPG

The lower sections (inner side walls) with the little fiddly bits (brit slang?) removed from the top and the two walls separated, in that order.

TIP#1 - When cutting the thick card sections, be sure to keep the blade perpendicular to the surface or else your cut may come out with a slight bevel. Make the first pass gently, with the tip of the blade angled in toward the scale rule slightly in order to follow the ruler and not wander down the line. BUT, then be sure and hold it straight up perpendicular to the page or else beveling will occur as it follows that angle down into the card, pass after pass. This tip comes from experience!

TIP#2 - Sanding sticks work very well to help correct the bevel and remove any fuzz you may encounter. I have two kinds - one fine and one coarse. (You may have seen one stick with each on a side...this'd probably be fine too.) I'm sure regular old sanding films and a block would work as well.

TIP#3 - You may have heard it before, but it bears repeating. Work slowly, let the blade do its job, and make multiple passes without having to bear down heavily. It took me at least 8 or 9 steady passes to get down through this card. It WILL dull the edge quickly.
 

ocalicreek

Member
May 4, 2005
824
0
16
48
Puyallup, WA
groups.yahoo.com
Instructions

Last post for the night...I'm tired and I wanna work on this more...but will probably just go to bed...

P1040376.JPG

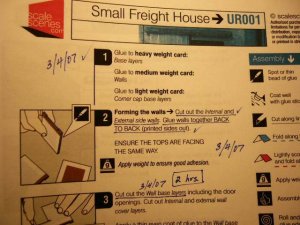
So here's what I'm doing with the instructions. I'm underlining and/or checking off steps as I complete them to keep track of what I've done and to be sure I haven't skipped a step. There's one potential pitfall coming up right away, as you'll soon see, that I avoided by careful pre- and re- reading of the instructions.

Also, I'm keeping track of how many hours I spend actually working on this project...not counting the time I put in sharing it here on The Gauge. Just for funsies.

You may also notice that I have already accomplished yesterday more than what has been shown here so far, so that means more pictures very soon...probably tomorrow sometime.

Next...pulling out the big guns...carpenter's wood glue!
 

scottcn

New Member
Jul 8, 2006
75
0
6
coastal SC
What a timely thread. I started building the same freight shed this weekend too (but no pictures to share :( ). Tip #1 is definitely a good one - I have several buttress pieces (step #6, a bit ahead of Ocalicreek's progress) that are definitely beveled. Once the glue on those pieces has dried, I'm going to try sanding them square. The beauty of working with card is that if I goof, I can just print out another sheet and try again!

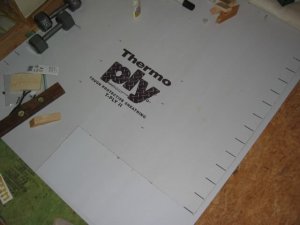
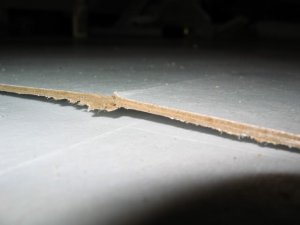
For the heavy card, I found the perfect solution in my attic. The previous owners of our house left behind 3 large (4x8 foot?) sheets of "Thermo Ply Tough Protective Sheathing, T-Ply II." I guess this stuff is inside our walls or roof somewhere, but it looks just like thick card and is exactly 2 mm thick. With the amount of this stuff I have, I won't *ever* run out of "heavy card."

Thanks for the progress pics, ocalicreek. I might just slow down my own construction efforts and let you pass (and then learn from whatever mistakes you make :) ).

- Scott
 

ocalicreek

Member
May 4, 2005
824
0
16
48
Puyallup, WA
groups.yahoo.com
Scott - this thread is by no means exclusive! In fact, I was kinda hoping someone who either had or was in the process of building this kit would chime in!

This Thermo Ply sheathing sounds like a good thing...I'm going to look into it. Is the surface rough or smooth?
 

ocalicreek

Member
May 4, 2005
824
0
16
48
Puyallup, WA
groups.yahoo.com
Gluing side walls

P1040370.JPG

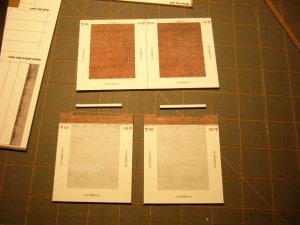
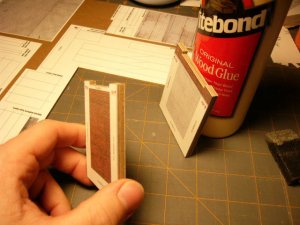
Here are two side walls, an interior and exterior, being glued together. Above them is a pair that have just been glued. I applied a few squirts of titebond wood glue and spread it evenly over the surface before aligning the halves and pressing them together. I used just enough so that it didn't squish out when I pushed them together...but the tips on the scalescenes website and instructions do include keeping a wet cloth handy to wipe excess glue from the model and your skin.

P1040372.JPG

These walls are thick!

P1040374.JPG

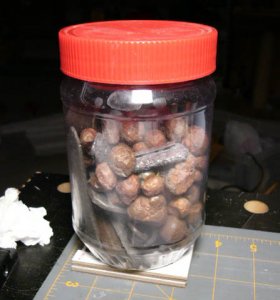
If you don't have an old peanut butter jar of copper nuggets and other assorted heavy metal weights, then find something suitable around your house to set on top of the wall panels as they dry. Honestly, I don't think they needed it since the heavy card was very true and warp-free to begin with, but I did it anyway.

HINT: The instructions mention PVA glue. THIS IS JUST WHITE GLUE. Elmers, Sobo, and many other brands I'm sure, it's all the same stuff. Carpenter's wood glue is a close cousin and should work fine.

Next...a cool tool from Micro Mark comes in handy!
 

MasonJar

It's not rocket surgery
Oct 31, 2002
5,362
0
36
Ottawa, Canada
Visit site
Great work guys! Galen - this is definitely shaping up to be a contender for Tutorials or The Academy! Great pictures and great write up too! :thumb: :thumb:

Andrew
 

ocalicreek

Member
May 4, 2005
824
0
16
48
Puyallup, WA
groups.yahoo.com
Thanks, Andrew! I hope it'll be helpful for folks. It's fun, that's for sure! But my progress may be more like the slow and steady turtle than the speedy hare, so hopefully folks will hang in there for the duration.
 

Wabash Banks

Member
Mar 11, 2005
115
0
16
52
Indiana
I have built this one and you will know if you have the thickness right when you start attaching the skinds and wrapping them around. I had mine too thick and the wrapping was terrible. I printed off another copy and will be starting again in the near future with thinner stock this time.
Great tips. The dulling and the multiple passes are right on.
 

ocalicreek

Member
May 4, 2005
824
0
16
48
Puyallup, WA
groups.yahoo.com
I have built this one and you will know if you have the thickness right when you start attaching the skinds and wrapping them around. I had mine too thick and the wrapping was terrible.

Dan - that's what I'm concerned about...just how tight the tolerances are in their printout and how much slop they allow.

I printed off another copy and will be starting again in the near future with thinner stock this time.

That's great advantage, in that once you have downloaded it (even the purchased products) you can just print more! In fact, I've already been dreaming about the possibility of lengthening this structure to allow multiple sliding doors, say for a packing house or other multiple-spot industry that would handle a solid cut of similar length box cars or reefers.

The trick would be in disguising the fact that it's a copy every few feet, since the printouts already include weathering, brick colorations, etc. that would ordinarily vary slightly when added to a plain wall by hand.

Would you mind sharing a few pictures of your structure?
 

scottcn

New Member
Jul 8, 2006
75
0
6
coastal SC
Here are a couple of shots of the Thermo Ply sheathing I mentioned earlier.

Overhead view of a large sheet lying on the floor. In one corner you can see where I cut out some pieces to use for this project. For scale, the black lines along the edges of the sheathing are ~3 inches apart.
Thermo Ply top view.jpg

Here's an "on-edge" shot of the sheathing. To answer your earlier question, Galen, the sheathing is smooth on the top and bottom (those "bumps" in this shot are random bits of attic dirt). The sheathing is a little warped near the edges, but seems pretty sturdy at the sizes used for the scalescenes.com model.
Thermo Ply edge shot.jpg

I guess I'll know how well it works once the model is finished.

- Scott
 

scottcn

New Member
Jul 8, 2006
75
0
6
coastal SC
ocalicreek said:
... In fact, I've already been dreaming about the possibility of lengthening this structure to allow multiple sliding doors, say for a packing house or other multiple-spot industry that would handle a solid cut of similar length box cars or reefers.

The trick would be in disguising the fact that it's a copy every few feet, since the printouts already include weathering, brick colorations, etc. that would ordinarily vary slightly when added to a plain wall by hand.

I've been thinking the same thing about modifying the structure by making it longer and maybe adding a second level (an office?). I seem to recall that the scalescenes.com website had a section where you could download the raw building materials (that is, patterns of bricks or stones or whatever) for use in extending existing structures or creating new ones. It would require a bit of playing around on the computer to make everything look right, but shouldn't be too hard to do.

First things first, the small shed with step-by-step directions. Then comes the freelanced version.

- Scott
 

ocalicreek

Member
May 4, 2005
824
0
16
48
Puyallup, WA
groups.yahoo.com
It would require a bit of playing around on the computer to make everything look right, but shouldn't be too hard to do.

OR, the "old-fashioned" way of just printing off a few sheets and then cutting and pasting by hand, trial and error until it fits. OR, using colored markers or paints, altering the pattern slightly to disguise the origin.

First things first, the small shed with step-by-step directions. Then comes the freelanced version.

Yep. As I mentioned on the other thread in the general talk forum, I usually make a dish by the directions first, then modify it the second time around. In this case, I want to practice a bit first and it looks like this kit will give me that practice.

Scott - Thanks for sharing the pics of the sheathing. Also, have you considered scoring the horizontal mortar lines? It sounds like overkill, I know, but the effect might be the extra mile effort that takes this kit over the top to be a stunning foreground model. I think most plastic kits put too much relief in the mortar lines between bricks as is, but perhaps this would benefit from the extra effort?
 

scottcn

New Member
Jul 8, 2006
75
0
6
coastal SC
ocalicreek said:
OR, the "old-fashioned" way of just printing off a few sheets and then cutting and pasting by hand, trial and error until it fits. OR, using colored markers or paints, altering the pattern slightly to disguise the origin.

Well, sure, you could do it that way, too.

ocalicreek said:
Also, have you considered scoring the horizontal mortar lines? It sounds like overkill, I know, but the effect might be the extra mile effort that takes this kit over the top to be a stunning foreground model.

No, I hadn't even considered it. I'm going to build the shed following the directions, then I'll see if it needs the extra "oomph" that scoring the mortar lines might provide. But, man, there are a lot (!) of bricks on those walls.

Think I used too much glue when putting the buttress covers on the buttress base layers (step #7) - ugly bubbles have started forming under the cover layers and I can't get rid of them :(: Maybe the bubbles will go away after everything dries overnight (is there a smiley for "keep your fingers crossed?") but I suspect that I'll be rebuilding the buttresses tomorrow. :eek:ops:

- Scott
 

scottcn

New Member
Jul 8, 2006
75
0
6
coastal SC
ocalicreek said:
What sort of glue are you using for that step? I plan on using a glue stick, or a really thin layer of wood glue.

Tomorrow, I'll try the glue stick. Today, it was basic white (Elmers) glue that must have been applied too thickly. It's been a long time since elementary school and I think I've forgotten how to cut and paste.

- Scott
 

Wabash Banks

Member
Mar 11, 2005
115
0
16
52
Indiana
After trying white glue and also using CAA, I can tell you the spray adhesive works best. Carpenters glue should work better than white glue. Stick glue didn't seem to be sticky enough.
As for the pictures, Ocalicreek, I would post mine here but honestly there are a lot of them in the thread because multiple people have built it. Here is a link for the thread:
http://www.2guyzandsumtrains.com/Forums/viewtopic/t=2847/start=0.html
It contains the structure you have started, one where the structure was bashed into a large structure as some of you have suggested, and a couple of other great paper buildings. Too much to cross post everything and I don't want to short change you by leaving out portions of a great thread. A few folks working on this will also provide a great thread like that here as well.

On a side note to scratch building this structure bigger... you can buy texture sheets from scale scenes as well of the same type used on this building. With a little work you can add a lot more to the building.

I will post the results of my next attempt here as well.
 

ocalicreek

Member
May 4, 2005
824
0
16
48
Puyallup, WA
groups.yahoo.com
Dan,

Thanks for the great link! Outstanding work over there on that forum. I'm looking forward to seeing your revised effort. And the kitbashed scissors place - wow! It's enough to almost make me want to modify this little beastie right away! BUT...I will stick with the plan to build it as is this time around.

What I also noticed about the kitbashed scissors place was the great family resemblance by using the same material. SO, this first kit could be part of a larger complex quite easily without having to match paint, brick size, etc. Hmmm....
 

ocalicreek

Member
May 4, 2005
824
0
16
48
Puyallup, WA
groups.yahoo.com
Also, gang, I did get a bit more done last night and will post pictures later tonight when I get home. I will have TWO cool tools to share along with progress photos and a couple more tips. In the mean time...its back to work!
 

ocalicreek

Member
May 4, 2005
824
0
16
48
Puyallup, WA
groups.yahoo.com
Cool Tool #1

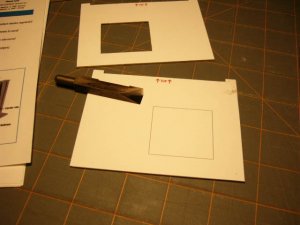
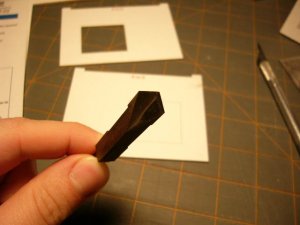
This is the moment I'd been waiting for, an opportunity to use this great 90 degree punch from Micro Mark! I had requested and recevied it as a birthday gift (thanks in-laws!:thumb: ) and had not even tried it out yet. SO, I dug it out of a box of tools which hadn't been opened since I packed it in CA back in June last year. As you can see, it is quite effective at making a clean cut on a corner. I tapped it down through the cardstock with a small hammer. Punch four corners and then just connect the cuts on the straightaways in between. Works like a charm.

P1040378.JPG

P1040379.JPG

P1040380.JPG