Free Model #3 - HMS Dreadnought by Mark_1984

M

Mark_1984

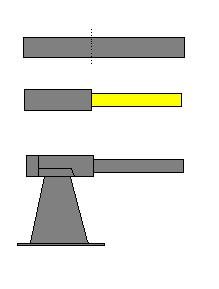
Hmmmm, probably not much details in the guns Lex. I'll be happy if I get the barrels on straight !

The next two deck houses got fitted today. The roofs were a tad small, but as they are not visible on the finished model I didn't bother cutting new ones. They sit inside the bulkheads with a small gap down one side.
Not a problem as it will be covered soon.

Here are the two assemblies before I filled in the score lines with ground pencil leads.

SSL12622.jpg

Finally here are the two parts fitted.

SSL12623.jpg
 
M

Mark_1984

Superstructure front

This part is a bit fiddly. Well, to be honest, the whoel darn model is fiddly, it's just degrees of fiddliness !! This bit was more fiddly than most, so far ;)

As it's got a very thin upright part at the edges I rubbed superglue into the back of the paper to strengthen it. I also found that the gray felt tip covered much more evenly on top of the superglue as it doesn't soak in.

The part has a curved centre section, which was curved round my felt tip. The bottom half of the outside sections fold back at about 45 degrees, and the top sections go round the wheelhouse deck, I think. This is what it looked like, cut out and edge coloured.

SSL12637.jpg

Gluing it in place was much easier than preparing the part. I glued the centre section first. When that was dry I moved the outer sections into position.

SSL12638.jpg

Guns next - I'm really not looking forward to them. I don't enjoy making lots of items all the same.

Looking ahead slightly, after the deck head (part 20) goes on there are some handrails to fit. These are represented by white card with a texture printed on them. I'm going to try and replace them with handrails made from cotton in the same manner I made the ladders earlier. I'm not sure if it will work or not.

This will be the last update for a week or so as I'm going to be away from work.
 
nice:thumb: i attempted this ship at the same time as my cerberus(ages back) and i made some really good looking secondary guns by using electical wire i cut it into bits and then removed a small part of the outer covering with a wire stripper ..............:wave:
 

Attachments

  • dreadgun.JPG
    dreadgun.JPG
    5.3 KB · Views: 323
M

Mark_1984

I'm back, and have made a little progress with the guns. Boy, are they fiddly.

Here some of them, one cut out, and one folded.

SSL12651.jpg

Here is one glued and the edges coloured. After colouring the edges I also colored the rest of the gun base which gave a more uniform finish. The barrel doesn't really bend up like a grey banana - it's a trick of the camera. Close up's are so unforgiving :cry:

SSL12653.jpg

Finally, here are some of them glued in place. I haven't attached the barrels yet. I figure that this will be easier done after the guns are attached to the model. I'm still trying to find some electrical wire thin enough to try Nullmoon's suggestion, but I'm struggling to get anything :(

SSL12654.jpg

I got four gun bases done today. Another lunchtime or two should see the next four done then I can carry on with the superstructure.
 
M

Mark_1984

I've managed to get the remaining four bases finished. I failed miserably in my quest for some small single core wire, so I've had to go for some ordinary copper wire. The barrels are superglued on the bases, but not painted yet. Have to bring some grey paint to work tomorrow ;)

SSL12665.jpg

Once I've got this out of the way I can get back to some of the ship structure, which is far more enjoyable.
 
M

Mark_1984

I've painted the gun barrels now. It makes the world of difference.

SSL12666.jpg

Now the guns are out of the way, for the moment, I started on the superstructure roof (for want of the proper word). Took ages to cut out, but here it is, with edges all neatly coloured. I coloured the underside of the part grey before cutting it out.

SSL12667.jpg

However, having looked at the instructions, I decided to add the rear guns before adding the roof. Here is the small platform in place. The guns will go on next (Oh yes, back to those %$£@ guns). Then the roof, followed by the gun shield, part 22

SSL12668.jpg
 
M

Mark_1984

Quite good progress this lunchtime. Here are the two aft guns fitted.
I did try cutting the two halfs of the gun mount in half to see if that would make it easier to make the mount. Wrong !! Completely wrong. Much more fiddly, and the results look exactly the same.

SSL12669.jpg

With the guns done, the roof (what is the proper name for this part ?) was fitted.

SSL12670.jpg

Finally the front bulkheads needed to be fitted to the 'roof' (which I suppose is a deck now that things are going on top of it.)
These would have been much easier to bend if I'd done them before gluing the part in place. Ah well, you live and learn...... It went OK in the end, with a bit of patience and a bit of shouting at it ;)

SSL12671.jpg
 
S

Soaring

My Gosh, it looks fantastic from where I am..Great Detail by the way, can't wai to see how this progresses! :goldcup:
 
M

Mark_1984

I see in the picture above I've chipped the paint on one of the barrels - didn't notice it on the model until I'd seen the photo :eek:ops:

Here's a quick tip for you. If you're doing this at work and have to use a plastic ruler, borrow somebody elses. They don't have a very straight edge after cutting out a few parts ;)
 
M

Mark_1984

I added one of the funnel casings today. Part 23.
A nice simply assembly. The roof sits quite neatly inside the bulkheads, making it easy to get level, and also neatly keeps the part square.
Here it is after the score lines had been coloured with ground pencil lead.

SSL12673.jpg

And here it is fitted.

SSL12675.jpg

Part 51 next I think. Not sure what it is, but it is small and seems to have lots of curved surfaces ???
 
M

Mark_1984

Now on to that pesky part 51. Here are the 5 parts that make up the little blighter.

SSL12676.jpg

I attached a backing tab tot he main part to make it easier to assemble.

SSL12678.jpg

Here it is assembled and the base glued in place. It didn't go perfectly, but it's close enough.

SSL12679.jpg

The two little circles, bent through 90 degrees actually went in place easily. They looked like they were going to be a nightmare, but were the easiest part on the bit.

SSL12681.jpg

Finally here is the little so-n-so in place. I'm not really pleased with it, but I don't think I can do much better, so I'm not going to have another go. It will be OK by the time it's surrounded with funnels, boats, masts, etc. and I do want to get the model finished before the competition ends :p

SSL12682.jpg

Funnels next........
 
M

Mark_1984

On to the first funnel. I started by folding the funnel body into a tube (a backing tab joined the tube edges.) and then inserting the top and bottom formers. While this method worked, it wasn't very easy to get a neat job.

The observant will notice that the funnel is upside down. Luckily I spotted this, and simply turned it over and coloured the white top with black marker.

SSL12685.jpg

The top of the funnel is just a thin strip of card bent to the right shape, as per the deisgn. My chances of getting this to stay in the right shape while the glue dried were nil !! Plan B. I made a former the right size, so I could fold the strip round it. Here it is half glued.

SSL12686.jpg

And here it is completely glued in place.

SSL12687.jpg

The grid at the top of the funnel is a fiddly bit. Here it is with a 0.5mm pencil for scale.

SSL12689.jpg

I formed it to shape over a glass headed pin, and then glued it in position. The edge colouring was done after it was glued into position. All the white areas that should be black were coloured with black marker at an appropriate time.

SSL12695.jpg

Finally the finished funnel glued in position on the ship.
I'm quite pleased with the finished result, given that it was an awkward thing to make.

SSL12698.jpg