Eastern Tn logging on the DG CC & W RR 1928

Bill Nelson

Well-Known Member
Dec 14, 2008
2,680
467
78
Clarksville Tn
ASLA-1a  tannery  site.jpg fitting the tannery

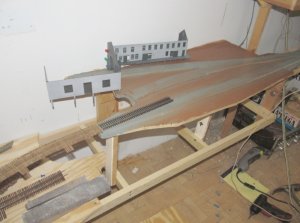
I did some work fitting the tannery, and I painted the plywood and road bed in the vicinity which will help me blend the ballast and scenery materials in the area, and any holes won't show much.


The siding closest to the main will go out on a short trestle with a coal dump


nelson
 
Last edited:

gbwdude

General Manager, W.R.Ry.
Jun 14, 2010
377
31
33
Omro, WI
www.facebook.com
Looks like progress is coming along at a fairly decent rate. Maybe after Korea and time depending on how quick the Army needs me at the next duty station I'll get to see this in person.

Keep up the great work, I like seeing progress.

Tyler
 

Bill Nelson

Well-Known Member
Dec 14, 2008
2,680
467
78
Clarksville Tn
I sure hope so!!

sure hope you will be able to visit sometime when the railroad is more than marginally operational. Switching Crooked Creek can be a blast, with 19 delivery locations spread out over 22 feet or so, working with Shay # 8 , which with a full 12 volts can manage about 10 scale miles per hour. with all of the under the tie magnetic uncoupling. when everything works correctly you can swtich cars for hours without touching a car or a locomotive. the tab on car system lets you know what goes where in crooked creek, and the color coding makes it easy to block up cuts of cars for trains northbound and southbound

The whole point of this rebuild is to try to get the rest of the raiload to that level of reliability. kind of like the sawmill area at the club I want my track to be simple, and oriented so as to make the switching easy. When you have a little railroad there is a high value to nasty switching puzzels , once you have a big RR every nasty switching puzzel becomes a bottleneck from hell.


My disatisfaction with my old layout, as great as it looked, caused me to stop operating, and that lead to stopping maintenance, which made running anything next to impossible. I've been working on my RR more than I have in the last ten years, and I'm enjoying the **** out of it. once I have the three long shelves in, I'll tear out the current center aisle, and revisit my plans from there. I will want to think about simplifications, and possibly widening the aisles.


I'm having lots of fun, and can't wait until the 2-4-4-2s have more room to run. I will have to work some gentle meanderings into the long straight sections, so they can do thier little dance.


I picked up more lumber comming home from work, so I should have all the track lumber, roadbed and everything else I can think of to get these 3 shelves (four if you count the narrow gauge) all the rest of the way down the 19ft 2 inch east wall.


I also got a sheet of plywood to make the upper level return loop at the club, I have my surveying tools in the truck, I'll try to plan in tonight, cut it later this week and perhaps install it next week.


Nelson
 

Bill Nelson

Well-Known Member
Dec 14, 2008
2,680
467
78
Clarksville Tn
ASLA-1a Crooked  Creek  bridge.jpg Shelves on   E  ast  wall2a .jpg more progress on the east wall

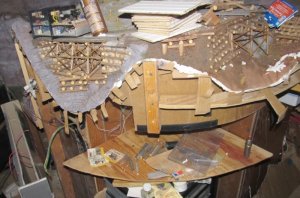
After working all night the night before last I got a second wind, and built some more shelves of the east wall. I extended the top standard gauge shelf all the way to within 6 inches of the skylight opening, there will be a liftout there for maintenance and cleaning of the window, but it will be semi perminatly installed.


I added another six feet to the lowest level shelf, which will be my Sander's Switch TN block. that will have a passing siding about ten feet long, and a long stub sissing, , all of which will serve as staging until more RR is built.


I did some work toward setting up ny new Crooked Creek Bridge, which so far is pieced together from two bridge decks from the terrapin area, two steel spans and three stone piers borrowed from two different bridges in the old Gizzard. I still have to cut the stone piers (carved from alder wood cabinet facing) to the final hieght, but is is going to look real good! on either side of the stone piers and steel spans there will be long trestle approaches. I'll have to work on some scenery there soon so I can build the bents to fit the scenery, as doing it the other way, is painfull, and never gets as good results. I'll have to do the detail on the tresstle bents to the nines, with NWB castings ect.; as this bridge may be the biggest, most visible bridge on the system. I will try to reuse my Cave cove bridge, but it will no longer be on a steep grade, and it will be on the lowest level so it won't be as clsoe to the eye; and it will not be in as prominent a viewing location, so it won't have as as much visual impact as it had on the lod layout. I'm reusing it because i don't want to waste the months I spent putting NWB casting on the massive bent supports that I'll never be able to use elsewhere.


At the end of the lower shelf in the photo, the track will get as close to the floor as it will get on the mainline <I may have a spur or a branch go lower. it is entirely too low, but I want to fit in three levels with at least 18 inches of headroom, and a four or five inch shelf for Southern staging. I probably will end up with less than 18 inches headroom in places, but most of the scenes will be two feet in depth or less so I'm hoping I can make it work visually, but that extra level on my big center peninsula will increase the size of the operable layout considerably.


Nelson
 
Last edited:

Bill Nelson

Well-Known Member
Dec 14, 2008
2,680
467
78
Clarksville Tn
ASLA-1a Nw Hrlw yrd #1.jpg ASLA-1a Nw Hrlw yrd #2.jpg Salvaging the old harlow yard

I took the old Harlow yard out of the attic storage, and out to the driveway to try to cut it down as close to the 9 inches allowed for the plan. it's widest spot is a half inch oversize, but I will have to live with that encroachment on the three foot aisle. I peeled off the homasote roadbed from the mainline next to the yard, as it veered away from the yard, and exceeded the 9.5 inch wide , that was the second fattest I'll replace the removed main line with cork roadbed, and with Peco code 83 . I may have to hand lay in a short section of code 70 to ease the transition, as the old harlow yard is Code 55. I may come back later and re build the two mainline switches with code 83. that would be relatively easy since the ties and the DPDT switch used as a ground throw is in place, but that track is very accessible, so I don't have to do that now. besides having a very skinny footprint for wheels to get electricity from, some flanges contact the spikes making the wheels bump up slightly worsening the electrical contact further. I like the looks of the smaller rail, but am aiming at code 83 on the main as much as possible. That said I won't be rebuilding Crooked Creek, Murray, or State line where the main line is code 73. In Harlow The old Southern mainline (which was inoperable) was code 83, I did my railroads track in code 55 mainly to get as big a visual difference in rial size as practical. in hind sight, a mistake, at least I should have done my main in 70 or 83, and done the Southern in code 100.


the switch that peels off on one side used to go to the engine facilities. in the new location, it will line up with the windowsill opening under the skylight, and area that has been piled up with tools parts and details since I finished the sheetrock. I may run a little spur into that space to serve the fright house, or a caboose track, as the Rest of Harlow is going to be cramped, even though it will be close to twice the size of the old Harlow.


Tomorrow I will try to measure for the chunk of plywood to fill in between the end ot the Harlow yard and the end) of the roadbed at the second (Crooked Creek level) so I can mount this on the east wall with brackets, and start to get to work to hook this up to the surviving railroad. eventualy the track into this yard will loop into Harlow on the center peninsula, in the mean time I will make a temporary lead, so the yard can be used as staging sto set up trains for Crooked Creek; Very soon it will be time to start setting up my new control panel so I can make what I have started to build off of Crooked Creek operational.


Nelson
 
Last edited:

Bill Nelson

Well-Known Member
Dec 14, 2008
2,680
467
78
Clarksville Tn
ASLA-1A   CC & RVRBT.jpg ASLA-1A  HRLW EH :SKYLT NK.jpg ASL fine morning.jpg I got the Harlow yard installed as a shelf. I had planned on abandoning the switch that used to lead to the Harlow turntable, but when I went to install the yard, I moved it a little, and got the switch to line up with the skylight nook.


I think I may be able to cut down the Harlow turn table/ engine house reminants, shoehorn it into the skylight nook ; and hook it up to the Harlow yard. If I can do this it will be huge, as trying to fit the turntable into Harlow itself was giving me fits.

I had to throw in a picture that shows the view from the sky light.

The shelf is all in from Crooked Creek to the Harlow yard, and the roadbed is down and painted the track is about halfway in, this is going to be fun.

I did the first couple coats of paint on Crooked Creek on the lowest level. and found to my suprise that the lower reaches of Crooked Creek are navagatable.
.
 
Last edited:

Bill Nelson

Well-Known Member
Dec 14, 2008
2,680
467
78
Clarksville Tn
ASLA-1a TT in Sklgt nk 1.jpg ASLA-1a TT in Sklgt nk #2.jpg ASLA-1a  SL  ore  transfer  trks in!!! .jpg It fits!!!!

I cut down the engine house facilities and it fits. I screwed two 2x4s in the window nook, and dropped it in place, I will have to relay the approach track, the hole between the sections will have to be filled in, that will allow me to make an ash pit easily.

also the standard gauge track is in at the ore transfer. even though this facility takes up a lot less space than it did in it's previous set up, the rear track loads coal, and the front loads iron ore. I have all my standard gauge ore cars except one on the track right now, am going to need more ore cars, as the tracks at the Montgomery Furnace will be larger too.


I have one more piece of flex track to add to hook the new/ old Harlow yard to the south side of Crooked Creek. I have a lot of rewiring to do, the wires under Harlow yard took some damage during it's removal and re- installation, and the wires to the turntable area, which is much more complicated, took lots of damage, so I have a lot of wiring to do, especially since I need to transfer the guts from my old control panel to the new one in the dispatcher's desk , remove the power and control infrastructure from the old central peninsula, and install it in the computer printer drawer of the dispatcher's desk, and run a common rail wire around the entire room, and start running the wires for the twelve blocks. it is a sign of how big this rebuild is going to be that none of those blocks will be small.

I'm going to start by wiring in Crooked Creek, Harlow Yard, and Murray.


Next I'll do Gegokayoosa, State line, and Midway, and then add power to other blocks as they get built.

I have my old throttles an innovator 2000 memory throttle that works off of phone jack plugs, two GML memory throttles that work off of headphone jacks, and two aristocraft radio throttles, one of witch was generously donated by Dr Tom. that will give me five operating throttles, which should be plenty; while my railroad might be able to handle more traffic, there isn't room enough in the aisles, especially since we usually run two man crews to put a more experienced operator , to act as a conductor ,with any new engineers , as my RR operations can be intimidating for the uninitiated.


Nelson
 
Last edited:

Bill Nelson

Well-Known Member
Dec 14, 2008
2,680
467
78
Clarksville Tn
ASLA-1a filler w  ash pit hole 1.jpg ALLA_1A  E  wll  6-18-13#2.jpg ALLA_1A  E  wll  6:18:13#1.jpg I have screwed the engine facilities in place, with a filler piece, with a hole for an ash pit.


putting the engine facilities here solves a lot of problems as they take close to two by two feet, all of Harlow is made up of two foot deep shelves, at the places I wanted to but the engine facilities I would have to widen the benchwork to allow room for the main. on the upper levels that fattening of the benchwork would lead inextolerably to places it would be impossible to reach.


also I had thought I'd run my RR's main through the southern staging. It has already gained to much height for that, and that will make the southern staging much simpler, my main line run won't be as long, but simplicity is good..


When I built the logging camp at Terrapin I lost some aisle space, and at it's narrowest the soace between Terrapin and Crooked creek was two feet. most of my aisles are three feet. I'm trying to rework the plans for all three center peninsula levels to allow a four foot aisle at the end of the peninsula . I loose almost ten square feet of railroad on each level, 30 sq feet total.


I had originally thought to build the bottom level first and work up from there; but since I'm already in Harlow yard; I'm thinking it might be good to start building Harlow first I have to work on the design some more to establish a backdrop location that fits well on both lower locations, as a stud wall @ the backdrop will be the main support for all three levels
 
Last edited:

Bill Nelson

Well-Known Member
Dec 14, 2008
2,680
467
78
Clarksville Tn
ASLA-1a  new  pwr  cbnt  #3b-1.jpg ASLA-1a nw elctrcl cbnt #2.jpg ASLA-1a nw elctrcl cbnt #1.jpg ASLA-1a  nw cntrl pnll3.jpg progress

I have six of the eventual 14 blocks wired up in my new control panel. On the previous incarnation of my railroad I had all of the power supplies neatly stashed under a section of my center peninsula. I hope to have trains rolling well before I build my new center peninsula; so that location won't work. I was thinking of using the printer drawer of my dispatcher's desk; but I decided that would waste some space, and expose the wires to unnecessary movement, and I have learned from modeling and automotive applications, if your wires move, there will eventually be problems. I figure those two large flat surfaces in the printer drawer can hold lots of plastic trays with tools and supplies, witch will help keep the RR room organized and neater.


I have a heavy duty plywood box I got from Hardware city, that looks like it was originally made to hold flare rounds for a mortar. I have screwed some 2x4s to the bottom to keep it at the right distance from the wall and the gas flue from the propane fireplace in the family room, cut and drilled some holes in the back to allow power cords to get in, and throttle power to go out on the common rail wire, and wires to the block control panel in the adjacent roll top desk.


So far I have the power supplies for throttles #3 and # 4 ( both Aristocraft radio throttles, one salvaged from my old layout, and the other from Dr Toms old ho layout. these will be the first operational throttles, as they wont need control loops to be wired all around the layout like throttles # 1, #2, and #5 will require. I'm thinking I will run the control loops on the 3rd level Faischia . The power supply and guts of throttle one will go in here, as well as the power supplies for throttles # 2 and #5. which are GML memory walkaround throttles. their base is made to mount on the fashia, so I will probably mount them on the fachia @ flea Creek when that gets built, as that will be closest.


I may be able to get throttles 3 and four operational in the next week or so, and throttle #1 not much longer than that, and three throttles should be plenty for quite some time intill more of my new rr is built.
 
Last edited:

Bill Nelson

Well-Known Member
Dec 14, 2008
2,680
467
78
Clarksville Tn
ASL A_-A cntrl pnnl  7-6-13.jpg ASL-a-1 pwr cbnt 7-6-13.jpg ASLA_1a  girard  dem #1.jpg more work on electrical system

I sent out a letter showing some progress, there is some overlap with previous posts, but I'm to lazy to edit it down


I have been rolling along on my rebuild efforts . The last few days I have been working on the new electrical system. I have got the first six six position rotary switches in place in the control panel to control six of the eventual thirteen blocks, I have retained four blocks of my railroads previous incarnation, and have already installed track on one of the new blocks. another new block will be real easy, and will happen soon, so I got it's control switch installed and ready. the output from each of the rotary switches has an on and off switch, so I can shut down each block easily for operational or short detection purposes.


My old control system was centrally located in a blank area of my central peninsula created by the split level design. My new design has no such available space, also the old central peninsula has not been removed yet, so some other place to put the control panel and electrical goodies was needed. I made a new control panel to fit in a Surplus Roll top desk. The desk is not an antique, it is a nicely built modern desk designed to hold a computer, but my computer has grown much too large for it. We had no room for it elsewhere in the house, but I figured out how to disassemble it and Forrester and I were able to shoehorn the pieces up into the RR room. My previous dispatcher's desk was in a nook in the wall, which on my rebuild will house a helix, so the roll top will make a fancy dispatcher's desk. I built a control panel to fit the space that was made for a monitor, and on the pull out drawer for a keyboard will hold a track schematic on cork board, so a dispatcher can mark train order information on the schematic with push pins.


For an electrical cabinet I had a wooden crate I picked up at hardware city. it is military surplus, and it looks like it was made to hold flare rounds for a mortar. I screwed some 2 x4s to one end, so it would stand upright securely on it's end. I cut a square hole in the bottom, ( now the back ) to pass power cords to a power strip mounted on the side. I mounted some terminal strips for the throttle wires to hook up to, and linked a bunch of them into a homemade buss for the layout's common rail. I drilled some round holes in the back of the cabinet to pass wires through, that run up to the control panel on the desk, for the throttle inputs to the control panel.


My new design for the railroad is much less compact, and uses more wall space, so the old wiring I considered inadequate, since the new control center was less centrally located, and the layout will be considerably larger, I figured I needed heavier wire to prevent excessive voltage drop over the longer run. I removed the outer casing from some house current wiring, and used that wire, and some thick stranded cable, to run a circle of wire for the common rail all the way around the room with branches off the main loop for each of the three levels. when I build my new central peninsula, I'll add branches off of the common rail loop for each of the three levels on the new central peninsula.

I then ran wires from the control panel carrying the switched power for the isolated rail to each of the five existing blocks on my railroad. I still need to hook some of them up, make some gaps in the insulated rail for some of the blocks, and hook up the three power supplies in the cabinet to the three throttles in the cabinet, run a control loop for throttle #1 around the room, and I will be able to have trains rolling again


I have also started to pull the fashia off of the Perry's Gizzard area, the big tall fachia of this section was designed for a differnt space, and did a lot to give my RR the clausterphobic feel it had, hopefully having more visable scenery at that level will make the room feel larger and more open.

Nelson
 
Last edited:

Bill Nelson

Well-Known Member
Dec 14, 2008
2,680
467
78
Clarksville Tn
ASLA-1a Full  elect  cab  #1.jpg ASLA-1a Full  elect  cab  #2.jpg progress

I got my electronics cabinet filled up. I had to swap out one of the power scources, as it supplied 22 V AC and the two aristocraft radio throttles require 12-24v DC. I tossed in an old MRC power pack instead.


I have the cotrol loop for throttle # 1 about half way around the room at the third level. I still need to hook up the dual gauge at State Line, GA. and the narrow gauge at Gegokayoosa, NC.: but I need to study my track plan very carefully to figure out which rail is the common rail at those locations.


I'm thinking the Crooked Creek block, and the Murray block should be operational. I want to get State Line and Gegokayoosa wired in, and contine the control loop for throttle #1 all the way around the room, and add a terminal block for the future central peninsula before I test it, cause if it works without any major glitches I will be playing with trains, and if I have soem major glitches, I will be spending all my time trying to run them down. This is about to get fun!


Nelson
 
Last edited:

Bill Nelson

Well-Known Member
Dec 14, 2008
2,680
467
78
Clarksville Tn
I have trains rolling in the Crooked Creek block, trains are inoperative in the Harlow yard block some diagnostics are in order. I havn't tested the Murray Tn block, and State Line GA. and Gegokayoosa NC. are not hooked up yet.


I'm going to run some track cleaning trains. My # 22, the weaker of my two 2-4-4-2s has pulled a 15 car train up hill from Crooked Creek to the edge of the Harlow yard block, with 10 of the cars being loaded log cars (in operation loaded cars will be going down that grade.


Later tests show the Murray TN. block is functional, time to run track cleaning cars , as soon as I can get some diesel fuel and resque my tractor from the woods

Bill Nelson
 

Bill Nelson

Well-Known Member
Dec 14, 2008
2,680
467
78
Clarksville Tn
Trains rolling in Harlow yard now too

I made a test lead that was about ten feet long so I could do some long sistance continuity tests. the comon rail in Harlow Yard had continuity withe the common rail buss in the electronics cabinet. I checked the power lead to the block next. it had continuity to the block terminal in the control panel, and to the onn off switch for the block, but not through that switch. I hit that switch with contack cleaner and got continuitty, but the trains still did not run, so I checkse the block selector rotary switch, and had no continuity through it either, so I shot it with contact cleaner, and then the trains ran close to the main wire hook ups. I had several places that did not work in the yard, and I repaired the broken wires there. I was not happy with one of the stub switches on the main , as the rails did not line up very well, so I rebuilt that ground throw, hitting the spdt switch the ground throw is built around with contact cleaner while I had the chance.


Harlow yard is now operable, as are Crooked Creek, and Murray, off of throttle #1. throttles four and five are Aristrocraft radio throttles, and need bateries before I can test them, hopefully they work too. Next I need to add roadbed and track in the Sander's switch, so I can wire it up as well. if nothing else I need it for a place to move cuts of cars, every siding in Crooked Creek is full of cars right now, I need to move some of them so I can clean track on the yard tracks and sidings.
 

Bill Nelson

Well-Known Member
Dec 14, 2008
2,680
467
78
Clarksville Tn
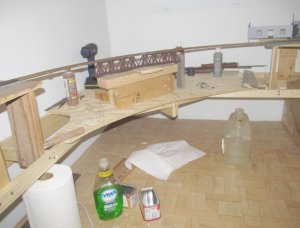
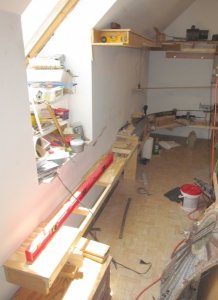
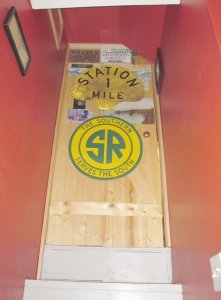
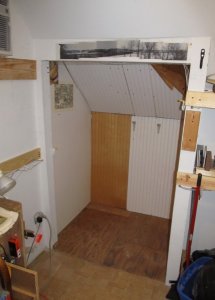
AA-RR rm door  #1.jpg AA- helix  closet empty.jpg AA pnoramc  pic  of  trstle  #1.jpg continuing Progress

I have had a busy week, I have aquired an aftermarket seat and muffler for my anicent tractor, and done a lot of serious mowing, both with the tractor and the lawnmower, My front yard, and the dog yard inside the privacy fence are closwely mowed for the first time this year.


Having made serious improvements on the yard situation , I retreted into the RR room. I moved all of the stuff that was stored in the odd corner that was once my dispatcher's office, and will be my helix nook. this corner has not been this clean since I installed the floor in there. I need to do some work at the ceiling level; when they installed my new metal roof, some of the insulation got dislodged, and the top of the helix loop is like a solar oven.


Besides eptying out the helix nook I did some work to my RR room's goor, adding a knob. this wasn't much of an issue when there was no AC up there; but now I have a good window unit up there there is good reason to close that door, but now there is .


above the helix nook there is a pieced together panoramic view of the trestle and downtown, that was taken a couple days after my #1 son was born, this shows how long that trestle is, as the woods in front of my place have grown up a lot since then.


With the helix nook cleared out I can start planning for what will go on there. I can also start to build the spine for the central peninsula, which will encourage me to work harder toward removing my old center peninsula with all of it's awesome scenery
 
Last edited:

Bill Nelson

Well-Known Member
Dec 14, 2008
2,680
467
78
Clarksville Tn
aa  old  harlow  courthouse..jpg AA  old  Harlow  water  works.jpg AA-Sou pwr in  old  Hrlw.jpg AA old harlow  empty.jpg AA=  alltread  support  in  tree.jpg some destruction

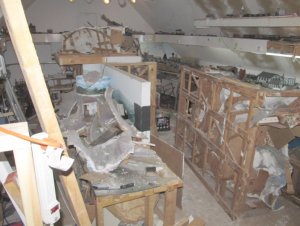
With the Helix nook empty, I'm getting really close to the point where the old center peninsula will be in the way, so this morning I packed up the buildings from downtown Harlow, and began to tear it up.


This is sad, because Harlow looked great, but it was never fun to operate there. The new Harlow will be considerably larger, but will have less vertical room, so I may not be able to replicate the feel of Old harlow. O will try, but likely the new hHarlow will be flatter, and thus more boring. Hopefully I can make it a place that is a joy to operate in, and counterballance the loss of great looking hilly urban scenery.

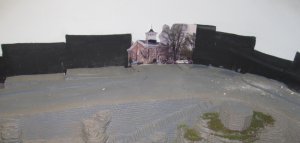
The first photo shows Depot street, with all of the false fron't left, and just the photo, representing the courthouse left.

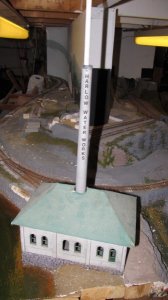
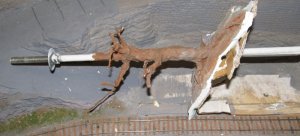
The second photo shows the Harlow water works. It is still in place, as a piece of all thread, supporting the upper level, tuns through the center of the building and the smoke stack, will be tricky to remove. In the new Harlow, I will use the same trick to suport the upper deck, leaving the corner wide open.


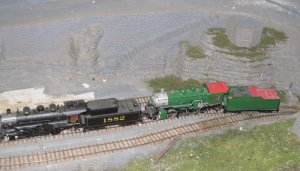
the third photo shows the Southern interchange power, the last rolling stock to be removed. behind it is the foundation for the band stand, and the stairs along the retaining wall, this is my favorate sceane in old harlow, I may not be able to recreate it in the new set up.


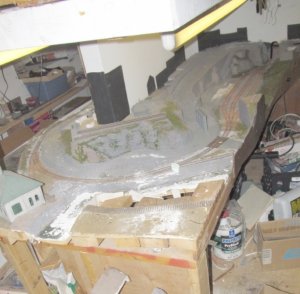
The fourth photo shows Harlow , with most of the buildings gone, and the piece of mountain that used to sit in the corner removed. I got it out in two pieces, with most of the rock carving in tact in one piece, and a wire armature tree built around another piece all thread, that suppoeted the Gizzard above. Note how the backdrop is painted bloact where the partial buildings fit, so you wouldn't see sky blue through the windows.


the last photo shows the tree with the all tread. this two will get re used. I'm thinking there will be an small island in the river, with a big rock formation sticking out of it, and this tree, or one like it will be growing out of it, effectively hiding the all thread, which will support the top deck, a simmilar trick will be used on the bottom bdeck to support the corners of the new Harlow.
 
Last edited:

Bill Nelson

Well-Known Member
Dec 14, 2008
2,680
467
78
Clarksville Tn
AAA SG  br  pre  rmvl..jpg AAA  SG  w  tr  gn.jpg AAA  rmv  NG  wlkundr.jpg oops

I left my track cleaning train at the club, and have to find something else to do; so I have been doing more work toward the removal of the old center peninsula.


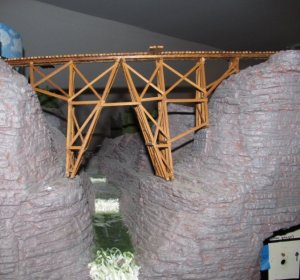
Yesterday I removed the Sander's gorge trestle. I was able to get it out with only slight famage to one bent, and I fixed that right away.

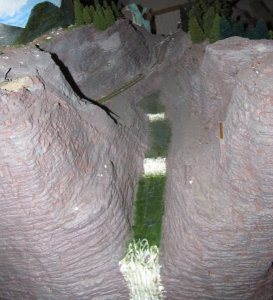
there are some benchwork screws behind the clif to the right side of the trestle, I'm going to drill some holes thropugh the hydrocal cliff face to get acess to the screws to unscrew them, and then I'm going to try to saw off a section of the scenery with a piece of the creek, and the rocks under the trestlse so I can re use both the bridge and the rocks under it on the narrow gauge on the new peninsla.
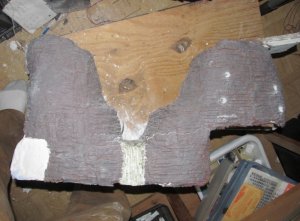
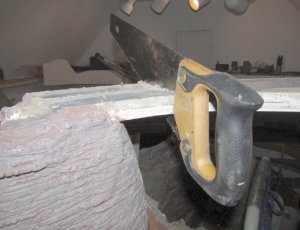
I have also taken a hand saw to the six foot two walkunder that carries the narrow gauge from the top of the center peninsula to the fith level shelf hanging on the sloped ceiling. I'm cutting it off with a hand saw, as I have a lot of stuff stowed on the top two shelves which hanf from the sloped ceiling, and I did not want to see what would happen with the vibrations of a power saw.


Bill Nelson

PS sadly the waterfall broke booo hooo
 
Last edited:

Bill Nelson

Well-Known Member
Dec 14, 2008
2,680
467
78
Clarksville Tn
aaa SG  torn  out #1.jpg aaa trpn  fsh  off.jpg aaa   SG  clif  removed.jpg aaa SG  torn  out #1.jpg aaa trpn  fsh  off.jpg aaa   SG  clif  removed.jpg tearing stuff up

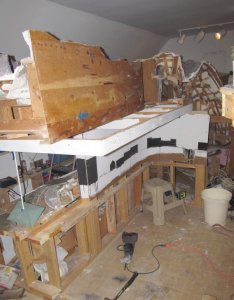
I removed the clif with the stream and the waterfall and the footings for the narrow gauge bridge off of Sander's Gorge. when It came off it tookk a big chunck of faschia with it, and that cot me to removing Faschia elsewher, inclufing the Terapin area. I'm making a lot of progress removing stuff, but there is a whole lot more that needs to go before I can start the benchwork for my new center peninsula, which will both be larger than the old one, and have three levels, instead of two.


This end of the railroad is easier to dissasemble as it was built mainly with screws. the other end, over toward Harlow, and the Gizzard was built with a lot of nails, and dissasembling things takes much longer and is much messier.


PS later the waterfall broake
 
Last edited:

Bill Nelson

Well-Known Member
Dec 14, 2008
2,680
467
78
Clarksville Tn
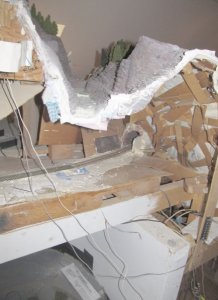
AAAA gizzard  cut  out!!.jpg AAA  N  harlow  gone,  Gzzed  reversed.jpg AAA  old  helix .jpg I have cyt a five foot by four foot piece of the Gizzard out, and removed North Harlow undeirneith it. God willing, I will be able to get some help here on Saturday to remove the Gizzard. after that, some clifs and the small helix that used to go to the Southern Staging will be the only things I will plan on salvaging, so it will be destruction from there out., which should clear the deck for the new center aisle relatively quickly.


I'm going to try to preserve the Gizzard for a while, to see if anyone is crazy enough to adopt it. I don't have room for it anywhere, so it will likely go under a tarp in one of my falling down outbuildings for the time being.
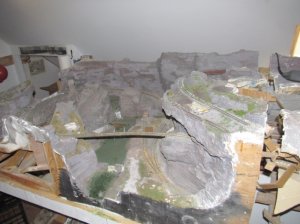
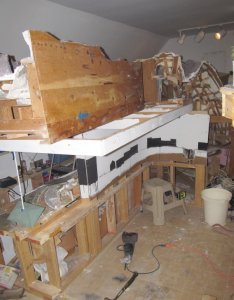

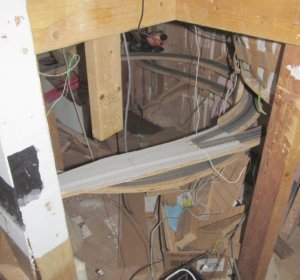
The one loop helix that used to connect Harlow to the Southern staging is just the right size to fit in my Helix nook. likely it will be slightly altered, and be used as the Southern Mainline between Harlow and the Southern Staging in my railroad's next incarnation as well.
 
Last edited:

Bill Nelson

Well-Known Member
Dec 14, 2008
2,680
467
78
Clarksville Tn
AAA  N  harlow  gone,  Gzzed  reversed.jpg aaa_center__peninsula__destruction__1.jpg I balanced the gizzard on the east side of it's support. build an inclined plane from the middle of it's support to the floor, hooked a comealong to it and the benchwork, tipped it untill the come along cable was tight, and then used the come allong to safely lower it to the floor level. Hopefully some freinds will come tommorow and help me move this out to one of my decaying sheds while I see if anyone want's to addopt it.
 
Last edited:

Bill Nelson

Well-Known Member
Dec 14, 2008
2,680
467
78
Clarksville Tn
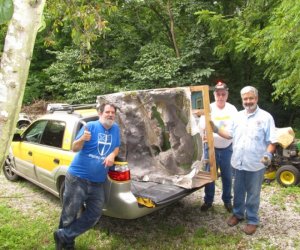
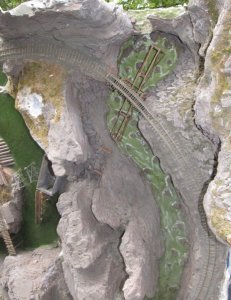
aaa gizzard removal  crew.jpg aaaa_gizz_overhead.jpg Bob and Dr Tom from the train club came over this afternoon, and helped me remove the shortened Gizzard from the railroad room. a big job, because it weighs a blue ton, do to lots and losts of plaster.


with the gizzard on my little truck out in the sunlight, I was able to get a good photo from overhead showing the cool stream effects domn with acrylic paints and gloss medium.


The Gizzard is now out in a tumbledown shed, I'll have to try to find a tarp to cover it up to help protect it while I try to see if anyone wants to adopt it. Lesser sections of my RR have gone to the burn pile.
 
Last edited: