Building my own x-wing

dnalor

Well-Known Member
Oct 28, 2011
917
186
58
Belgium Europe
YES after the millenium falcon..which went fairly good..
Now i go for the real stuff… the Imcold X-wing. :inw:
This fighter is a lean mean fighting machine..without to much place for errors.….on the falcon that wasn’t a big problem…
So I hope I can do this to.
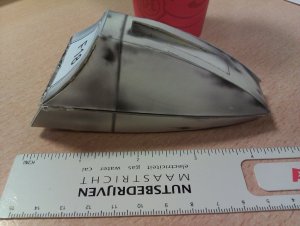
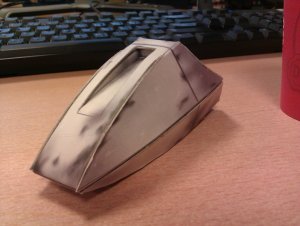
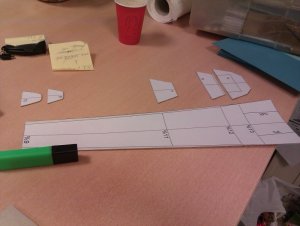
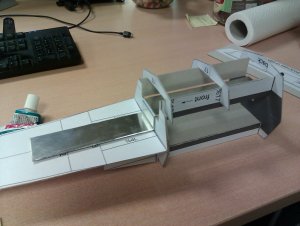
I started with the nose-cone ..today the cuts ..tomorrow the glueing parts.
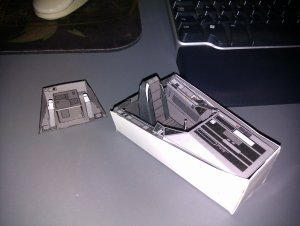
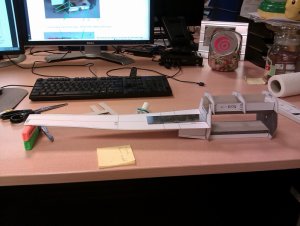
Also I’m thinking about the mainframe…I want to make it from metal..because i think that a carton mainframe wouldn’t be strong enough.

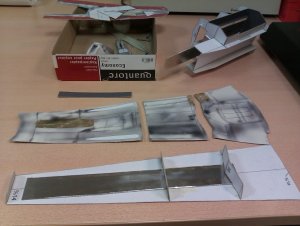
the picture is A1 en the small paper is A4
 

Attachments

  • my printing size..jpg
    my printing size..jpg
    75.7 KB · Views: 146

Rhaven Blaack

!!!THE MAN BEHIND THE CURTAIN!!!
Staff member
Administrator
Moderator
Jun 12, 2009
12,531
9,914
228
Oregon
www.deviantart.com
You my friend, are very ambitious. I wish you the best of luck with it.
Your work on the Millennium Falcon was FANTASTIC.
This should easily rival it with no problems.

I wish you the best of luck with it.
 

imcold

Member
Feb 3, 2008
104
1
16
Slovakia
satd.sk
Good luck with it! The nose-cone is probably the most complicated part to shape on the whole fuselage, after that it should be easier. Did you considered using wood instead of metal? Should be much easier to work with.
 

dnalor

Well-Known Member
Oct 28, 2011
917
186
58
Belgium Europe
humm...lucky me...i hoped the cone was an easy start :)
I thinking about wood..but metal is not as thick as wood...and more paper like...maybe easier?

But i'm still thinking what i should do...
 

dnalor

Well-Known Member
Oct 28, 2011
917
186
58
Belgium Europe
Hum....the nose is difficult..it has to warp on serval sides..
And my hot glue gun is hot on my fingers when holding the nose :) (of the xwing)


But it looks nice..:)

Also yesterday in front of the tv i build the R2 unit..i only need to build his legs then he is ready.
 

Attachments

  • nose 1.jpg
    nose 1.jpg
    150.1 KB · Views: 80
  • nose2.jpg
    nose2.jpg
    141 KB · Views: 79
  • R2.jpg
    R2.jpg
    128.6 KB · Views: 78

dnalor

Well-Known Member
Oct 28, 2011
917
186
58
Belgium Europe
YES i'm ready with my R2 :)

i'm also started with the cockpit but i think i have to build first the fuselage before glue the complete cockpit together...
 

Attachments

  • r2 complete.jpg
    r2 complete.jpg
    115.1 KB · Views: 52
  • cockpit1.jpg
    cockpit1.jpg
    128.1 KB · Views: 57

dnalor

Well-Known Member
Oct 28, 2011
917
186
58
Belgium Europe
All cockpit parts are ready..
Now the fuselage
and then i can glue everything in place..
 

Attachments

  • IMAG0409.jpg
    IMAG0409.jpg
    137.1 KB · Views: 56

Inv8r_timmy

New Member
Oct 30, 2010
13
0
1
Canada
Jeebus, that`s bigger than studio scale on Red2, isn`t itÉ! Where are you going to put all this stuffÉ :) Any chance you`ll release your layout after you`re doneÉ I`ve been afraid to start the IMCOLD X after looking at all the teeny-tiny pieces with multiple folds, and a giant version seems less intimidating somehow (yeah, apart from the `explaining to the wife` part that is).
Looking at your framing, does that mean you`re not going to try a metal armature after allÉ
 

dnalor

Well-Known Member
Oct 28, 2011
917
186
58
Belgium Europe
Well..i still have a corner in my computer room where this one would fit fine..
And this is the IMCOLD x-wing.
I only blown it up..from A4 to A1..
So everything became a lot bigger.

But i still are a little scared about some parts..

And yes my master plan was to build the chassis from metal..
But after study-ing the parts i don't know if that's possible,
because of the many loose parts in the back.

So i'm looking for a way to go pass that.
 

dnalor

Well-Known Member
Oct 28, 2011
917
186
58
Belgium Europe
a rainy weekend..
And this is all i did

And i did the cockpit windows wrong..
I did first all the cuting and then the folding..
And now i know that that is wrong.

Now i have to re-do that piece to get a sharp fold.
 

Attachments

  • cockpit.jpg
    cockpit.jpg
    157.1 KB · Views: 59
  • droid plate 1.jpg
    droid plate 1.jpg
    144 KB · Views: 52

dnalor

Well-Known Member
Oct 28, 2011
917
186
58
Belgium Europe
My droidplate update
And the chassis is almost ready.
i have placed an metal strip, what will be attached to the metal strip in the nose piece. (not shown).
 

Attachments

  • droid plate 2.jpg
    droid plate 2.jpg
    151.5 KB · Views: 68
  • chassis2.jpg
    chassis2.jpg
    153 KB · Views: 60
  • chassis3.jpg
    chassis3.jpg
    150.9 KB · Views: 62

dnalor

Well-Known Member
Oct 28, 2011
917
186
58
Belgium Europe
little update.
I'm started with cutting the hull (underside).
glued the alu-strip to the nose chassis.
 

Attachments

  • HULL1.jpg
    HULL1.jpg
    145.4 KB · Views: 61