BSG Stealthstar

silveroxide

Senior Member
Aug 22, 2007
2,036
525
113
Fayetteville NC
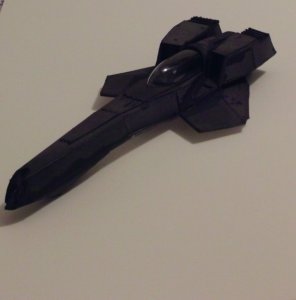
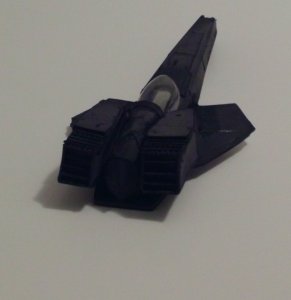
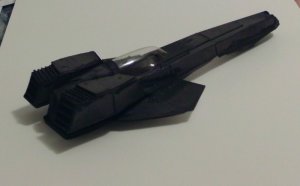
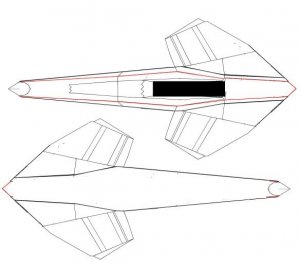
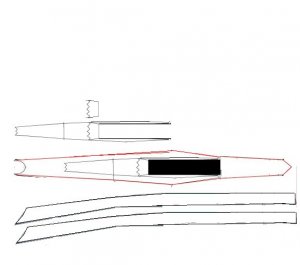
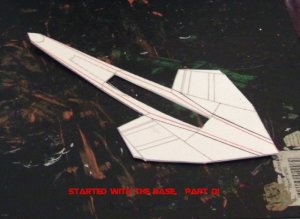
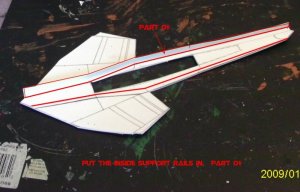
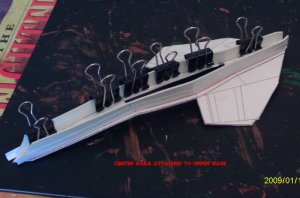
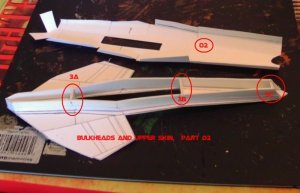
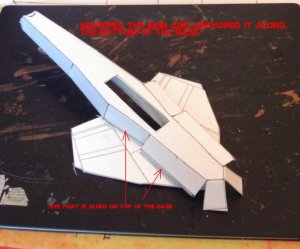
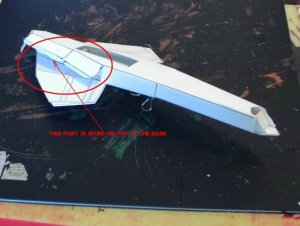
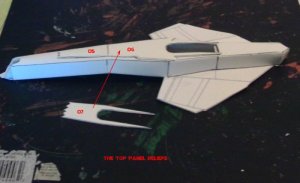
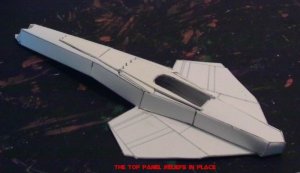
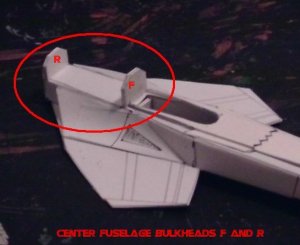
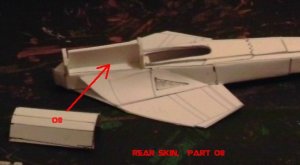
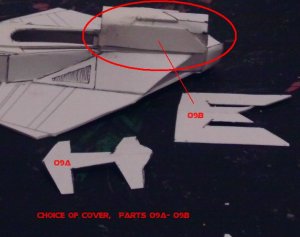
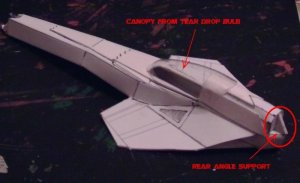
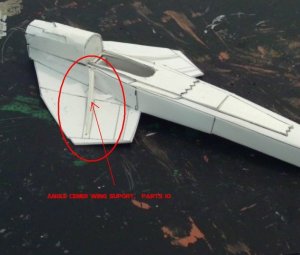
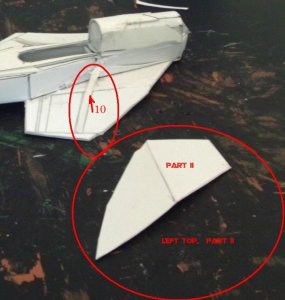
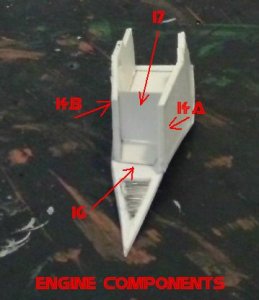
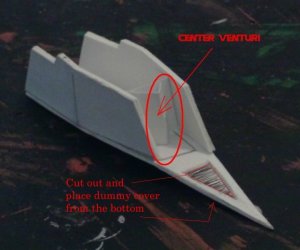
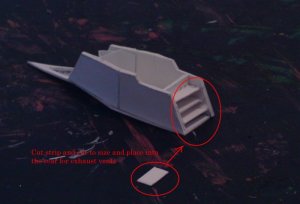
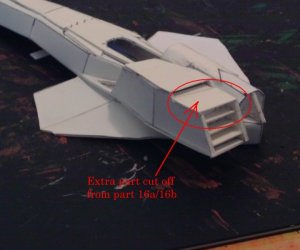
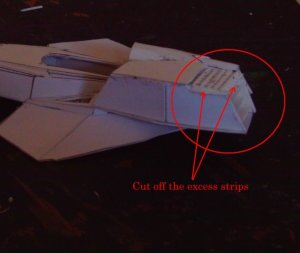
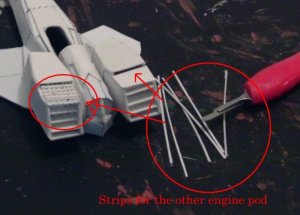
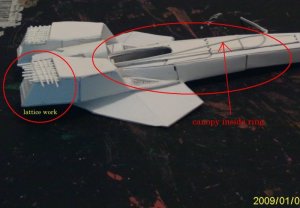
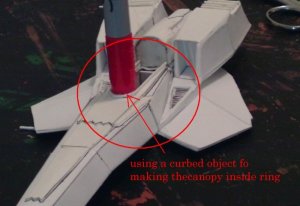
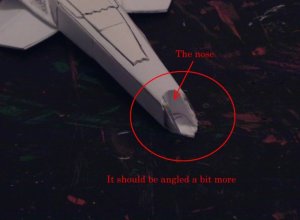
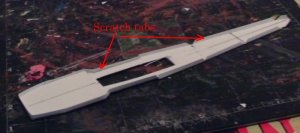
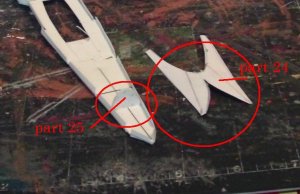
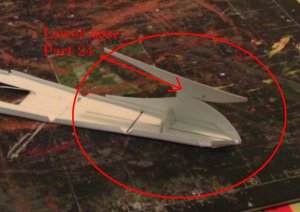
There are few background photos of this elusive spacecraft but here is what I have been able to come up with. This where I am at the moment. Presently I am working on the cockpit and then finish the bottom part. This model is built different, in that there is a top part and bottom part. The top part is finished and now for the interior details. The cockpit will be inserted from the bottom. So far I have four pages of parts and still adding. Since this is copyrighted, the plans will be in the download section as a freebie.
As of this time, there are over 40 pictures and more to be added. The build will sequence will start soon.
 

Attachments

  • 041.jpg
    041.jpg
    60.6 KB · Views: 96
  • 042.jpg
    042.jpg
    56.9 KB · Views: 57
  • 043.jpg
    043.jpg
    66.9 KB · Views: 58

Paragon

Active Member
Apr 22, 2007
814
48
38
37
Greenville NC, USA
www.freewebs.com

silveroxide

Senior Member
Aug 22, 2007
2,036
525
113
Fayetteville NC
I have the limited info on two versions and this one has a bit of both. The coloring is a primary test paint to get an idea of the layout. I reverted to my old days of scratch building with styrene sheets but in this case it is heavy poster-board and 120lb weight paper. and some laminations, but that will be covered in the build sequence. I am glad that you like it. If this one comes out alright, then the next one will be the blackbird. I have more background info on that one than this one.
 

Rhaven Blaack

!!!THE MAN BEHIND THE CURTAIN!!!
Staff member
Administrator
Moderator
Jun 12, 2009
12,519
9,894
228
Oregon
www.deviantart.com
Silveroxide,

This stealthstar looks great so far. I am looking forward to the wonderful build thread:thumb: and the finished product.:mrgreen:
 

silveroxide

Senior Member
Aug 22, 2007
2,036
525
113
Fayetteville NC
stealthstar

And so it begins. I was going to put in the preliminary plans but they are way to big at 800kb. I will put them in later in the thread when I resize them. So here are a few refernce pics and the start of the top portion. As you can see, there is a big hole in the center of the upper base. This will come in handy later when I have to build the cockpit. The center guide walls are set off from the edge and placed along the red line. I made a long tab to hold the inner walls in place. That is what those clamps are for.:cool::cool::cool:
 

Attachments

  • stage 01.jpg
    stage 01.jpg
    57.1 KB · Views: 48
  • stage02.jpg
    stage02.jpg
    34.7 KB · Views: 26
  • stage03.jpg
    stage03.jpg
    25.3 KB · Views: 30
  • 001.jpg
    001.jpg
    122.7 KB · Views: 38
  • 002.jpg
    002.jpg
    134.3 KB · Views: 39
  • 003.jpg
    003.jpg
    123.1 KB · Views: 40

silveroxide

Senior Member
Aug 22, 2007
2,036
525
113
Fayetteville NC
stealthstar

More on the build. Started to Skin the top. Folded under the bottom plate and the rear to the top of the wing. I should of made a slight curve on the top from the cockpit to the nose. In this version, the top is flat. As you noticed, I did not score the fold lines but used a flat edge to fold the flaps down and avoid the open cut edge when scored. This way you do not have to worry about coloring some or most of the edges.

In the photo ther is a scoop on the sides, I got rid of it because I had problems attaching the engines, but that will come up later in the build.:wave::wave::wave:
 

Attachments

  • 004.jpg
    004.jpg
    115.4 KB · Views: 27
  • 005.jpg
    005.jpg
    119.9 KB · Views: 28
  • 006.jpg
    006.jpg
    127.8 KB · Views: 25
  • 007.jpg
    007.jpg
    91.8 KB · Views: 28
  • 008.jpg
    008.jpg
    87.5 KB · Views: 32
  • 013.jpg
    013.jpg
    33 KB · Views: 36

silveroxide

Senior Member
Aug 22, 2007
2,036
525
113
Fayetteville NC
stealthstar

Doing the rear behind the cockpit. Like I said earlier. I have some reference for two versions of this bird. Here you have the choice of the rear covering.

I placed a triangle support for the rear to help in the covering later on.

Started on the lattice work for the engine pods. It is a scratch build out of fine cut thin strip. Another thin strip is used to go around the cockpit opening. This is to help in the placing of the canopy in the future.

Here is where I removed the inlet covering and I place the center angle to give the wings the center raised section.:wave::wave::wave:
 

Attachments

  • 014.jpg
    014.jpg
    45.2 KB · Views: 26
  • 015.jpg
    015.jpg
    32.4 KB · Views: 25
  • 016.jpg
    016.jpg
    51.4 KB · Views: 22
  • 017.jpg
    017.jpg
    90.1 KB · Views: 22
  • 018.jpg
    018.jpg
    112.4 KB · Views: 21
  • 019.jpg
    019.jpg
    92.7 KB · Views: 27

silveroxide

Senior Member
Aug 22, 2007
2,036
525
113
Fayetteville NC
stealthstar

Thanks for the comments, KK and Sean.

I like to make my models sturdy. Even when I made J-Leslie and Paragons vipers, I built up the interior with formers and bulkheads and used 60lb to 120lb weight paper.

Here I placed the engine mounts on the wing section. The engine pod has some parts that you will have to make out of scrap paper. They would look better if they are colored in silver or gun metal. The louvers at the exhaust are also scrap. I used poster board strips and space them even . The cover is the piece from the top plate which I trimmed off and then lowered it onto the top rear of the exhaust.:wave::wave::wave:
 

Attachments

  • 020.jpg
    020.jpg
    109.5 KB · Views: 29
  • 021.jpg
    021.jpg
    24.9 KB · Views: 406
  • 022.jpg
    022.jpg
    97.1 KB · Views: 26
  • 023.jpg
    023.jpg
    99.3 KB · Views: 25
  • 024.jpg
    024.jpg
    100.6 KB · Views: 33
  • Like
Reactions: Rhaven Blaack
Feb 16, 2008
108
0
16
texas
Stealth Viper

I knew it was just a matter of time before someone had done. Silver you are one talented builder. Hope you plan to release it soon because I really want one to for launch pad 1.

Husker
 

silveroxide

Senior Member
Aug 22, 2007
2,036
525
113
Fayetteville NC
stealthstar

Hello Adama: The plans are coming along nicely. Still working with this beta build. If you want it for your bay, keep in mind that this ship was assigned to the BSG Valkarie.

Worked on the Engine pod lattice system. Cut a thin strip of heavy paper for an inner ring around the canopy and cockpit connector. This raised ring will help in positioning the canopy later on. I used a round object to help form the ring at the front. Built up the front radome and placed markers for the nose vents. This markers will define the exhaust ports in the nose of the ship. It is coming along nicely and it is almost finished. There is a bit more to do on the landing gears and a display platform.:wave::wave::wave:
 

Attachments

  • 026.jpg
    026.jpg
    86.5 KB · Views: 30
  • 027.jpg
    027.jpg
    120.3 KB · Views: 29
  • 028.jpg
    028.jpg
    115 KB · Views: 26
  • 029.jpg
    029.jpg
    112.2 KB · Views: 25
  • 030.jpg
    030.jpg
    100.3 KB · Views: 23
  • 031.jpg
    031.jpg
    31.2 KB · Views: 383
  • Like
Reactions: Rhaven Blaack

silveroxide

Senior Member
Aug 22, 2007
2,036
525
113
Fayetteville NC
stealthstar

Thanks for the comment jgderuvo.


Well here are some more pics and one of the stealthstar at the moment of being almost finished. Finished with the inner canopy ring. Now to work on the lower portion of the ship.:wave::wave::wave:
 

Attachments

  • 064.jpg
    064.jpg
    68.8 KB · Views: 46
  • 032.jpg
    032.jpg
    86.1 KB · Views: 30
  • 033.jpg
    033.jpg
    116.3 KB · Views: 24
  • 034.jpg
    034.jpg
    81.5 KB · Views: 25
  • 035.jpg
    035.jpg
    67.2 KB · Views: 34
  • 036.jpg
    036.jpg
    66 KB · Views: 31
  • Like
Reactions: Rhaven Blaack
Feb 16, 2008
108
0
16
texas
Stealth Technology

Silveroxide,

Two words my man, Holy S&!t. That is the most beautiful sight a Hardcore BSG fan could behold. Almost speechless. You are still the Jedi Master and I but the student.

Husker
 

silveroxide

Senior Member
Aug 22, 2007
2,036
525
113
Fayetteville NC
Thanks for the comments guys. The tear drop bulb was rather easy to make but I will show how to cut it later on in the build. Right now I am catching up on the photos and fixing the tutorials. I am also working on the plans. I reduced them and the lettering is rather hazy on the fuselage at the down-loadable size. I will resume shortly with more pics. I am already working on how to build the black-bird.