I managed to print some of the sheets you posted and will try my hand at fuselage. I'm really looking forward to your future post can hardly wait to what you do next.
BSG Stealthstar
- Thread starter silveroxide
- Start date
You are using an out of date browser. It may not display this or other websites correctly.
You should upgrade or use an alternative browser.
You should upgrade or use an alternative browser.
stealthstar
Go for it Husker. I just do the preliminary builds and everyone is welcome to modify them.
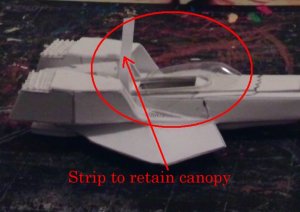
Working on the bottom section, Made a strip to retain the canopy in place at the rear.
The canopy is in place in a test mode. It will be placed on last in the build. Here it is painted with a basic matte black finish.
More pics to come. I am doing a double build sequence, here and at PM, but the PM site is down for a while. I was hoping that it would be up but I guess that I will continue here. There are some of you out there that want to see more and can't wait for the other site to come up.
Go for it Husker. I just do the preliminary builds and everyone is welcome to modify them.
Working on the bottom section, Made a strip to retain the canopy in place at the rear.
The canopy is in place in a test mode. It will be placed on last in the build. Here it is painted with a basic matte black finish.
More pics to come. I am doing a double build sequence, here and at PM, but the PM site is down for a while. I was hoping that it would be up but I guess that I will continue here. There are some of you out there that want to see more and can't wait for the other site to come up.
Attachments

This looks absolutely fan(frakking)tastic... You are doing a wonderful job on this model.
I am really looking forward to building this one.
I am amazed by your work and the amount of detail you put into all of your models.
You truly are a Shidoshi (master above masters) of model building.
I am really looking forward to building this one.
I am amazed by your work and the amount of detail you put into all of your models.
You truly are a Shidoshi (master above masters) of model building.
stealth Star
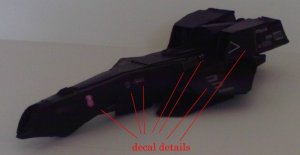
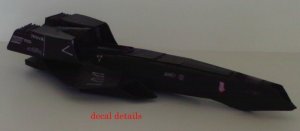
Domo Harigato, Blaak-san. Here are a few more.
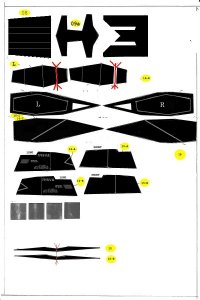
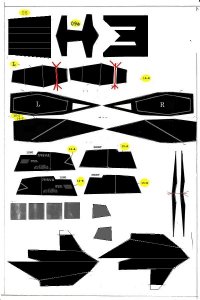
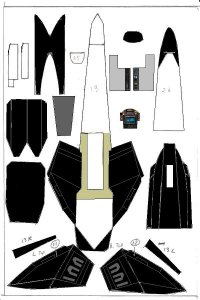
The pictures are the top side only for now. Here is a resized copy of some of the plans. You can see that the lettering details suffered in the resize.
The cokcpit was placed piece meal but I hope to make it all into a one piece tub and put it in place from the bottom as a whole unit.
Domo Harigato, Blaak-san. Here are a few more.
The pictures are the top side only for now. Here is a resized copy of some of the plans. You can see that the lettering details suffered in the resize.
The cokcpit was placed piece meal but I hope to make it all into a one piece tub and put it in place from the bottom as a whole unit.
Attachments

stealthstar
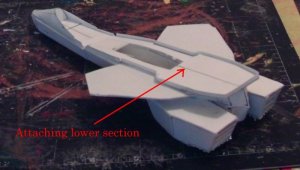
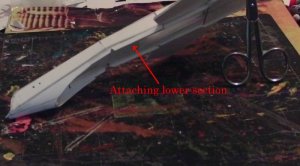
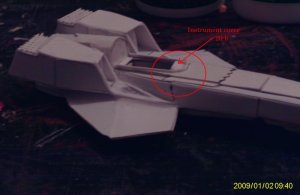
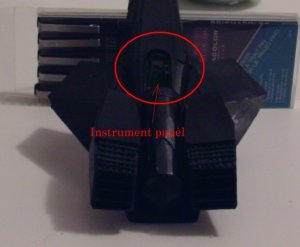
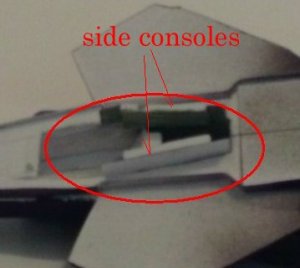
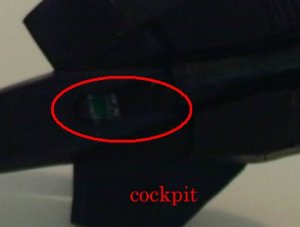
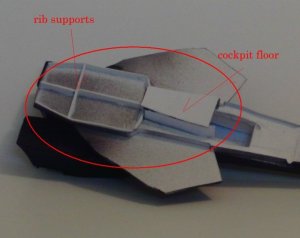
More on the stealth star. I did some support braces for the rear lower panel, and closed the bottom of the cockpit. I kind of rushed this area, I should have done the whole cockpit tub at one time. I ran into a few problems in the side panels fitting right because I had put the instrument cluster in first and was tight for room.
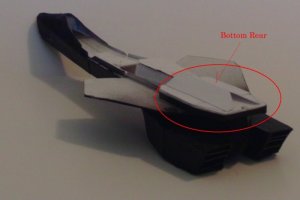
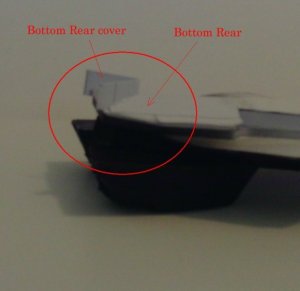
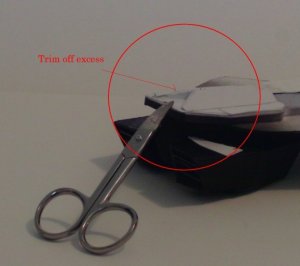
I place the rear panel section and closed it up with a piece of scrap. Waited for it to dry and then cut off the excess. A piece of colored black scrap is better in the future. This method avoids any gaps of misalignment.
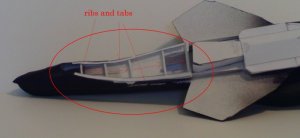
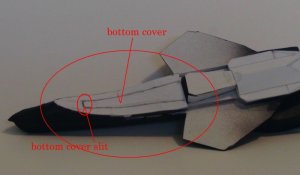
The front half is built up with braces and made up tab connectors. At the front of the bottom panel, there is going to be a slit but that will be evident in the next posting.
More on the stealth star. I did some support braces for the rear lower panel, and closed the bottom of the cockpit. I kind of rushed this area, I should have done the whole cockpit tub at one time. I ran into a few problems in the side panels fitting right because I had put the instrument cluster in first and was tight for room.
I place the rear panel section and closed it up with a piece of scrap. Waited for it to dry and then cut off the excess. A piece of colored black scrap is better in the future. This method avoids any gaps of misalignment.
The front half is built up with braces and made up tab connectors. At the front of the bottom panel, there is going to be a slit but that will be evident in the next posting.
Attachments
It looks like it is starting to come together nicely.
Actually, it almost finished. Working on the landing gears at this time.
Blackbird
The next is the black bird, but something just happen to land on my build pad happenstance. The Atomic Blossom, which will be done with a few modifications my way. That is almost finished also and I will post a few pics soon.
If I may be so bold as to ask, WHat is the next BSG model that you are planning to design?
The next is the black bird, but something just happen to land on my build pad happenstance. The Atomic Blossom, which will be done with a few modifications my way. That is almost finished also and I will post a few pics soon.
stealthstar
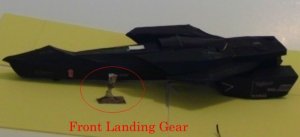
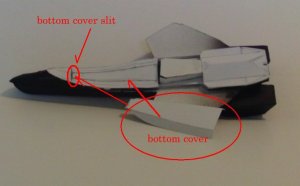
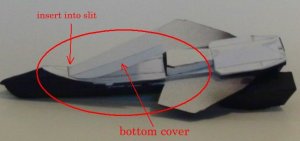
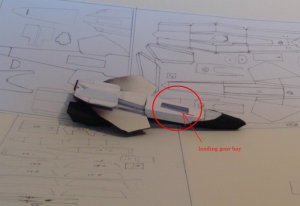
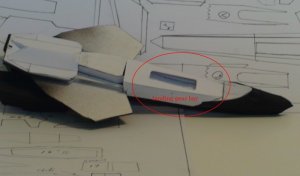
In continuation, more pics. The bottom front for the landing gear. In this section it is too big, later on in the build I made the landing gear well shorter. There is a slit at the front where the bottom portion is attached.
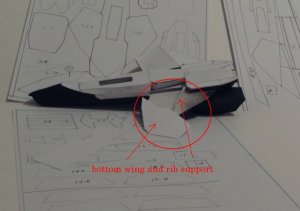
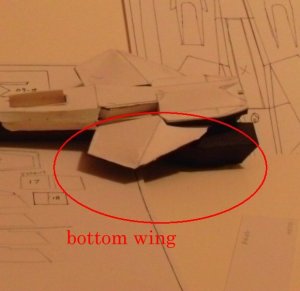
Place a rib support on the bottom wing and skinned it. There is still more to come. Se you all later.
In continuation, more pics. The bottom front for the landing gear. In this section it is too big, later on in the build I made the landing gear well shorter. There is a slit at the front where the bottom portion is attached.
Place a rib support on the bottom wing and skinned it. There is still more to come. Se you all later.
Attachments
BLACK BIRD?!?The next is the black bird, but something just happen to land on my build pad happenstance. The Atomic Blossom, which will be done with a few modifications my way. That is almost finished also and I will post a few pics soon.
Well, if your Black Bird is going to look as good as this Stealthstar, I can not wait to see it as well. I am looking forward to it.
So far, the Stealthstar is really looking good.
stealthstar
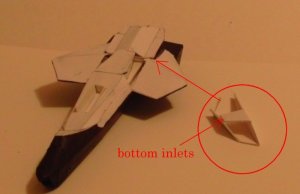
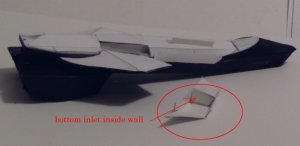
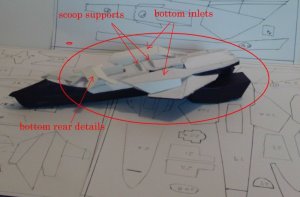
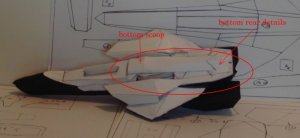
Yup! The Blackbird. Next up on the queue line-up.
Here are the bottom inlets. and the making of the bottom scoop.
I cut and pasted the decals from the plans and glued them to the sides like a decal, but the plans will have them on already. Then again, the reduction in size made them blurry, I may make them separate and then they can be cut out and glued to the finished model. Print them out on the Avery sticky labels and stick them on.
Attachments
Blurry, or not, IMO I really do not think it matters too much. I still think that this is going to be a GREAT model (even if it has blurry decals).
It is looking better by the moment.
Are you going to design a stand for it, or just have it standing on the Landing gear?
Here are some of the BSG seals for stand ideas.

Are you going to design a stand for it, or just have it standing on the Landing gear?
Here are some of the BSG seals for stand ideas.
Thanks for the logos, they are loaded and ready for some other project.
As for the stealthstar, I am designing a tractor with a tow bar and placing it on the deck.
As for the stealthstar, I am designing a tractor with a tow bar and placing it on the deck.
Really good model!!
I like it :thumb::thumb: and just waiting for the beast!!!!
Your job is excellent!!! Many congrats
I like it :thumb::thumb: and just waiting for the beast!!!!
Your job is excellent!!! Many congrats
stealthstar
Thanks for the comments.
Here a few more updates. I was doing a double thread of this model, here and at PM. My thread over at PM was lost but I will finish the thread here and then post them over there. In the meantime, here are some more photos.
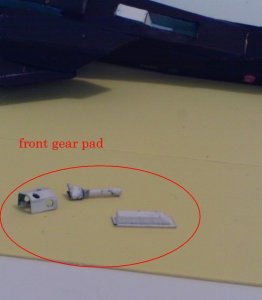
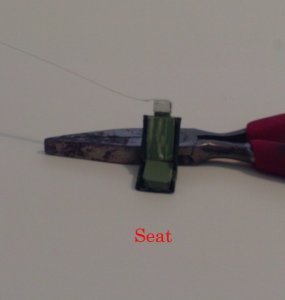
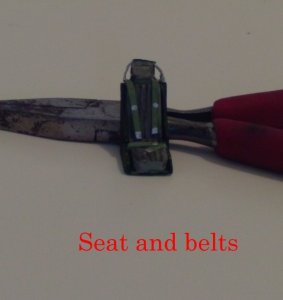
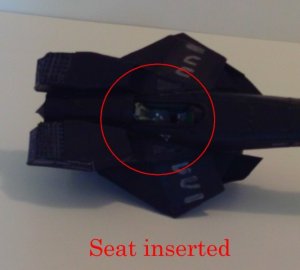
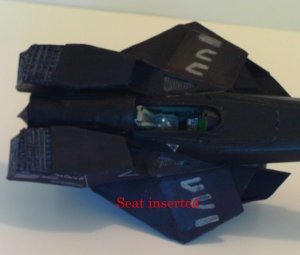
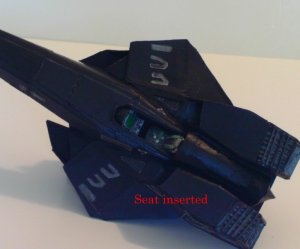
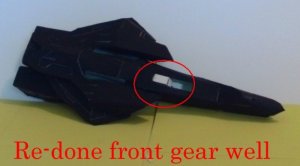
Constructed the seat and inserted it. As mentioned earlier, the whole cockpit tub should be one unit, inserted from the bottom. The front landing gear pad will also double as the gear cover. I reduced the size of the opening and The gears will be on the next posting.
Thanks for the comments.
Here a few more updates. I was doing a double thread of this model, here and at PM. My thread over at PM was lost but I will finish the thread here and then post them over there. In the meantime, here are some more photos.
Constructed the seat and inserted it. As mentioned earlier, the whole cockpit tub should be one unit, inserted from the bottom. The front landing gear pad will also double as the gear cover. I reduced the size of the opening and The gears will be on the next posting.
Attachments
stealthstar
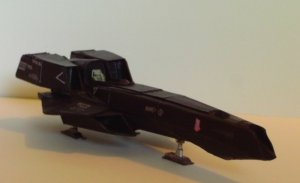
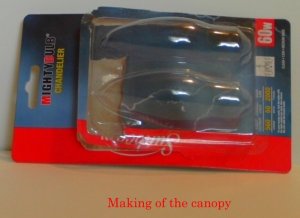
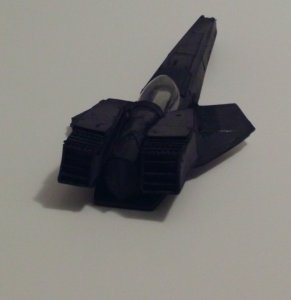
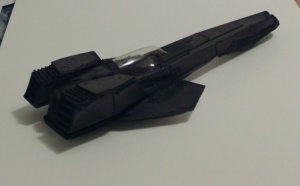
The Stealthstar is almost at the end of its build. Here are a few updates and the next posting will be on the Bubble Canopy. Here is the Casing that I used to construct the Canopy. I buy the cheapest bulbs that have the shape that I want. With this packet you get two bubble shields. This means that you get an extra one in case you mess up the first, but more on that on the next posting.
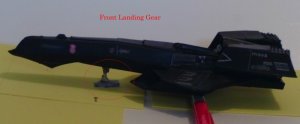
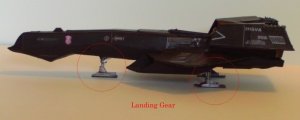
The landing pads are in place and now to start work on that tow mule.
The Stealthstar is almost at the end of its build. Here are a few updates and the next posting will be on the Bubble Canopy. Here is the Casing that I used to construct the Canopy. I buy the cheapest bulbs that have the shape that I want. With this packet you get two bubble shields. This means that you get an extra one in case you mess up the first, but more on that on the next posting.
The landing pads are in place and now to start work on that tow mule.