G1 i am not sure if this has been covered already or not what paper weight and tools are you using to do these. i am fairly new to the papercraft hobby and dont quite know all this stuff yet. and on the wing thickness the instructions say to use a strip of paper but it looks like you would need several strips to create the proper thickness, would a sanded down popcicle stick also work?
Wulf,
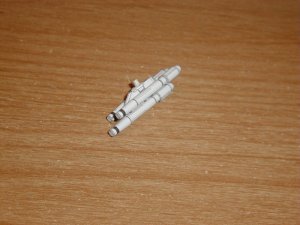
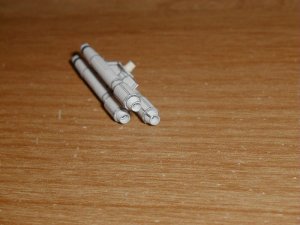
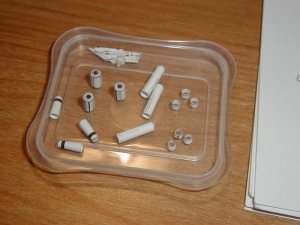
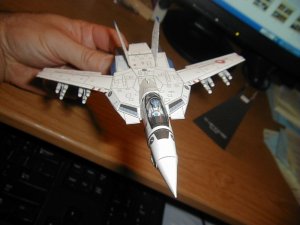
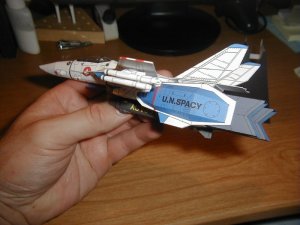
1st off the paper used is 65lbs. cardstock. I used construction paper for the Triple Missiles as the cardstock was giving me alignment fits trying to roll so tight for the paper weight. The canopy was printed on regular printer paper to reduce the thickness. I actually made a whole page of canopy frames to print on regular paper to save from double printing a page of parts when I only need a few of em

Too bad I did that after I already did Max's canopy as I added pilot names to the canopy frames

For tools *(Take notes, Getta-Tricks ahead)*,
Small Metal Ruler - for cutting and scoring parts.
Stylis - for scoring parts. Note I score fold lines before I cut anything out.
X-Acto Knife and Good Scissors - for cuting out parts obviously
Needle Nose Pliers - for pressing seams tight to lock in alignment. I also use these to hold small parts along the fold lines and fold em using the edge of the pliers to keep the fold straight. I use a toothpick to aid in folds to. For small sections a toothpick can make the folding a lot easier and safer for the part. For many folds I even use the above method to sharpen the fold up producing a much cleaner fold. Bottom line Needle Nose Pliers are a must!
Various pens, markers, watercolor pencils, ect. - for edge coloring. Note for black edges try to use a gray marker instead of black. A couple passes with gray matches far better than one overpowering pass of black.
Lots of Toothpicks - What don't I use em for? I apply glue with em, I fold small parts with em, True up fold edges with em, on occasion they are parts or reinforcements for parts. When they are all gummed up with glue they become handy paint stirrers or stock for parts (such as landing gear struts for the Valks.). Toothpicks are like duct-tape man

Dowels and rods of various diameters - for rolling parts agianst to shape.
Sanding Films and paints - for hiding bad building technique
Sometimes you can smooth out rounded areas for a more blended look and paint em.
Last but not least my favorite,
STICKY FINGERS - take an old toothpick and wrap a 2 inch piece of masking tape around on the "end" of the strip of tape on to itself. Then take the tape and wrap it onto itself sticky side out. Walla you got yourself a sticky finger for holding small parts to apply glue and for setting those pesky little parts in place. When the sticky is all messed up peel a bit off and walla it's refreshed
One word of warning on Sticky Fangas. For tiny delicate parts the finger's strength may be a bit too much. That can be remedied but rolling it in yoiur finger tips to lessen it's grip with the oil from your fingers.
Hope this helps
G1


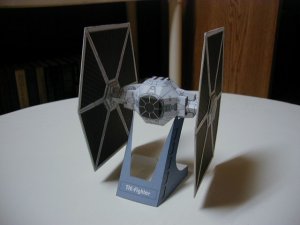
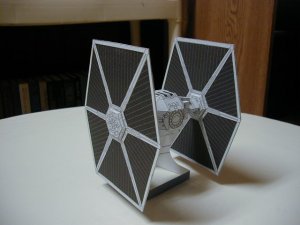
") I hope this does Master Shunichi proud
I hope this does Master Shunichi proud