Tutorial: Paper-to-Plastic Part 1

myrmedon

New Member
After posting pics of my stuff, I have had a few requests for a tutorial on making plastic models out of paper plans. Now, I have only done this with Battletech mechs but this process should be usable on other designs.

One of the biggest things to remember is that the plastic you work with is often much thicker than cardstock paper and this additional thickness can cause some scale/fit problems.

Please keep in mind, I have only been doing this a short time. The Mackie is only my 3rd attempt using this method. There are others who do this and may have other methods or ideas....this is just my variation.

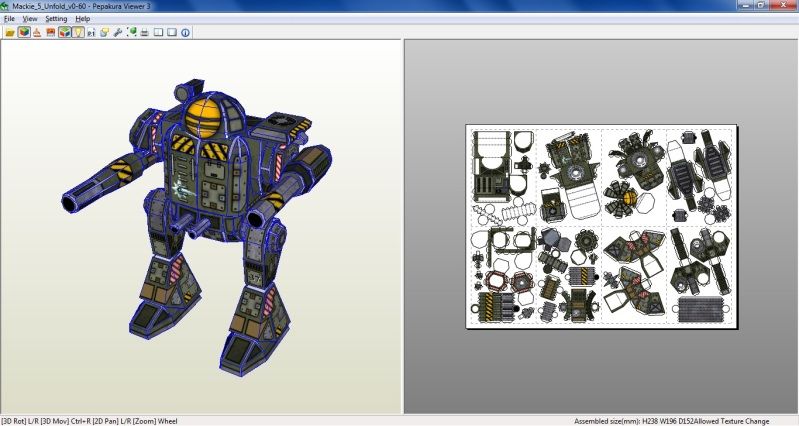
First, I scale the subject (found here) in Pepakura:
MackieScreenshot.jpg


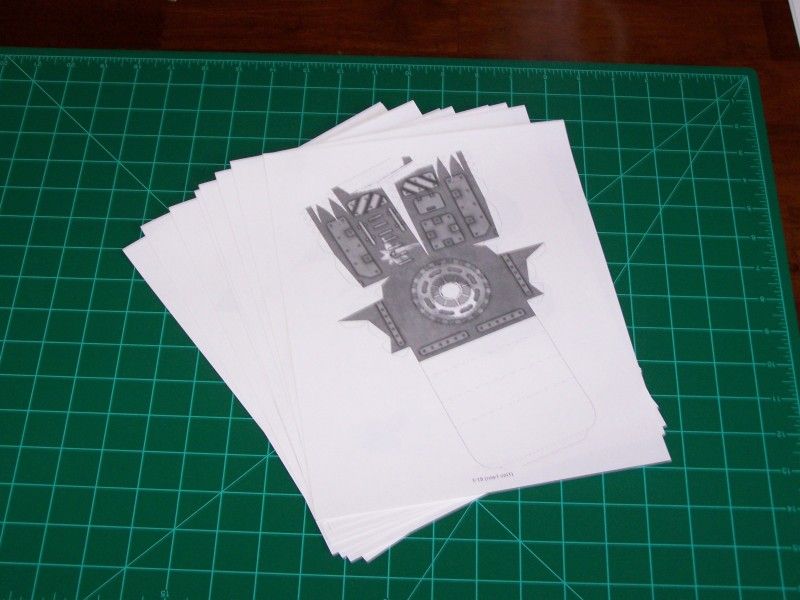
Once I have done this, I print it out on my laser printer on full sheet sticker paper.

100_7212.jpg


Now comes the tedious part....but first, a beverage is in order. In my case 64oz of gin and tonic with lime. :twisted:

100_7211.jpg


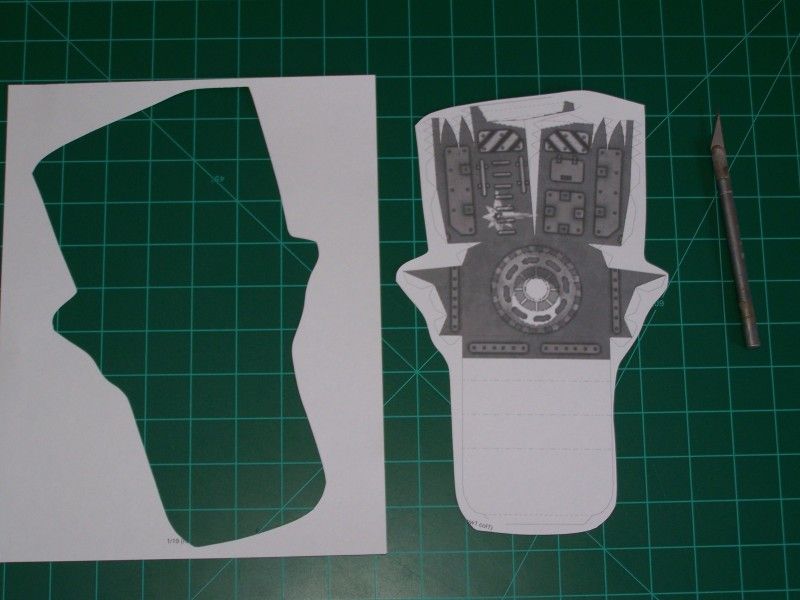
Cut-out the individual pieces that are printed on sticker paper. Just a rough shape is fine.

100_7216.jpg


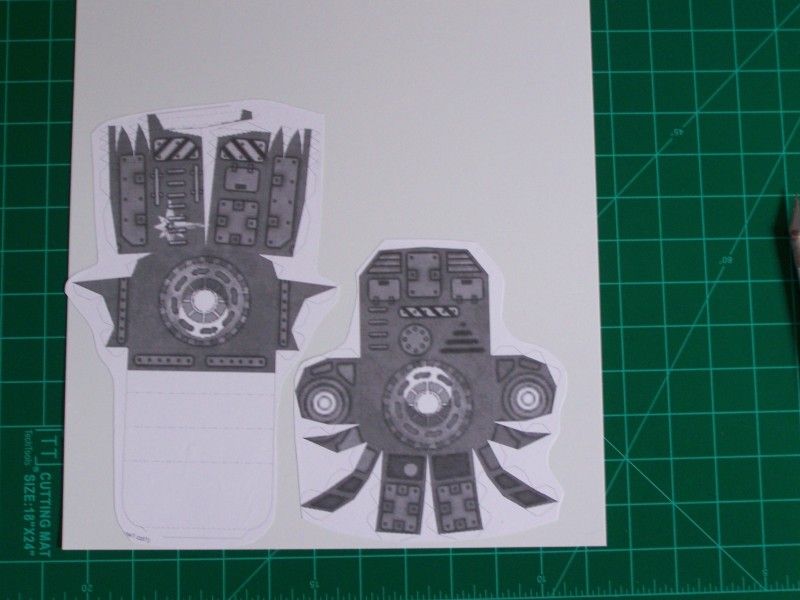
Then, peel off the image and stick it to a large sheet of styrene. Normally I use 0.40 thickness, however I think I overscaled the Mackie so this time I went with 0.20. This is a little thin and is not as rigid as I like. I use large sheets of styrene that I purchased in bulk here.

100_7219.jpg


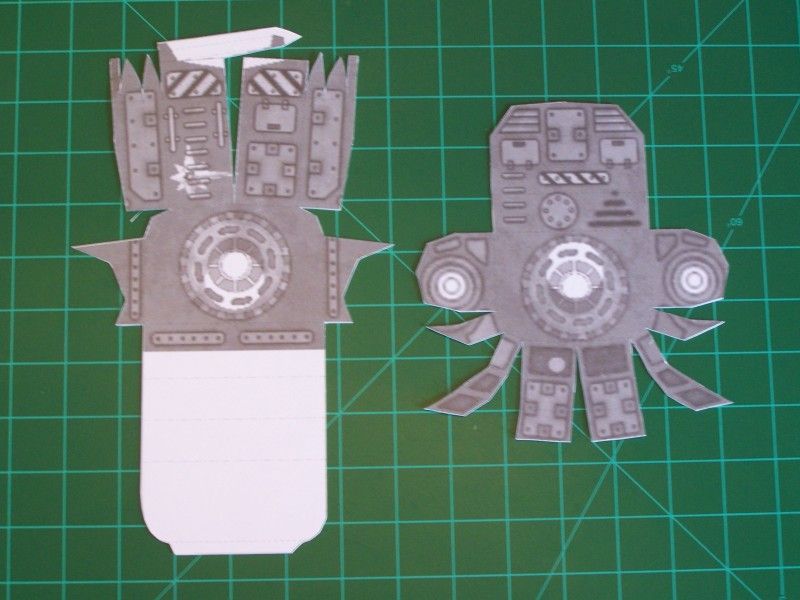
Now, pull out your ruler and start cutting. Personally, I cut the tabs off. I find for my version of this process, they get in the way.

100_7221.jpg


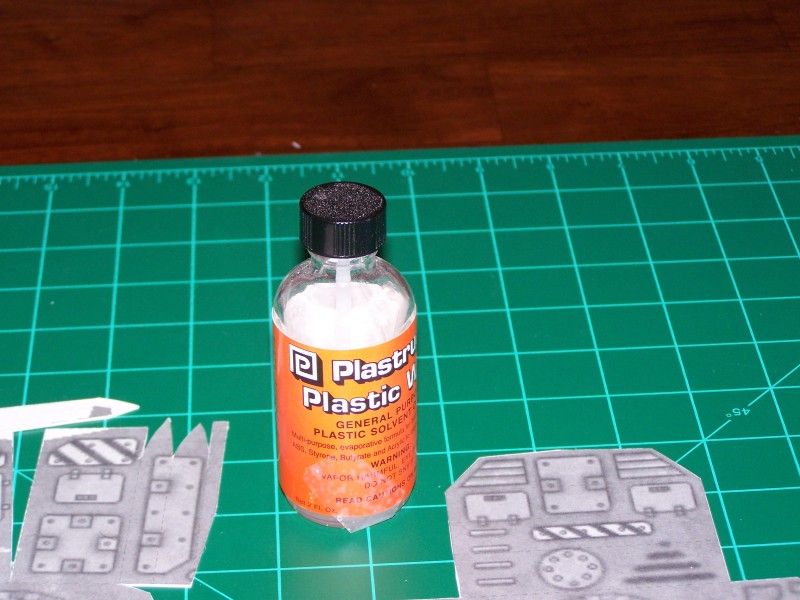
Score along the lines just as you always would and begin folding. Now, you may wonder about assembly without tabs. I use a liquid glue that bonds plastic to plastic in about 30 second.

100_7229.jpg


So, score and fold and score and fold. I hold the pieces together and add just a drop of glue. It holds the plastic together quickly.

100_7232.jpg


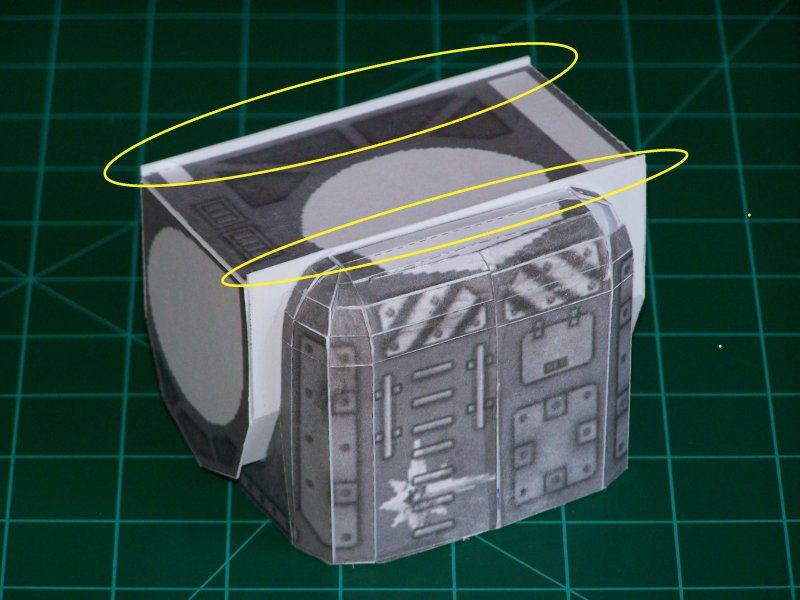
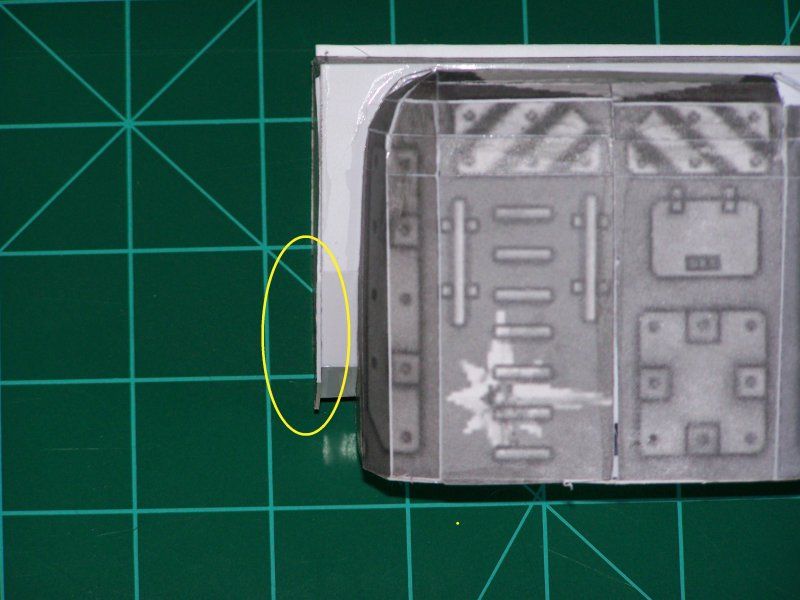
I had mentioned that I am using 0.20 styrene for this build which is a little thin. Fear not...as you all know, there are lots of scraps. In this case, not paper but plastic and I will use that to reinforce seems from the inside.

100_7237.jpg


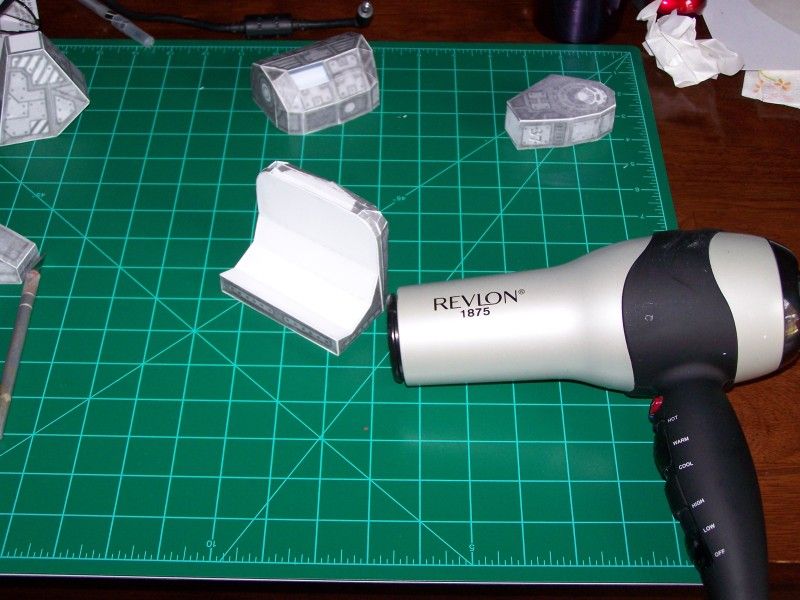
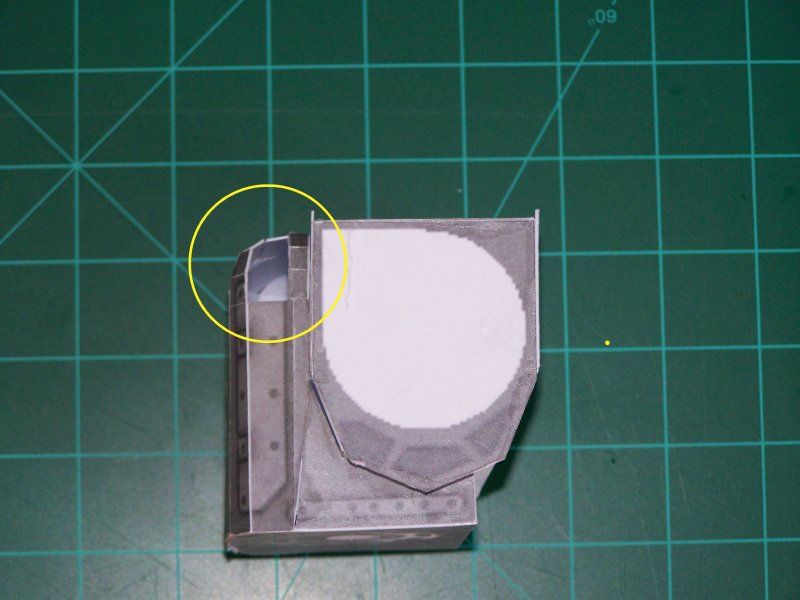
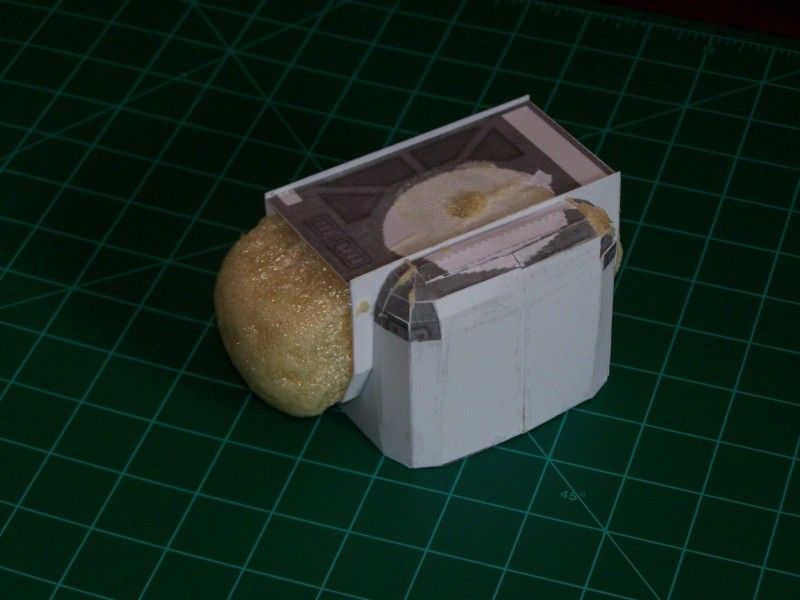
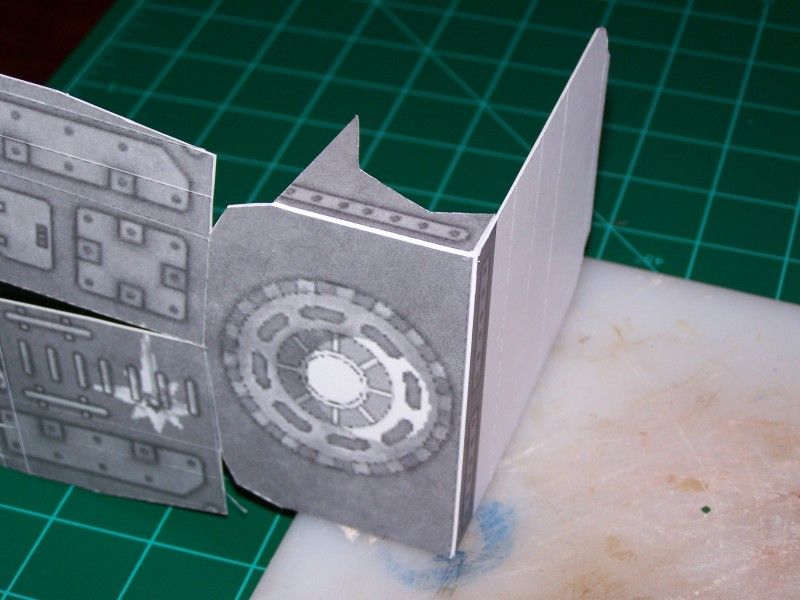
Now, the Mackie has some curved areas. Make sure you "bend" these before you start gluing or it will cause issues down the road. I keep various size round dowels around to curl the plastic like I would ribbon. Unfortunately, as you can see in the pic below I forgot to do this on the top of the torso (may have been the second drink) so I had to use tweezers to hold and bend. :cry:

100_7234.jpg


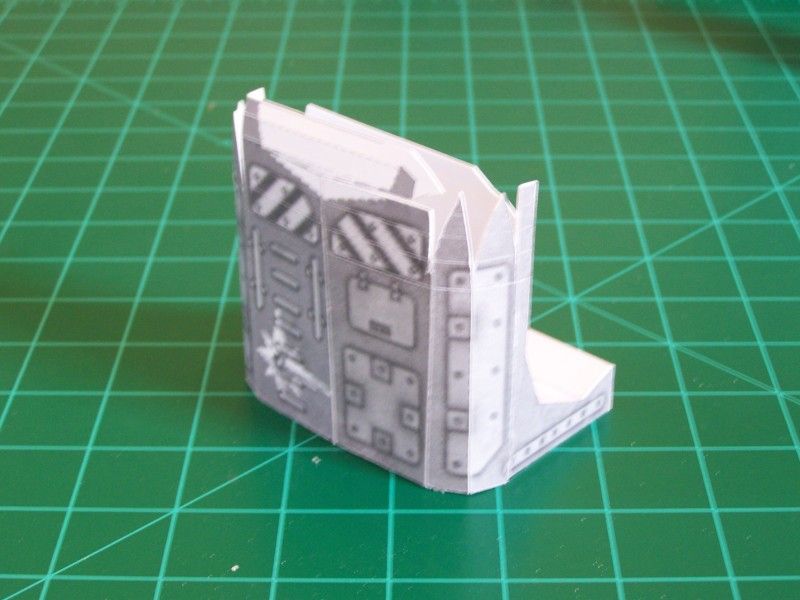
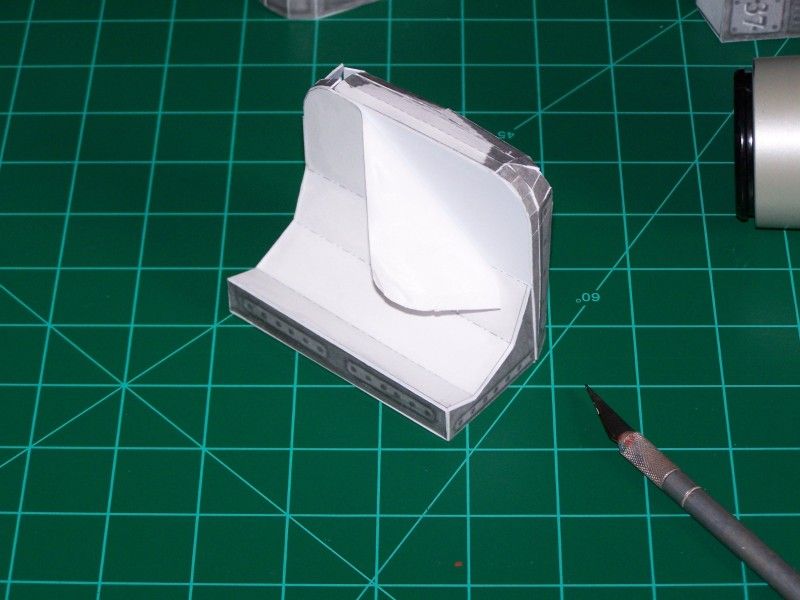
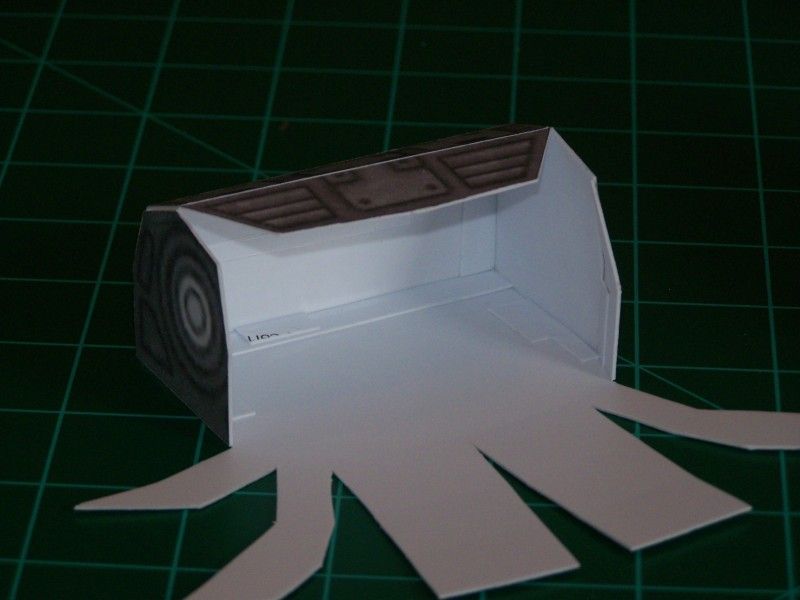
Finally, after just a few hours I have a leg, hip section and front of the torso.

100_7238.jpg


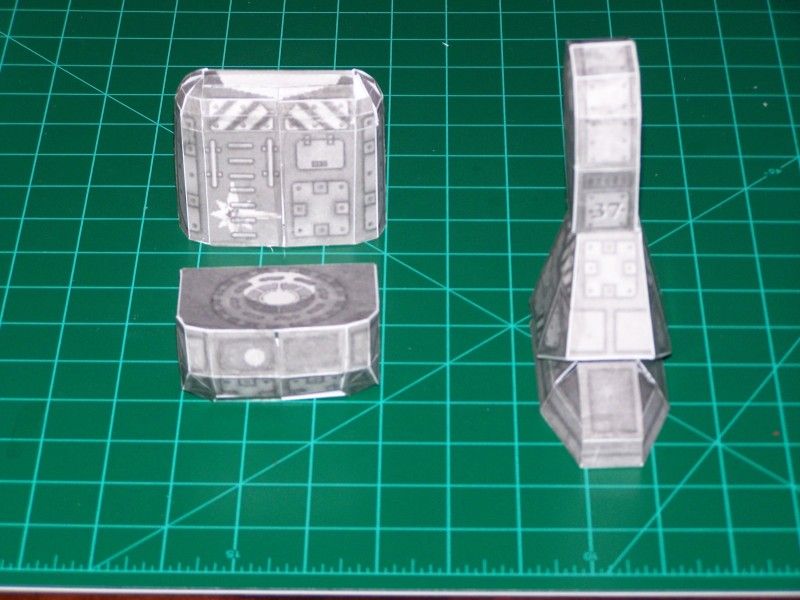
At this point, I will take the liquid glue and go back over all the seems, just to make sure everything is glued nice and tight.

Next up: Removing the stickers and adding more detail with styrene. :wave:
 

myrmedon

New Member
Continuing on....there are some pieces where two flat surfaces are suposed to attach. It is my understanding of paper models that the normal process is to glue them together which is what one would do here as well. However, you must first remove the sticker sheet so that you can have plastic on plastic to glue together. I use a hairdryer to loosen the adhesive before trying to peel the sticker off. If not, it often just rips and shreds.

100_7239-1.jpg


100_7240.jpg


Unfortunately, I have had a few fit issues. I am unsure if it is the design of the model, the thickness of the plastic, or just that I messed up somewhere. Where the back torso/front torso is supposed to be flush, there was a significant overage and the same for the torso pieces on the side where the arms will attach. What I have done is just snap the plastic at the seam and glue it in place where it should be. I will trim it up later.

100_7244.jpg


100_7246.jpg


One thing I should have mentioned earlier, you have to be really careful when you bend the plastic at the seams. Plastic is much more brittle than paper and if you are not careful, the pieces will snap off. Fear not, a little glue and all will be right with the world.

100_7247.jpg


More to come.
 
Z

Zathros

That may be because the software takes paper thickness into consideration. I see many Pepakura models that have fit issues. It could be this particular model also. Great tutorial, you are really touching on important issues. :)
 

Rhaven Blaack

!!!THE MAN BEHIND THE CURTAIN!!!
Staff member
Administrator
Moderator
This is an interesting technique.
I will be following this thread.
 

myrmedon

New Member
That may be because the software takes paper thickness into consideration. I see many Pepakura models that have fit issues. It could be this particular model also. Great tutorial, you are really touching on important issues. :)

Honestly, I really think it is the model design. So far, the torso area is the only area I have had a problem. The legs and foot were perfect...and the hip area was pretty dead on.
 

myrmedon

New Member
Continuing On:

With paper models, all the details are on the paper. With this process, when you peel off the sticker, all detail is gone. Now this can be a good thing or a bad thing...depending on your point of view. Once the sticker is off, I start cutting detail pieces to glue on. Some pieces are straight shapes, others are more complicated. For the detailed pieces, I use this process.

100_7251.jpg


On this build, I used 0.20 styrene which is a touch thin. I have been using Alumilite Super Foam 320 to reinforce the kits from the inside:

100_7254.jpg


This stuff is tricky...too little and the shrinkage will cause the flat areas of plastic to become concave. Too much and the expanding foam will blow apart the section you are working with. Unfortunately, that is what happened with the hip section and I am now rebuilding that. It worked fine with the leg...
100_7260.jpg


...and for the torso I removed one large section so the expanding foam would not blow-up the torso. The excess will be carved off and the plastic replaced.
100_7261.jpg


As the legs are identical, I will probably mold the leg pieces in rubber and cast copies in resin. This way I can ensure the legs are exact copies and it is nice to have the heavy resin pieces to support the model.

More to come.
 
Z

Zathros

Is this foam closed cell? i just wonder if it could be used as flotation for some models.
Do you use these models in a gaming environment? It seems if your building just a display piece, you can do without this step? Regardless, it is nice to see what you are using. I know some modelers who achieve great compound radii in models using structural foam. They use Smooth-on, or SilPak, I guess you gotta go with what you can get though, and if you buy large amounts, shipping costs become an issue.

I guess that's why I stay away from the stuff, but then again, anything I build goes on shelf. I have a really big chunk of aircraft grade structural foam, but as far as I know, the aircraft grade stuff much be purchased already made, in box or rectangle sizes. This stuff is beyond stiff. Used with aluminum, it is amazing what one can build. :)
 

myrmedon

New Member
I am unfamiliar with the term "closed cell"...but I threw the leg into a sink of water and it floated. Here is a link to the foam....cost wise, they sell this at the local Hobby Lobby and every week or so, they have a coupon for 40% off one item so I get it cheap and it lasts forever.

These are usually just display pieces, however I have found that unless I am using really thick plastic, the models may sag or warp over time. Also, having some rigidness and filler to the model makes it easier when I am drilling holes for arm/leg joints and detailing. The dried foam is hard as a rock. When I get to the step where I am sanding seams and adding detail, rigidness is a plus. Finally, having them backfilled makes them tough...they can survive being knocked off a shelf by a cat or kid.

Using the 0.20 plastic for this build was a huge mistake...it is turning out to be way to thin. I have never gone this thin on a build before...whoops! Odds are, if I had stayed with 0.40 I would not have any problems with the expanding foam.
 
Z

Zathros

This is where the modulus of paper may have plastic beat. As paper has much air in between the fibers, if a model is sealed off, and/or it is not contaminated by moisture, it will not sag for a given comparable weight. The dried paper fiber matrix is very strong, and also formed in many directions. There are many large sailboats made with balsa wood cores which are fiberglassed over. Balsa, a close cousin of paper, is extremely rigid, and for it's weight, is hard to beat. Heat will not have the long term affect on paper as it will have on PVC plastic or styrene, and since the paper is not a liquid, in the sense of how plastic is, at least in the PVC thin sheets, it will have a better rigidity. Obviously, there are modern plastics that do not have these problems, but they are not used normally in the hobby world. I don't think there is a plastic that is readily, and the key word is readily, available that will beat paper, as far as rigidity vs. weight ratios.

Open cell foams (reticulated) is foam in which the cell windows have been removed by thermal or chemical methods. This results in a foam product that has excellent liquid retention and particle entrapment capability.

Closed cell foams are completely sealed with cell windows intact. Closed cell foams have a higher density, better durability and don't absorb as much moisture opposed to open cell foams.


Closed cell foam is foam where the "bubbles" are in fact closed, containing the air within them. This kind of foam floats. In open air foam, the "bubbles' are not completely formed. This kind of foam will allow moisture to pass through it. Air obviously will pass through it also, which is why it is used as an air filtration in so many products, from rigid to soft, varieties.

Closed cell foam is used for flotation on boats, canoes, and anything else, such as docks, etc., that need to displace water in a space for safety reasons.

Open cell is used for filtration, and a lot of other things, too much to list (as is either actually).

The aerospace industry has many different kinds of uses for either type of foam. I have worked with Polystyrene, open cell foam, with epoxy resin, and fiberglass cloth to form rock hard objects. Unbelievably hard objects. :)


.
 

myrmedon

New Member
Based on that info, I would call this closed cell foam.

As for the paper vs. plastic....hmmm. As I have never really built a straight paper model, I cannot address that.

For me, plastic is the way I go as I am always building these with the hope that one day I can get them molded and cast (like with my Cougar and Puma)...and to mold something in rubber, it needs to be really sturdy.
 
Z

Zathros

Based on that info, I would call this closed cell foam.

As for the paper vs. plastic....hmmm. As I have never really built a straight paper model, I cannot address that.

For me, plastic is the way I go as I am always building these with the hope that one day I can get them molded and cast (like with my Cougar and Puma)...and to mold something in rubber, it needs to be really sturdy.

I understand you reasoning. For one off models, Paper works fine. You're making plugs for a mold, different story. I did mold making (as a machinist) for a while, graphite plugs, working in the negative. Looking forward to seeing the outcome! :)
 

myrmedon

New Member
Now, I do not know a lot about paper modeling, but I also get a kick out of the detailing...making armor sheets, scribing lines, painting...some of which paper models don't seem to be a prime candidate for. Or maybe I am just a plastic snob and don't realize it..... :eek:
 
Top