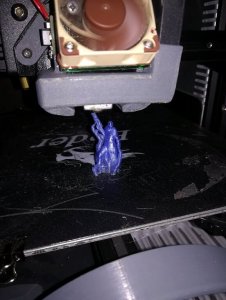
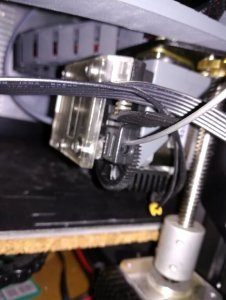
Trials and Tribulations and my Ender 3

daishi

Well-Known Member
WOW! It is already October, I got myself a Creality Ender 3 around April but never got around to write my experiences. Better later than never I guess ...

A little history: Me being a big Fallout fan I just had to try out the new Fallout based Board and war games that came out last year. one of them being Fallout Wasteland Warfare. The game I liked, I don't get to play it often, but it did get me infected with collecting minis, and making terrain. The thing being, those things are expensive for something I barely get to play, BUT around the same time my co-workers got into 3D printing, and after I asked them to please print a few small tokens and generally talking about 3D printing I decided this sounds Intriguing.

Choosing the printer: Everywhere I looked and asked which printers are good two names came up Prusa and Ender. Prusa, being a not-too-expensive and overall good machine, and Ender being a really cheap one that can do wondrous things with some love. Me being the cheapskate I am, and just wanting to dip my proverbial toe in 3D printing, choose to go with Ender 3. ... Ok, there were other reasons too. Most of my co-workers had Ender-3s as well, as a lot of information and a big community around this particular printer. At the time of me buying it, there was the standard and the pro edition available. Checking the community my take on the two models was that the pro is nice but most of the small upgrades can be printed afterward, and me being a cheapskate I went with the standard edition.

IT ARRIVES:
The package got here without a hitch and I could start assembly, there are a lot of videos how to do it online, but I found this one really informative and it had some nice pro tips, I haven't seen anywhere else. One thing my co-worker advised is to dump the factory firmware and install Merlyn on my printer first thing I can and Install Marlin instead.
Flashing a 3D printer is a bit more complex, especially since the viring and exact steps depend on what kind of board you use to do it, also for Marlin you have to compile it yourself on a PC. There are online tutorials for it, just have to find one for your board. I used a borrowed USBASP for it but I've seen it done with a few kinds of Arduinos as well.

First prints:
After I finally got it to print something, I've started to print upgrade parts. I eventually wanted to print terrain and minis, but for learning how to do things upgrade parts are fun. They can be ugly but still function, so I thought they are the optimal baby steps I can take. I've started with grey PLA and the stock 0.4 mm nozzle.
The printer came with a plastic build plate that is fixed to te heated bed with paper clips of all things (LOL), I borrowed a glass plate because everyone said glass+glue is far superior .. well after trying out all kind of glues I remained with my stock build plate. for PLA it was much less hassle and worked as good as the glass+purple glue combo. Glass is very good to make the contact surfaces smooth, but for my prints, that's usually not an issue.
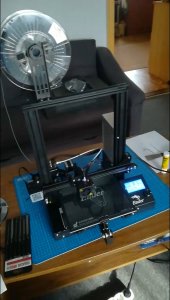
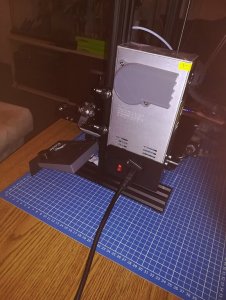
Ender.jpg
So the first things I've printed:
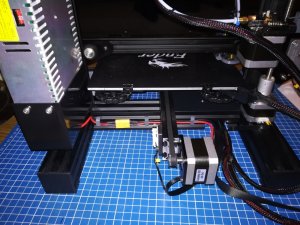
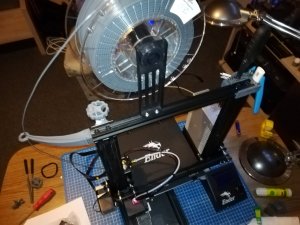
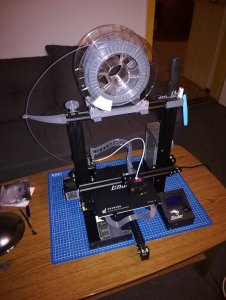
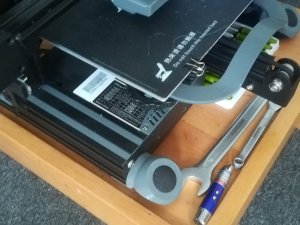
- A knob to the end of the Z axis because it is a greased screw and it was inconvenient to move it at the base near the motor.
- An O shaped part cooler because the stock one seemed a bit wasteful*
- A fan cover for the mainboard fan, to prevent it from sucking in junk from the build plate. (the pro has the mainboard box flipped just to fix this issue)
- Some cable clips, because the Ender 3 has cables going all over, my OCD was going :eek:
- A back cover for the LCD because I dislike electronic boards in the open
- A tool holder for obvious reasons
- Filament guides

* a part cooler is the blower fan on the side of the hotend that cools hot plastic as it leaves the nozzle so it hardens where the printer put it.
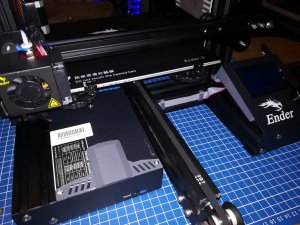
IMG_20190210_211611.jpg IMG_20190210_211534.jpg IMG_20190210_211623.jpg

Next up quality problems, upgrades and more cable management ...

....And yes I am hijacking Scott's thread title :p
 

daishi

Well-Known Member
...Quality problems.
At that time I was still printing upgrades for my Ender, I was not that satisfied with the prints: I frequently got stringing (the nozzle drags little strings when no plastic should be extruded), and overall the prints were not as smooth as I'd like for minis. I didn't want to spend hours sanding, also small details would suffer.
Around this time I ran into my first under extrusion (not enough plastic coming out resulting in weak prints, or complete print fails). I thought It was a partial clog so I've changed to the spare nozzle and tried again. It worked for a while, then it got even worse, even getting complete clogs, that cold pulls only fixed for a while. Cold pull being a nozzle cleaning technique (cold DOES NOT mean room temp).
That was probably the first and only time I thought about throwing the whole thing out of the window and forget about it. It was really frustrating. But me being a cheapskate I was hellbent to get all the value of this thing. then I've found this video and Finally understood why my coworkers said I should change the hotend from stock. The stock hotend has a peculiar design that can lead to clogs if not assembled correctly.
Upgrades I've printed at this point:
- Handle for the heated bed ... because it was hot to touch :)
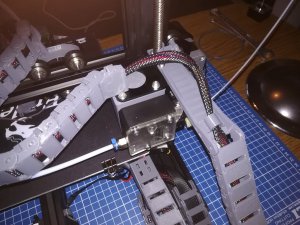
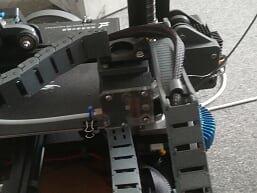
- Cable chains because my OCD was going :eek: from the cables hanging everywhere.
- A silencer for the PSU fan (noise management later)
- A new filament holder that had the spool on ball bearings so the extruder can feed the filament easier.

IMG_20190224_201120.jpg

Bowden vs. direct feed.
This is a good point to go into one of the design elements of FDM printers. The filament comes from a spool and the extruder feeds it into the hotend, but depending on how the printer is built this either done trough tube (called bowden tube, usually made of teflon) or the extruder is sitting on top of the hotend and feed the filament directly into it. Both setups have pros and cons. Bowden tubes allow the printing head (hotend basically) to be lighter, but add more failure points between the feeding cog of the extruder and the nozzle. While the direct feed extruder allows for more precise control of the plastic quantity but the print head will weight more and since it is moving on at least 2 axis the added weight can cause positioning issues due to inertia. for minis I was sticking with the Bowden tube.

Upgrades:
So the stock hotend was not working out for me. Mostly due to my lack of knowledge, but fortunately the upgrade parts I ordered at the same time as the printer started to arrive a little later from China. What I got was:

- A copy of the Titan Extruder: this is a 4:1 ratio extruder instead of the stock `1:1 one, this means that for the same length of filament feed the extruder motor have to do 4 times the revolutions => more precise control. This was the first part where I had to tweak the firmware since the original installation. Because the extra cog I had to reverse the feed direction on the extruder.

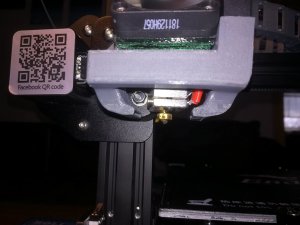
- A copy of the E3D V6 hotend+heatsing, really popular easy to get stuff for it, and most definitely does not have the problem the stock ender hotend has. I actually pulled out the heating unit and thermo diode from the stock hotend and they fit in the V6 one so I did not need to revire the whole thing fortunately.
Installing these required some mounts to be printed, but luckily I had a 3D printer on hand :D The mount for the hotend is Glass green PET I asked a friend to print, as it starts softening on higher temperatures, which can be advantageous while holding a heat sink that has a 200C nozzle on its other end. the new mount I got from the hivemind a.k.a the Internet has a really nice new part cooler as well that fit the stock blower. Oh and since nozzle moved because of the new mount, I had to move the Z axis cut off switch. I'm noting this because it has a little extrusion on it to position it more easily, I had to cut that off :p

IMG_20190310_152839.jpgIMG_20190310_152935.jpgIMG_20190310_164233.jpg

So what happened with my shiny new heatsink and extruder you ask? They didn't work too well, molten plastic was oozing everywhere ... oh, the horror! Turns out the Chinese copy hotend has a mall PTFE tube in the throat (the part connecting the actual heating part with the heat sink in the hotend), and I didnt notice it fell out when I changed nozzles. It was a relatively easy fix after I found the PTFE tube in the trash :D After that it worked like a charm.

Finally some minis:
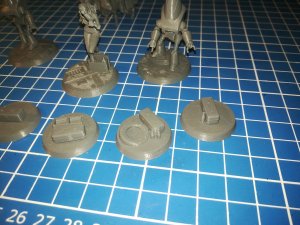
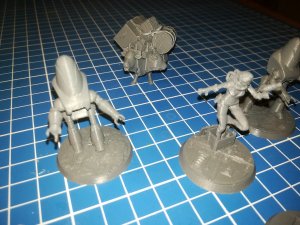
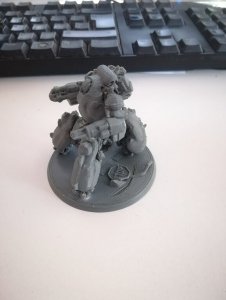
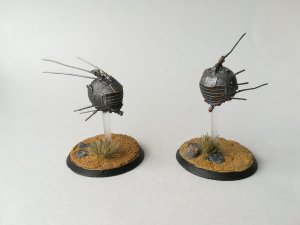
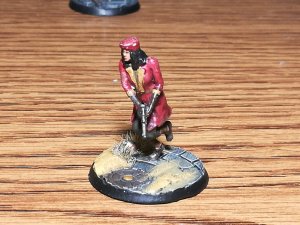
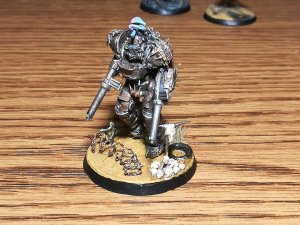
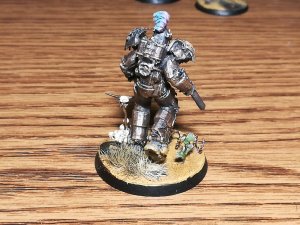
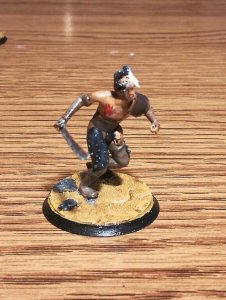
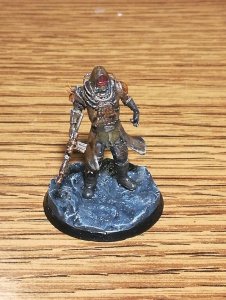
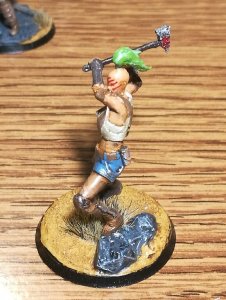
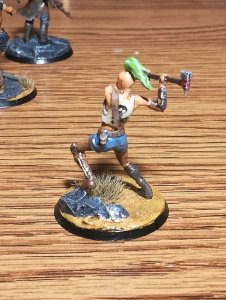
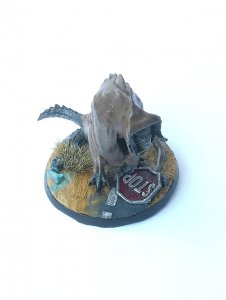
An with the new hotend and extruder I finally got to the point to start to Print some minis:
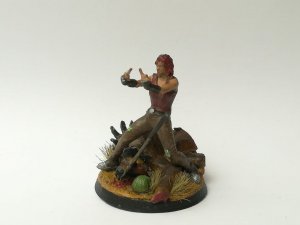
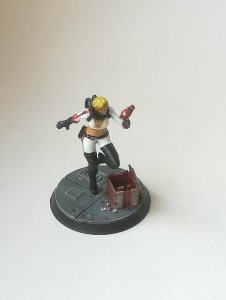
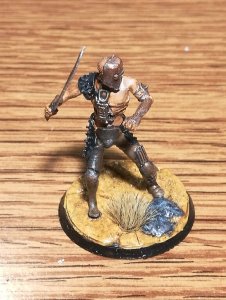
IMG_20190331_194631.jpg IMG_20190331_194637.jpg IMG_20190401_084558.jpg IMG_20190505_202734.jpg
They were looking nice (0.4mm nozzle above), BUT I also ordered some 0.2mm nozzles for the V6, it was time to try those babies out, and oh boy....
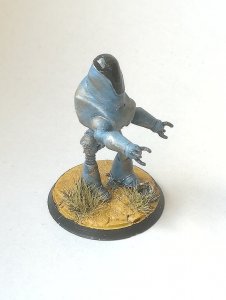
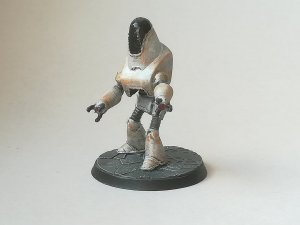
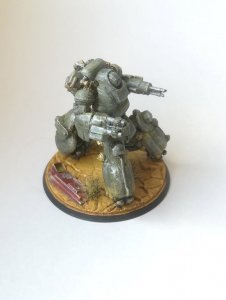
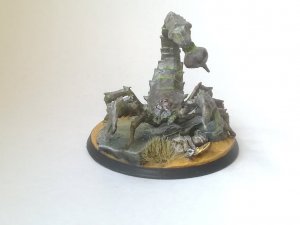
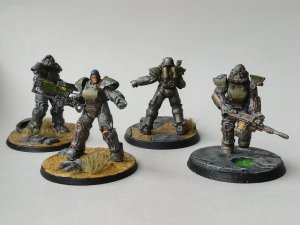
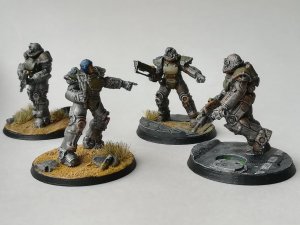
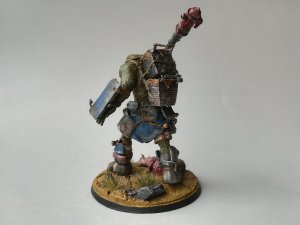
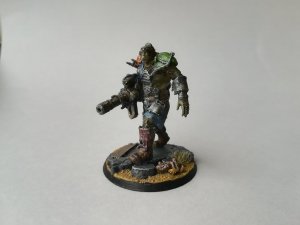
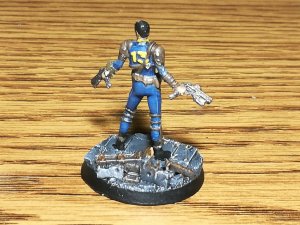
The prints did take 3-4 times longer, but they are usually smoothe enough so I can use washes and dry brushing on them without any sanding or filler. .... Ok, the print lines do show a little but I don't find them intrusive enough to bother with sanding ... I'm lazy.

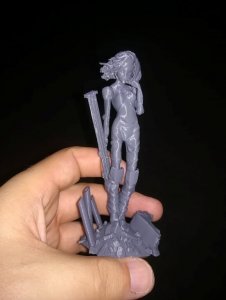
IMG_20190526_150302.jpgIMG_20190526_150337.jpgIMG_20190526_150040.jpgIMG_20190526_145851.jpg
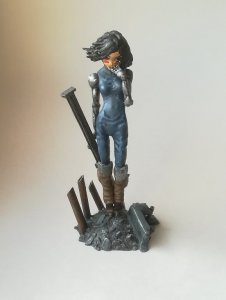
(FOWW uses 32mm minis, Alita is a "bit" bigger. The big 3 legged robot is not the same on the 2 pictures, the upper is printed with 0.4mm, the painted one with 0.2mm nozzle)

Next up: Noise Reduction, More upgrades :D ....
 
Last edited:

Revell-Fan

Co-Administrator
Staff member
Administrator
Moderator
Very interesting and good results! It's fascinating to see the development of the technology.
 

zathros

*****SENIOR ADMINISTRATOR*****
Staff member
Administrator
Moderator
You'll get even better results if you mount that to a very heavy table, and bolt the 3D printer down to it. The vibration is one of the biggest problems with these extruded Aluminum printers. Bolting it down will put all the high frequency into the floor, away from the table/part. The top of "Z" axis is not well designed, as the top is not triangulated, and it has the potential to vibrate, as vibrations tend to go to the furthest moments, acting kind of like a tuning fork.

First 3D printer I worked with was in 1984, and they were classified back then. It took a lot of further tinkering to get the results we needed. :)
 

daishi

Well-Known Member
You'll get even better results if you mount that to a very heavy table, and bolt the 3D printer down to it. The vibration is one of the biggest problems with these extruded Aluminum printers....

Yes, the I've done a lot of those under "Noise reduction" section. I will write that too.
 

daishi

Well-Known Member
...Noise reduction:
After switching to 0.2mm nozzles the print quality went quite a bit, but the print time almost quadrupled. Printing with a 0.2mm nozzle not only means that the printer can extrude less plastic, but the head needs to be positioned more precisely to the layers to adhere as they should. If the nozzle position is off by 0.1mm for a 0.4 mm filament it is still quite a big overlap, for a 0.2mm nozzle it's less than half than it should be. This means the print speed has to be lowered considerably. The prints came out great, but the thing was really noisy. I don't have a dedicated garage or shed and in a small flat it can be quite annoying. So I had to go look for some options to reduce the noise.
The noise generated by these printers can be basically put into 3 categories:
- The colling fans
- The vibrations generated by the stepper motors amplified on the aluminum frame
- The vibrations from the frame traveling to the table surface

Fans:
For the fans, there is basically 4 on the Ender 3, the mainboard, the PSU and the hotend heatsink coolers, and the blower fan used as the part cooler.
I printed a muffler for the PSU fan a while ago at that point so that was as quiet as I can get it without a fan replacement. The mainboard and the part cooler fans are not that bad by default, so I left those alone. now the hotend fan is quite annoying, silencing that is my current project.
I was thinking about converting my hotend to be water-cooled, but after a while, I gave it up. It would be great for an enclosed printer and printing with ABS, but for minis PLA is more than enough for me, also It would add a few potentially fatal failure points to the printer. like a pump failure will not only ruin the print by potentially my hotend mount as well. A coolant leak over the mainboard or the PSU is better not contemplated.
My other options are printing a muffler, which I scheduled to next week (yeah I have a print backlog now yaay) and/or changing the fan to a silent one.
Noctua makes some really great silent 40mm fans, according to the hivemind ... ekhm ... Internet. the only problem being for me is that the Ender 3 is a 24V system, the fans from Noctua are all 12V ones so I need a buck transformer or something to change the voltage. Also, It's quite pricey, and I'm cheap :D
IMG_20190224_201208.jpg the PSU muffler

Motors:
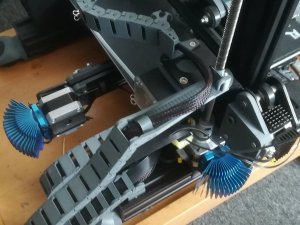
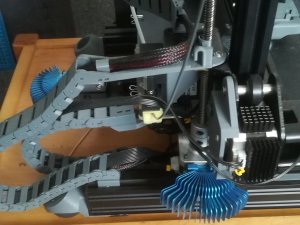
On the Ender3 the stepper motors are more or less screwed to the Aluminum frame or other metal parts, which is not very good for noise reduction, but great for cooling the motors. There are dampers that can be inserted between the steppers and the frame that will do wonders for those pesky vibrations BUT they are made of rubber .... not so great at heat transfer, unfortunately. Oh well, the nose was really annoying me so it was time to ... re-purpose all the old PC northbridge heatsinks I had lying around + some new sinks I got in a package deal for the dampers.
There was one thing left before disassembly thou. Those dampers modify the motor position, quite a bit so I needed to print some new mounts for the stepper motors. fortunately Ender 3 has a huge fanbase and lots of options for upgrades online. so this was actually my smallest problem dring this procedure.
IMG_20190526_153156.jpg IMG_20190526_153210.jpg IMG_20190526_153202.jpg
(small tip: that little yellow thing on the filament near the extruder is a piece of sponge, it removes dust from the filament so it does not muck up the extruder/hotend/nozzle)

Table/shelf contact:
Ok now that I had all motors equipped with dampers and put more heatsinks on them than a decent RTG has, I still wanted to do something with vibrations that get transferred to the table surface. So instead whet Zatros advised (well I did this a few months before the advice but still :D ) I did something novel and ... nope, of course, I printed some upgrades :rolllaughing:
Basically, I needed vibration dampening feet on my printer. I found a great design that only put the printer a few millimeters higher and used squash balls for the dampening. Those worked out great.
IMG_20190526_153227.jpg IMG_20190526_153202.jpg

After these upgrades the printer got quite quieter, my gaming PC is about as noisy on full throttle as the printer. If the heat sink fan is not running its really really quiet. so that one is still WIP.
The motors weren't too hot even the summer heat, so the heat sinks seem to be enough for them. Also, I moved the printer to basically a short-legged breakfast tray/table of a quite sturdy wooden construction. So far so good.

Next and last (for now) .... Final upgrades, and the latest misbehavior
 
Last edited:

daishi

Well-Known Member
Final (so far) upgrade:
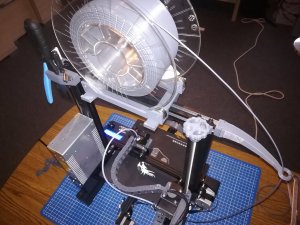
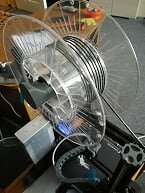
As the heatsink silencer is still not printed I only had one more thing to change. The spool holder I printed a while ago. that had the spool on 4 ball bearings, while worked nicely, had a problem of not really holding the spool in place if I moved (the turned off) printer around. I found a nice one that used the factory spool holder just basically put the ball bearing into the tube that is in the middle hole of the spool. no more tipping off from the top of the printer.

IMG_20190310_153001.jpg IMG_20190705_083536.jpg IMG_20190705_083541.jpg IMG_20190705_083548.jpg

The latest head-scratcher:

Since the thread is called trials and tribulations I will write this one down. So The printing went well for a while, then I noticed something strange. While the prints didn't get noticeably under-extruded there was a lot of stuff left on the model, similar to stringing, but not as spider threads, more like oozing on de part. It was strange, and of course, it got worse, after a while, the models started to get deformed, or partially failed on an arm or leg.
I mostly print my minis as 1 part maybe with arms cut off, but some poses like running require one of the legs to be in the air. in these cases, I rely on supports made by the slicer, they worked great for more than half a year and suddenly I started to have a lot of partial fails mostly on limbs starting from such supports. Also more and more oozing, and finally what I call walking failures. This is when the part comes off the hotbed and the hotend drags it around since the part adhered to it. thus the part walks around on the heated bed :D
I was baffled by this, I was thinking maybe my Z motor is dying and not shifts up the next layers enough, or something. Or maybe it was a nozzle problem if a deformed nozzle caused the oozing and the extra plastic created some drag, that could be it.
So I went with the easier first and changed the nozzle. Then I've noticed something I've never expected:

...(this is the dramatic pause)...

The thing is I had a little silicon hood on the hotend, It has a dual purpose of help with heat retention, and prevent stray plastic to adhere to the hotend, which is a pain to get off afterward. So what did I found you ask, the little hole that is made for the nozzle has a quite a bit of plastic on the inside, and the outside was rubbed smooth. What happened is that the thing started to slag on the side I couldn't see and it got so low that it dragged on the top of the part during printing. It basically exerted sideways forces on the part due to drag, that's why the poorly supported limbs moved and subsequently failed, and that was the cause of the oozing too. Basically, the little hole for the nozzle shaved off some half hardened plastic as it was dragged around. Removed it and voila nice prints again ... actually, they got even better than before. I got a new hood in the meantime, the new one has a nicer design, harder for it to droop, but I print without it at the moment, The minis come out better at the moment without it (at the moment at least). My theory is that there's more space for the coolant air from the part cooler without that 1-2mm silicone hood, and it cools much better that way (even if the hotend radiates more heat this way on the top layer).
 

spaceagent-9

Right Hand Man and Confidant
Moderator
this is a great thread!! I have looked in to an Ender 3D printer but you really made a good description of it here, thank you. I might be contacting you for some 5 inch tall figures for my Land of the Giants 40 inch Gary Pilsworth paper model I enlarged. I will be buying one in 6-7 months so this description of what an Ender 3DP can do is great and I will follow this thread!
 

bigpetr

Designer/Master Modeler
Thank you for your experience with printing small thing on 3d printer, daishi. What is the scale of your minis?
 

daishi

Well-Known Member
this is a great thread!! ... I will be buying one in 6-7 months so this description of what an Ender 3DP can do is great and I will follow this thread!
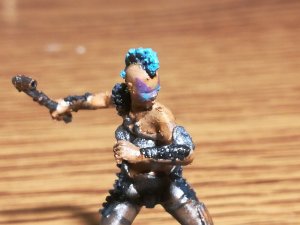
I knew I had a closeup pic rattling around somewhere: So this mini came out great, I didn't bother with sanding or filler, and used washes on it. this is with 0.08mm layer height and a 0.2mm nozzle. I am looking into chemical smoothing but it's an ongoing project at the moment. you need a magnifying glass to see, but there it is.
IMG_20190922_204532.jpg

I intend to open a new thread in tips and tricks as well to share what worked for me and what not for printing minis as well.

What is the scale of your minis?
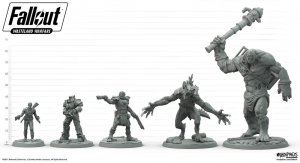
Fallour: Wastland Warefare uses 32mm scale figures. so most humanoids are around 35mm tall on 32mm diameter bases. the power armors and super mutants are bigger, on 40mm bases, the Radscorpion and Deathclaw/Goris are on 48mm bases, and the Supermutant Behemoth (big green with a fire hydrant) and the sentry bot are on 60mm bases. The Alita statue is 11cm tall.
fo-promo-scale-comparison-white-bg-low-res-1_orig.jpg
*These are the official resin minis btw
 
Last edited:

zathros

*****SENIOR ADMINISTRATOR*****
Staff member
Administrator
Moderator
Looks good, Get some "machinists files', and you could touch these up very quickly and get the skin parts really smooth, with some filing. Good looking figurines!! ;)
 

daishi

Well-Known Member
Looks good, Get some "machinists files', and you could touch these up very quickly and get the skin parts really smooth, with some filing. Good looking figurines!! ;)

Oh I have them I just dont bother with it unless I really have to on game pieces (I think I wrote it somewhere) ... I'm lazy ;) oh and Thank you!
 

Rhaven Blaack

!!!THE MAN BEHIND THE CURTAIN!!!
Staff member
Administrator
Moderator
This is a very interesting and informative thread about the 3-d printer. Thank you for sharing this with us!
 

daishi

Well-Known Member
Some new Trials and Tribulations:

So I had a little issue with one of the multi-day prints I was doing. The nozzle got clogged and I was so busy with life I failed to do the (mandatory for me) morning and evening visual checks for 2 days straight. That is kind of bad for multiple reasons:
- The extruder will not be able to forward the filament, so the cog will basically start to eat through the filament and the shards will likely get into the Bowden-tube
- PLA can be melted fairly easily, but if it is kept around 200C or above for extended periods of time it will start to burn, clogging everything up in the hotend.
- Obviously, in this case, multiple days of printing time (and electricity :p ) was wasted.

So It was time for a cleaning, I pulled the filament, removed the nozzle (heated to 200C ofc). Checked the heat-break which looked clean of burnt PLA thank the Machine Spirit. REmoved the Bowden tube and used compressed air to clean it, used a toothbrush and some more air to clean the extruder. Reassembled the whole thing with a new nozzle. Everything was good.
IMG_20191004_205354.jpgIMG_20191006_104506.jpg

Then I thought since I've pulled the metal grey filament anyways, It's a great opportunity to use the white one I've got a few meters of with the printer. I wanted to print a pair of dice for the Fallout wargame. White looks better without painting.

Well. I don't know what happened with that white filament, but man did it mess up the printer.
Basically, I printed one die no problem, then I started on another one to be sure. And for some reason, it started under extruding again, I thought I might have put on a defective nozzle no biggie. Standard procedure: heat hotend => pull filament => change nozzle => push filament ... right?
Well, I got to the pull filament part and stuck. Somehow I couldn't remove the filament from even the hot heat-break. Had to disassemble the whole hotend mount to remove heat-break (with the filament end stuck in it).

I wanted to just forget the whole thing I had about 5 heat-breaks as a backup so just put in a new one, throw the remaining white filament to the trash and forget this took about an hour from my life

... yeah, it is never that easy ...

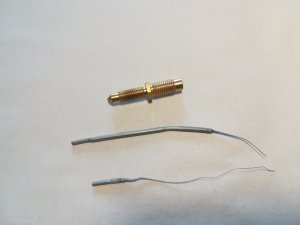
So turns out I got Mk8 (I think) heat-breaks from China instead of the ones that actually fit a V6 heatsink and hotend. And I've never realized because the one I had was put in the printer. A heat-break is the small metal tube that connects the heatsink and the hotend. Not very much of it is visible when put in the printer. T_T

I still had some integrated nozzles which are basically a heat-break and a nozzle in one. It will be a pain to remove later due to the mount I use for the heatsink, but beggars cannot be choosers they say...
Well, those things did not work at all. they transferred so much heat to the heatsink my printer did emergency stops before it could even start printing. The upper end of the heat sink was waaaaaay too hot as well, threatening to melt the mount, and successfully melting the filament up to the back end of the heatsink as well. Which meant I could not remove the filament without a full disassembly ... again ... oh and I had to ditch the PTFE tube as well because of potential loosening to it. ... YAAAY ... That weekend was "fun".

On Monday I got a replacement heat-break from a coworker and ordered a bunch of the correct kind from China, will be here in a month or so LOL.
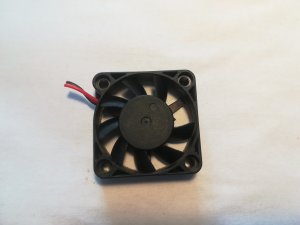
Another hotend assembly ... I "love" working with 200C metal parts if I've never mentioned it... Everything went smoothly until I managed to put one of the Allen wrenches into the 40mm fan, which was on full throttle since I need to tighten things on work temperatures, and broke off one of the 9 blades .... :headbange:

So the thing is I have 3 separate blowers for part coolers, (I thought) I have 5 heat-breaks, an extra thermistor, and heating element, 2 extra heat sinks, a meter of PTFE tube for the Bowden, a bunch of extra fittings for the Bowden .... what I don't have is an extra 40mm cooling fan. Oh, and the Ender 3 is working on 24V so the 12V PC fans are out by default ... :realmad:

I did try it with 8 fan blades the thing works as well as it usually does, except the vibrations from the fan make the printing noisy and the result ... look like some kind of abstract art piece.

At this point, I was kind of frustrated, and since I've needed a new fan relatively fast I've shelved the silencer part I wrote about earlier and went full Noctua.
Noctua is a super silent fan for PC. Yes, I know PC fans are out by default unless you use a step-down Buck converter, which I got as well, so as soon as the mailman arrives time to get the soldering Iron. I look forward to what I manage to break next. :hammerhead:
Here's a great vid on putting a Noctua on an Ender 3.

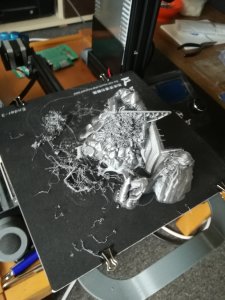
And that's it for now since there are so few pics this time here's one of my salvage-able print fails just for fun, the supports on the arm gave out. (Geralt will get a new arm eventually :p )
IMG_20190820_094019.jpg
 
Last edited:

zathros

*****SENIOR ADMINISTRATOR*****
Staff member
Administrator
Moderator
Excellent write up. Truly informative. Thank You!! That piece could be used in a diorama, I would keep it, Paint it up as some kind of Nuclear Blast post apocalyptic scene. Great stuff!! ;)
 

daishi

Well-Known Member
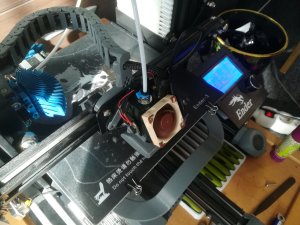
Spliced in the buck converter and the Noctua onto my printer, works so far. Got a lot less "whiney" with the new fan, thumbsup
you can see the buck converter on the side of the mount.
Overall I'm very satisfied with this setup. ... I do hope I don't put an Allen wrench trough this, it was waaay too expensive for that :hammerhead:
Maybe I should put a fan duct on it like this?

IMG_20191020_104327.jpg
Also here are some pics from this disaster:
IMG_20191020_104317.jpgIMG_20191020_104350.jpg
- broken fan,
- the integrated nozzle/heatbreak you should never under any circumstances try with PLA (imo),
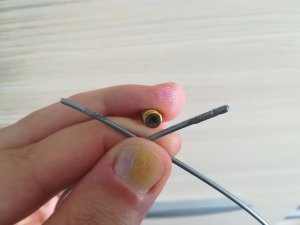
- the filament I drew back from said integrated monstrosity, you can see the left end that thinner part is the original filament thickness, the thing melted up to the end inside the heatsink, which it obviously should not do.
- the metallic grey filament I've pulled from the nozzle clogged with the white one, you can see how chunky it is, that is very baaaaaaad. The nozzle is 0.2mm those chunks will clog it like nobody's business.
 

zathros

*****SENIOR ADMINISTRATOR*****
Staff member
Administrator
Moderator
Very informative. I got you emails but haven't been able to answeer anybody with the house roof project I have going. :)
 

daishi

Well-Known Member
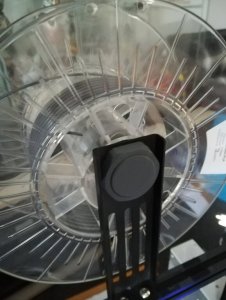
I have tried transparent PLA filament last weekend...
The result is about what I expected based on my Internet research, not great but does the job.
IMG_20191122_215547.jpg

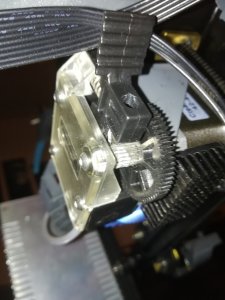
As for trials, I always wondered why some people put on a second filament guide close to the extruder. I just noticed that the filament ate itself into the extruder's guide plastic thingie :eek:
Guess I will try to hot-push a metal ring into the hole and check if it can chew through that. :D
IMG_20191124_195704.jpg
 
Top