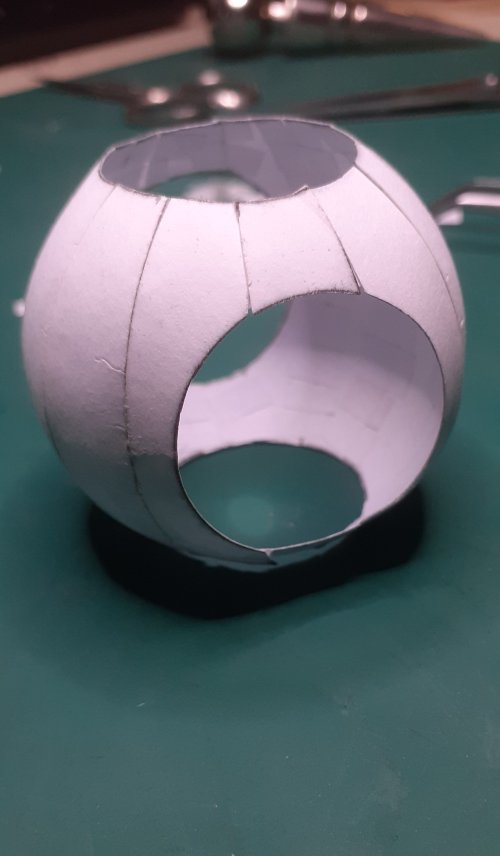
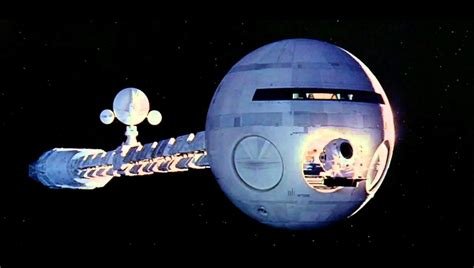
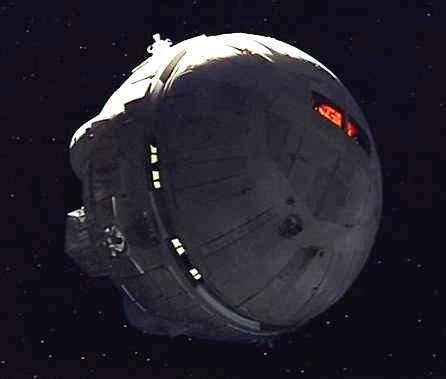
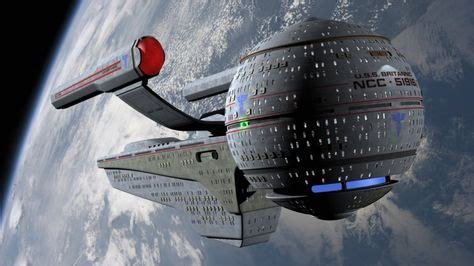
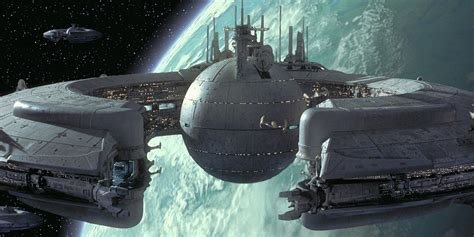
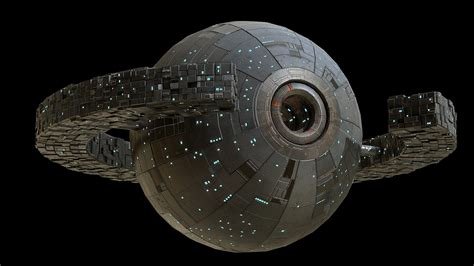
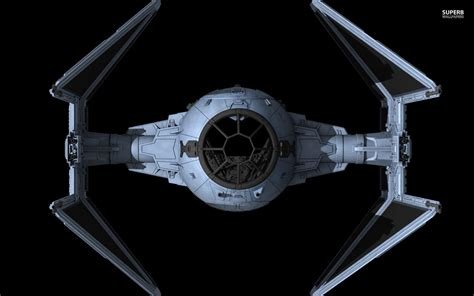
(TIE Fighter) Sphere water shaping by DanBKing, in collaboration with Mijob

DanBKing

Dan the Man
Feb 29, 2012
1,914
1,905
113
Netherlands
"Play the work with no innuendo - just honesty. Trust will follow." ~ James Kerr
(I will do my best to keep innuendo out of this tutorial...... );)


One of the most difficult shapes to create realistically in paper modelling is the sphere, or ball....

This shape is especially prominent in Sci-fi subjects.....

th-4198762706.jpegth-3784080482.jpegth-262629470.jpegth-698260858.jpegth-938477289.jpegth-442734426.jpeg


The objective of this tutorial is to see what can be done to improve/perfect the cockpit sphere of the TIE fighter (and variants,) for future builds.
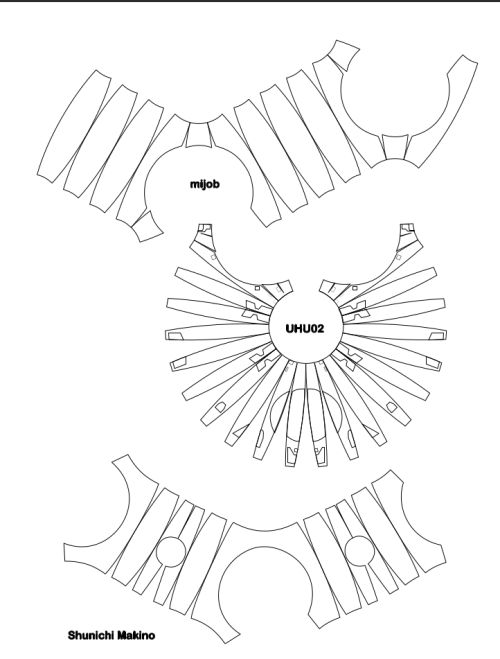
The sphere designs covered in this tutorial will include the versions from UHU02, Shunichi Makino and master TIE-designer @mijob himself!

Mijob, very kindly, sent me a template of all three versions to try out.

Screenshot from 2024-12-31 00-46-53.png

The process I am going to use is a technique called water-shaping.

So, be prepared for some wet times ahead....!
 
Last edited:
I'm really curious about that. At first I really tried to keep my fingers dry, because I got the impression, wet fingers are destroying the print (laser printer). But you @DanBKing said you do just laser prints. So perhaps it is just my cheap laser printer doing the print really superficial and it will break of of the paper also woth dry fingers.
In fact, when I fold a piece, the color on the fold line is always coming loose
 
When I was 9 years old, I used to make Hot Rods out of paper, and plastic pieces I had left over from other models I tortured. I started water forming, as my Mom was an incredible cook, and had every possible shape you could need for a "buck" to lay a moistened shape on. I would cut wet strips, and when the dried, glue the top side, smoothly, then pop off the spoon. I could draw a line on the paper was to where I intended to cut the final shape.My friend always asked me where Ii got the finders. Back in those days everything was fabricated, so painting was a must, which made the finders and front grills come out even better.

DanBKing really mastered this on his Discovery model. Those nose of that model is one, if not the best Water Formed Sphere I've seen.

I'm on the opinion that Pigment Inkjet printers are the best way to go, as the ink does not run when wet, and the print is considered "Archival", lasting 100 years. You work with what you got though. ;)
 
DanBKing really mastered this on his Discovery model. Those nose of that model is one, if not the best Water Formed Sphere I've seen.
;)

Thank you for the compliments, John. :)

I'm on the opinion that Pigment Inkjet printers are the best way to go, as the ink does not run when wet, and the print is considered "Archival", lasting 100 years. You work with what you got though. ;)

Yes, indeed. I have used an inkjet with standard ink for this tutorial, which, as you pointed out, has bled a little from the water.
The Discovery was laser printed and I had zero problems with bleed.
So, yes, I recommend pigment ink, or laser print for this technique.

I have made a start on the process and I will post more to this thread tomorrow, once I have recovered from the festivities of later tonight!! :toast:

Have a great one everybody!!
:wave:
 
"I know size can be daunting but don't be afraid." ~ Robin Williams


Right, let's get this tutorial under way...


Pt 1: The science bit!

Before we get into the actual process of water-shaping paper, let's get some basic background information first.

For those who do not know how paper is made, check out this video of the process...


In the video, it is mentioned that the paper pulp has many additives included, chemical and natural.
One of these additives creates a process called SIZING. The main objective of sizing, is to make the paper resilient to moisture and also strengthen the paper to some degree.
Having an understanding of this process it important for us in the subject of this tutorial.
You can learn more about the sizing process from the two links below...

Paper Sizing
Sizing

The process of water-shaping involves breaking down that sizing, and therefore the bonds of the paper fibres, using water. This makes the paper somewhat malleable.
It's then a case of re-forming the 'weakened' paper into the desired shape and letting it dry.
Once the paper, (and sizing) have dried out, the paper will retain its molded shape, and generally the same attributes as the source paper, albeit slightly weakened.

The quantity and type of sizing used in paper and card varies, depending on factors like the thickness and the papers' intended use.
The general rule; the higher the amount of sizing, the more protected the paper is to moisture penetration, and has a more rigid structural strength.

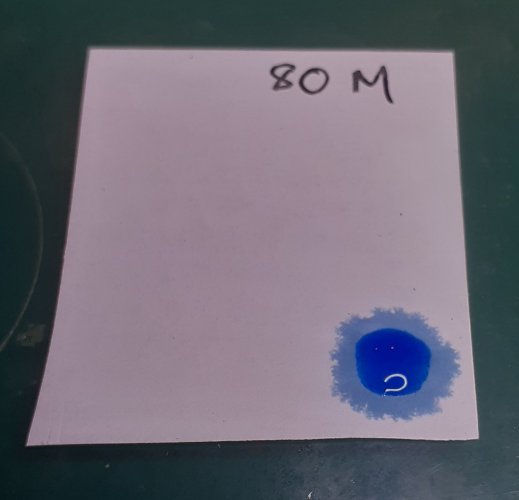
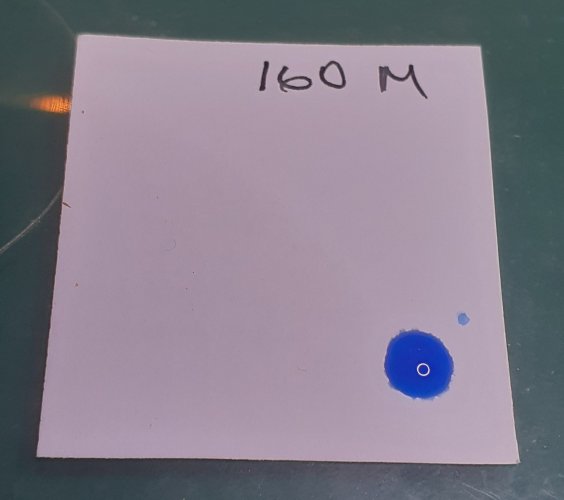
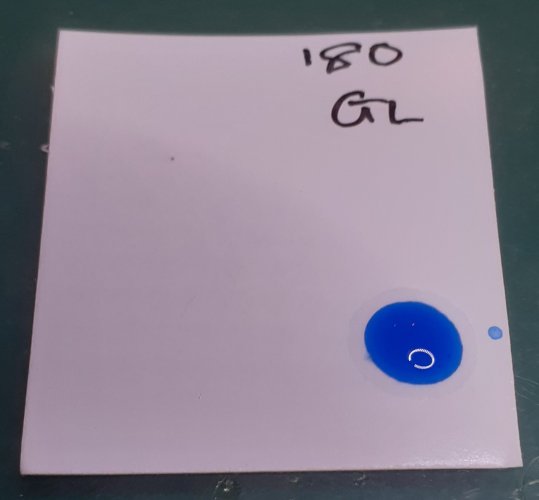
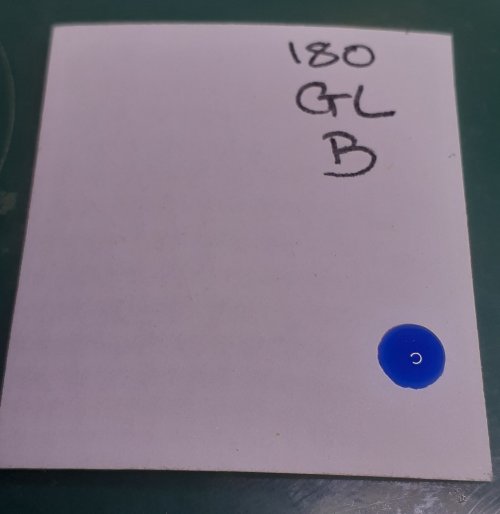
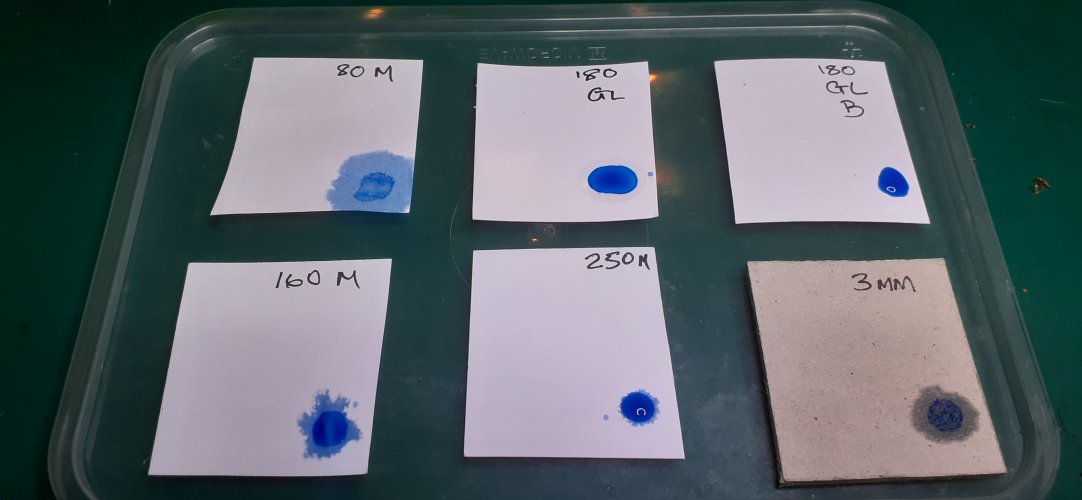
I made some pictures of a little demonstration I put together, to show the differing moisture penetration levels...

I cut out 6 squares of paper/card, in differing thicknesses and types.
I mixed up a few drops of ink with a drop of water.
Using a pipette, I added one drop of this mix to the surface of each sample piece of paper/card .
I let 15 seconds elapse and then took a photo.
I think you can clearly see the difference in moisture penetration.

80gsm standard copy paper. 15 second lapse.
20250107_093430.jpg

160gsm standard matt paper. 15 second lapse.
20250107_093601.jpg

180gsm gloss photo paper. 15 second lapse.
20250107_093732.jpg
But, a caveat to this... The glossy photo paper is also specially coated on one side, hence the low moisture penetration seen... But, look at what happens when you do the ink drop test from the back of it... A totally different result, almost 0 penetration!!!
20250107_093911.jpg
Be aware of this when using coated papers. We will touch on this a little later in the tutorial.

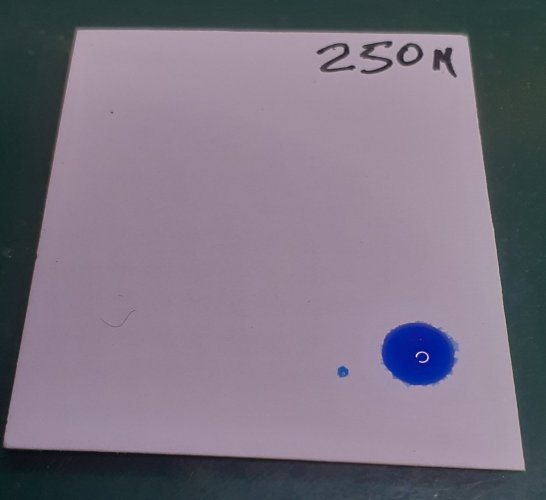
250gsm standard matt paper. 15 second lapse.
20250107_094048.jpg

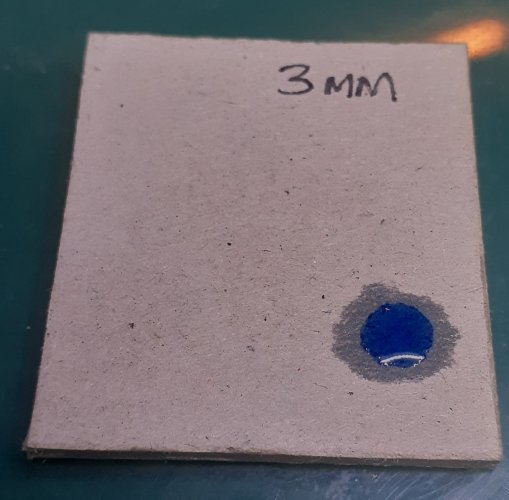
3mm thick laminated packing cardboard - 15 second lapse.
20250107_094226.jpg

And finally, all six papers after 5 minutes lapse.
20250107_094342.jpg

From these results we can determine a few things:
  • The obvious is that we would not use a 3mm thick laminated cardboard for water-shaping!
  • I would not recommend using photo quality papers for water-shaping, as the coatings used in these papers give varying results. Also, water can damage these coatings which would lead to damaged prints.
  • In my experience with this water-shaping technique so far, I recommend using standard matt paper. The results of these papers clearly show the difference in moisture penetration as the card density/weight increases; 80gsm, 160gsm and 250gsm. This shows the difference in the amount, or strength, of the sizing which increases as the paper density/thickness increases
We will touch more on paper choice in the next section.

Back with more soon.

:wave:
 
Last edited:
"We seal our fate with the choices we make." ~ Gloria Estefan​


Pt 2: Paper and Print.

There are many choices to be made when it comes to the paper or card that we can use for the construction of paper models.
Also, there are some choices we can make as to which printing method we can use, for the printing of the model template.

Let's have a look at some of these choices in a bit more detail...

Pt 2a: Paper.
The choice factors of which paper or card we can use for our models, are diverse:- Type, quality/grain, thickness/weight, colour and even which manufacturer!​
I am not going to delve too deeply into this subject here, that is a whole tutorial in itself!​
We will concentrate on only 3 factors that concern us when performing water-shaping; Type, quality/grain and thickness/weight.​
Type: The two main types of paper are basically glossy and matte. Glossy paper, often referred to as 'photo paper,' is not ideally suited for the water shaping process. It can be done, but the results are not guaranteed! The reason for this is that glossy paper has a surface coating on one side, to create the smooth glossy finish. It is this coating that creates the problems for us.​
In my experience so far, when making this paper damp or wet, the water can cause the gloss coating to delaminate from the base paper, also it can stain the coating, leaving ugly water marks.​
Matte paper is my go to for the water-shaping process, as matte paper does not have such heavy coatings as glossy paper. Matte paper coatings are normally incorporated throughout the paper and not just on the surface of one side like glossy paper.​
Quality/grain: The quality or grain of paper varies between manufacturer. Also, the thickness/weight of the paper affects the quality/grain too.The grain of the paper is determined by how fine and tightly packed the paper fibres are when the paper is produced. As a general rule, the finer the fibres, the smoother the paper finish.​
The thickness/weight of the paper also effects the finish in most cases. The reason for this is that the thicker the paper, the rougher and less fine the paper fibers are. For example, if you had a sheet of 80gsm paper and a sheet of 250gsm paper, from the same manufacturer, the 250gsm paper will have a rougher feel than the 80gsm paper.​
Thickness/weight: The biggest factor when determining which thickness/weight of paper to use for your model, is the size or scale of the finished model, (or part thereof.) Thinner paper has less structural strength and is thus more malleable and easier to fold and shape than thicker paper. To clarify this, try rolling a 2mm diameter tube with 250gsm paper, it would be almost impossible to achieve. However, if you used 80gsm paper instead to roll the same tube, you would achieve the desired result much easier!​
The thickness/weight of the paper affects us in water-shaping too. As shown in part 1, thinner paper would require less water and be easier to shape than thicker paper, which would require more water to soften it and more force to shape it. In the past, I have successfully water-shaped varying thicknesses of paper as required for the model subject at hand.​
In our hobby the commonest paper thickness/weight used, and recommended by designers, is normally around 160gsm. This is an ideal thickness/weight for water-shaping, as it contains a balance of the qualities of thin and thicker paper together in one. I will be using 160gsm throughout this tutorial.​
Pt 2b: Printing.
The two main sorts of printers for printing on paper are inkjet and laser. Which type of printer is best suited for our hobby is open to debate. Both have their pros and cons. What concerns us the most in water-shaping is the process used to get the print on to the paper. Inkjet and laser printers use different processes to achieve this. I am not going into extreme detail here, but will outline the important factors that concern us for water-shaping.​
Laser printers: These printers work by fusing a plastic type of powder, called toner, onto the paper using heat. The bond between paper and toner is quite strong. However, the strength of the bond is directly related to the amount of heat used in the process. More heat, the stronger the bond.​
I have always used laser printed templates for my models, but that is a personal choice.​
For water-shaping, I have had hardly any issues during the process, when using laser prints. I think the reason here is, as the toner is a plastic based product and is literally melted to the paper, it is not directly affected by water in any way. It does not stain, run, bleed or de-laminate from the paper. So, it is ideal.​
Inkjet printers: As it seems, the majority of paper modellers use inkjet type printers, instead of laser, so I will touch on this in a bit more detail.​
These printers use a liquid ink which is sprayed onto the paper through extremely fine nozzles in the printhead. The ink either permeates the paper fibres, or lays on the surface. There is no bonding process like a laser printer, only the drying of the ink. Inkjet prints require careful handling when fresh out of the printer to avoid smudging the print before the ink has a chance to dry or cure completely.​
** The information given below, is of the utmost importance to those of us that wish to perform the water-shaping technique when using an inkjet printer. **​
So, pay attention!! ;)
Inkjet printers use two types of ink: Dye-based and pigment.
  • Dye-based inks soak into the paper and as the name suggests, dyes the paper fibers. Unfortunately, this can cause bleeding of the ink on certain types of paper, which is not a desired requisite. Also, these types of inks, are not friends with water, and will run and/or bleed when wetted.
  • Pigment inks leave a pigment residue on the surface of the paper once the carrier medium has dried out. This pigment residue is impervious to environmental issues like UV light, and the most important: Water!
(For a more in-depth discussion about these ink types, you can read about it here.)
So, to sum up this (long-winded) section, here are the main points again:
  • Use a paper or card that will suit the final model requirements. The differing thicknesses used will also depend on the scale of the model, or part thereof, being constructed.
  • For water-shaping, use either laser printed paper, or if using an inkjet print, use ONLY pigment type inks.

Next up, the tools, equipment and materials required to aid us in the water-shaping process.

See you soon!

:wave:
 
Last edited:
"Discover the tools to build your own vision." ~ Mary Anne Radmacher


Pt 3: Tools, equipment and materials.

This section will be the last of the blah-blah-blah, before we get down to the actual water-shaping process itself. Promise!!! :yesyes:

The use of the water-shaping technique has endless possibilities as to what can be created, so your tools and equipment will differ for every application of it.
So, what I recommend in tools and other equipment here, is only the tip of the iceberg.

As we are concentrating on the water-shaping of a (TIE fighter) sphere, or ball, I will only cover what I have found to be useful and/or required to achieve this.

Pt 3a: Tools.

I think most of us modellers will already have these common tools in their arsenal.
Below, are my tools that I used in the making of this tutorial.

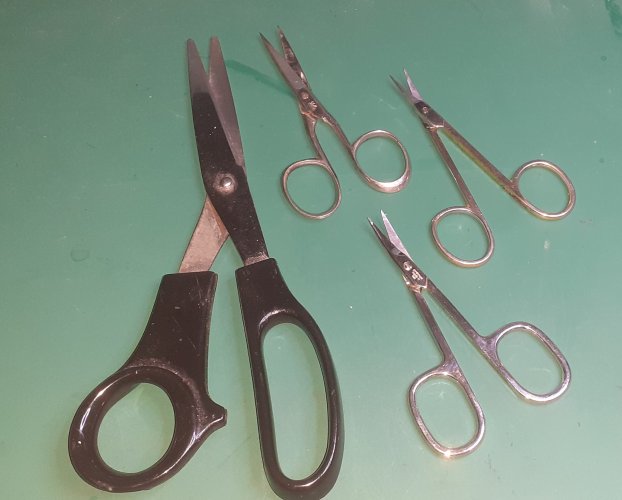
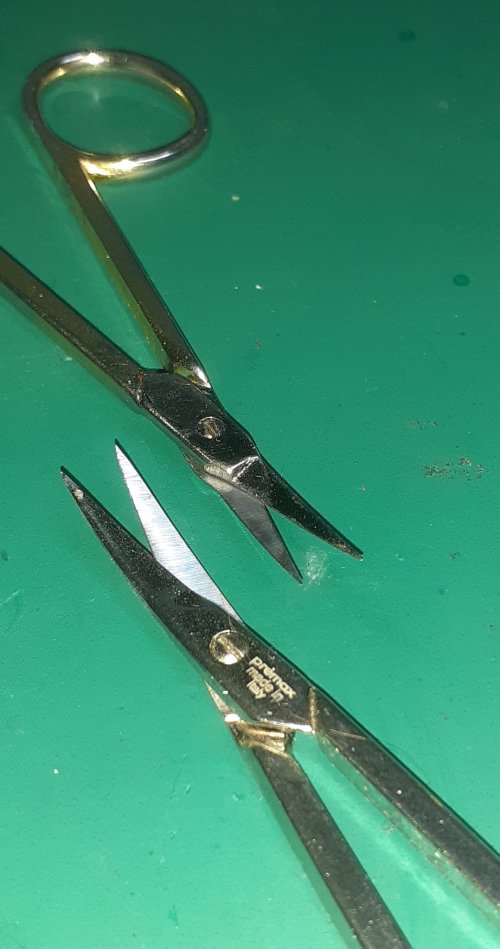
Scissors:
Self explanatory!​
20250110_152329.jpg
However, my go-to scissor for cutting rounded/curved parts are the curved variety of scissors.​
The one on the left is basically a good quality nail scissor.​
The one on the right is a fine, thin bladed, curved scissor that I use for very fine trimming of parts.​
20250110_152409.jpg
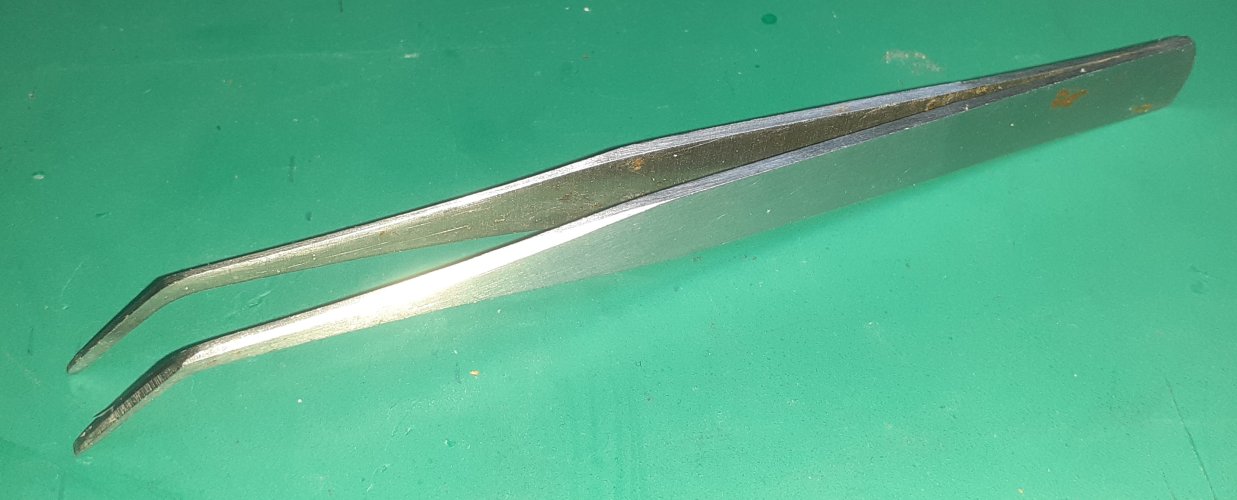
Tweezers.​
We all have our favourite one...​
20250110_152638.jpg
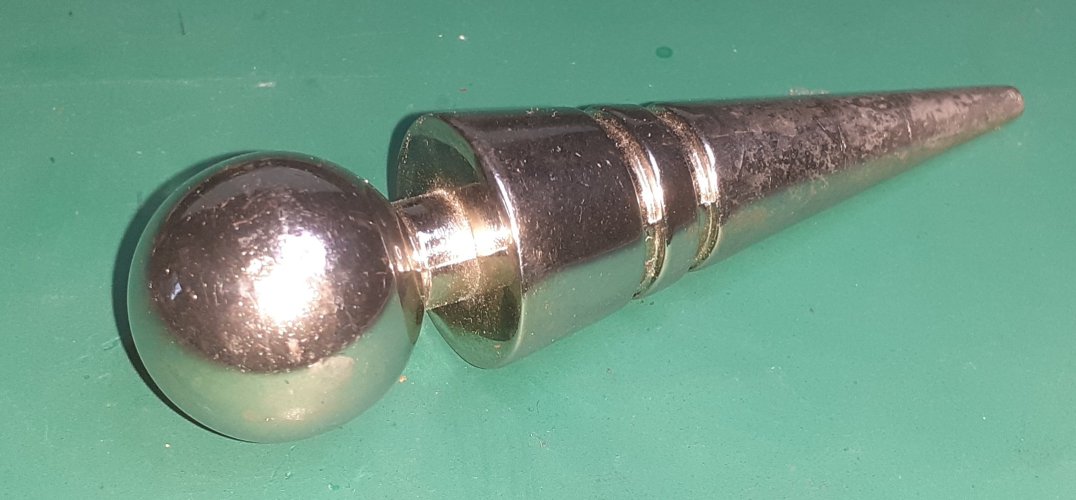
Burnishing tool.
I'll explain more about the use of this later.​
The one in the pic is my trusty, well used, (ex)wine bottle stopper. The balled end is suited perfectly for burnishing curved rounded surfaces.​
20250110_152750.jpg
Pt 3b: Equipment and Materials.
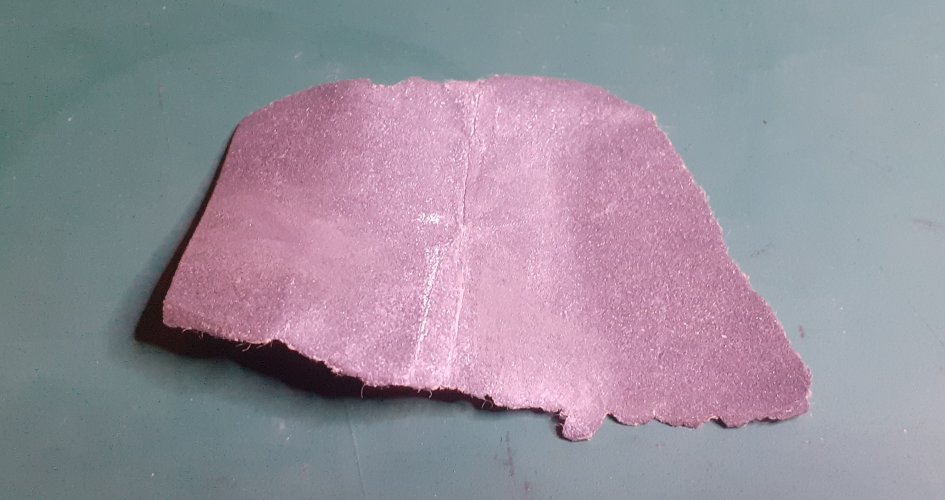
Sandpaper.
The Wet-n-Dry variety around 600-800 grit.​
This is used to smooth and clean up any rough edges, or for removing any final ink residue from cutting lines, (more on this later!)​
20250110_202958.jpg


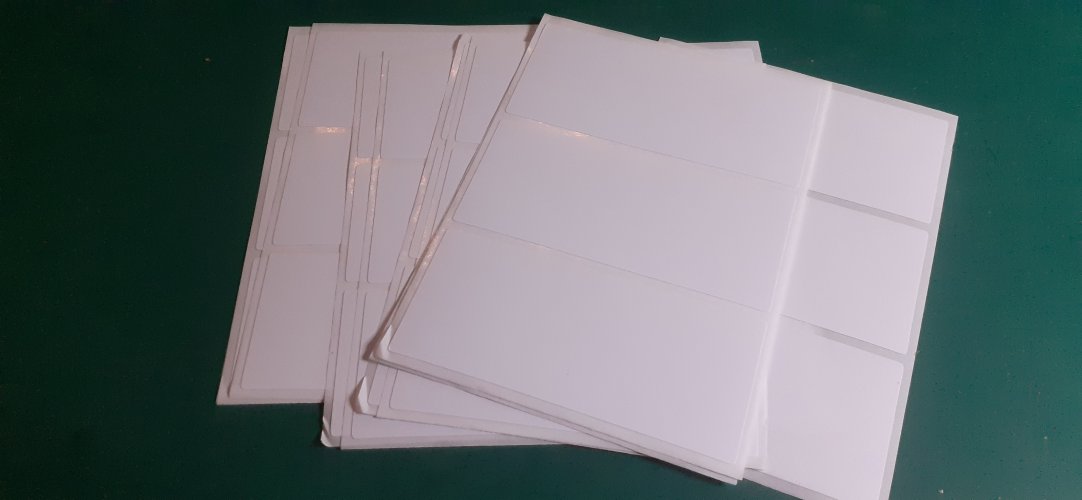
Adhesive.​
We need to attach all the parts together, obviously!​
There is a LOT of back-tabbing involved in this process, to keep the outer surfaces of the sphere/ball as smooth as possible.​
This may sound strange, but conventional glues that we use in this hobby, will destroy the end result of the water-shaping process!!!​
The moisture from the glue will soak into the paper, softening it slightly, distorting any shaping work we had already achieved!​
Therefore, we need to use some form of 'dry' glue instead...​
@mijob has already mentioned this alternative in one of his brilliant TIE related build threads...​
The solution......Adhesive-backed labels, or stickers.....!​
20250110_214458.jpg
A form, or mold.
As we have already learned, water-shaping involves softening a flat piece of paper and forming it into a new desired shape, and letting it dry.​
Once dried out, the paper retains the new shape.​
However, we need to keep the paper in the desired shape as it dries, otherwise the paper edges, or parts in their whole, will curl and deform as they dry, and spoil the end result.​
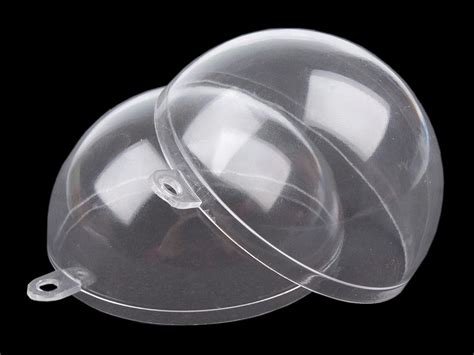
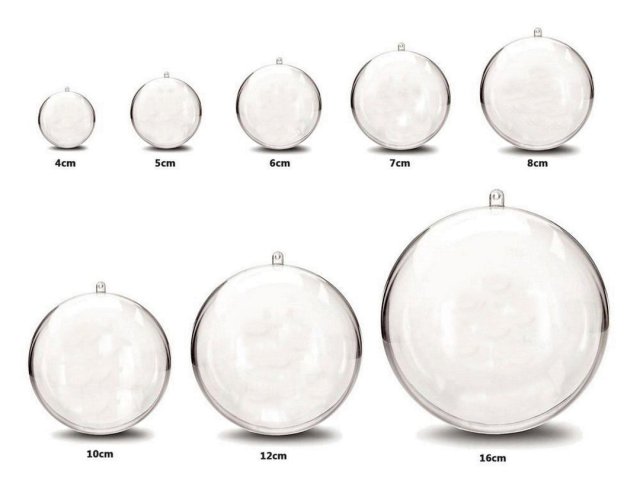
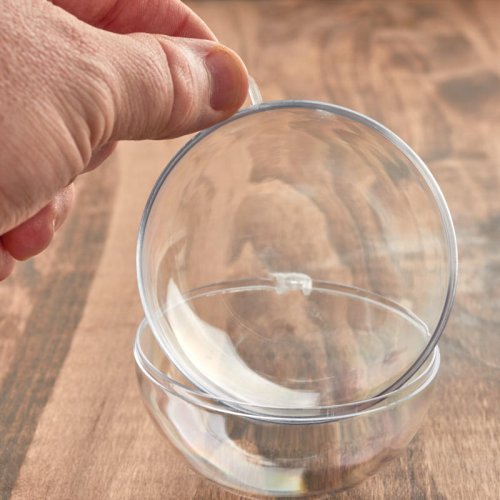
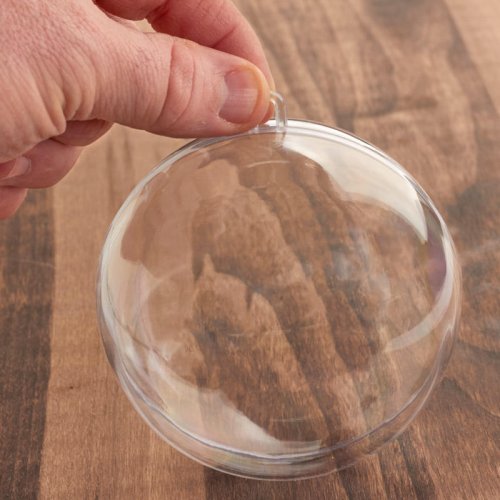
For water-shaping spheres, balls, radar dishes, (R2D2)domes, globes, convex and concave shapes, ... and the list goes on,.. I have used, with many successes, clear plastic, fillable (Xmas tree)decorations as a mold. They come in a range of diameters, are readily available in most decent craft stores or online, and are relatively cheap to purchase. They generally come in metric diameters, but if you shop around, the diameters can vary between manufactures. I have the full set of metric sizes from 4 to 16cm, in 1cm increments.​
th-4191061022.jpegil_1080xN.2415630516_jud6-3735863137.jpg80mm_clear_acrylic_fillable_ball_ornament_1-3261105483.jpg100mm_clear_acrylic_fillable_ball_ornament_2-3715344505.jpg
Now that we have a mold we need a ....​
Former.
A former, will hold or pressure the wetted part in place, within or over the mold.​
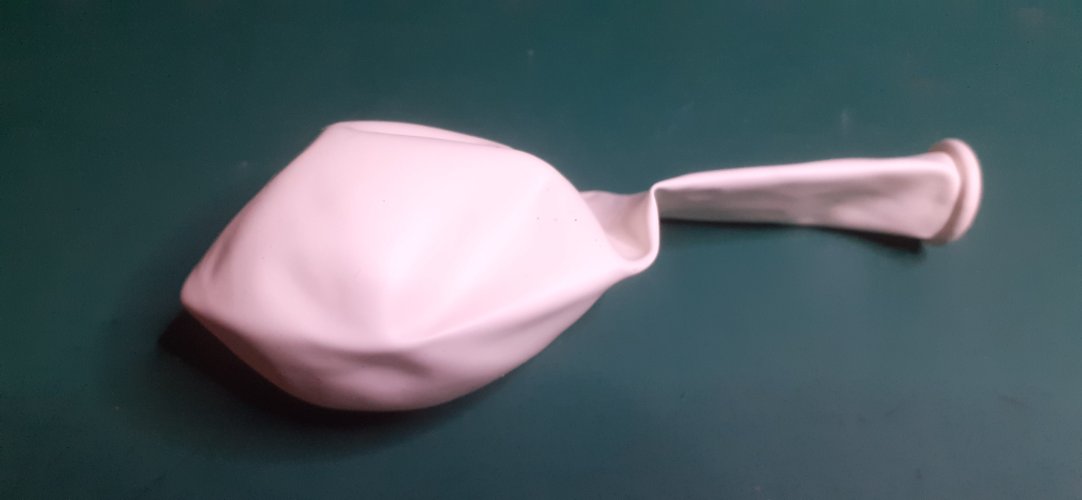
For this tutorial, I used one of these...... A simple cheap party balloon!​
20250110_225702.jpg

And that is it!!! We are ready to demonstrate the process in action.....

Oh, wait, two other things that are definitely required......


and


;) :cool:


So, the theory is, at last, over...... :bulgeeye:

Next post, we shall begin!!

See you all soon!

:wave:
 
Last edited:
I picked up a set of Scissors from "Micheal"s Craft Stores' that have various radii built into the set, small to large scissors. They too can be very useful. Excellent thread!! It's a "STICKY" now. :)
 
"Interesting fact: a shark will only attack you if you’re wet." ~ Sean Lock


Pt 4: The process.

Right, let's do this.....

A few quick points before we begin:
  • I am using 160gsm matte paper for this demo.
  • I printed the templates on an inkjet printer using dye based ink, so you will see a little bleed of ink on the parts. Especially the template of UHU02 which has surface texture. The other two do not.
  • The stickers I used turned out to be nightmare!! More on that a little later.
  • I used a 5cm diameter ball for this demo.
  • I am not concentrating on aesthetics here, only the basic process of water-shaping. If I was building this as a show model, I would spend more time on the finish overall.

Pt 4a: Preparing the parts.

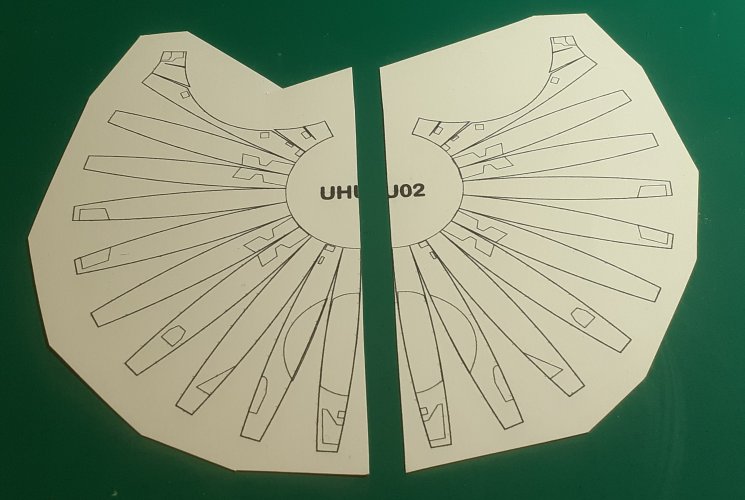
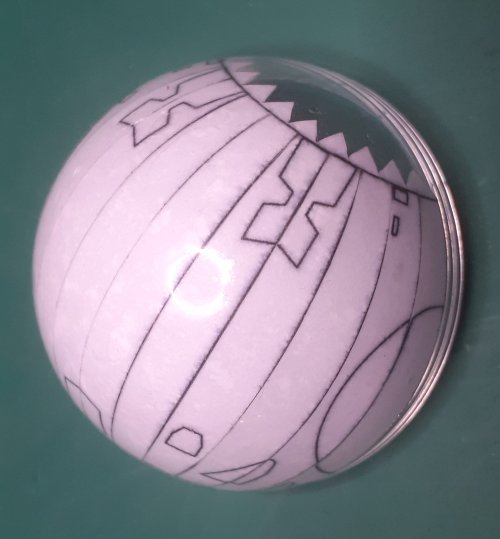
I selected UHU02's template first as it is the most complex of the three.
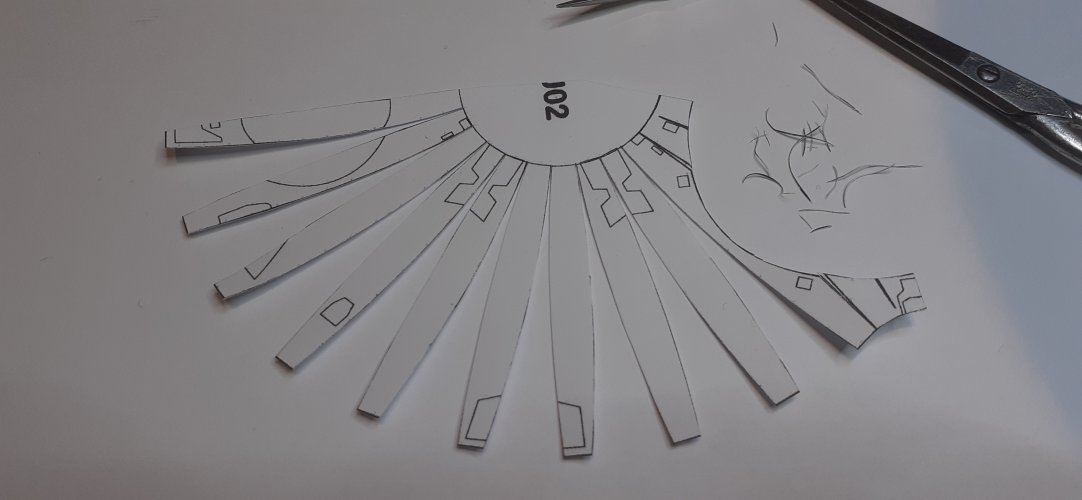
The template as presented is too large to fit into one half of the molding ball, so I halved the template.

2.jpg


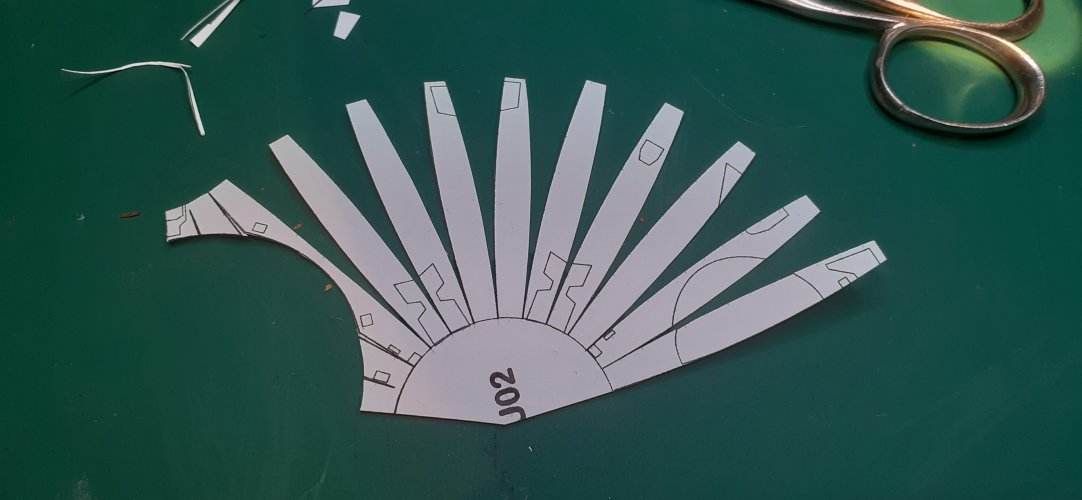
Each petal was then carefully cut out using scissors, removing as much of the black cutting line as possible.
I left the half-circle, (where is says UHU02,) intact at this stage. When cutting out the petals, I cut about 1 mm past this half-circle boundary line.
Came out OK, right ??????? Well, not actually .....

3.jpg


If you then lay the cut part on some white paper, you can see that is not right (yet.) There is still too much black cutting line present.

4.jpg


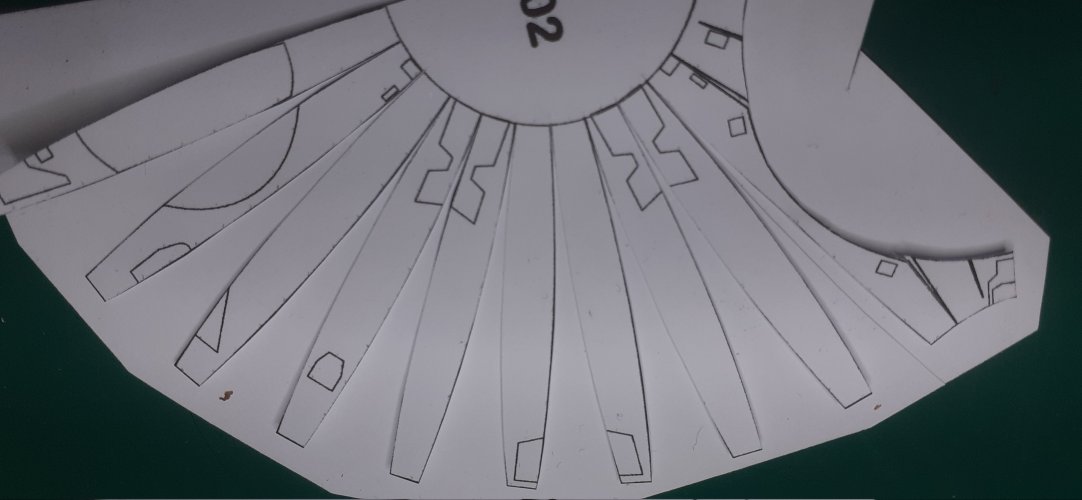
So, more careful trimming required, I recommend using a magnifier for this, it helps you to see the line better.
Also, if you lay a sheet of white paper on the cutting mat as you work, it helps to show the black lines much clearer.
This is after the second trim. Still not quite, but almost...

5.jpg


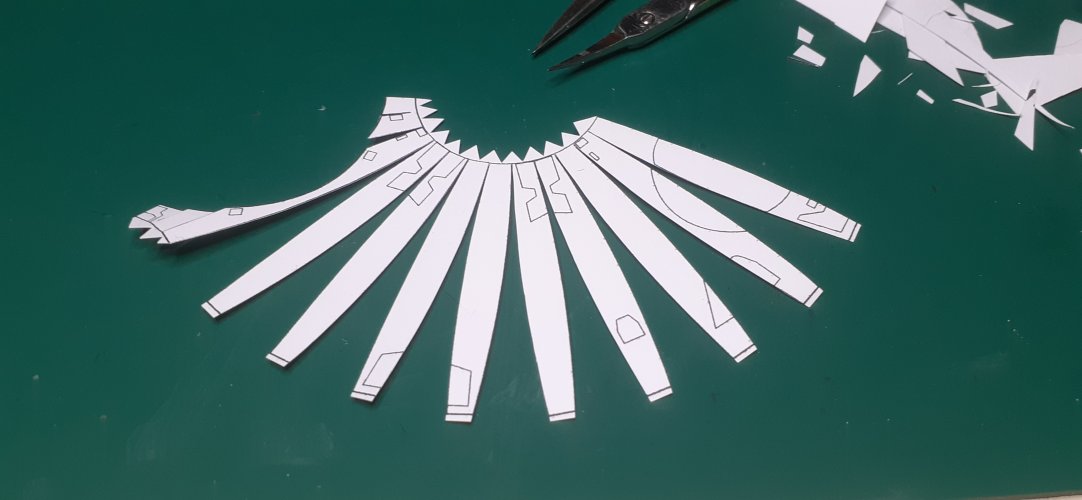
I did one final trim and then gave the edges of each petal a gentle rub with sandpaper to remove the last, (I thought,) of the ink residue.
I then cut out and trimmed the rest of the part. Because I had cut slightly past the central half-circle border line when I cut out the petals, I cut out the half-circle, leaving joined tabs to hold all the petals together, also on the lower section of the window frame piece.
Be careful when handling the part at this stage, as it is quite flimsy.

7.jpg


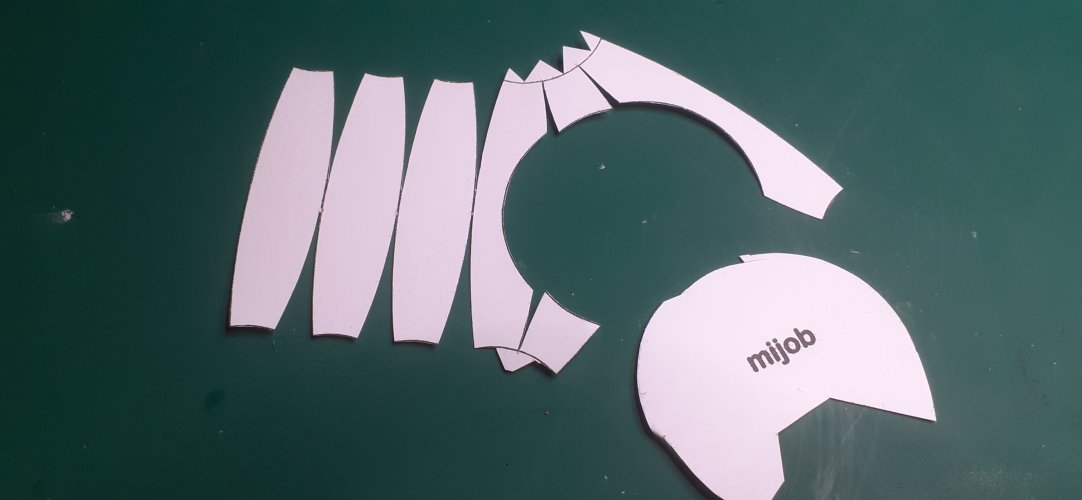
I followed the same process for Mijobs' template and cut this out too, For this template, I had to divide it into three sections to make it fit the molding ball half.
Also, as the petals are joined together in the middle of each petal, it is not possible to completely remove the cut lines without the petals falling off.
So, you are left with a small section of cut line over. I guess you could completely remove each petal and form them separately, but you would have to be very accurate with alignment of each petal when you assemble.
But, I have found a way to overcome this problem......

12.jpg


Pt 4b: Getting things wet.

One thing I forget to add in the Tools and Equipment section is a very handy item to have for doing water-shaping; An atomiser spray bottle.
This gives you a very nice uniform spray of water and gives you more control with water application.
But, if you do not have one, just use a soft sponge dampened in water instead.

20250112_122005_1.gif


Firstly, we need to prepare the mold. Give the inside of one half, (or both,) a good clean with soap and water to remove any oily or dirty residue.
Then dry and polish it up with a lint-free cloth.

Now then, here we go .....

Spray/add a little water into the mold to make it damp, but not too wet at this stage.
Carefully dampen the part from the back too, wait a minute or two, then very carefully, coerce the part into the mold, adding another application of water as necessary. Again, don't over do it with the water. It is best to apply some water and allow it to soak into the paper for a minute or two before pushing it into the mold.
Bear in mind that the more water you add, the integrity of the paper part will begin to deteriorate and become very fragile and easily prone to tearing.
Gently does it!!!!
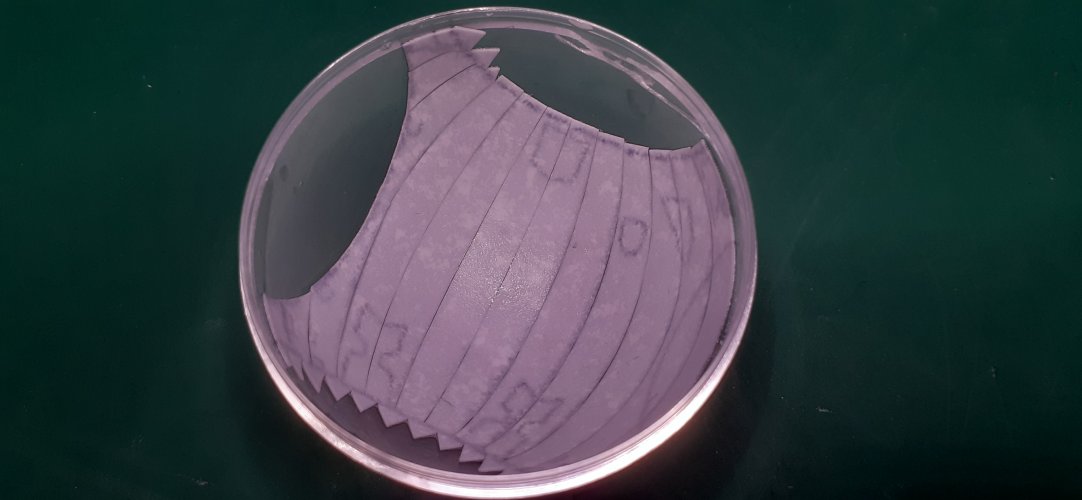
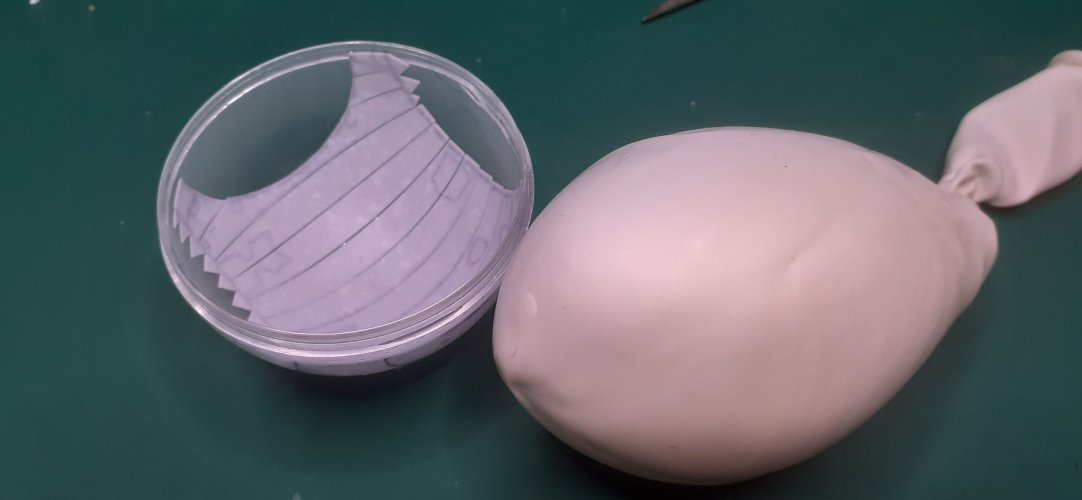
The important thing here is to make sure that none of the petals overlap....

8.jpg


You'll notice in the next pic that I didn't manage to remove all the cut lines completely and because I used dye based ink, the cutting line residue has bled a little from the application of the water. It is not pretty, but, as I said earlier, I am not concentrating on aesthetics here, only the method.

9.jpg


Once you are completely happy with everything, it is now time to add the former that will keep the part in this shape while it dries out.
I inflated the balloon slightly, so that it is approximately the same size as the mold....

10.jpg


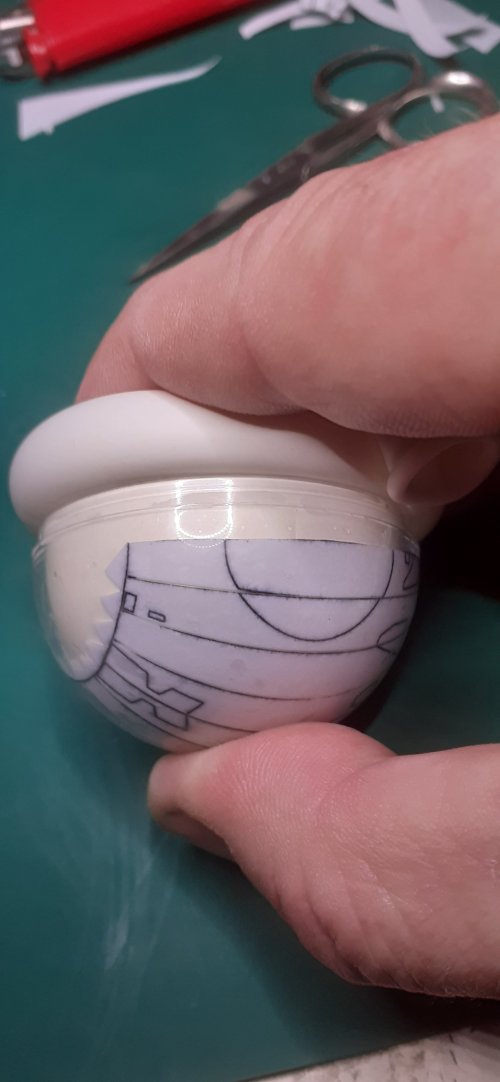
The balloon is then inserted carefully into the mold. Then, using your fingers, apply pressure to the balloon.
Double check that nothing has moved as you do this, if it has, remove the pressure and then the balloon, reset the part where necessary and repeat the process.

11.jpg


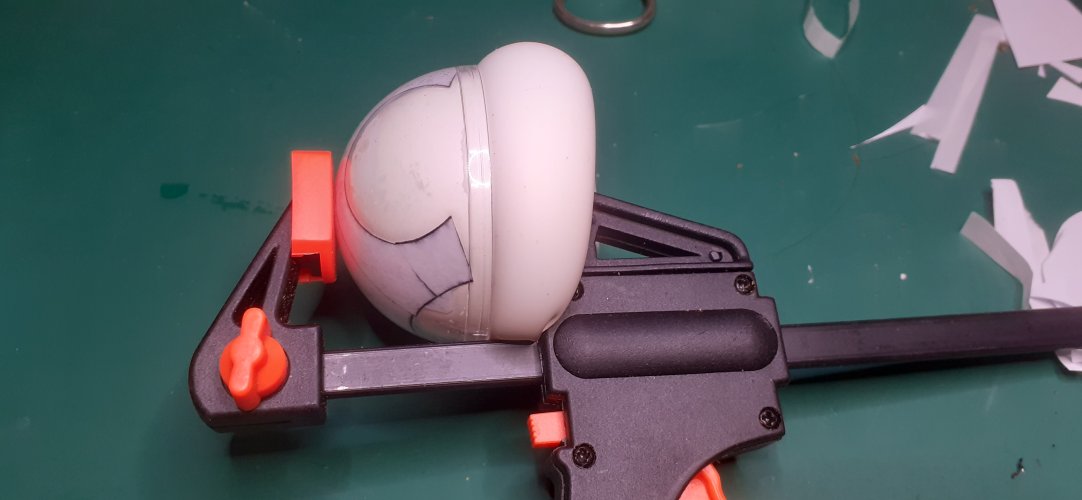
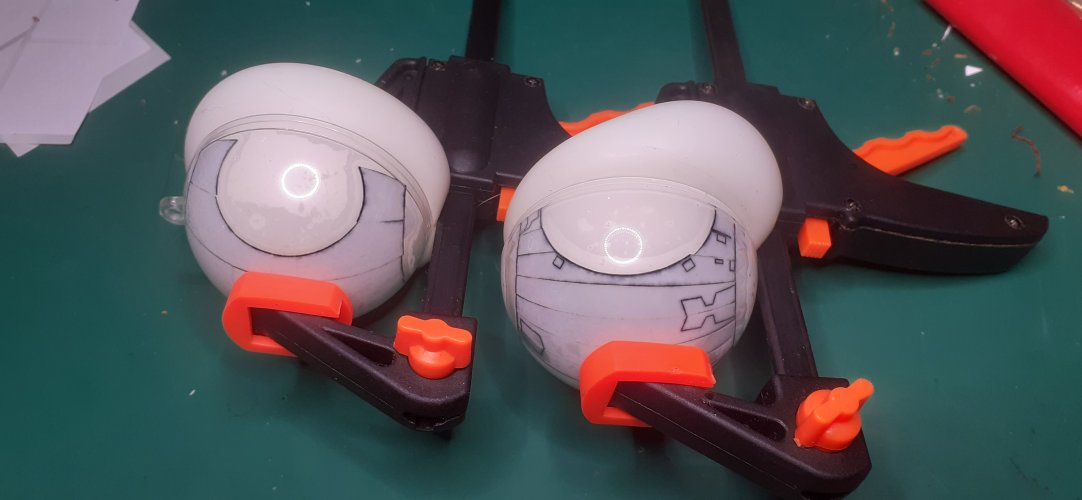
I followed the same procedure for Mijobs' parts and using a clamp to apply constant pressure, I left them both to dry out for about 6 hours.

13.jpg14.jpg


To be continued ...
 
Last edited:
"When the well is dry, we know the worth of water." ~ Benjamin Franklin

Part 4c: Assembly.

And now the fun, and work, begins....

The best way to see if the part has dried out, is to look at it through the mold.
The part should have its original colouring back, namely the paper will now look pure white again if dry.

Carefully remove the pressure on the balloon and very carefully remove it, making sure nothing sticks to it as you do, but it should come out cleanly.

Once you have removed the balloon, double check that the part is completely dry.
I noticed with mine that it was still slightly damp, even after a day of drying.
I think this is because the balloon does not allow the water to evaporate away completely. I left mine to dry completely with the balloon removed. The part was already well formed and did not curl when having its final dry (about an hour.) It had no detrimental effect on the outcome.
I may need to look at an alternative for the balloon and use something that will allow better evaporation.

Very carefully remove the part from the mold, it is still delicate!
I forgot to take more photos of this stage, but the pic below shows the part fresh out of the mold.
Nicely formed!

15a.jpg


At this point I decided to go further with mijobs sphere first, as I knew he was chaffing at the bit to see the result.... ;)
So, I got prepared.....

I water-shaped all the remaining parts of his sphere in three stages.
The pic below shows how I cut the template (in red.) The two parts with the blue squiggles were molded separately from the main sections.
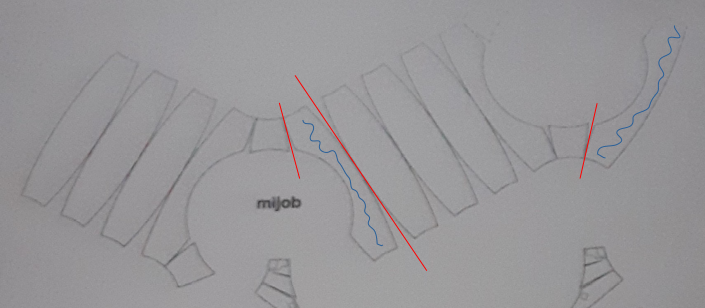
Screenshot from 2025-01-12 20-28-07.png


As I have mentioned before, the following procedure requires a lot of back-tabbing.
I cut out long strips of adhesive sticker, about 5-6mm wide and then cut off lengths from these, about half the width of a petal long.
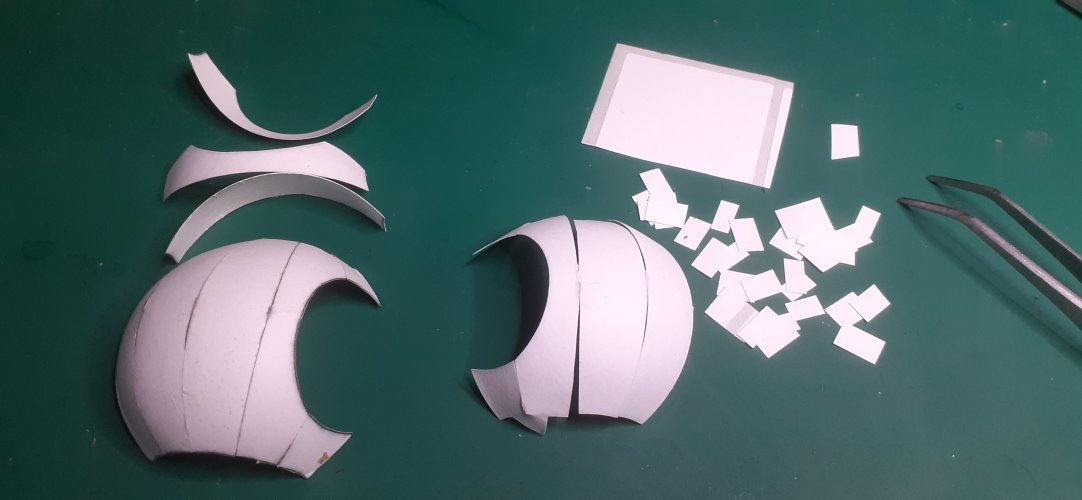
18.jpg


Start each joint by first accurately lining-up the ends of each petal and then tab it from behind with a sticker piece. Do this on both ends of the joint.
It is important here, and with every other tab you do, to make sure the two petals are pulled tight together at the joint.
Add the next tab in the same way. Proceed like this, alternating from one end of the joint to the other, until you meet in the middle.
Then start the next joint, and so on. The more joints you complete, the firmer and rounder the sphere will become, as it pulls itself towards itself!!
The pic is not a very clean example, but you get the idea.
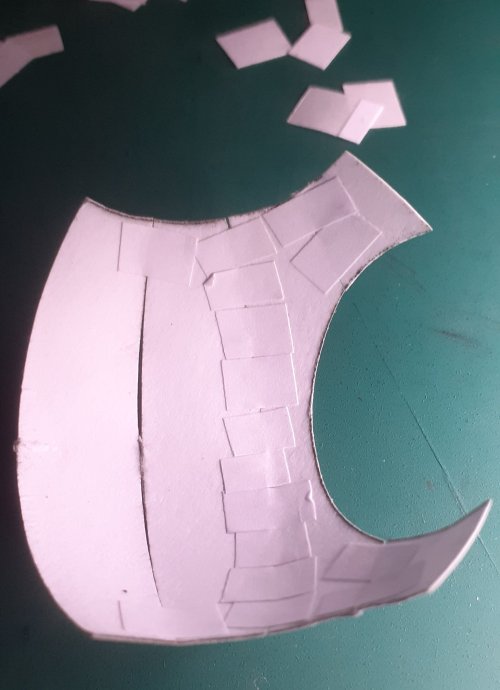
19.jpg

** I want to add a note about the stickers here. The stickers I used for this project were very cheap to buy, and it shows. The adhesive was really weak and did not stick very well, so as I continued joining each petal. the stickers were coming loose on completed joints, allowing the joint to pull apart. :realmad:
Somewhere, I still have a roll of industrial stickers that I 'acquired' from my old work, I just need to find them. Once they stuck, they stuck like excreta to a blanket!
With this in mind, I therefore recommend using an adhesive sticker with an adhesive that has a strong bond. Bit more expensive, but it is worth it in the end.
It would of stopped me getting very grumpy.... ;)

After quite a bit of cussing and grumpiness, I managed to get the two halves assembled.

Back in Pt 4a, I mentioned about the residue cut lines in middle of each petal, due to the design of the template. (Shunichi Makinos template will have the same issue.)
In the pic below, the completed half shell on the left, shows these lines.
Because there is no texture on these templates, the half shell on the right was placed in the mold back to front, with the lines on the inside.
The pic shows the difference!
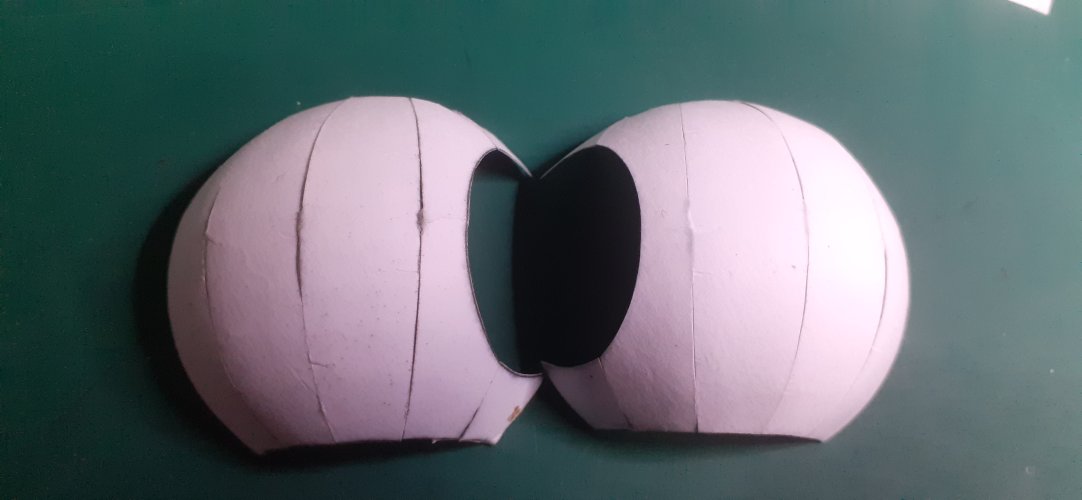
20.jpg


Using the same tabbing procedure the two halves were joined together, completing the construction.
The sphere has come out quite well, but could be a lot better in my opinion, mainly due to the sticker problem. Some of the joints just refuse to stick now.
There are also a few creases from the shaping process where I was a little careless and hasty.
Once I get/find decent stickers, I will build a cleaner version.

I hope you are sitting down @mijob because here is the end result.
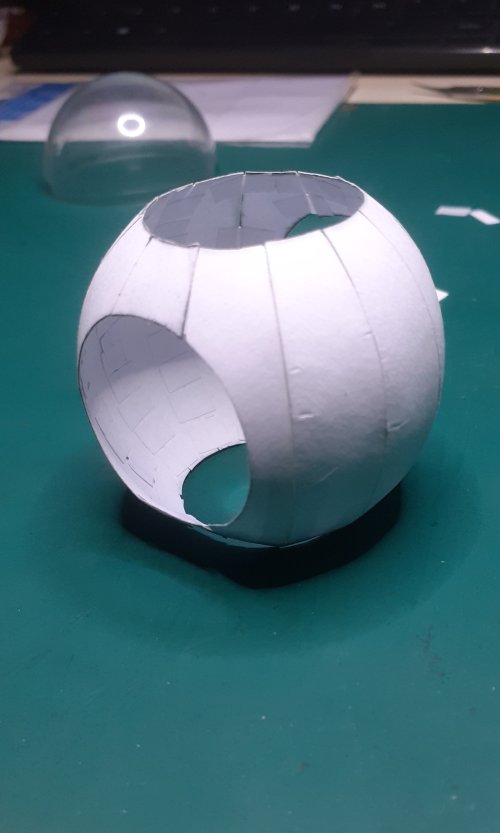
21.jpg22.jpg


I am going to pause the tutorial here for now, until I can find better stickers.
Then I will complete the remaining two templates, and probably re-build the one from mijob too. :yesyes:

I hope this tutorial has helped and/or inspired people so far!
If there are any questions, feel free to PM me anytime, or drop a comment below.

Take care for now everybody!

:wave:
 
I don't think a sphere made ot of paper can be done any better than you have demonstrated. Your thread is so instructional, it should be an inspiration for other types of models that can benefit from this kind of detailing. Excellent, all the way around!! :)
 
  • Like
Reactions: mijob and DanBKing