The UHU02 Colonial Viper appreciation thread
- Thread starter Revell-Fan
- Start date
You are using an out of date browser. It may not display this or other websites correctly.
You should upgrade or use an alternative browser.
You should upgrade or use an alternative browser.
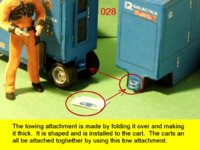
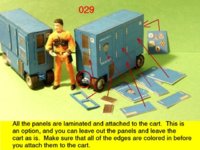
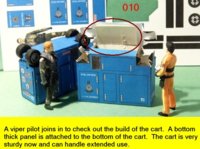
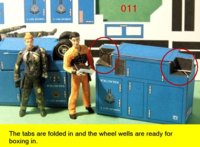
I have to say that this cart is (by far) better than the one that was used in the series.
It is just that I wanted to make it look a bit more usable and with some graffiti decals on it. The only thing That I did not do, is to give it a black wash to simulate grime.
Absolutely wonderful! Thank you, silver!
You are welcome Revell-Fan. The cart is there as a basic model but if you feel adventurous, the panel door can be made in the open position with some sort of tool inventory to show.
Now to continue on with the next installments of photo updates.
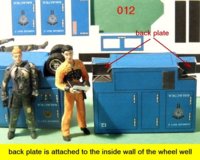
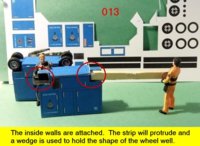
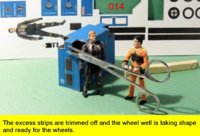
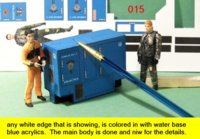
In showing appreciation to (and thanking) @uhu02 for for this wonderful model.
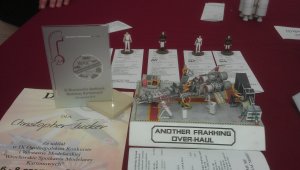
I was at a paper model expo this weekend (06/06 - 06/08 2014). I had entered my diorama using this Viper.
I won the award for "Best in category" "Dioramas".
I would also like to thank; @silveroxide for the service mule, @Tirick for the figurines, @Revell-Fan for one of the cabinets, and Japanese Epson paper crafts for the pit-crew equipment.
Thank you everyone for such WONDERFUL models!!!

Last edited:
T
Texman
CongratulationIn showing appreciation to (and thanking) @uhu02 for for this wonderful model.
I was at a paper model expo this weekend (06/06 - 06/08 2014). I had entered my diorama using this Viper.
I won the award for "Best in category" "Dioramas".
I would also like to thank; @silveroxide for the service mule, @Tirick for the figurines, @Revell-Fan for one of the cabinets, and Japanese Epson paper crafts for the pit-crew equipment.
Thank you everyone for such WONDERFUL models!!!
View attachment 131282
- Apr 5, 2013
- 13,876
- 10,214
- 228
Words can't describe this. Thank God you posted pictures! Incredible, inspiring workmanship. This is Art. most of your work falls into that category. 3 dimensional representations of our fantasy. It's really neat if you think about it. It's neat because anyone can do it. Silveroxide, we should put "Pathfinder" under your name. You show us a way, and it's always awesome. 
Words can't describe this. Thank God you posted pictures! Incredible, inspiring workmanship. This is Art. most of your work falls into that category. 3 dimensional representations of our fantasy. It's really neat if you think about it. It's neat because anyone can do it. Silveroxide, we should put "Pathfinder" under your name. You show us a way, and it's always awesome.
Thanks for the words of encouragement John. I have to start soon on the figures and other items for the hangar. Plus working with the prototype figures, I am learning on how to pose the figures. Thanks for looking and keeping the thread alive.
I would like to ENCOURAGE EVERYONE in this forum to build this Viper (that UHU02 so GRACIOUSLY made and shared with all of us) and put it into what ever setting you like!
I would also like to encourage those who have started their builds (but have not finished them yet) to pick up this project again and finish it, PLEASE!!!
That is what this thread is for. To show THANKS & APPRECIATION to UHU02, as well as to show off your skills, talents, and imagination in this WONDERFUL hobby!!! So please start building!!!
- Apr 5, 2013
- 13,876
- 10,214
- 228
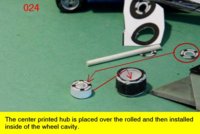
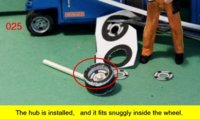
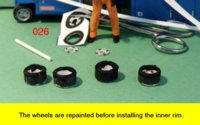
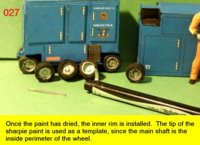
Hey Silver, I am going to give you one of my secrets, (and everyone else) for making incredibly realistic tires. Use Liquid Electrical Tape, and use a medium grit sand paper so just before it dries, you roll the tires on the sand paper and if gives them a texture. If you build a couple pf inch patter on a piece of paper, and tape it to the table, if you really go nuts, and make it slightly "U-SHaped", then when you roll the tire you will impress the patter, right up the side walls, of a tire with tread patterns on it (for trucks, on utility carts you want a flat patter, a 1000 grit sand paper makes it look like a rubber tire, but the bottom looks rolled on). I used this stuff. See Pic below. 


I have used something similar but for my tool handles to give them a rubber grip and insulator. I will give that a try next wheeled vehicle I construct. It has been staring me in the face and I did not considered this option. Thanks for sharing.
- Apr 5, 2013
- 13,876
- 10,214
- 228
Sharing iss fun. I find that applying a thin coat at first, letting it dry allows the stuff to "bite" into the paper, then you can build up as necessary. It also is really good for making a car look like it hast a "flat tire" You bend the tire, do a first coat, then you can decide if you want it really flat or just low on air. The uses are endless. Steering wheels rings, vinyl interior door/dash panels, There are really many good applications. Also, it is great for electronics. you can make a diorama , using LED's, and have a circuit of bare copper wire with leads going off in their necessary directions. You glue the wire down at necessary places, then insulate with this. If you are really brave, you can then providing you have used enough insuloator, run another circuit right on top of the previous one, using resistors and diods, etc, you will be creating a similar technology as in Integrated circuits. You could go nuts and use pure graphitee as sold in artists shores and create graphite multi-layered is forming a crude, but very effective Integrated Circuit the can, or not, be connected to the lower one. Keep on stacking and you have made a "chip". You can also paint bare thicker gauges of mare copper wire painted black with this stuff and run them inside models, and they can carry enough current to power LEDs, which can be heated and firmed into different shapes, as long as the anode and cathode are no exposed or their relative position is maintained. You end up with an interior that is very clean and tidy, you can mini start stop switches, the possibilities are endless. 2:11 a.m., better go to sleep, better ideas always come at night for me. 
Thank you for the tip Zathros. These are GREAT IDEA!!!
I will see if I can find anything like that here (and experiment with it).
I will see if I can find anything like that here (and experiment with it).


