Star Trek: TNG was the first show to deal with a torpedo gone wild. On New BSG they use projectiles in space which is absolutely insane. Each dogfight would produce so much debris and bullets which continue to travel at high speed till they hit anything, even if it takes several millennia. I don't want to think about the collateral damage such a space war would do.
Razor Crest - A Return to the Bench
- Thread starter Chuffy70
- Start date
You are using an out of date browser. It may not display this or other websites correctly.
You should upgrade or use an alternative browser.
You should upgrade or use an alternative browser.
Yes it would be fascinating to see after someone warps from the battle and comes into an intersecting area of the battle years later only to get shot down by their own ordinance!Star Trek: TNG was the first show to deal with a torpedo gone wild. On New BSG they use projectiles in space which is absolutely insane. Each dogfight would produce so much debris and bullets which continue to travel at high speed till they hit anything, even if it takes several millennia. I don't want to think about the collateral damage such a space war would do.
Of course right now there's a LOT of debris in space around our own planet from all of the launches from the 50's to present as well as dead satellites. One of the big 4 (US (NASA), Russia (Roscosmos), China (CNSA), or Europe (ESA)) will have to do something about that hopefully sooner vs later.
Right whilst laser bursts and bullets seek a destination in the depths of space...
We now draw a conclusion on this little build.
With the top parts placed on, I found myself yet again too far forward.
Although I was flush to the front of the hull (red arrows) - it needed to be back to where the red pen marks are drawn.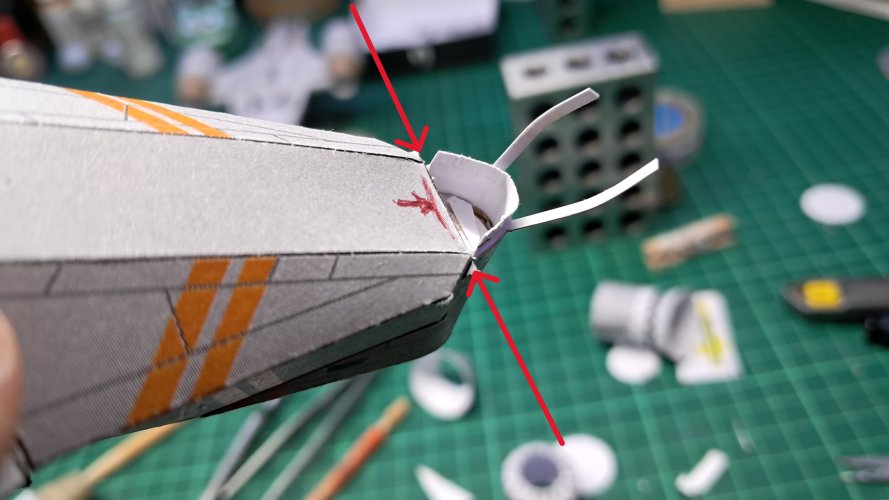
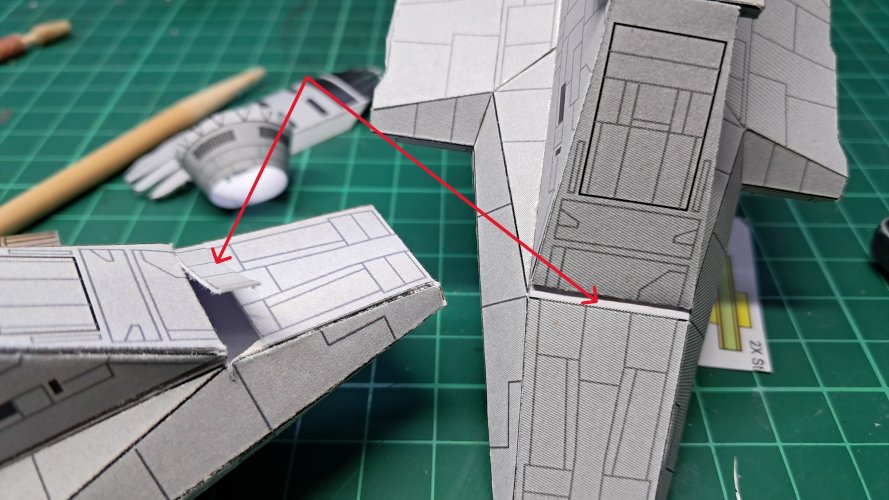
Seen from underneath, you can now see how far back I should have been.
Concentrating on the front, meant I didn't check the back.
I wasn't about to make a third Crest, so using a cut from the first build, I filled the blank space with 'donor panels'
One thing to note, is the Razor Crest is a possible tail-sitter.
Not a problem if you glue it to the base, but if you need to fly the model around your house making whooshing noises, then you will need to add some weight to the front. I just packed the front nose with scrap cut-offs and splashed some glue into the hole.
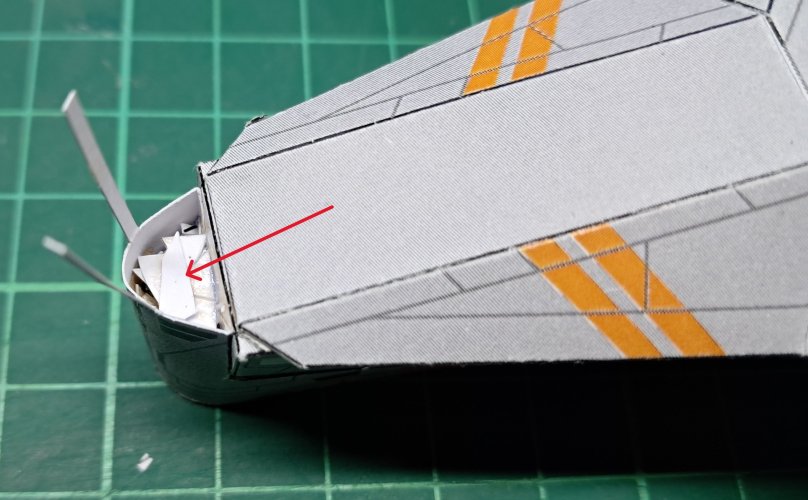
As I now had a gap at the front, I needed to add a spacer to meet the windshield.
tiny tabs were cut to aid folding under the shield.
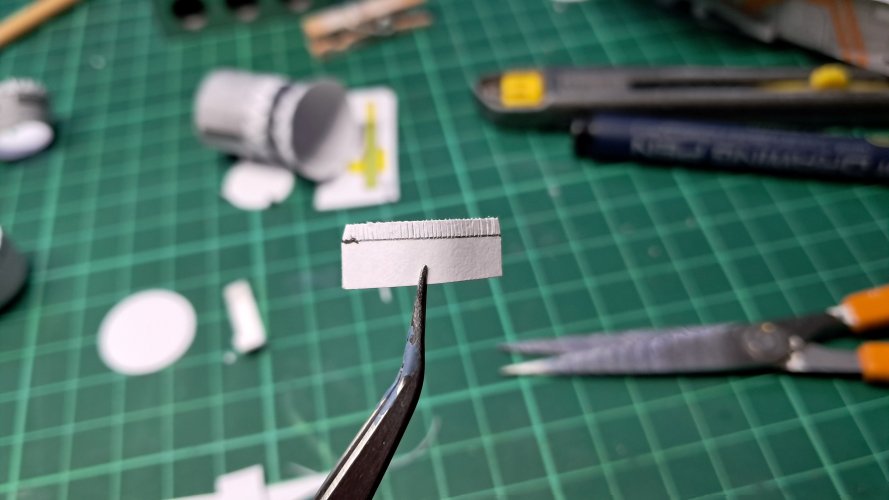
Test fitment, was good, and so I proceeded to fit the canopy.
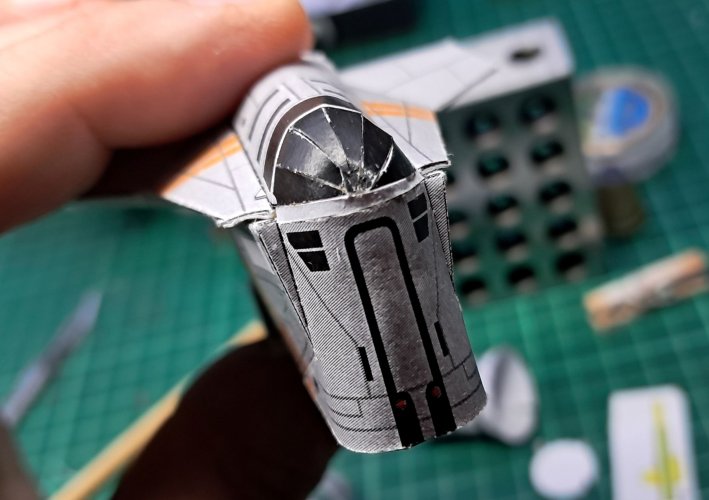
I was not happy with the rear of the engine, something just did not look right to me.
Thus I inserted the rear turkey feathers into the engine by a small amount, to give me a small step which looks more like the Crest in the show.
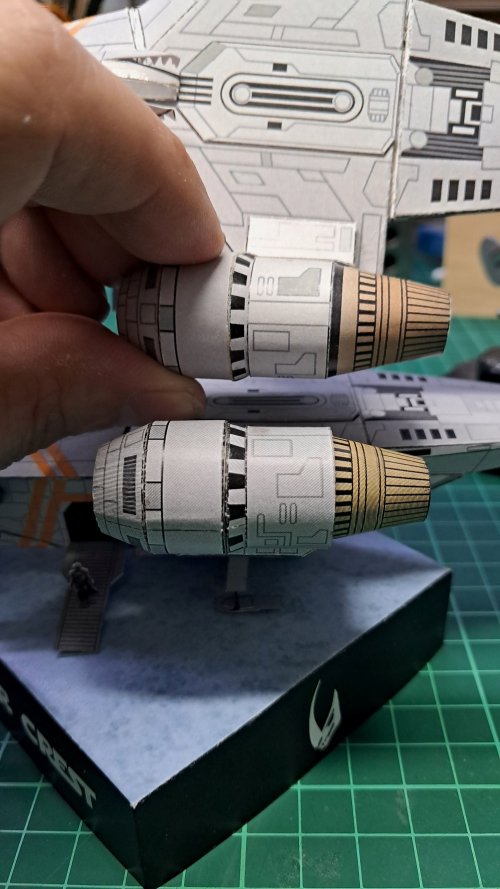
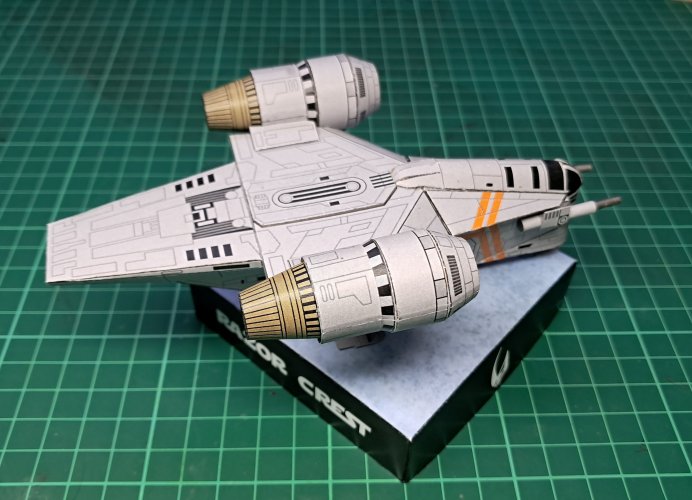
A few splashes of paint and I'm calling this finished.
Luckily the front windshield turned out better than I expected.
A little angle was also added to the front of the landing gear feet.
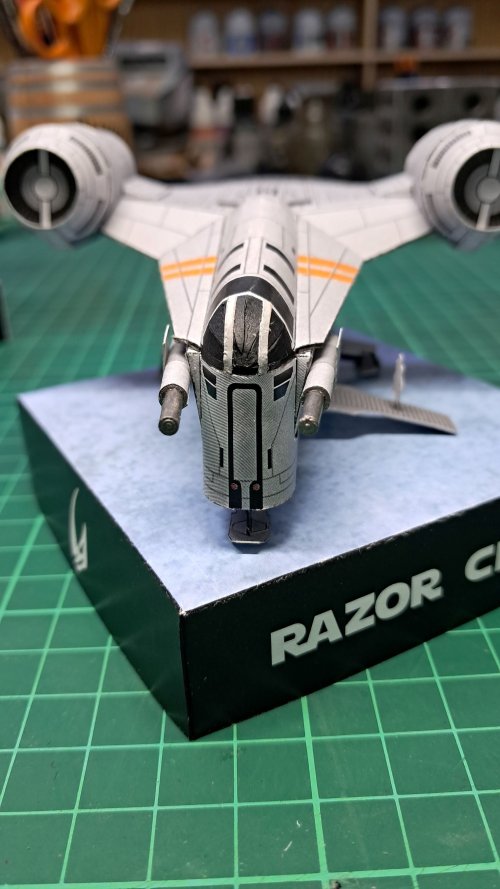
Looking half decent.
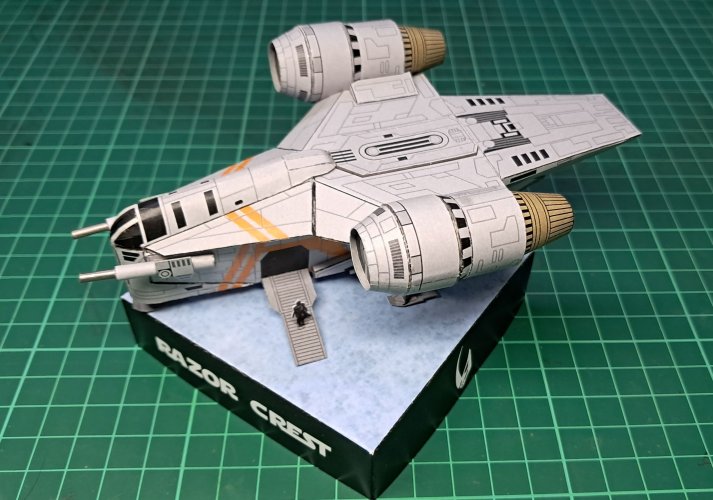
…and half decent from another angle.
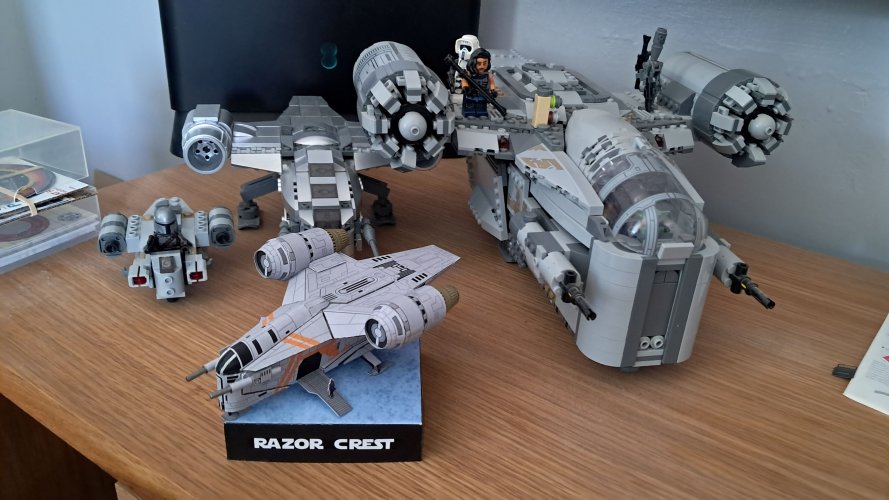
She now sits with some Lego variants (one knock-off) whilst I wonder what to do with her.
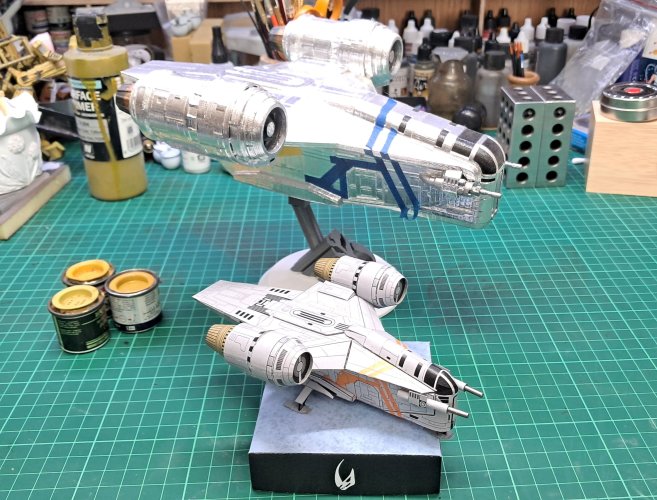
This build has also got me round to finishing another Crest I bought some years back.
An ugly 3d filament printed version bought cheap of the internet, which I covered in ducting tape - I believe this was used on the first prototype model, SFX artist John Goodson of ILM fame used for motion control test shots prior to production of the tv series.
Whilst I covered the model in the highly reflective tape, I never finished the stripes.
I will now complete this, ready for a model show in a few weeks time.
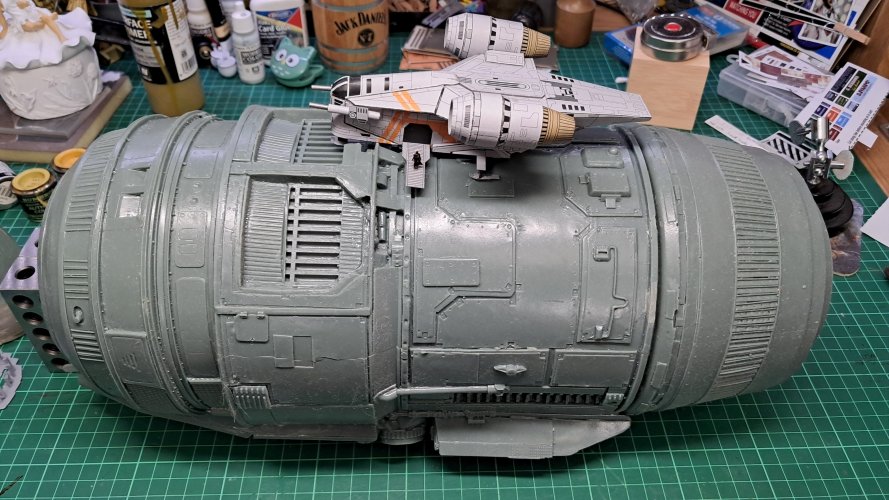
Another Crest model I have in the stash is a huge 1/18th scale version.
This requires at least lighting up and a few other donor parts, but won't be on the bench this year, but thought you might like see the size for comparison.
In conclusion the Mikro Model is not that bad, as long as you test fit everything beforehand.
I would certainly suggest cutting all parts out and study the fit much the same way as building a plastic kit.
Another mistake was made on one of the engines, I was so focused on finishing this model I made a boo-boo.
But she is finished, and will be donated to my friend, who hopefully will give her a good home.
Thanks for watching and all your kind comments, it was very inspiring to aid me back onto the bench.
We now draw a conclusion on this little build.
With the top parts placed on, I found myself yet again too far forward.
Although I was flush to the front of the hull (red arrows) - it needed to be back to where the red pen marks are drawn.

Seen from underneath, you can now see how far back I should have been.
Concentrating on the front, meant I didn't check the back.
I wasn't about to make a third Crest, so using a cut from the first build, I filled the blank space with 'donor panels'

One thing to note, is the Razor Crest is a possible tail-sitter.
Not a problem if you glue it to the base, but if you need to fly the model around your house making whooshing noises, then you will need to add some weight to the front. I just packed the front nose with scrap cut-offs and splashed some glue into the hole.

As I now had a gap at the front, I needed to add a spacer to meet the windshield.
tiny tabs were cut to aid folding under the shield.

Test fitment, was good, and so I proceeded to fit the canopy.

I was not happy with the rear of the engine, something just did not look right to me.
Thus I inserted the rear turkey feathers into the engine by a small amount, to give me a small step which looks more like the Crest in the show.

A few splashes of paint and I'm calling this finished.
Luckily the front windshield turned out better than I expected.
A little angle was also added to the front of the landing gear feet.

Looking half decent.

…and half decent from another angle.

She now sits with some Lego variants (one knock-off) whilst I wonder what to do with her.

This build has also got me round to finishing another Crest I bought some years back.
An ugly 3d filament printed version bought cheap of the internet, which I covered in ducting tape - I believe this was used on the first prototype model, SFX artist John Goodson of ILM fame used for motion control test shots prior to production of the tv series.
Whilst I covered the model in the highly reflective tape, I never finished the stripes.
I will now complete this, ready for a model show in a few weeks time.

Another Crest model I have in the stash is a huge 1/18th scale version.
This requires at least lighting up and a few other donor parts, but won't be on the bench this year, but thought you might like see the size for comparison.

In conclusion the Mikro Model is not that bad, as long as you test fit everything beforehand.
I would certainly suggest cutting all parts out and study the fit much the same way as building a plastic kit.
Another mistake was made on one of the engines, I was so focused on finishing this model I made a boo-boo.
But she is finished, and will be donated to my friend, who hopefully will give her a good home.
Thanks for watching and all your kind comments, it was very inspiring to aid me back onto the bench.
Chuffy,Right whilst laser bursts and bullets seek a destination in the depths of space...
We now draw a conclusion on this little build.
With the top parts placed on, I found myself yet again too far forward.
Although I was flush to the front of the hull (red arrows) - it needed to be back to where the red pen marks are drawn.View attachment 225665
Seen from underneath, you can now see how far back I should have been.
Concentrating on the front, meant I didn't check the back.
I wasn't about to make a third Crest, so using a cut from the first build, I filled the blank space with 'donor panels'
View attachment 225655
One thing to note, is the Razor Crest is a possible tail-sitter.
Not a problem if you glue it to the base, but if you need to fly the model around your house making whooshing noises, then you will need to add some weight to the front. I just packed the front nose with scrap cut-offs and splashed some glue into the hole.
View attachment 225656
As I now had a gap at the front, I needed to add a spacer to meet the windshield.
tiny tabs were cut to aid folding under the shield.
View attachment 225654
Test fitment, was good, and so I proceeded to fit the canopy.
View attachment 225653
I was not happy with the rear of the engine, something just did not look right to me.
Thus I inserted the rear turkey feathers into the engine by a small amount, to give me a small step which looks more like the Crest in the show.
View attachment 225662
A few splashes of paint and I'm calling this finished.
Luckily the front windshield turned out better than I expected.
A little angle was also added to the front of the landing gear feet.
View attachment 225661
Looking half decent.
View attachment 225663
…and half decent from another angle.
View attachment 225660
She now sits with some Lego variants (one knock-off) whilst I wonder what to do with her.
View attachment 225659
This build has also got me round to finishing another Crest I bought some years back.
An ugly 3d filament printed version bought cheap of the internet, which I covered in ducting tape - I believe this was used on the first prototype model, SFX artist John Goodson of ILM fame used for motion control test shots prior to production of the tv series.
Whilst I covered the model in the highly reflective tape, I never finished the stripes.
I will now complete this, ready for a model show in a few weeks time.
View attachment 225657
Another Crest model I have in the stash is a huge 1/18th scale version.
This requires at least lighting up and a few other donor parts, but won't be on the bench this year, but thought you might like see the size for comparison.
View attachment 225658
In conclusion the Mikro Model is not that bad, as long as you test fit everything beforehand.
I would certainly suggest cutting all parts out and study the fit much the same way as building a plastic kit.
Another mistake was made on one of the engines, I was so focused on finishing this model I made a boo-boo.
But she is finished, and will be donated to my friend, who hopefully will give her a good home.
Thanks for watching and all your kind comments, it was very inspiring to aid me back onto the bench.
That's some awesome and amazing work!


Thanks for sharing some of the details of your fixes very nicely done!
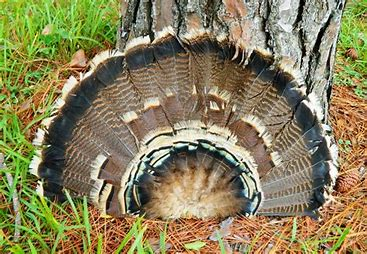
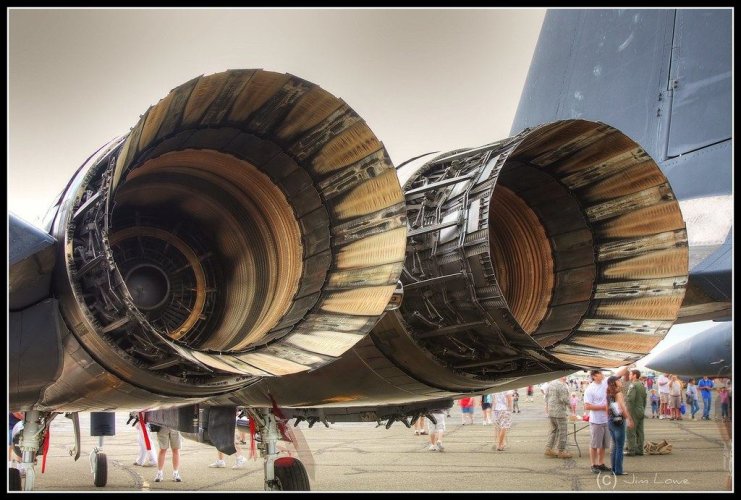
I do have a question about the "turkey feathers" and what you are referring to.
Looking forward to when you finish up the 3d printed model - which looks amazing!
That mega model version will be something to see at Comic Cons or the like when you are done with it.

Great job!

Last edited:
The model came out great!  The enhancements add a new layer to the build. This is a fantastic collection of Crests!!! I really like the reflective tape idea.
For what it's worth, there is another Crest in the Resource section:
Just to make the collection complete..!

For what it's worth, there is another Crest in the Resource section:
Just to make the collection complete..!

Thats a great looking model and you added some great fixes. It's a very interesting model to build thanks for sharing your thoughts width us.
I agree with all the above, nice job,
anyway what are you complaining about, half decent from one side and half decent from another angle makes it (at least by my calculation (1/2 + 1/2 = 1))
a full decent Model !!

anyway what are you complaining about, half decent from one side and half decent from another angle makes it (at least by my calculation (1/2 + 1/2 = 1))
a full decent Model !!

Thank you @Sky Seeker - in reference to Turkey feathers, the rear blades which expand and contract over the rear of most fighter jets.Chuffy,
That's some awesome and amazing work!
Thanks for sharing some of the details of your fixes very nicely done!
I do have a question about the "turkey feathers" and what you are referring to.
Looking forward to when you finish up the 3d printed model - which looks amazing!
That mega model version will be something to see at Comic Cons or the like when you are done with it.
Great job!

I'll add the 3d printed finished model to this thread when done... the Meg, may take longer.
That destroyed model, was a superb piece of tongue in cheek modellingThe model came out great!The enhancements add a new layer to the build. This is a fantastic collection of Crests!!! I really like the reflective tape idea.
For what it's worth, there is another Crest in the Resource section:
Just to make the collection complete..!

Cheers and appreciated my fine fellowThats a great looking model and you added some great fixes. It's a very interesting model to build thanks for sharing your thoughts width us.
Thank you, @thegreek270 I love your equation... I was never any good at mathsI agree with all the above, nice job,
anyway what are you complaining about, half decent from one side and half decent from another angle makes it (at least by my calculation (1/2 + 1/2 = 1))
a full decent Model !!

