Pzkpfw. I Ausf. A, Orlik, 1:25

snake7

Well-Known Member
Thanks Mijob and Zathros

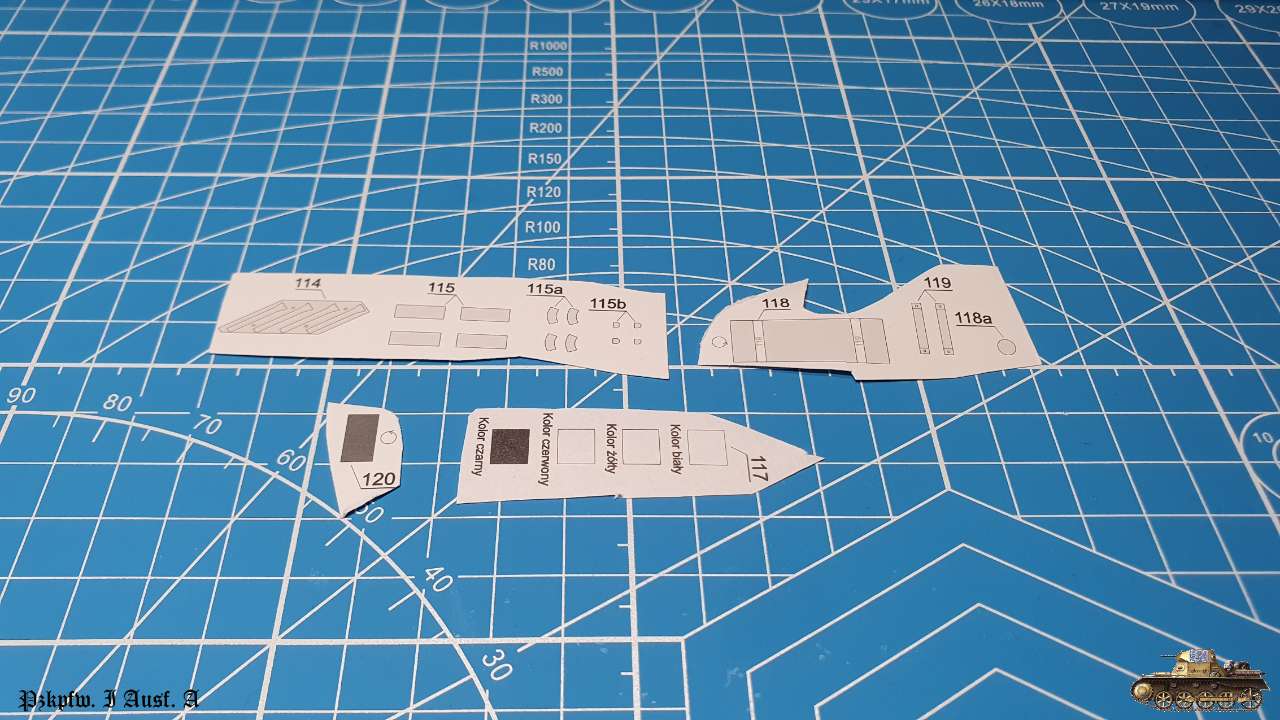
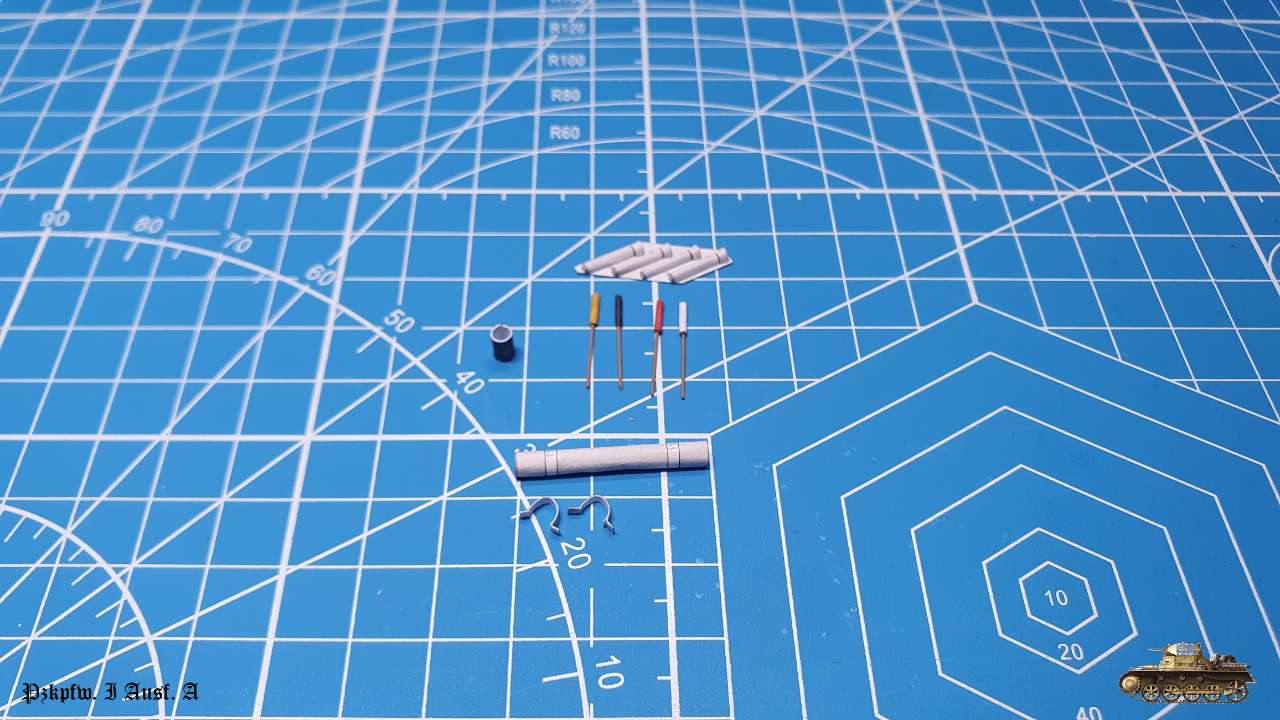
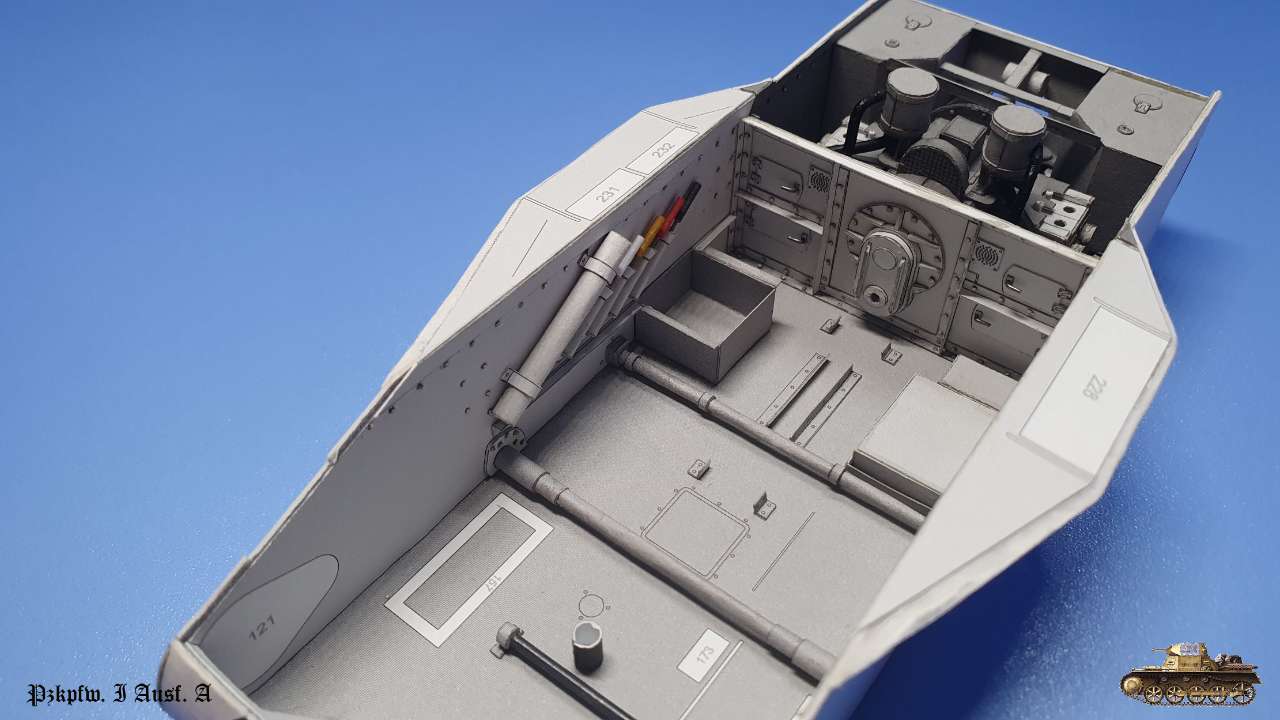
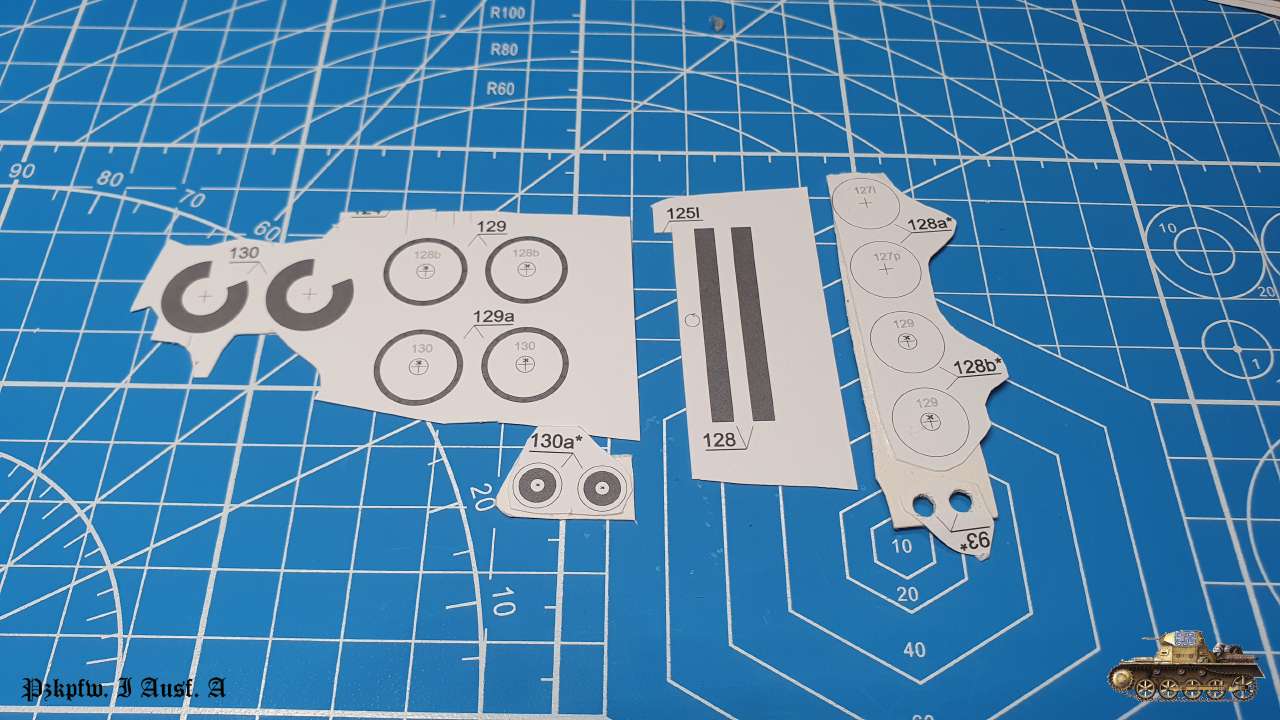
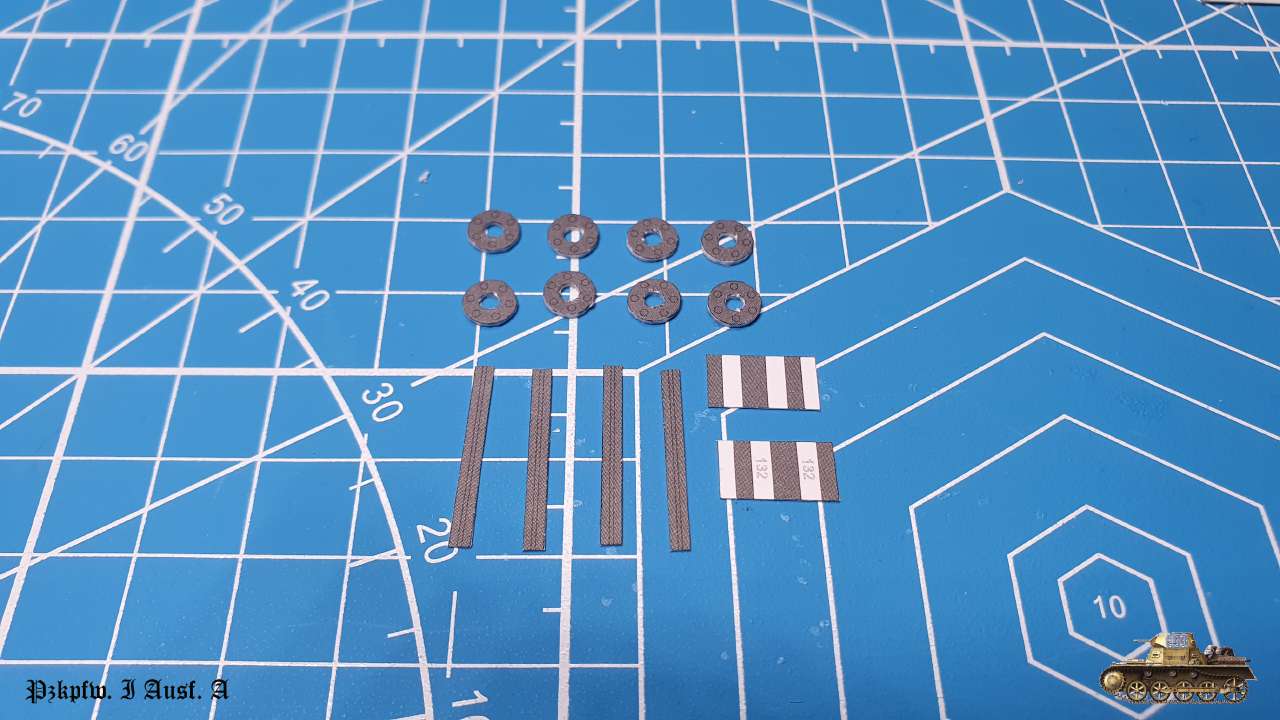
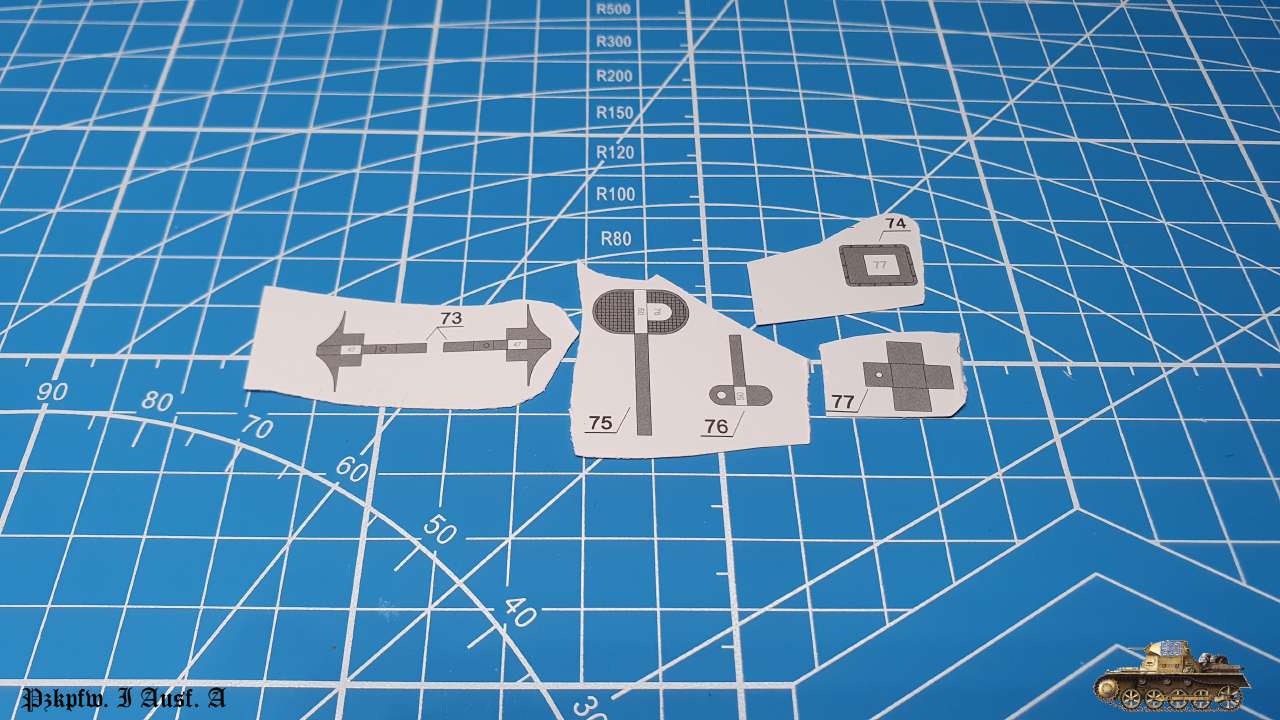
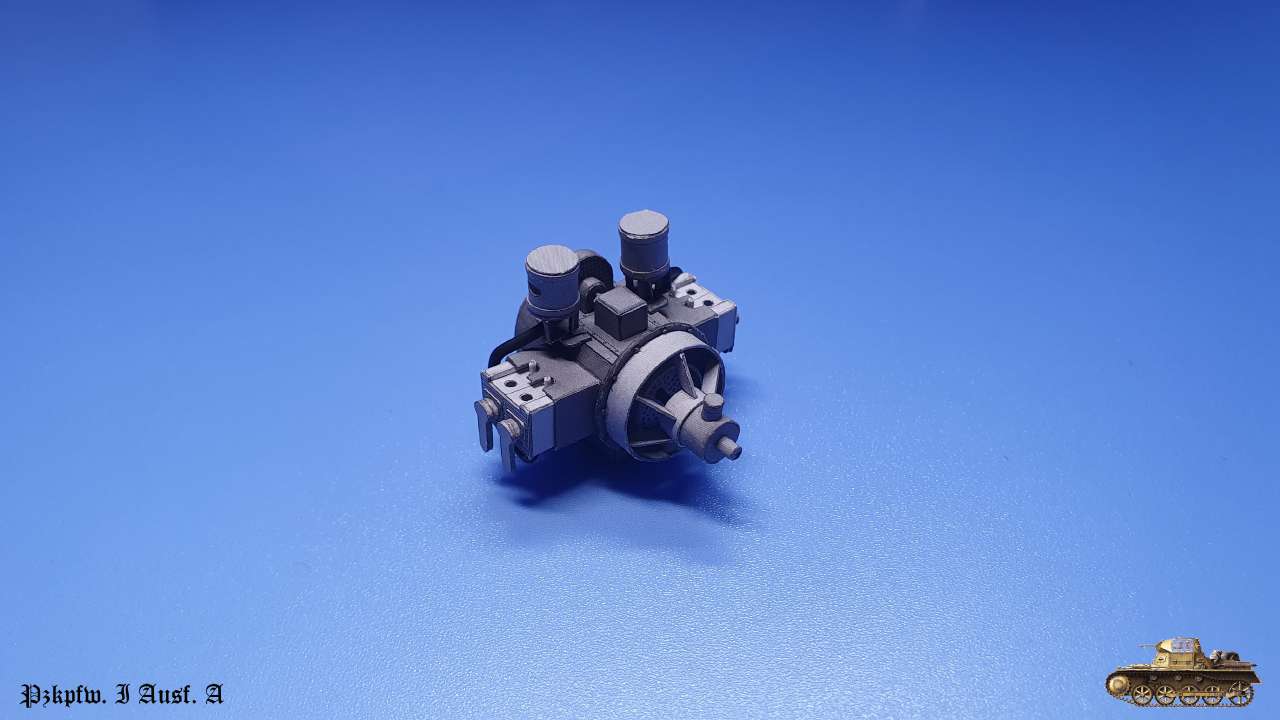
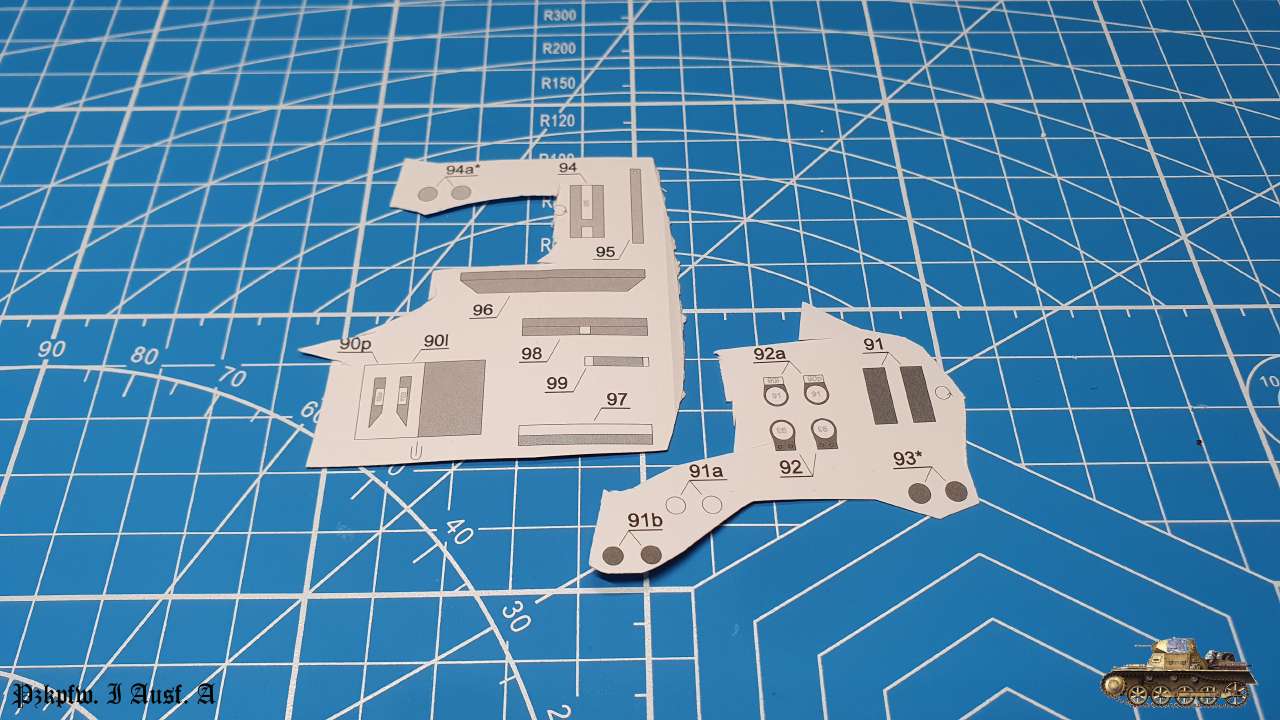
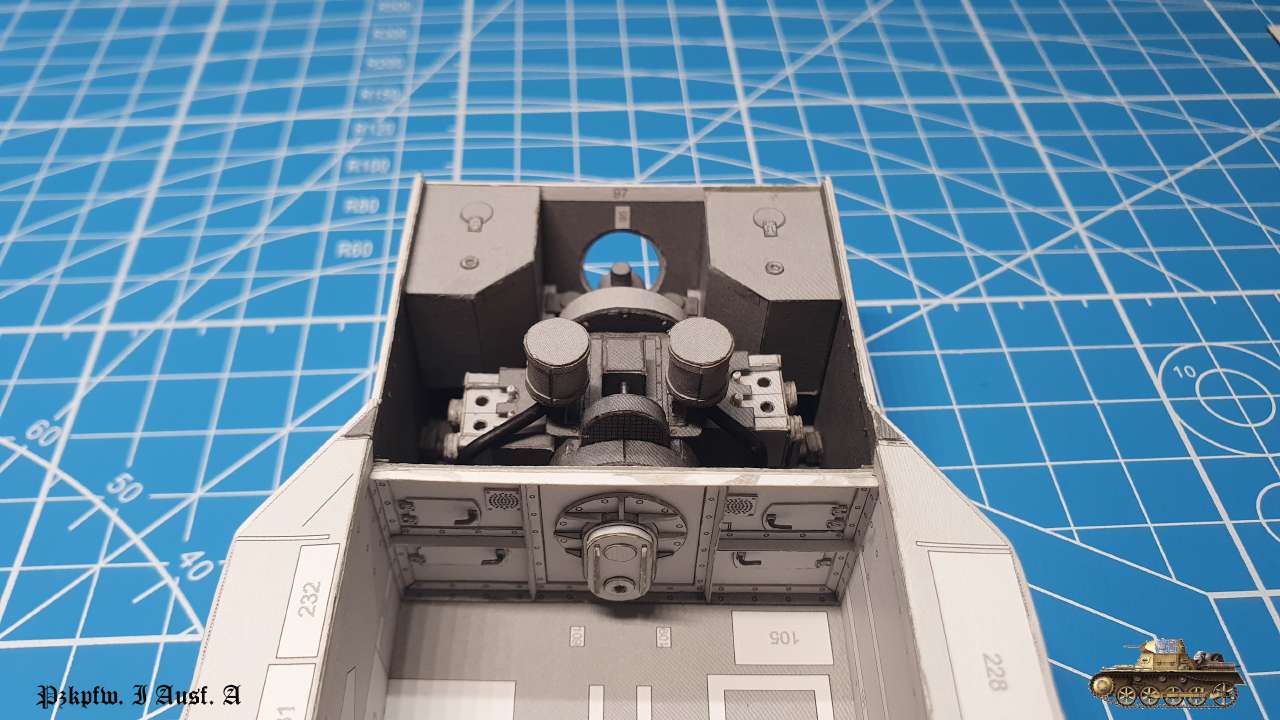
Additional parts for the engine

WchRF4.jpg


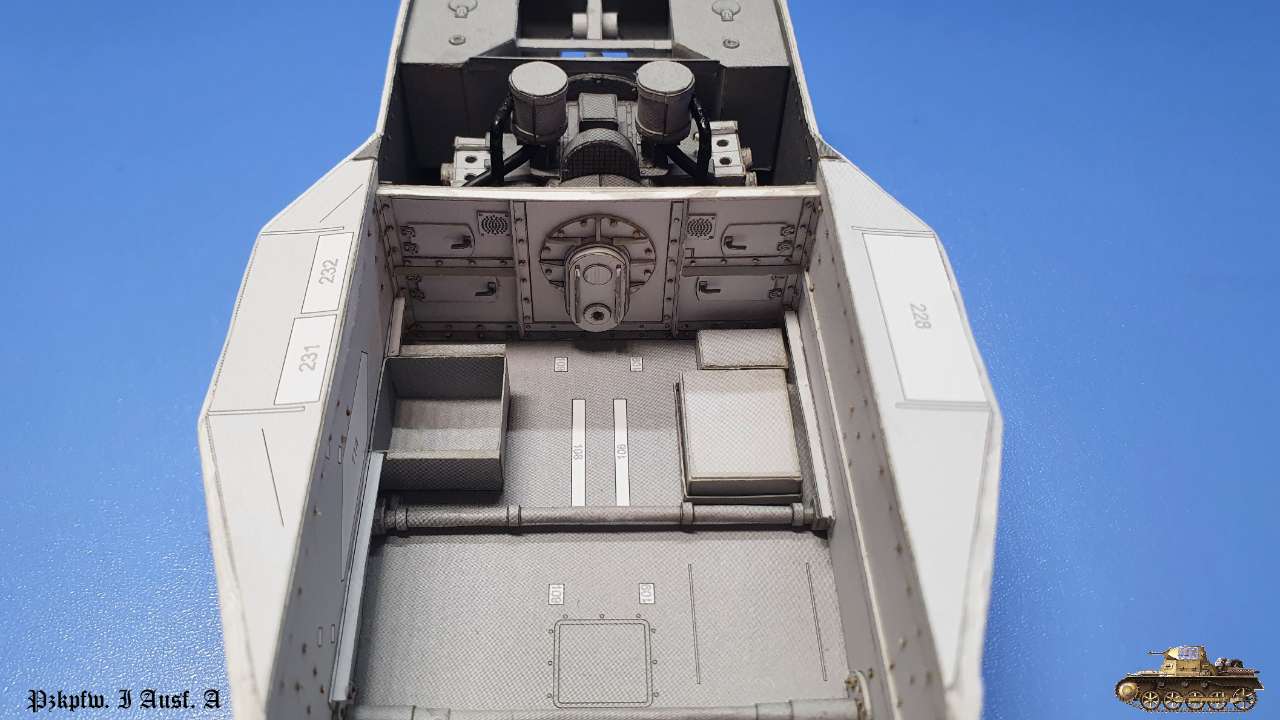
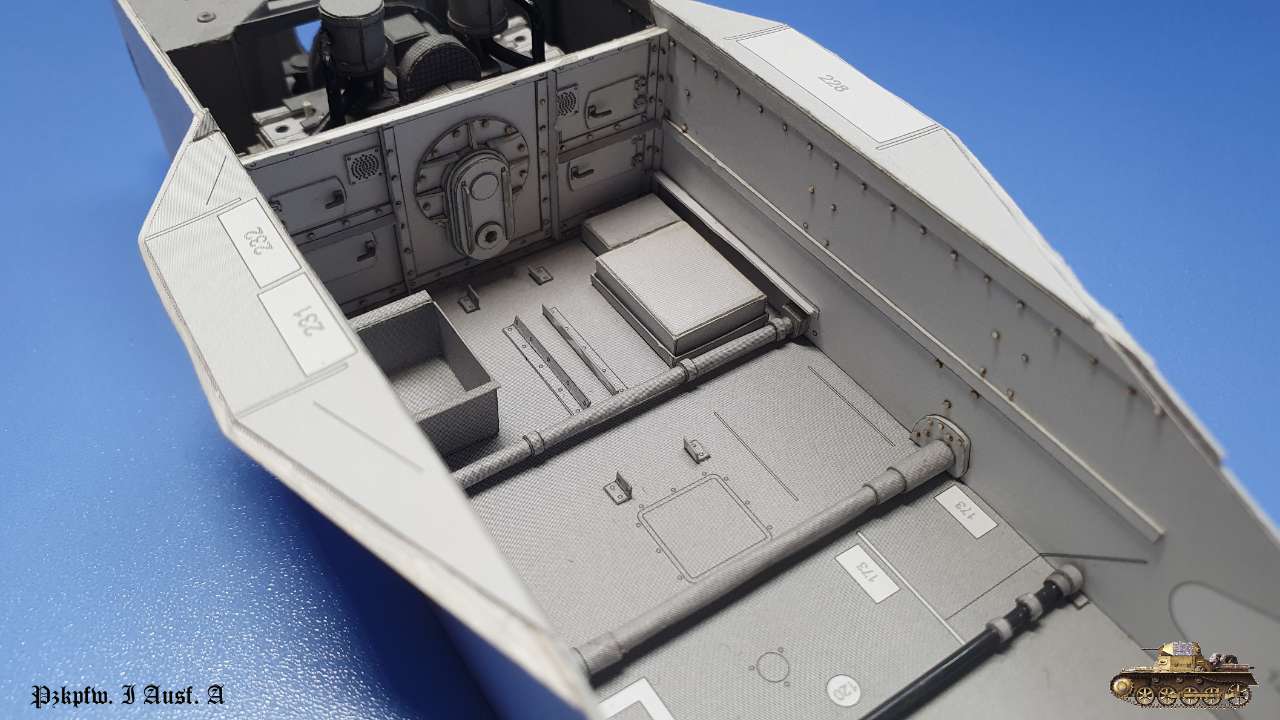
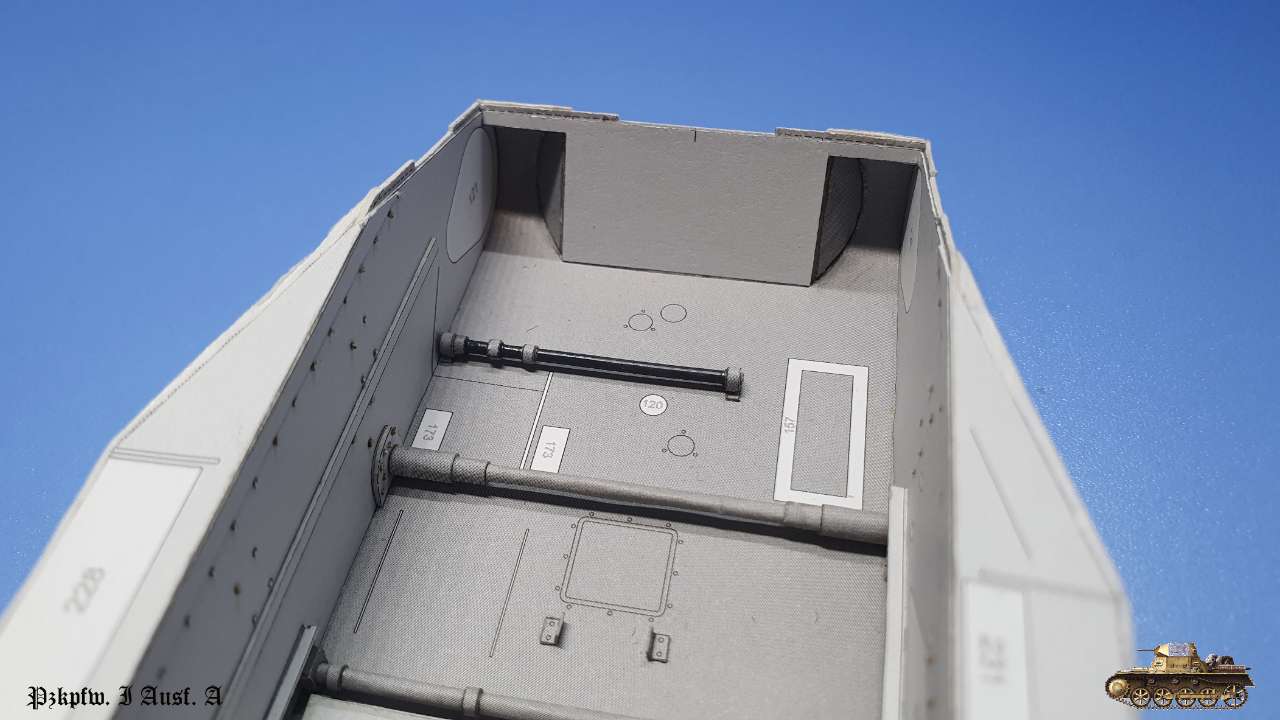
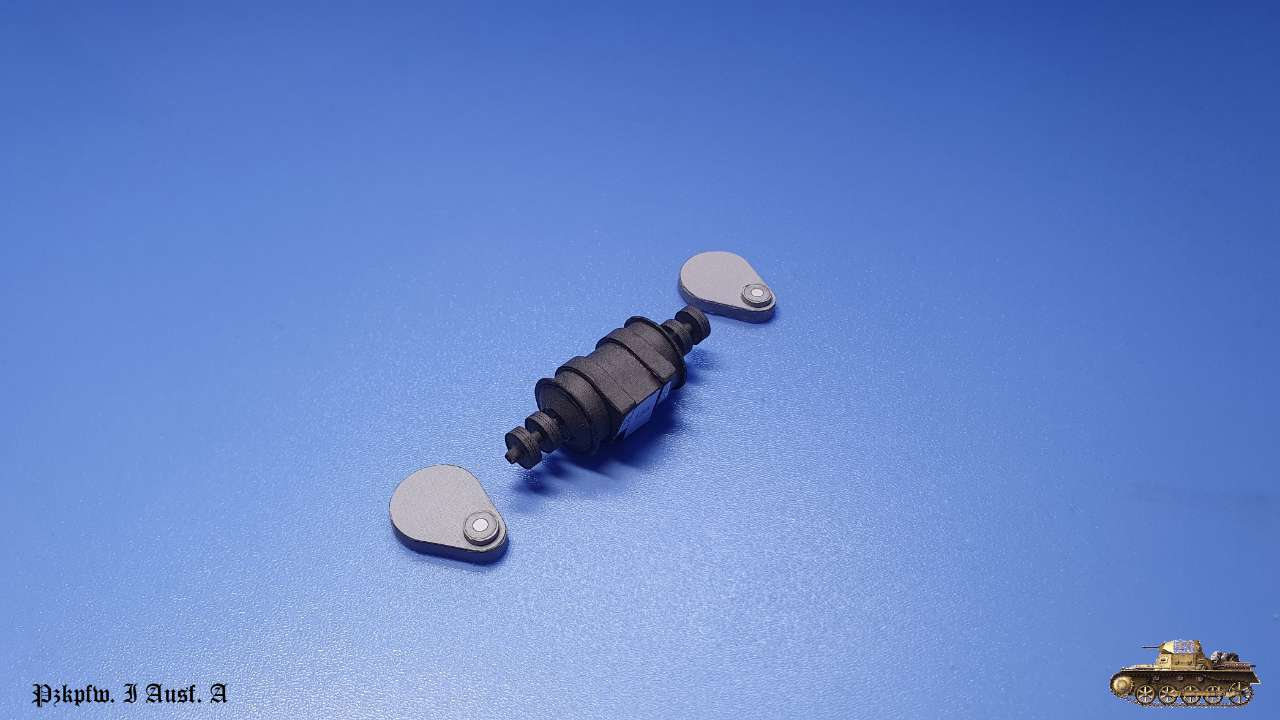
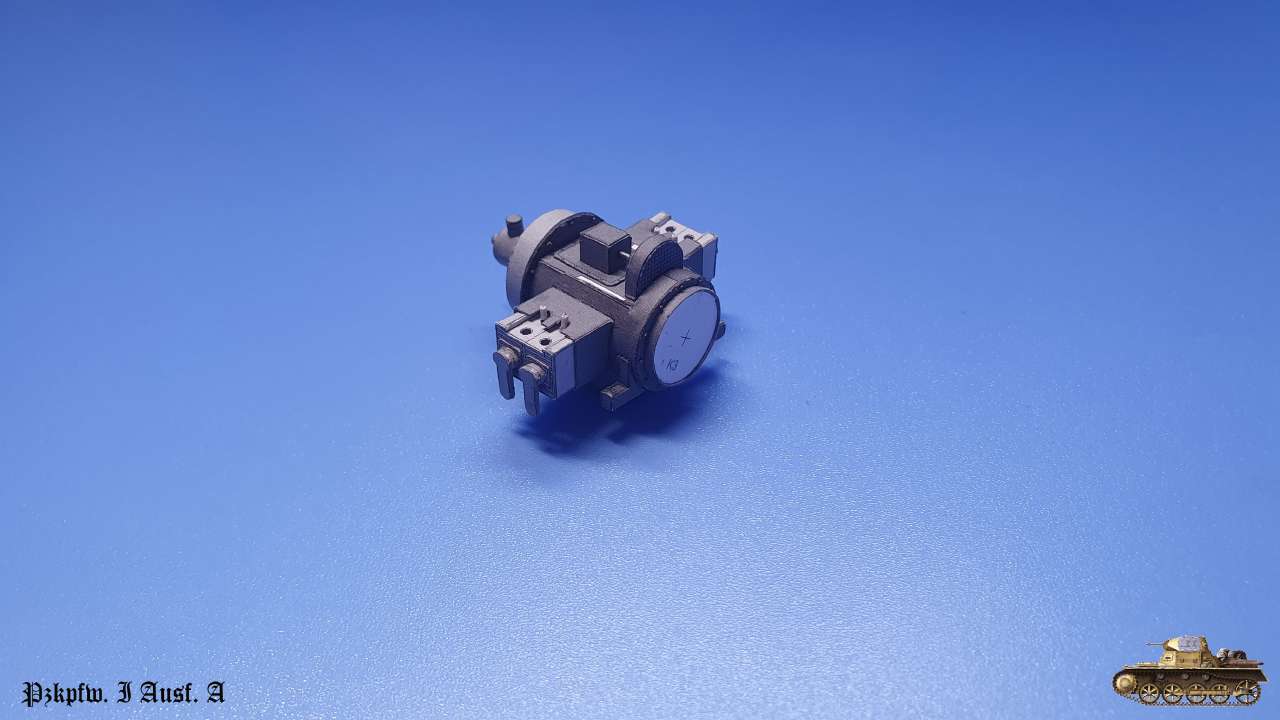
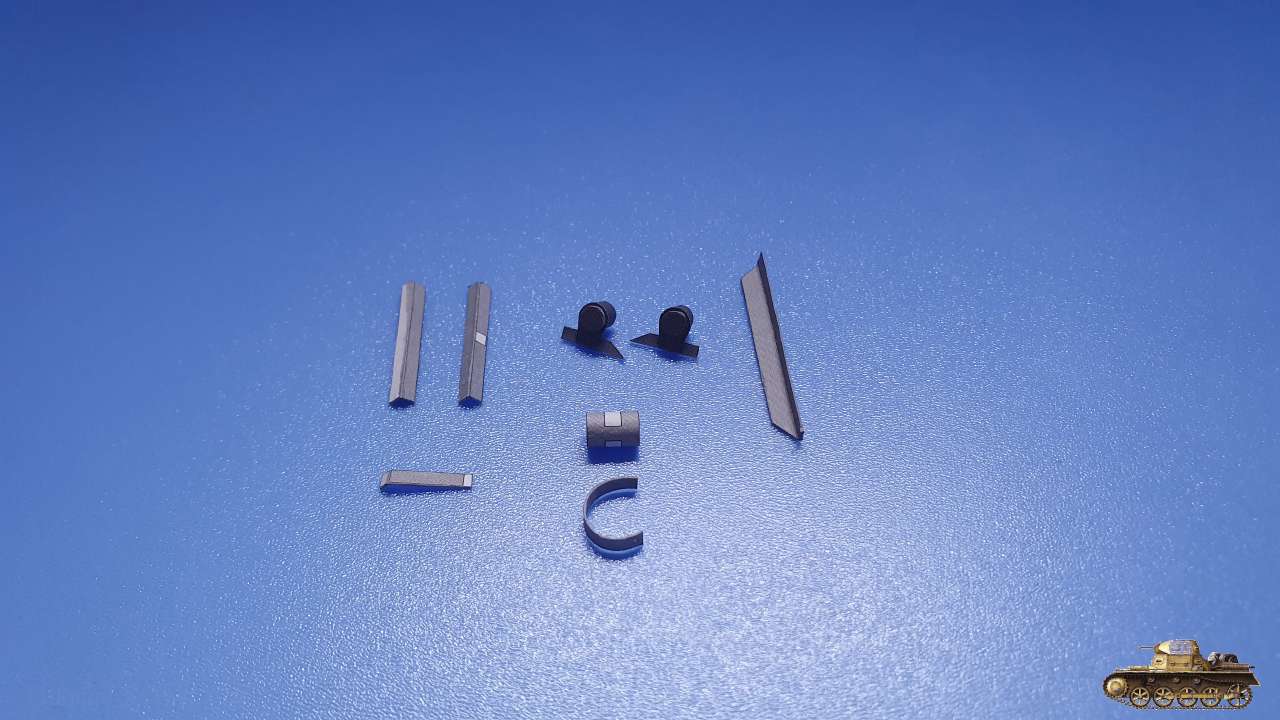
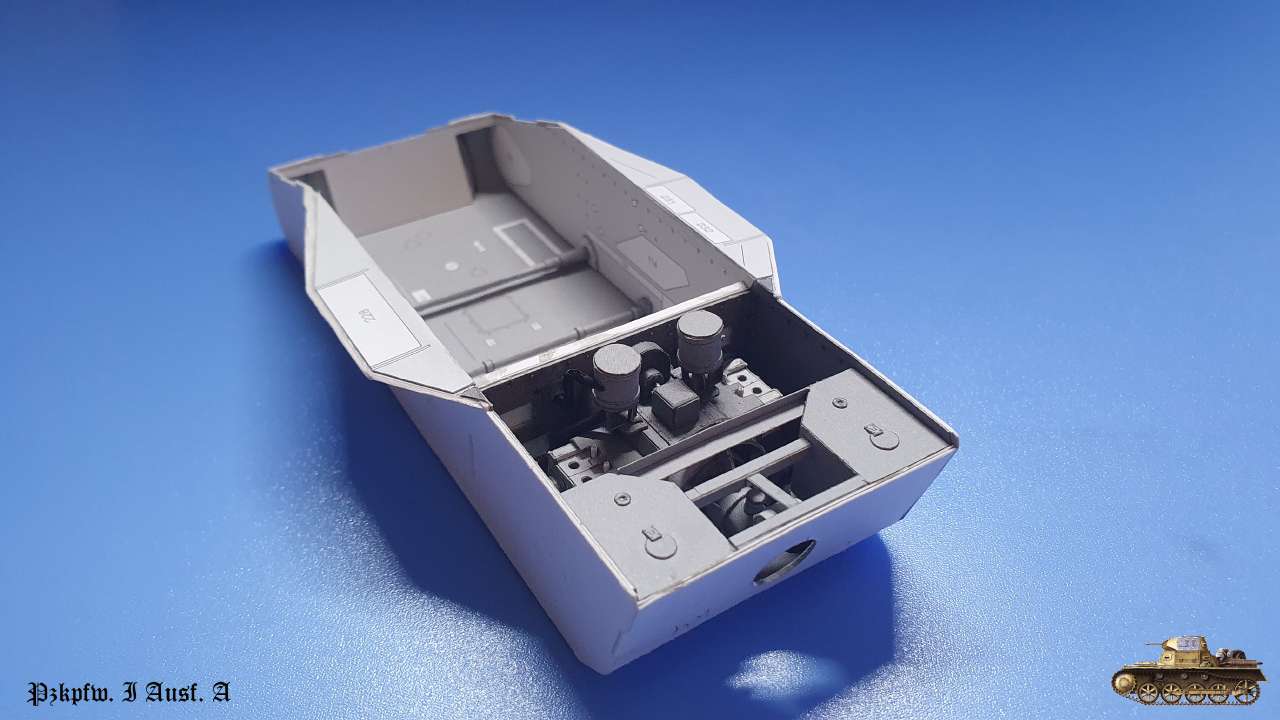
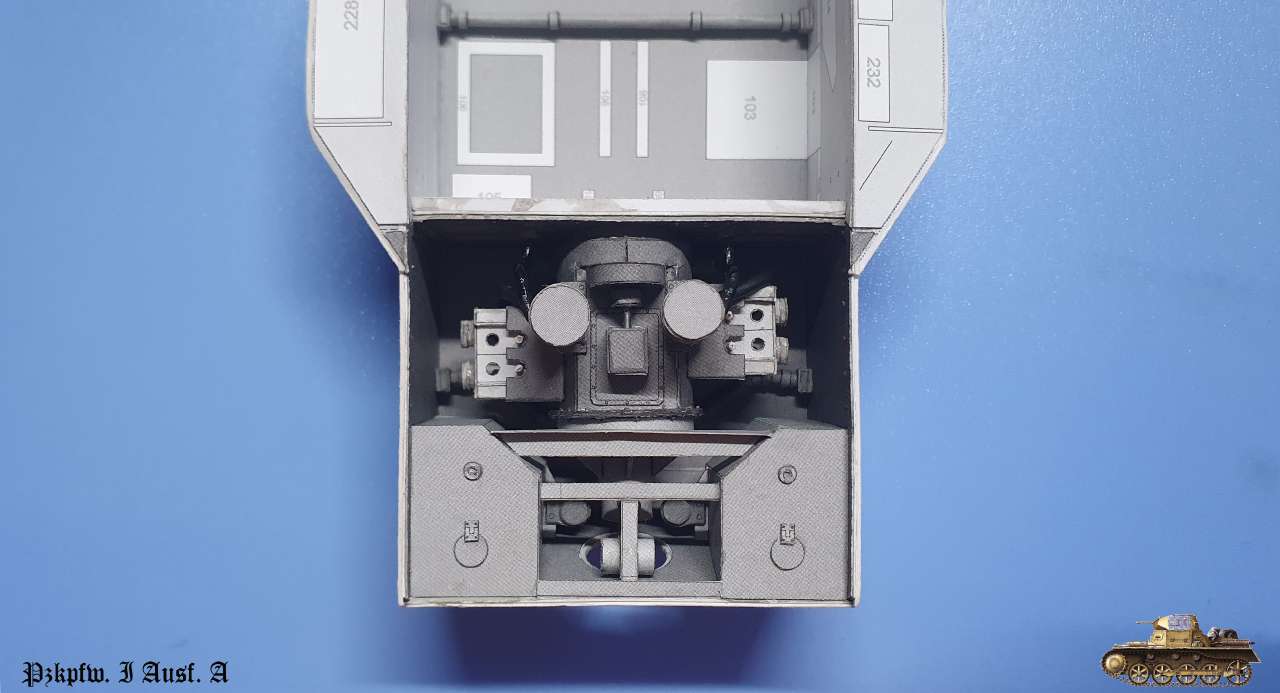
Power unit and engine mounts

FEOwpz.jpg


KW1W1I.jpg


DT7LxQ.jpg


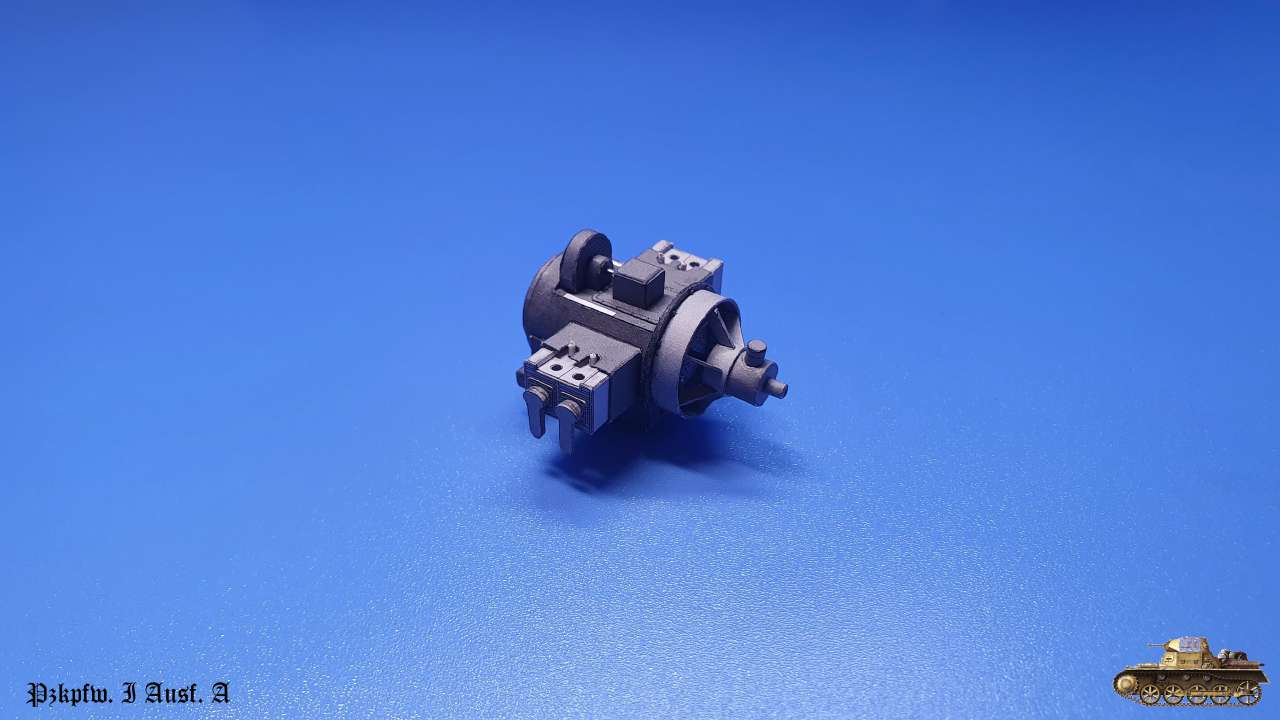
Now i got exact position of engine mounts on the floor

mFZlnL.jpg


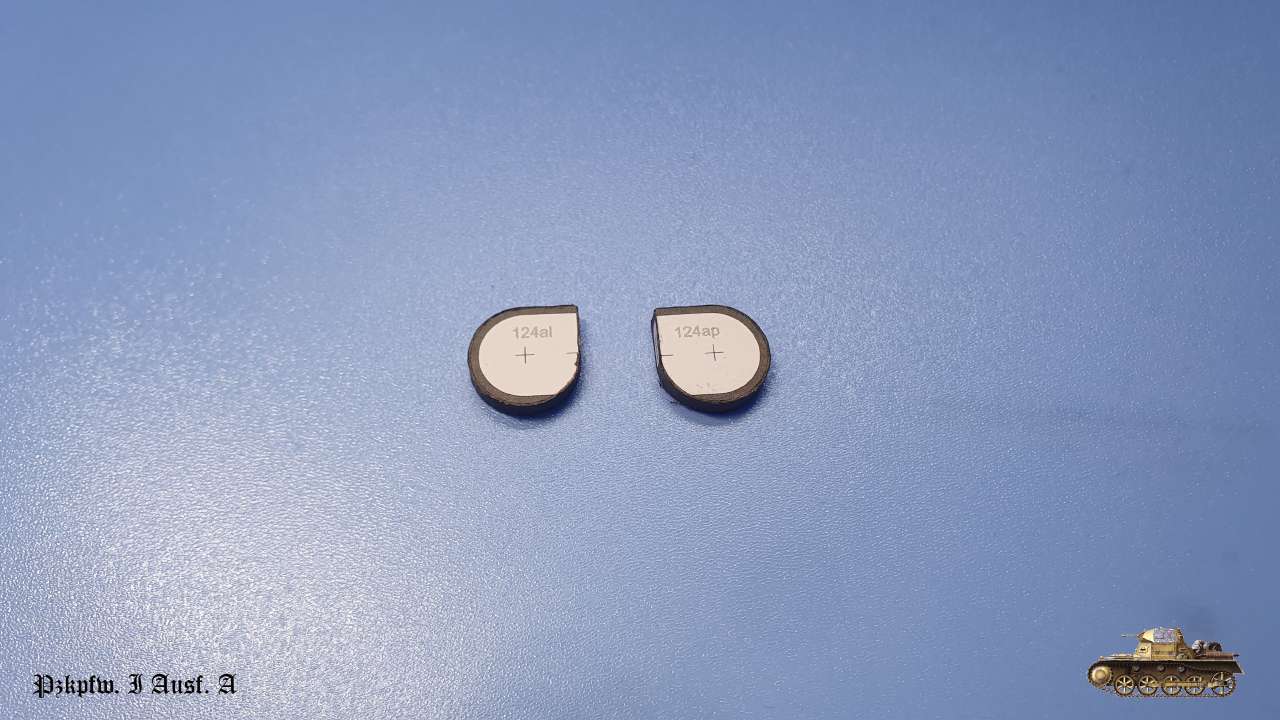
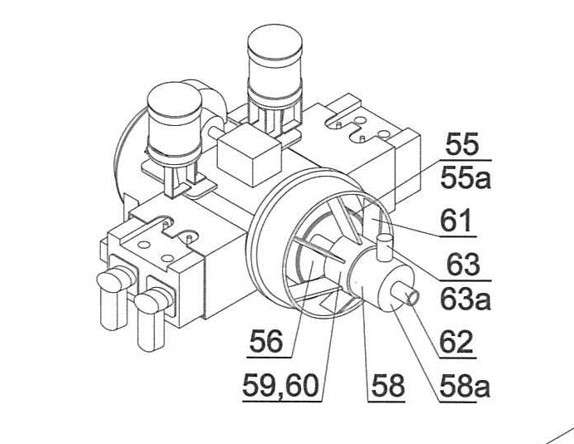
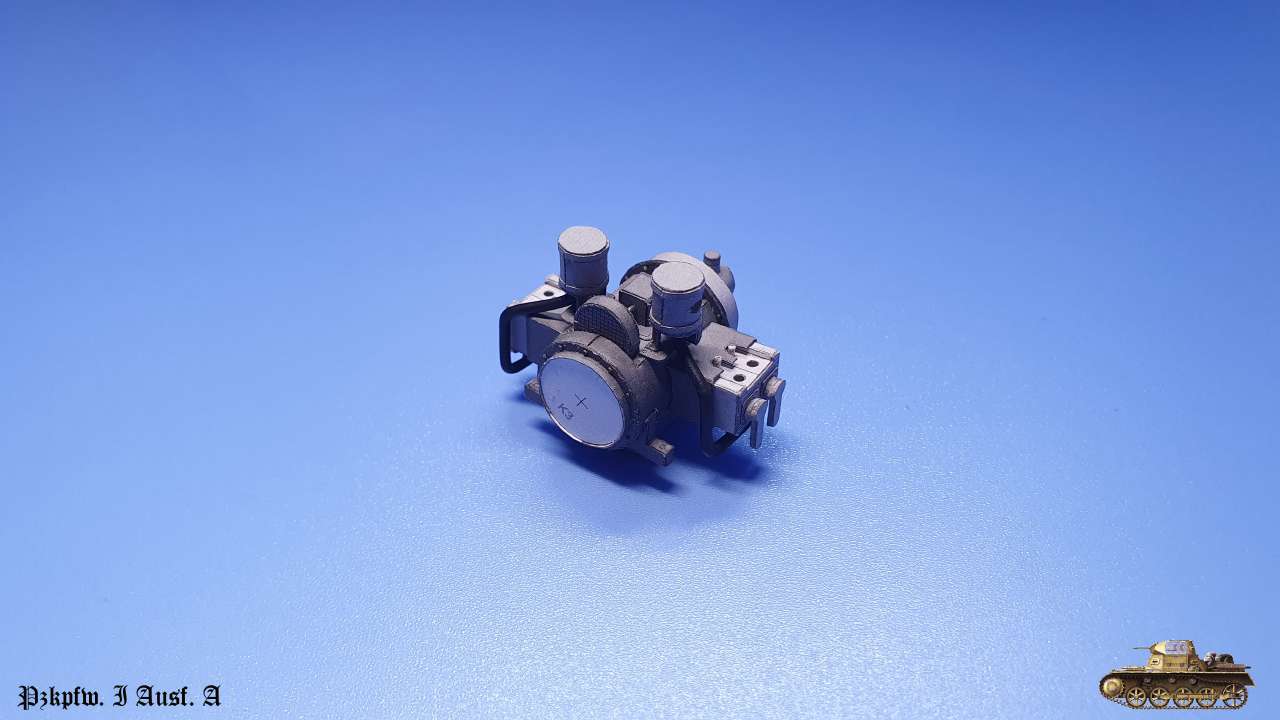
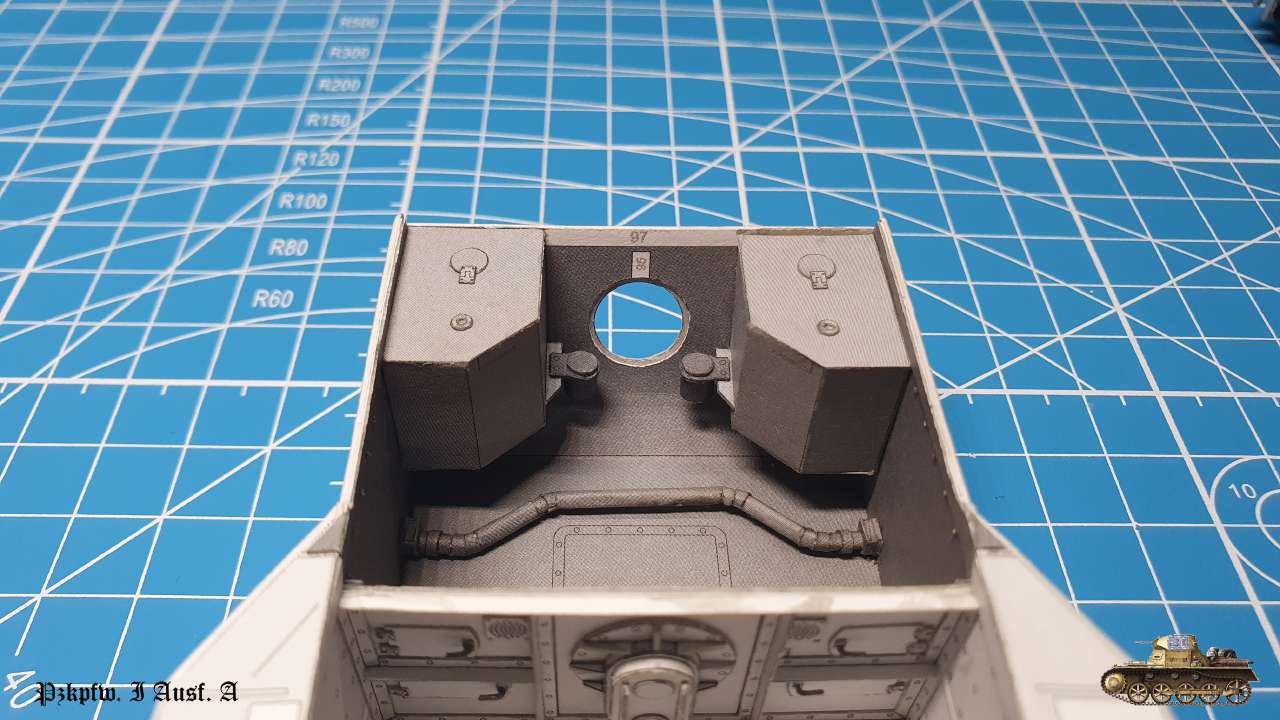
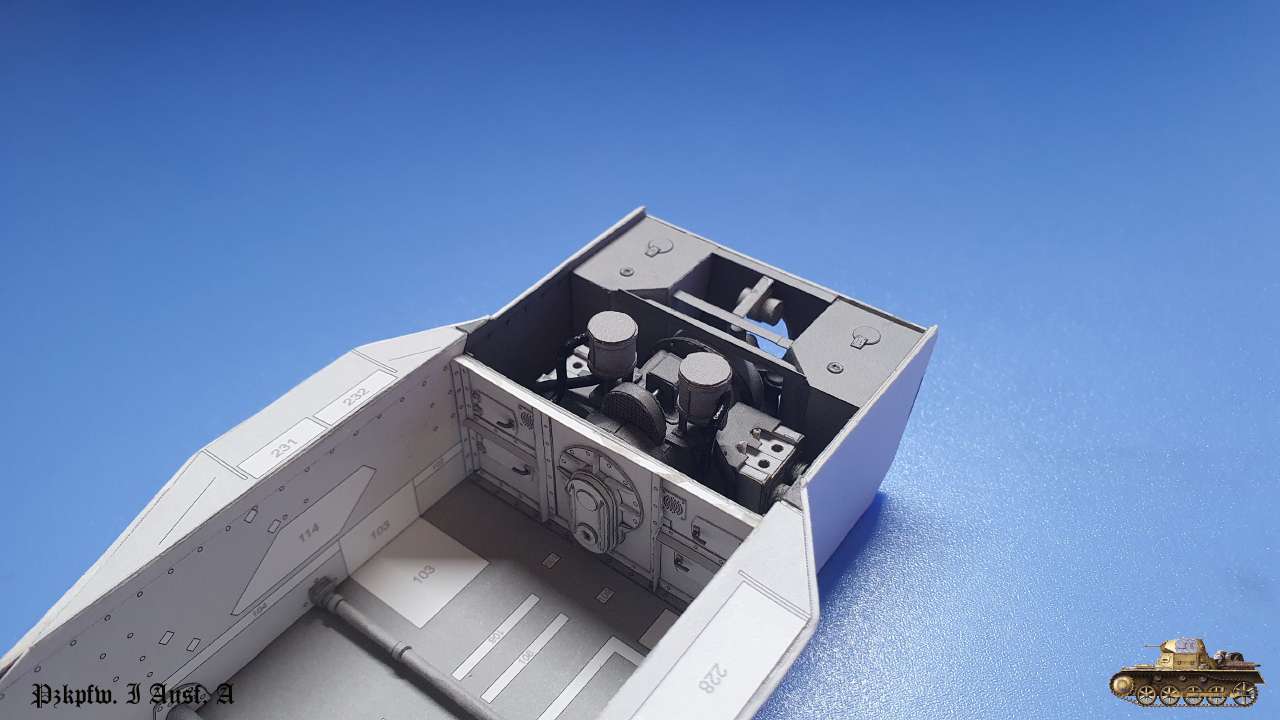
Air filters with mounts
Tubes from air filter to cylinder were maid from wire with isolation
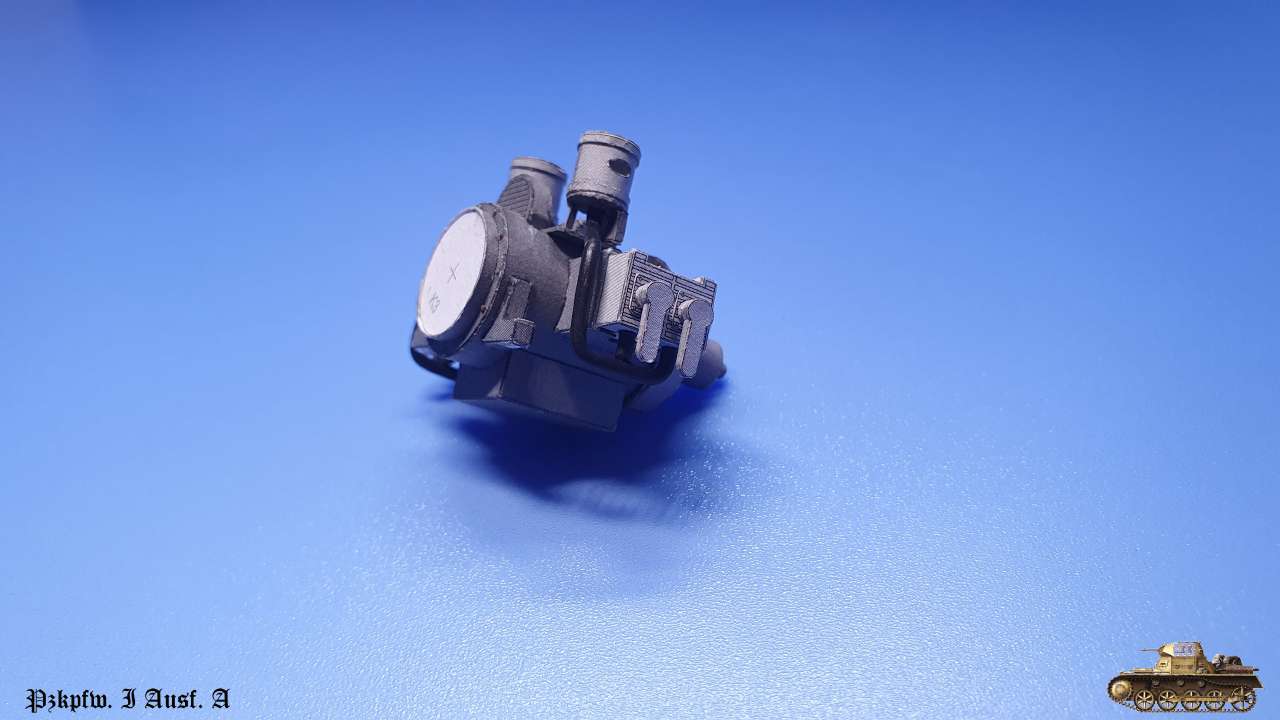
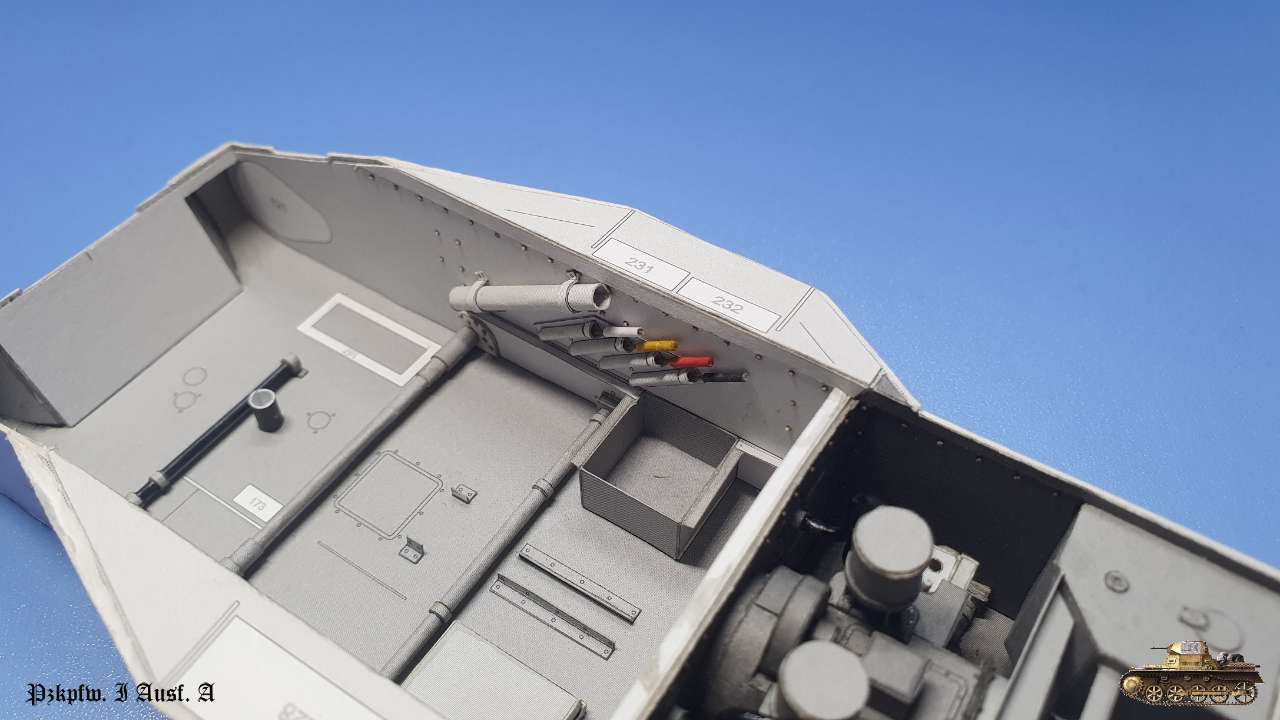
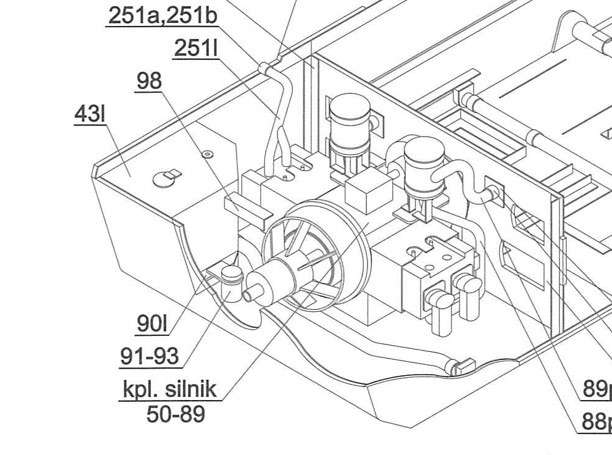
GUiv8c.jpg


kLx76M.jpg


jnbHto.jpg


SPtBkT.jpg


Errors:

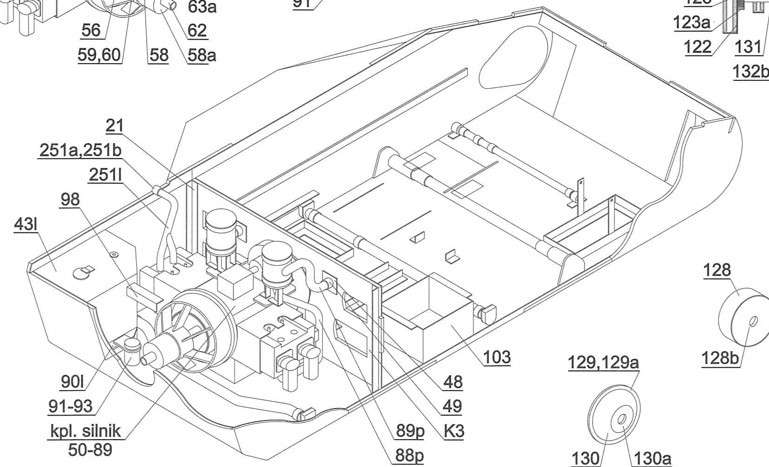
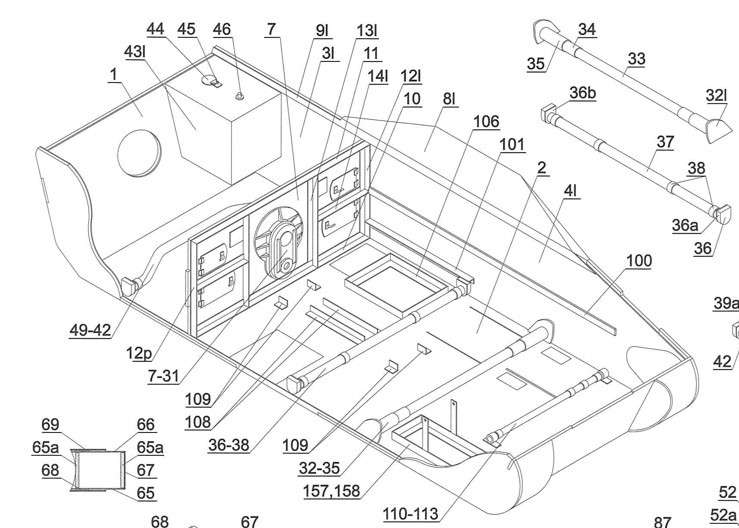
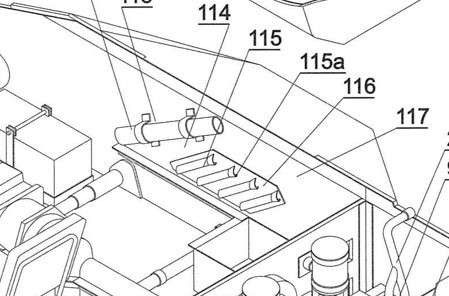
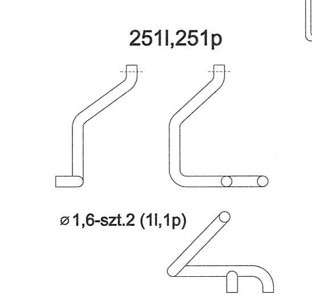
Tube pattern number confused with other tube pattern.
By 251l, 251 they meant 88l, 88p. And vice versa 88.
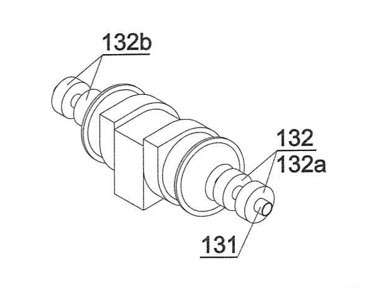
In addition this pattern was wrong - cylinders on both sides are asymmetrical and there is no chance you can use same pattern for both. Also, connections to cylinders must be vertical and not horizontal, as shown

jewCTv.jpg
 

snake7

Well-Known Member
Spent some time to finish glue all bolts in engine compartment and then came the time to put engine in!

iBYeZm.jpg


Prepared some more details: two fuel filters, one unknown small tank and some strengthening bars.

ytacLS.jpg


uCr8M0.jpg


To place engine and other parts easily, you need to do steps in right order.
First of all fuel filters

uBrtne.jpg


Then the engine, that attaches to firewall and seats on two floor mounts
(In retrospect, i think it was unnecessary to cut out the hole in firewall)

RCUZdx.jpg


Finally all the bars and two hoses from air intakes to air filters.
Engine compartment is finished, except exhaust pipes, that will be attached in later stage

SFq20z.jpg


lPxvNU.jpg


sNIRwj.jpg


Errors:
Confusing part 95 - strip that holds little tank and confusing drawings how to attach it. Sorted out by improvising.
Though this model was printed with double side color where needed, some parts are luck of it, like parts 96,97,98. Painted myself.
Part 99 a little bit short in length. Painted white glue mark and glued on remained edge.
 

zathros

*****SENIOR ADMINISTRATOR*****
Staff member
Administrator
Moderator
Great craftsmanship. I wonder where, and what that boxer 4 cylinder engine came from and what is may have been used for. Boxer engines are usually very reliable, as they can run on such a little bit of oil. The engine in the Piper I flew took 6 quarts, but was rated to fly with only two. That's pretty incredible, but since there's no sump, the cylinders are always getting any oil in the crankcase. Today's fun fact. ;)
 

snake7

Well-Known Member
Like i wrote before, they converted engine from Krupp Protze track. This was a regular petrol engine with about 60 hp.
Great craftsmanship. I wonder where, and what that boxer 4 cylinder engine came from and what is may have been used for. Boxer engines are usually very reliable, as they can run on such a little bit of oil. The engine in the Piper I flew took 6 quarts, but was rated to fly with only two. That's pretty incredible, but since there's no sump, the cylinders are always getting any oil in the crankcase. Today's fun fact. ;)
 

zathros

*****SENIOR ADMINISTRATOR*****
Staff member
Administrator
Moderator
I cannot find any pictures of the actual motor. Considering it was a common flat 4 engine, you think there would be one out there. 60 hp doesn't seem like much horsepower. I imagine this was almost a "tankette', it carried machine guns, no large guns, I don't know if there were sub models, they put anything on everything back then. Great job!! :)
 

snake7

Well-Known Member
I cannot find any pictures of the actual motor. Considering it was a common flat 4 engine, you think there would be one out there. 60 hp doesn't seem like much horsepower. I imagine this was almost a "tankette', it carried machine guns, no large guns, I don't know if there were sub models, they put anything on everything back then. Great job!! :)
Here you go :)


Yep, this was bicycle on tracks :biggrin:

There were several sub models on this platform, like flamethrower instead of submachine guns, or different kind of submachine gun (Italian version), commander vehicle without turret
 
Last edited:

zathros

*****SENIOR ADMINISTRATOR*****
Staff member
Administrator
Moderator
Here you go :)


Yep, this was bicycle on tracks :biggrin:

There were several sub models on this platform, like flamethrower instead of submachine guns, or different kind of submachine gun (Italian version), commander vehicle without turret
Wow! I have http sites blocked as they aren't secure, but that engine looks so clean, inn terms of engineering, no bumps, or other things sticking out. Very compact. It must have gotten hot though, sucking air in through the engine compartment, that probably really took it's toll on these engines. I used to have a lot of Volkswagen Beetles, very economic cars, you had to have all the shrouds around the engine in place or they would just seize up. Even with the shrouds, at 40K miles they were tired. I remember telling a friend that "I beat the sh*t out of this thing", he commented back, "It's the only way you can get anywhere!". Thanks for the pic or the info. I wouldn't want to be in one of these things in war, frankly, I never want to go to war! ;)
 

snake7

Well-Known Member
I'm sorry for late update.
Suddenly, there is some other major project in my life, that i need to route my free time to, so progress on Panzer I slowed down.
But i managed to glued rest of rivets in fight compartment, though this was pain in the @ss. 0.6 rivets easily delaminate and hard to work with.
The method i choose was: paint whole strip->cut->glue.

After that i added rails for compartment floor and some crates of ammunition
That's all for now... and i don't know when there will be next update, but please be patient and stay tuned :rolleyes:

XwYDoE.jpg


LchcwP.jpg


KkAJrk.jpg


lNkeKn.jpg


QWZeF7.jpg


Errors:
None
 
Last edited:

Revell-Fan

Co-Administrator
Staff member
Administrator
Moderator
Absolutely stunning! Keep up the great work and take all the time you need. This is not a race and it would be a shame if this fantastic model would suffer from rushing it. :)
 

zathros

*****SENIOR ADMINISTRATOR*****
Staff member
Administrator
Moderator
You slowed down, but made scale rivets? That's slowing down? :)
 

snake7

Well-Known Member
Hi all!
As i said before, probably until the end of the year i will be busy with other interesting things, but i managed to find some time in between for the model.
So next in main compartment are supportings for drive shaft cover and pedal rod

1s0RvK.jpg


0GKgri.jpg


zXSnFG.jpg


02uW95.jpg


Then set of signal flags and some tube for... maybe rocket or something. Unfortunately, i wasn't able to find any drawings/pictures of interior with explanations, so it will be all guesses :)

IlH4gg.jpg


atdojG.jpg


gqclH6.jpg


qgyUhh.jpg


BDR0BJ.jpg


Errors:

Part 116 on drawings page shows to make 5 wire parts, but you need only 4, for flag rods.

In this stage i also want to notice, that there are a lot of little mistakes in drawings, like overlapping isometrical view or like in drawing above that shows flags set and you can notice that all the pointers are offset
Little weird after Sherman :rolleyes:
 
Last edited:

snake7

Well-Known Member
Thanks Chufffy.
In a matter of fact, my other interest now is moving to new house :biggrin: and it consumes all my free time.
But i had a little break in between, so a there is a progress with Panzer I.

Main transmission mechanism.
A few sub builds, that parted to more sub builds. :)

c6zlGC.jpg


cvL1Zr.jpg


Steering clutches and brakes
Assembled each part separately and then connected together. Numbers on the side guided how to connect

Kq22Ij.jpg


uSqOtm.jpg


weI3Vl.jpg


37Ygy0.jpg


GLUFdB.jpg


LTMo0w.jpg


YB92kW.jpg


tLNwX5.jpg


izUnZT.jpg


O49nZi.jpg


132kwI.jpg


Errors:

none
 
Top