Model Of The Month: Time to build Union Station!

Bill Nelson

Well-Known Member
a_union_stations_skylightf_rames_a1.jpg

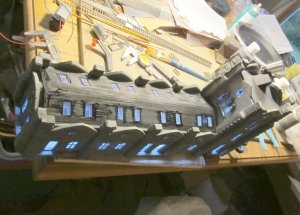
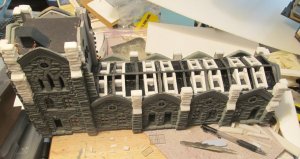
I made frames for the skylights; am going to use grant line casement windows. Other than the Central Valley steel girders, stairs and railings in the tower elevator, they are the only commercial parts. once the glue is fully set, I'll cut out the foam core at the bottom of the skylight wells , and paint the wells white, to help reflect the light from the LED light bar.


Then I'll deck the roof with stripwood, inserting the grant like windows (now skylights) agter they have been painted and glazed. May look at Hobby lobby to see if they have some copper foil I could make a copper roof from. or I may carve foam shingles and paint them gray with a purple tint to look like some really neat slate roofs I have seen.


Nelson
 

Bill Nelson

Well-Known Member
a_us_roof_and_skylights_2a.jpg
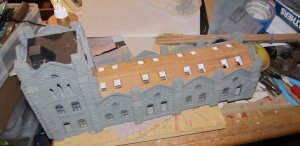
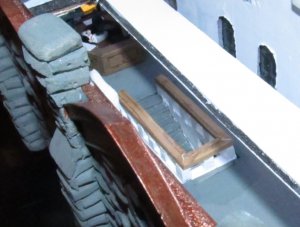
I have started building the wooden decking that will suport what ever roofing material I end up using. I have started framing in the skylight openings to fit the Grant Line window castings I'm using for the skylights. these are the first comercial parts used on the exterior of this stucture. I used some Central Valley steel beams, stairs and railings in the interior of the tower.

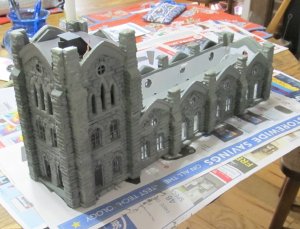
I painted the unpainted foam stones. there are some collor diferences in the photo. the pewter gray acrylic pait is lighter and shinier before it dries; and I couldn't wait to take a photo.


Nelson


a_us_with_painted_stones.jpg
 

Bill Nelson

Well-Known Member
a_us_sky_light_openings_a1a.jpg

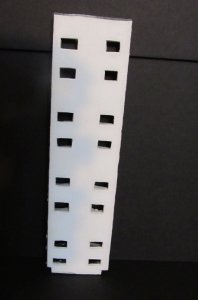
I left out a stup this is the ceiling side of the roof stucture, after the skylight wells had been cut out, and the inside of the skylight wells painted white; to reflect light beter, as well as hiding the fact they are made ofut of foam, and foam core.
 

Bill Nelson

Well-Known Member
a_us_roof_decked_a1a.jpg I build very tight fitting frames around the Grant Line window castings I will use for the skylights, and then decked in the rest of the roofing. Next I will paint this wodden decking black, and that will be the base for the final roofing material. the step after painting the decking black will be to paint the Grant Line window castings, and glaze and install the skylights.. the bright LED;s will make the skylights pop!!
 

zathros

*****SENIOR ADMINISTRATOR*****
Staff member
Administrator
Moderator
Congratulations on "Model of the Month!". This is truly a work of art. I learned a lot in that thread. You are among the top tier modelers here, don't be modest, it's true, and takes nothing from anyone else. You give much. :)
 

Bill Nelson

Well-Known Member
a_union_station_with_roof_at_j_street_yard1a1.jpg

Thank you Zathros, I share most of what I do, and I like to show every possible step of what I do; hoping that by showing all the steps, even two headded monster projects like this one can seem more possible. from looking at the dates on the posts, I have been working on this project, off and on, for over two years now.

I try to share all of the steps, because a lot of people have taught me a lot of tricks; and I want to share those tricks, and a few I have read about. It seems our trafic has fallen off; but this format is easier to use tha others I have seen; so I stubornly post all my stuff here, hoping folks will find it, enjoy it, and either leard something, or be encouraged to try something.

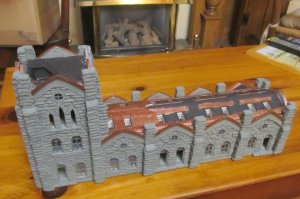
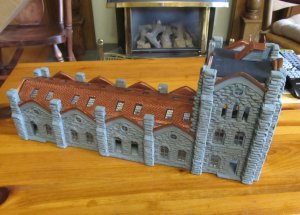
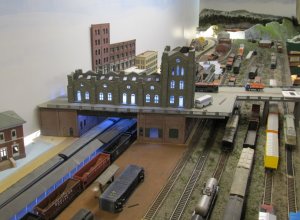
I carried the station to the club, to test it in place with the new roof. the brightly painted white ceiling helps magnify the lighting effect from the LED lighting strips, and as I hoped, the skylights look impressive. the two closest to the tower have the Grant line window castings in them and look really good. I took this photo without the flash. this empasizes the LED lighting, but hides some of the stone detail.

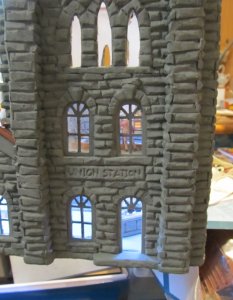
from a stricly scale point of view, I have too much irregularity in the stone work, and too much reilf in the stone walls, but artisticly it works. I have the stone work essentially done everywhere but the back side of the tower, which does not show in this setting. I will complete it anyway, a signature structure like this, hopefully will out survive it's current location, so one must provide for the possibility it may be viewed from a different angle later. that sone work is easily matched right now, but if material availability changes, it may be a bigger challenge later.


Bill Nelson
 

zathros

*****SENIOR ADMINISTRATOR*****
Staff member
Administrator
Moderator
The Train traffic has fallen off, but the forum in general is growing. I think if the Train enthusiasts realized how much more can be done here, files shared through P.M.'s, for instance, they would find the forum to be a great software package. Regardless of all of that, recognition of your masterful work, technique, and all around friendly, helpful person, is demonstrative of your place in this forum, being that of a foundation cornerstone. I'd like to get these train guys back, and some new ones, so they can see for themselves what's going on here is a great thing. What you show applies to all forms of model building, so you are not alone, and your techniques are well appreciated. :)
 

Bill Nelson

Well-Known Member
a_skylights_in_a1b.jpg a_sky_lights_ina_1.jpg a_u_s_copper_roof_1a1a.jpg

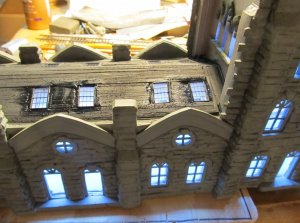
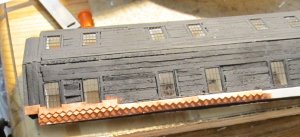
I was worn out and went to bead early last night. Woke up at six am to give the dog his insulin shot, an new daily ritual, when I'm not allready up getting ready for work. odlly enough I felt wide awake, and went to work on union station fitting glazing in the remaining skylights, and pressing them in place. there were some small gaps in places, and places where the white paint from the skylight wells was visable on the top of the roof. I painted around the skylight frames with black aclryic paint to cover any white paint, seal any light leaks around the skylights, and to glue them in place.

I had bought some lazer cut french shingle material. I did not use it as there was much less amterial than I though in the packet, and I would have had to buy three or more packets. also the shingles where scale thickness, and I figured they would dissapear from the most likely viewing distance. I was at Hobby loby yeasterday afternoon, and I picked up a pair of pinking shears, sissors that cut with this zigzag pattern that makes such nice frech style shingles. I picked up a piece of poster board that I am cutting up to make shingle strips. the cardboard it too thick, but like my exagerated stones in the wall, this will help with the effect. sometimes scale sizes look best, sometimes we can cheat, and exagerate some things, and our eye likes it better, cause we can see detail our brain wants to see, where often times were they scale size, they would be invisable.


Nelson

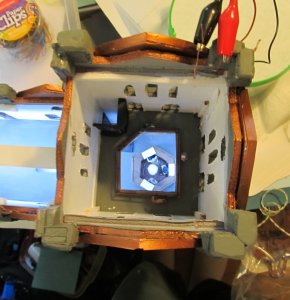
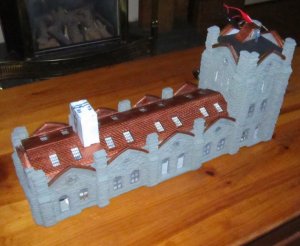
PS on the layout the building is plugged int a 12 volt circuit I built specifically for building lighting. Sticking out of the tower roof are two sets of wires twisted together. They complete the circuit to the tower roof, and the tower top floor which are removable for maintenance detailing and cleaning. I have a 9v battery set on those wires to light the LEDs on the workbench. on the layout it is brighter than this,
 

Bill Nelson

Well-Known Member
a_us_shingles_on_ridge..jpg


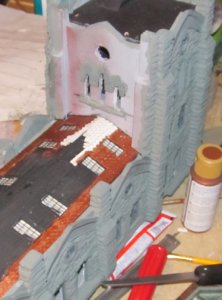
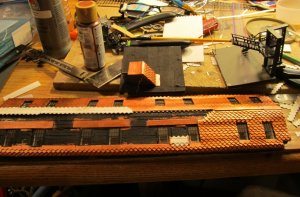
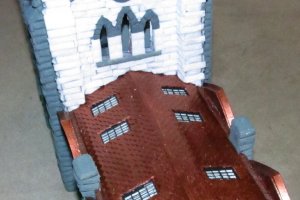
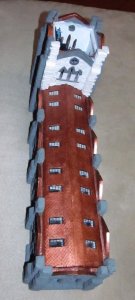
Have been going nuts with the cardboard shingles cut with a pinking shears to get the french shingle pattern. I am applying the shingles and then painting them copper with an acrylic paint from Hobby lobby. I forget the manufacturor, but the color is called old penny, and it is very convincing. I have enough on so I can start putting the stones on the back side of the tower. installing these things is adicting. It was hard to stop this AM; to go up to the RR room and clean track. Dr Tom came over to study my new set up. we were able to run trains in the new Harlow block, the Harlow yard block, and a part of the crooked creek block. lots of vacuming and track cleaning and lord knows what repair and maintenance needs to be done, found three broken olsder joint in just one hand laid switch. I hope the rest of them are in better shape.


Nelson
 

Bill Nelson

Well-Known Member
a_us_copper_trim_a1a.jpg

I liked the look of the copper french cut shingles so much I added coper trim to the gables. I think the roof on the stairway shed on the tower roof will get a copper shingle roof to. I will use cut up coffiee filter and black acrylic paint to do a tar paper roof on the top of the tower. Next time I make a ot of french styke shingle strips I will try to document the process with the camera, so I can share the process, as close as I have ever gotten to card modeling..
 

Bill Nelson

Well-Known Member
a_french_cut_shingles_a1.jpg a_french_cut_shingles_a2.jpg a_us_9_21_14.jpg
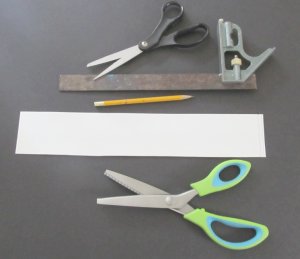
nIn the top photo I have the essential tools an materials a rectangular piece of card board. I'm using some ghost line card board I picked up @ hobby lobby. I'm not using the ghost lines, as the side the ghost lines is on is slicker than I like, and won't paint with the acrylic "old penny" paint well without three or four coats, instead of one or two on the back side of the cardboard.


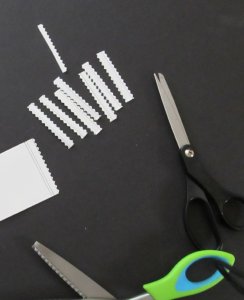
I use the square to keep the cuts square. I put a line near the bottom to use as a guide cutting the cardboard with the pinking shears to keep the bottom zig zag cut square. the courses of shingles at the very bottom of the roof and avove and below the skylights , I have plain rectangular strips with no zig zag cuts form the pinking shears. I start laying strips cut with the zig zag pattern on the bottom and a straight cut on the top between the bottom of the roof and the skylights. Once I'm past the skylights, I cut strips that ate zig zagged on both sides. the top zig zags ate covered up by subsequent layers of shingles. having two edges that are zig zagged just keeps me from having to switch sissors every cut, saving me some time.


cutting these shingles is just as deadly tedious as carving and applying the foam masonry. Thankfully the effect is at least as impressive. In this photo one can clearly see the 9Volt battery propped up on the roof, with its terminals touching the exposed twisted wire connections of the buildings lighting circuit. when I have the long roof, and the roof on the tower roof stairway shed shingled and painted, I will need to finish the masonry on the back side of the tower. then I will need to un twist the wires on the lighting circuit, and remove the tower roof and the tower's third floor, so I can clean the inside of the station, install some doors, interior details , and Ho scale people. I have been working on this for just over two years; but I may be just two or three months away from finishing it. this is scary, I never finish anything!!


Nelson
 

Bill Nelson

Well-Known Member
a_work_proceeding_on_possum_hollow_sideofusroof_.jpg a_us_int_work_09_30_14.jpg

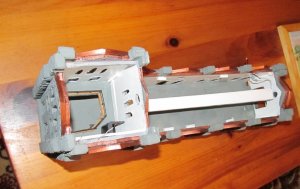
I am making progress on the roof, have the tower roof tar papered using coffie filter paper and black acrylic paint. I have the stairwell access roof shingled. since I took the roof off the tower to tar paper it, I also took the 3rd floor out. and I got another coat of white paint on all of the interior walls I could reach (everything but the first floor of the tower). the white paint is now more reflective, so the lights will be brighter. while the floor is out I'm going to try to make a ticket desk for the center of the tower, making it small enough to fit in the hole between the balconies . then I'll try to add some people and other details in the tower. it will be easier to put that stuff under the long roof which is easily removeable, as the wires have to be disconected to get the tower roof and the tower top floor . I'd like to make something slightly bizzare in the top floor of the tower, like a Super Hero's secter lair, but not suer how to present that.
 

Bill Nelson

Well-Known Member
a_us_wit_hroof_done_ala.jpg


I have the roof done. next I will be cutting and gluing stones on the back side of the tower, working to build pieces for the interior, making the internal staircase down to the lower levels, and adding some scale people to make it the busy place it needs to be.


Nelson
 

Bill Nelson

Well-Known Member
a_us_roof_joint_a.jpg a_us_almos_tdone.jpg

almost done with the last of the stones on union station. There are a few triangular shaped stones that need to go in the shadows to either side of the arch castings. I will be working on interior details . I may want to add a massive stone fireplace to the inside, possibly with a fire simulating LED. that would draw the eyes into the windows. It would also require a massive ornate smokestack.
 

Bill Nelson

Well-Known Member
a_us_test_fitting_chimeney_.jpg


I have the stones done on the back side of the tower, and just a little paint touch up to do on the gray stones. At the club, in its proper setting one can see into the building a little better than I had thought possible earlier. I decided a view break, with some interesting detail, would be useful, and so I am putting a massive stone fireplace in toward the end of the long section, between two of the buttresses, where it won't interfere with the skylights.

the section of foam I am going to carve the fireplace out of is notched at the top, and helps support the LED lighting strip that runs down the length of the building just above the level of the windows. The chimney is larger than one would expect. this is based on the Nashville Union Station that has a large smoke stack disguised as a tower There would be a massive boiler somewhere to heat the above and below street level of this structure, as well as possibly to heat passenger cars that were not hooked up to a steam locomotive.

when I get the fireplace carved for the inside of the building; it may be hard to resist one of those LED effect packages that replicates a flickering fire. that would really draw the eye into the building. As it is I am mighty close to being done with the main structure, I just have a boatload of interior detail to come up with.


Nelson
 

Bill Nelson

Well-Known Member
Our train club got evicted, we have secured a location, but will have less space, and not enough for Union Station, it looks like Union Station is homeless right now.


Nelson
 

zathros

*****SENIOR ADMINISTRATOR*****
Staff member
Administrator
Moderator
It will always have a home and a special place here. :)

(That sucks, about your train club)
 

Bill Nelson

Well-Known Member
We have a new location, smaller, more expensive, but with with finished walls, and ceilings, and good lighting. our old place was a dark hole, and had black mold. We will be building a smaller, and hopefully better railroad. I don't think there will be room for the Union Station there, at least as it was configured.
 
Top