Z
Model Of The Month: Time to build Union Station!
- Thread starter Bill Nelson
- Start date
You are using an out of date browser. It may not display this or other websites correctly.
You should upgrade or use an alternative browser.
You should upgrade or use an alternative browser.
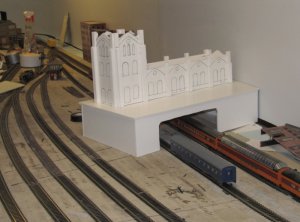
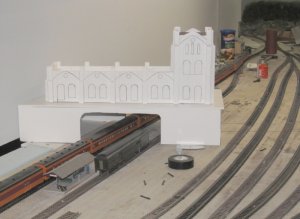 in location
I made it to the club last night, and took my camera, so this is where the station will go.
There is a single track main behind Tyler's Hiawatha , there will be a road in front of the station, which will extend over the freight yard on a bridge, a long covered platform on either side of the station, with stairs going up into the station building from the platform.
Bill Nelson
Last edited:
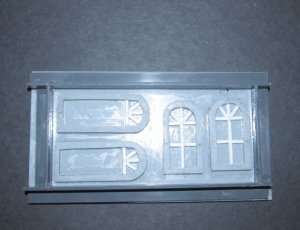 window master mould box
I spent some time this morning cleaning off my work bench. I usually avoid that like the plague, as no telling what interesting partly done projects are burred down there. Sometimes though I find some needed tools or materials. this time it was the material. I was trying to come up with something to make a mold box around the window and door master for the Union Station project, and I found some plastistruct angle material, which If I'm not mistaken is leftover from the original construction of my large scale Goose #2 project ( the last stages of that 25 year old project is documented in either or both the large scale section or the narrow gauge section).
In any case the plastistruct L girder was ideal to make the dam for the window master's mold box, so I cut out four pieces of it, and welded them to the styrene base of the master with some Same Stuff from Micro-Mark, which is a very good plastic adhesive/ welder. The rtv (room temperature vulcanizing) silicone mold material is , acording to the instructions, very viscous, so I had to test the box to be sure it didn't leak, so I put it on a paper towel, and poured water in to it, and it leaked, so I have to let it dry out, and see what I can do to seal it, perhaps a tube based styrene glue would have worked better, rather than a paint on liquid, live and learn, or in my case live.
I was hoping to pour this mold today, but it is about time to go to sleep to try to get ready, So tomorrow I will try to see if I can seal up wherever the leak is coming from.
Bill Nelson
Last edited:
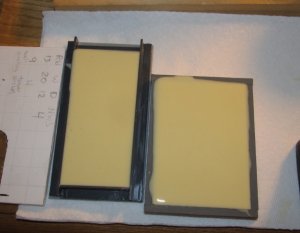
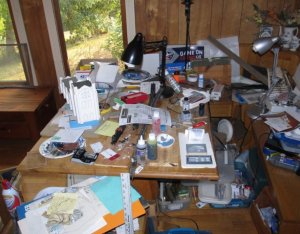
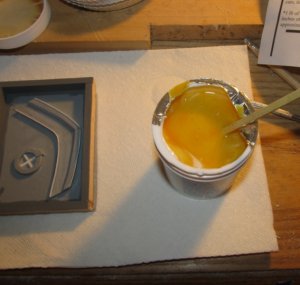
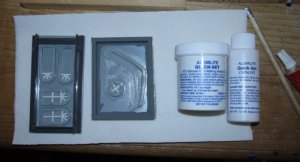 Having cleaned off my work bench (see the picture and try to imagine what a mess it was before.) I had room to work on the molds.
the small kit has some mold and catalyst in a pre measured containers mix them, stir till the goop is a even color, and pour it into the mold box, starting at one corner to try to minimize bubbles.
Tyler's experience tell us to test your work space to be sure it is level or you'll get a lopsided mold.
I poured the stuff into my two mold boxes. I had a feeling I did it sloppy and trapped air bubbles so I took a block of metal and beat on the underside of the hardwood table directly below the masters hopping to dislodge as many of the bubbles as possible.
I have heard of folks making plaster castings putting the mold on a sheet of plywood and running a vibrator sander next to it to help shake off bubbles. the rubber takes 4-8 hours to set, so I will try to pull the molds off tonight, or tomorrow, and see how badly I messed up. the small casting kit had enough rubber to make bothe these molds, and a little extra. it made me wish I had prepared something else to mold, but I'm wasting some of the rubber, as it would probably be beginning to set before I got the mold set up.
with the exception of the work bench photo, which doesn't really fit, I loaded the mold pictures Bassackwards, so look from the bottom to the top for the progression.
Bill Nelson
Last edited:
Bill,
I only had one issue with air bubbles in my molds when I made them and it was kind of a "duh" moment on my part. For those who didn't know, I attempted to make a copy of a old metal-style Roundhouse outside braced boxcar and it's parts. One thing that I overlooked was taking off the brake details on the underside of the frame of the car. Air bubbles were trapped around the small details, and then when I extracted the master from the mold where it did get around the parts, it ripped the mold. The molding stuff is pretty durable, but when it's thin it's fragile. Another thing I messed up, the car ends and roof are held together with a screw in the corner. In my infinite wisdom, I decided to Gorilla Glue them together with the though that it would eliminate the need for extra hardware. But since I had to find out the hard way that my kitchen table is either not level or the ground is not level (probably the latter), my attempts at casting for now are on hold. No damage came from the master and will be reassembled, just as I received it, but with the addition of Kadee couplers.
One thing about some of my rolling stock, some of it is older than me, a few cars and one locomotive may even predate Bill, but like 1:1 scale equipment if it works, it's being used.
Tyler
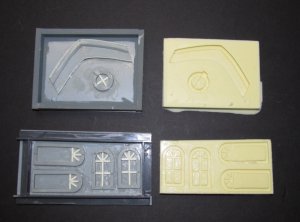
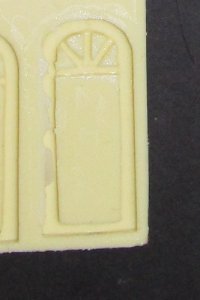 I have two molds ready. the roof arch and round window mold has a small tear. It has some deep undercuts, and If I were aiming at 100 % perfection I would re do it with high strength RTV compound.
but if I was aiming at 100 % perfection I wouldn't have used the roof arch master as it is, as it is slightly lopsided.
I have these molds ready to go, so my next step is to try to estimate the volume of the molds. I'm going to fill them with water,, and then pour the water out, collect it in a measuring cup like the ones that will be used for measuring the casting resin. that way I can get a close estimate of how much resin to mix up so I have enough, but am not wasting much casting resin.
The process from reading the instructions is to warm the mold in the oven or microwave to warm the mold. this will warm the resin as it is poured in the mold, and help it cure. the warmth may also help the resin flow into all the nooks and crannies.
equal amounts of the resin and hardener are mixed together, one is clear and the other is dark, you mix them until no swirls are visible and then pour the stuff in the molds. the resin is supposed to start hardening 90 seconds after mixing, and be hard enough to de mold after 3-7 minutes.
This applies to the Alumilite starter kit, working with other stuff, read the instructions.
In the detail photo of the window, you can see a flap of mold material that crept between the backing plate and the window master. this doesn't exist any more, as I used a rail nipper to remove it.
sadly , with a 90 second work time with the resin there will not be a photo of the resin pour, as I will have only 90 seconds and two hands.
once I have the first of the window and door castings, I can do the final plotting of the window and door locations, cut out the holes, and do some of the inside and outside painting of the structure , which will be needed to give the model a solid look, and more importantly help prevent warping of the foam core.
This is going to be fun!
Last edited:
Z
Zathros
What will ou be filling these molds with? Also, for train arts, I used this stuff called "Alumaloy", I used to repair cylinder heads, and all manner of aluminum products. You heat the part and when it is hot enough yo touch the rod of Alumaloy to it and it melts. When cooled, it can be machined. Since it only sticks to aluminum, I have made brass and copper molds and cast small parts using this product. When cooled, they pop right out of the mold. I have made flanges for cylinder heads and they never have let go. When you machine the head, you cannot see the line where it attaches. You ever loose the heat treated of the material, as it does not have to get to the temperature to stat meting. It is made for Brass and Steel also.
http://www.amazon.com/Alumaloy-Aluminum-Repair-Rod-Kit/dp/B008AWDWR8

http://www.amazon.com/Alumaloy-Aluminum-Repair-Rod-Kit/dp/B008AWDWR8

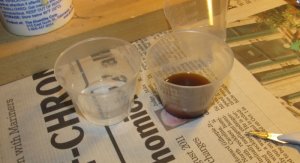
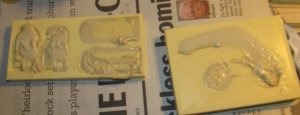
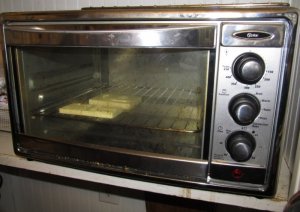
 Zathros, as mentioned earlier, I'm using the stuff from the Alumalite mini kit, a two part resin.
pay attention, there will be a test!
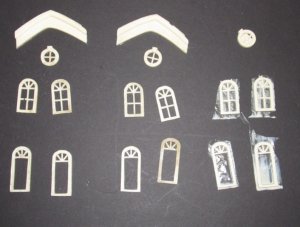
I did the first run of castings, and it was a miserable failure. The 90 sec work time proved to be an issue. on the first round I did not move fast enough, and of the roof arch , round window, 2 arch windows , and 2 door castings, only the round window casting was usable, I wasn't prepared to move fast enough. (see 2nd photo) later runs worked better
ask anyone who knows me about me, and the word quick will not come up in either physical or mental connotation.
If Doing lots of this type of work I would probably shop for a resin with a longer work time. Later runs were more successful, as I knew more about how fast I needed to act. Micro marks has a lot of resins available.
To clean up the backside of these castings I sand the backside on a piece of sandpaper on the workbench, and clean odd any remaining flash with a razor knife. all in all I'm pleased, a couple more days work, I'll have all of the windows, doors round windows, and roof arches cast, and can work on the masters for the door and window arches, and the tall arrow slit type windows for the tower.
once again this is a learning process for me; one I'm happy to share.
Bill Nelson (I cant wait to progress to casting Tweetsie ore cars for my HOn3 operations)
Last edited:
Z
Zathros
Those frames look great to me.
The alumaloy I was referring too was in the event you wanted to make molds of trains made out of aluminum. I was a mold maker for a time. This product would alloy you to make very strong aluminum parts without the investment of typical molds. Though it depends on what kind of equipment you have. I have a machine shop so I can do readily what others have trouble with, due to tooling.
The alumaloy I was referring too was in the event you wanted to make molds of trains made out of aluminum. I was a mold maker for a time. This product would alloy you to make very strong aluminum parts without the investment of typical molds. Though it depends on what kind of equipment you have. I have a machine shop so I can do readily what others have trouble with, due to tooling.
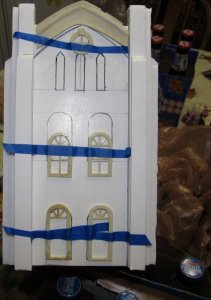
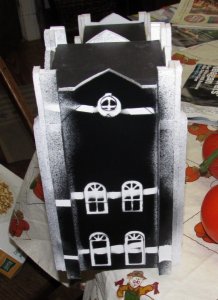 marking window and door openings
Now I have some windows and doors it is getting close to time to mark the openings so I can cut them out of the foam core. the widow and door markings on the mock up were made before I had the masters made, and I worked on the masters till they looked good and wer close to uniform, so it is a good bet they vary some from what is drawn on the mock up.
The round window I came up with is larger than I drew on the mock up, as is the arch detail, that pushes the round window further down than I planned on the tower, to avoid shortening the arow slit windows, I moved the second story windows down. to mark the locations, I put castings about where I wanted them with thin strips of masking tape (I should have masked the area around the arrow slit windows to) and then shot the mock up with some black spray paint. Now my window openings are marked, and I can use this marks to cut the window openings.
Once I have that done on this wall I can work around the building, locating and cutting the widow openings. then I will have to design the masters for the window slit widows, or just free hand them as I do the foam stones to build up the masonry. this is getting fun!
Last edited:
Way to go!!
The molds look real nice and you are getting the hang of making the parts. What an interesting project.
Tom
The molds look real nice and you are getting the hang of making the parts. What an interesting project.
Tom
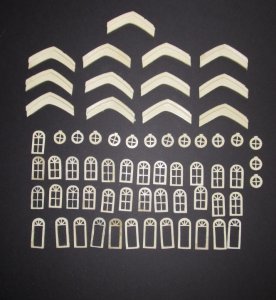
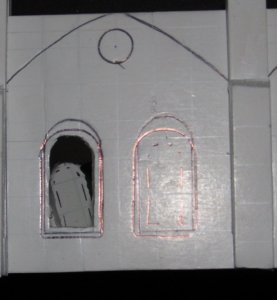
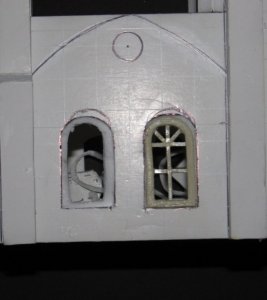 I got the windows and doors cast, and have cut out most all of the window and door openings
I am setting window or door castings on the foam core and outlining the outside of the window casting and the inside of the window/door opening. I cut an opening in the foam core approximately 1/2 way between those lines, and then score along the outside line and remove some material, so the window casting can set flush in the foam core being supported by the ledge of foam and the inside cardboard. when all of my openings are cut I will paint the ibnside of the building with black spary paint. the castings I will probably paint first with black spray paint and then with gray, similar to the limestone color I hope to use for the finished building. then I will put dome glazing behind the windows, get them glued in, and start cutting and fitting foam stones. this will really start to take off in the next week.
Bill Nelson
Last edited:
Z
Zathros
Wow!! That is impressive!! This is really going to be magnificent! That is really amazing picture, all those window frames, incredible! 
You have been a busy boy. I like all the castings you completed. Very nice.
Tom:thumb::thumb::thumb:
Tom:thumb::thumb::thumb:
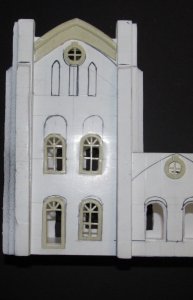
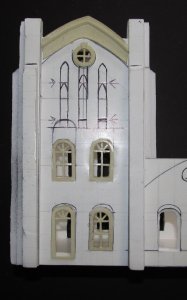
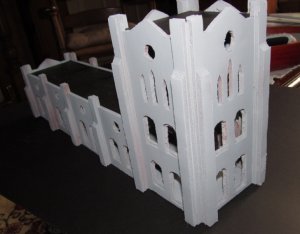
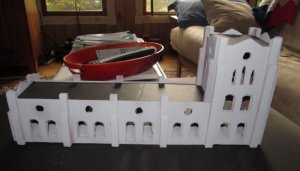 some more progress
Tuesday morning is the end of my weekend, as I have to go to work Tuesday night at 11pm. I got the last few window openings countersunk for flush fitting castings, and cut out the openings for the round windows.
The roof arch castings that I made ended up a little taller than what I had drawn on the mock up. so the round window had to be adjusted down. this interfered with the drawn positions of the arrow slit windows.
I had seen all of this coming, so I adjusted the 2nd story windows on the tower, to make more room for the arrow slits. this morning I sat down and figured the new position of the arrow slit windows, and cut them out.
Then I went out to paint the foam core mock up. My original plan was to paint the castings and the building, all over with flat black, and then with a coat of dark gray. My black spray paint can didn't have enough paint for the job, and the dark gray can was empty. I sprayed the building inside and out, top and bottom with two coats of red auto body primer. this should seal all the cardboard on the foamcore and help reduce the chances it will warp later. once that was dry I gave the building a shot of light gray. there wasn't enough light gray to do the castings, and I really want a darker gray anyway, so tomorrow morning at seven, after I get off work I will have to go out in search of the perfect dark gray color to paint the building and the windows. then it will be time to start glazing some windows and installing them, and then starting with the cut foam masonry, which will top off the project.
Bill Nelson
Last edited:
Holy balls Bill! I really am amazed at how far this thing is coming along, that and the number of castings you've made. It all looks great.
Tyler
Tyler
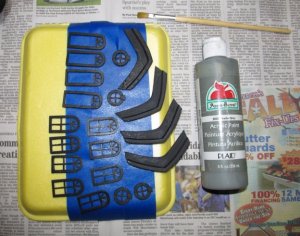
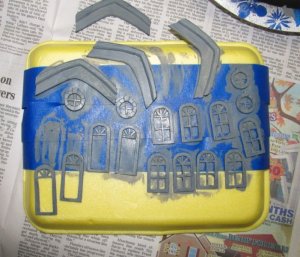
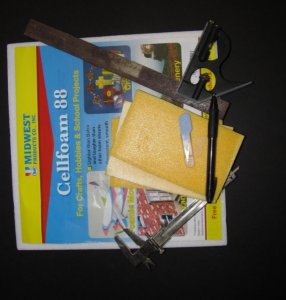 I didn't feel like shopping for spray paint, so I shot enough parts to do the tower with black spray paint, and then brush painted them with some craft acrylic gray paint
I have started cutting some foam stones, some are from this foam sheet I got at hobby lobby, and some is from some meat trays from the grocery store. both have very fine grain and will carve well.
I have started to glue on some of the foam stones. before I can get very far though I need to glaze a few windows, and the hemispherical window above the door openings, and get the windows and doors in the tower section.
I have enough windows and doors to do the tower, and will have to nake some others so the stones can crepe down the sides of the station. this will take some time as I will need to shape each stone before I glue it in place.
Bill Nelson
Last edited:
Z
Zathros
Looking good, just out of curiosity, what's the brand of the vernier calipers you have there? I don't remember seeing any with a screw on the back surface like that. Usually they just have a set screw on top. I have Mitutoyo, Brown and Sharpe and Starret, and some rather ancient but accurate ones, but I have never seen anything like that? 
those are some brand x calipers, They have no markings other than the measurements. I got them in a set with some dividers and depth gauges. They were cheap, I have three or four calipers, I sometimes use this cheap pair as a clamp for model projects.
Bill Nelson
Bill Nelson

