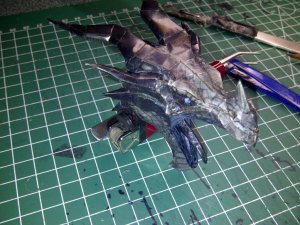
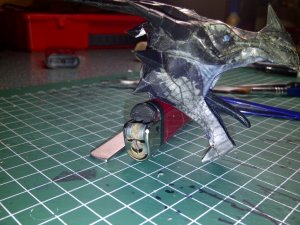
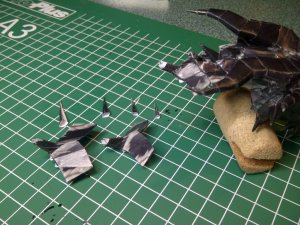
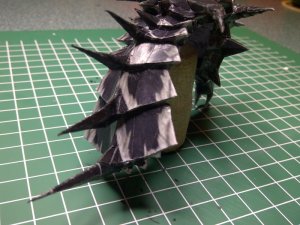
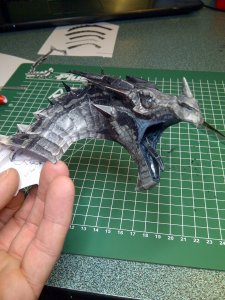
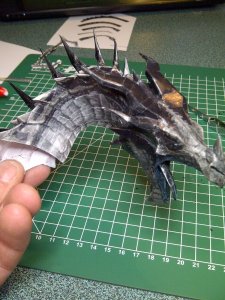
Model Of The Month: Daishi's Frost Dragon by DanBKing

DanBKing

Dan the Man
When I first saw Daishi's Model of the Month design and build of the Frost Dragon from the Skyrim episode of the Elder Scrolls game, I nearly badly injured myself, when my jaw hit the floor so hard, in stunned awe! I nearly fell in the bathroom too, as I ran to get tissues because,.... well..... never mind!:mrgreen:

Anyway, I would like to present my attempt at building this beauty.

I would like to point out at the start, that I am no gamer. I have never played the Elder Scrolls V game, or any of the others for that matter. I have always loved dragons, and in my younger days, I used to collect all the white metal dragon minatures from The Games Workshop. I had a large collection then, but they unfortuantly have all been lost in the past.
Even though I have only been paper modelling for just under a year, and am not very experienced, when I saw Daishis stunning model, I just HAD to give it a go. :cool:
As I have been building only technical 'hard' model designs, so far, I thought I would like to try my hand at biological/figurine type model for a change. And the Frost Dragon is my subject.

I decided to print the model in two weights of paper: 120gsm for the small intricate assemblies like the head, and 160gsm for the rest. I made an error at the printers, as the pages were printed on glossy photo paper, wall1, not exactly the correct texture for a dragon. But, I intend overcoming the shiny problem by spraying the whole model in various coats of matt acrylic varnish.

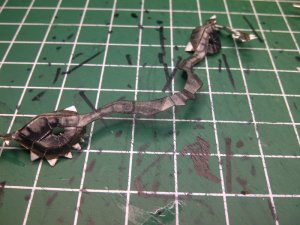
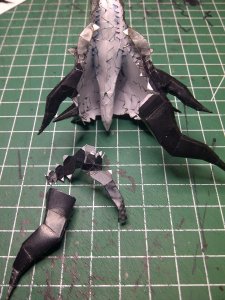
After reading various comments about the stability of the completed model, I decided to design an internal bracing armature for the legs and wings. To add to this, I also wanted to be able to remove the tail and wing assemblies, in case I ever need to move house, (or transport it to a paper model exhibition. :eek:ops:)
I spent a week or so studying the sub-assemblies in Pepakura, deciding how the heck I was gonna achieve all this, as well as building the very difficult model itself!! (What did I get myself into .....?:p)
I decided to move the joints of the wings to the body, to the elbow joint, instead of at the shoulder. The reason for this was to utilize gravity at the joint, so that I could attach the wings without glue, or any other form of bond, keeping in mind the wire armature holding the wings up, that attaches inside the body.
A bit difficult to explain, but it will hopefully come clear to you all (and me) as the build goes on.
I want to use a strong magnet and plate to hold the tail on, and I don't forsee too many problems with that. I am undecided as to whether I am going to make the head/neck assembly detachable aswell, if so I'll use the same system as the tail.
Most of the armature design is in my head, and I have planned how I am going to build it, sort of...:rolleyes: (A lot of the design will involve making it up as I go along.) I am going to have to build the model assemblies AROUND the armature I think, as there are too many bend angles to insert the armature after the model is built.

This model is a tab-haters worst nightmare!!!!!!! But, I stuck to the original design, because there was no way I was gonna attempt this by edge glueing everything. Some say I am a crazy Englishman, but I am definately not insane sign1

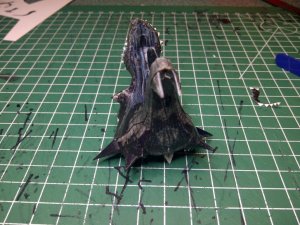
I started with the head and neck, which is the most difficult part according to Daishi. I started with the back of the throat and built outwards, almost as if the head is regurgitating itself into existance!!
There are 690 parts to the model in total, so let's start with the first 4, that make up the tongue...
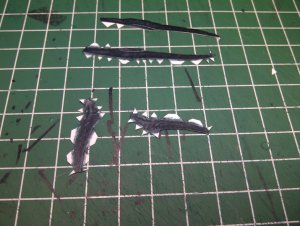
013 (2).jpg

I edge coloured all the parts using markers and water colour pencils before assembly. The throat and inside of the mouth were made up and the tongue attached.
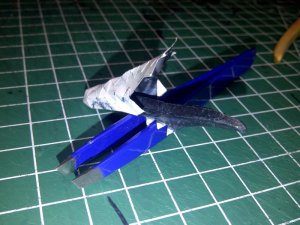
019.jpg

Next the front parts of the inside of the mouth were attached. The one piece that makes up the lower jaw, cheeks and a small strip along the top of the mouth was attached. That top strip is only about 1-2 mm wide in places....
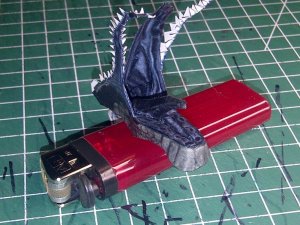
039.jpg

The next pieces were attached which included the first of the many horns on the model. The horns were pre assembled and glued on when the holding pieces were already attached to the head.
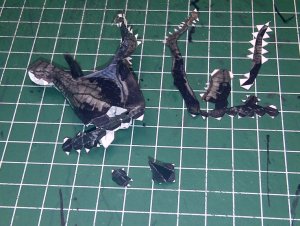
013.jpg

Next up the ridge under the eyes. (Tab-haters, please look away now....)
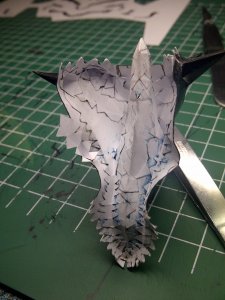
028.jpg

The two smaller horns were then made up and attached.
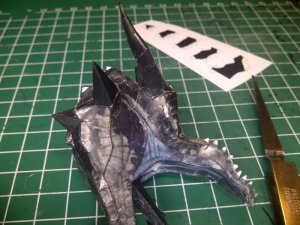
029.jpg


Back in a bit.......
 

DanBKing

Dan the Man
Continued...

The bottom of the jaw was closed up and the the two horns under the chin were attached.

032.jpg

Next the eye sockets and part of the nose piece was folded and attached.

001.jpg

The two large horns on the back of the head were made up and attached.

066.jpg


Next the eyes.....

012.jpg

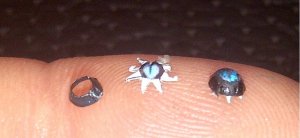
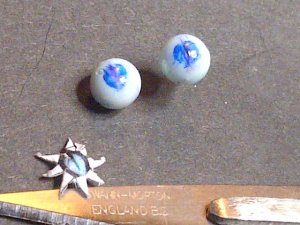
I tried an experiment at this stage, and made up a set of eyeballs from the heads of coloured map pins (in this case, white!) I cut a thin line in the plastic and filled it with black colour and then used a blue dry wipe marker for the blue. Once this was all dry I coated the eyeball with acrylic floor wax to give it a 'wet shine'.

051.jpg

I thought they looked quite realistic, but unfortuantly, when I glued them into the paper socket with CA glue, the glue reacted with the acrylic wax and caused it to peel off the plastic ball. The ball fell out and left a filmy, horrible looking mess in the socket. :curse: So, back to standard paper parts.... Well, it was an idea.....

So, (still without eyeballs,) this is where we are now.

060.jpg

See you all soon.

:wave:
 

DanBKing

Dan the Man
Finish off the head... Call him 'Gummy' !

Managed to get a bit more done with the head today. Basically the head is complete. I am going to fit the teeth after I get the neck done, just in case I break the teeth off with my clumsy fingers while building the neck.

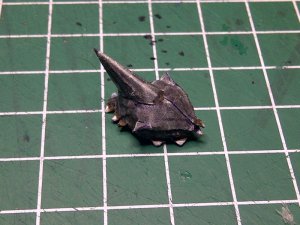
I first made up the nose horn and nostrils....

075.jpg

I made up the paper eyes and fitted them. The last piece to close in the head is folded and edge coloured.

079.jpg

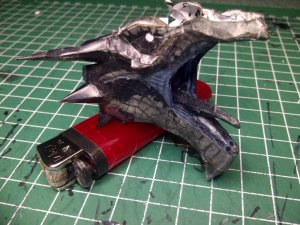
So, apart from the teeth, this is the completed head.....

096.jpg
097.jpg

Tomorrow, on to the neck.....

:wave:
 

daishi

Well-Known Member
Looks VERY nice!

on a side note Im seriously thinking on building a 2nd dragon using one of the enhanced dragon textures, from a mod. If I do so Ill most likely try to do an internal brace for the legs too, if nothing else. And Im also thinking of putting the dragon on a Word Wall which should give it more stability against tipping over. Not sure yet, just giving a heads up.
 

DanBKing

Dan the Man
Looks VERY nice!

on a side note Im seriously thinking on building a 2nd dragon using one of the enhanced dragon textures, from a mod. If I do so Ill most likely try to do an internal brace for the legs too, if nothing else. And Im also thinking of putting the dragon on a Word Wall which should give it more stability against tipping over. Not sure yet, just giving a heads up.


Thank you for the compliment Daishi. Coming from you, that means a lot to me.:mrgreen:

As with the internal bracing, I am making it up as I go along, but hopefully you might get some ideas that will help in your new design. I am thinking of using expanding foam in some parts of the model to hold the internal frame correctly and add strength to the whole model.
Will the new dragon be based on this one, or are you designing a completely different one ????
Two different dragons would look great as sentinals looking over and protecting my other paper models ....:mrgreen:
 

daishi

Well-Known Member
Will the new dragon be based on this one, or are you designing a completely different one ????
Two different dragons would look great as sentinals looking over and protecting my other paper models ....:mrgreen:

Nah Id use the same template witm maybe the different stone stand, and a white purplish white color scheme on the dragon (the one the frost dragons in Skyrim actually have)
 

DanBKing

Dan the Man
Nah Id use the same template witm maybe the different stone stand, and a white purplish white color scheme on the dragon (the one the frost dragons in Skyrim actually have)

COOL!! Looking forwards to seeing the new scheme.:thumb:
I think I'll wait before I decide to build another one, and see what this one turns out like!
If it is a disaster, then I have a good excuse to build another one. Learn by one, improve on the new.:cool:
But, if it turns out ok, I'll build another one anyway!:mrgreen:

I am working on the back of the neck at the moment, man that is more fiddly than the head was!!! I'll post a few pics later!

:wave:
 

DanBKing

Dan the Man
Something to hang the head on...

Thank you all for the kind comments everybody...:mrgreen::thumb:

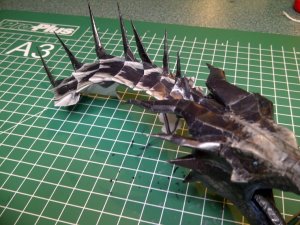
I started on the plating and spikes on the back of the neck today. The head was difficult and required delicate finger and tweezer use to build, but the back of the neck, I have found as fiddly as hell at the moment. Maybe I am just having a brain/hand/sight co-ordination problem today......:mrgreen::rolleyes:

Anyway, some pics..

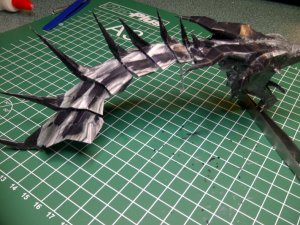
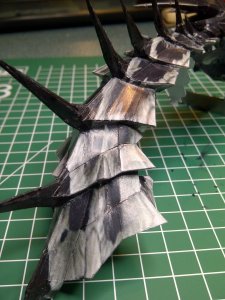
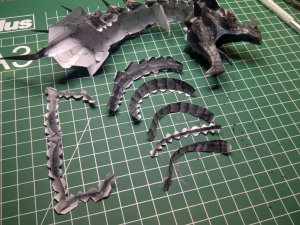
I made up each plate section and attached them in turn. The spikes are nice and sharp, and to keep them that way I soaked the tips in ca glue up to about 1/4 the way down.

005.jpg

This is where I am at... (Which took me over 8 hours....! :p)

013.jpg
014.jpg

I got bored making neck plates, so I decided to have a go at a few teeth ......

AAAAAARRRRRRRGGGGGGGHHHHHHH!!!!!!!!:eek: How the *-*-* do you roll the tips of the teeth??? They are sooo tiny. I tried with 160gsm 3 times, and at 120gsm 3 times, but failed miserably. wall1

So, I decided to make my own teeth with toothpicks...... :cool:

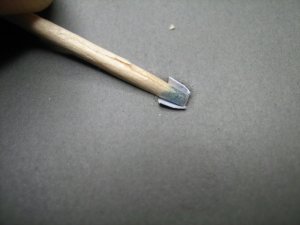
I whittled the tips of the toothpicks to the approximate shape required. The lower paper part of each tooth I used for size reference once rolled. I used a blunt toothpick and the back of a mouse mat to shape these.

016.jpg

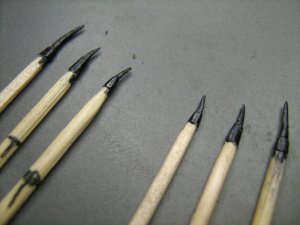
Once the fit and shape was good, I glued the paper part in position directly to the toothpick without using a tab. Once this was dry, I dipped the tip of each toothpick briefly in water, and then gently bent the tooth to the required form and angle. Once this was dry, I coloured each tooth black, ready for dry brushing highlights later.

007.jpg

I got the top set of teeth done ready for highlighting.

020.jpg

That's it for today. Depending on how busy my week ahead is, I hope to get some more done on the dragon.

See you all soon.

:wave:
 

DanBKing

Dan the Man
Oh, and Daishi,

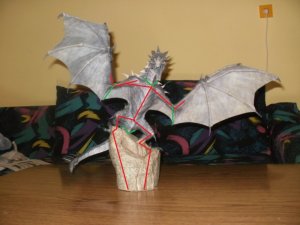
This is my idea for the integral support frame, or armature, if you prefer. The red lines indicate the main supporting frame, for which I think I am going to use 2.1mm MIG welding wire. The green lines represent where I am going to (attempt to,) split the parts for future transport.

Skyrim_Frost_Dragon_03.jpg

I plan to make a wooden base that fits inside the bottom of the rock, into which the two legs of the armature will be glued. This wooden base will also make a good and sturdy joint to a nice hardwood plinth or base to mount it on.

At most of the changes in angle of the armature, I am going to use a small amount of expanding foam to hold the armature central inside the model part, and also add rigidity to the angled joint. I am going to have to build the model around the armature and bend and fill as I go.
I think doing it this way is going to hinder the building proces, but I'll soldier on!!

P.S. My apology for using your photo as demonstration. :eek:ops:

:wave:
 

Rogerio Silva

Active Member
DanBKing

That model is in my to do list, but your thread is GREAT, and so are the looks of your work. I just can't believe you're using tabs, they're absolutely invisible!
Please keep on detailing your work, I'm following with total interest.
And thanks for the edge-coloring class!
 

DanBKing

Dan the Man
Gnashers...

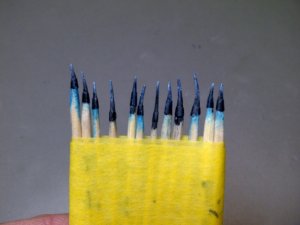
Been too busy with other things in life, to get majorly involved in modelling, so far this week, but I did manage to squeeze in an hour, or so, to get all the teeth made up and dry-brushed.
Will try to get more done this weekend.

036.jpg

:wave:
 

Rogerio Silva

Active Member
Dan, a question

My English is not so good, then it might sound like a stupid question, but here it goes: when you dipped the tooth in water, its was only the paper part, not the toothpick, right? I remember Zathros saying something about water shaping, is that it?
 

DanBKing

Dan the Man
Dan, a question

My English is not so good, then it might sound like a stupid question, but here it goes: when you dipped the tooth in water, its was only the paper part, not the toothpick, right? I remember Zathros saying something about water shaping, is that it?

Hi Rogerio,

Well, in this case it was the other way around. I wanted to get the tip of the toothpick soft, but not wet the paper part.
The objective of this excercise was to soften the tip of the carved toothpick so that I could bend it into a curved shape. If I hadn't of used water, the tip would of broken under the stress of bending. The smallest tooth is very delicate, only about 2.5mm wide at the base! I also did not want to get too much water on the paper part of the tooth as this may cause the glue to let go, as my glue is water based.

In my build of the USSC Discovery, I used the water shaping technique when making the radar dishes. You can see that here: http://www.zealot.com/forum/showthread.php?t=172205&page=7 about half way down the page, and the results a little further down the page again.
Be careful when using this technique, especially with inkjet prints. The water may cause the ink to run. Best to test it first on a spare piece of print.
 

Rogerio Silva

Active Member
Water not under the bridge... yet!

Hi Rogerio,

Well, in this case it was the other way around. I wanted to get the tip of the toothpick soft, but not wet the paper part.
The objective of this excercise was to soften the tip of the carved toothpick so that I could bend it into a curved shape. If I hadn't of used water, the tip would of broken under the stress of bending. The smallest tooth is very delicate, only about 2.5mm wide at the base! I also did not want to get too much water on the paper part of the tooth as this may cause the glue to let go, as my glue is water based.

In my build of the USSC Discovery, I used the water shaping technique when making the radar dishes. You can see that here: http://www.zealot.com/forum/showthread.php?t=172205&page=7 about half way down the page, and the results a little further down the page again.
Be careful when using this technique, especially with inkjet prints. The water may cause the ink to run. Best to test it first on a spare piece of print.

FANTASTIC assembly, BTW:thumb:. My compliments!:cool: All right, here's what I understood so far: you used the wet toothpick as a model for the paper teeth. Is that right? The teeth are just absolutely realistic, great job!
I haven't tried the water shaping technique beacuse whenever a small waterdrop hits the paper, it stains the printing:curse:, unless it's been printed on a laser printer. So, to use water shaping in papercraft, on ink printings, you probably would have to wet the NON-PRINTED side, is that it?:confused:
I would like to ask you a favor. Could you be kind enough to post or even PM me another class, this one on water shaping? You've got some very good teaching skills, so... If it's not asking too much, nor bothering you...:eek:ops:
Thanks in advance!:wave:
 

DanBKing

Dan the Man
To be honest Rogerio, my one and only experience with water shaping, was what you saw in the Discovery thread. I am by no means an expert in this technique, and have only been paper modelling myself for just under a year. (in fact, it is my 1 year anniversary of joining Zealot in 13 days :cool:)
So, I would recommend trawling through the forum here and Google-ing a bit. My limited knowledge would be more of a hinderence than help. :mrgreen:


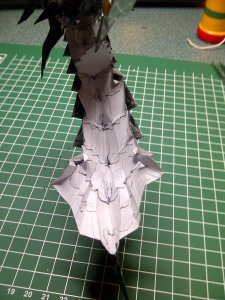
On to the Frost dragon.... I managed to get the back on the neck finished, it was very fiddly, but came out ok, I think.
See what you think....

The last three plated scale sections are made up and attached...

018.jpg

The strengthening plate was double laminated and fitted, ready for the sides of the neck.

024.jpg

All done....

036.jpg
037.jpg
043.jpg

The tab nightmare continues..... :eek:

046.jpg


More soon!

:wave:
 

DanBKing

Dan the Man
Even with the after effects of celebrating my birthday this weekend, I did get a bit done on the modelling front, albeit not as steady as normal ...:rolleyes:

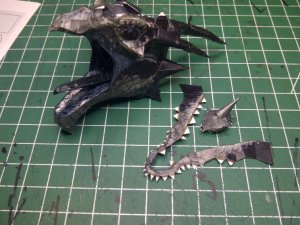
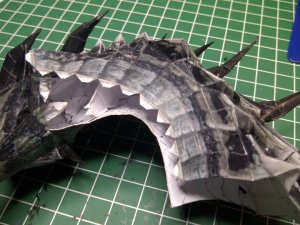
I built up the sides of the neck to complete the major assembly...

050.jpg
061.jpg
056.jpg
053.jpg

I started fitting the 12 teeth, but gave up after a while, as my body was refusing to co-operate with my brain, and the other way around too! :eek:ops:

Anyway, I will finish off the teeth tomorrow or so, to complete the head/neck assembly. I then need to do some touch ups here and there and then give it a couple of coats of arcrylic matt varnish.
Will post some pics when done.

Laters!

:wave:
 

Rogerio Silva

Active Member
"Heads up"!

That's a beautiful work of art you're doing, Dan. As I wrote before, this dragon is in my to-do list, but I don't feel comfortable enough to try it... yet!
I see that your "tab job" is not noticeable, which makes it even more worthy! :thumb::thumb::cool:
I'm stunned with your model's quality so far, so please, KEEP US POSTED! :mrgreen::mrgreen:
 
Top