

This just keeps look too good to be a model. It looks like you shrunk the real one.
M4A4 Sherman VC Firefly, Halinski 1:25
- Thread starter snake7
- Start date
You are using an out of date browser. It may not display this or other websites correctly.
You should upgrade or use an alternative browser.
You should upgrade or use an alternative browser.

- Apr 5, 2013
- 13,876
- 10,216
- 228
All those bits are eye candy, bringing this model to life. The care you take in every single part is inspiring! ")
micahrogeres, Revell-Fun, zathros and Boris - thank you!
And now we're talking hardcore!
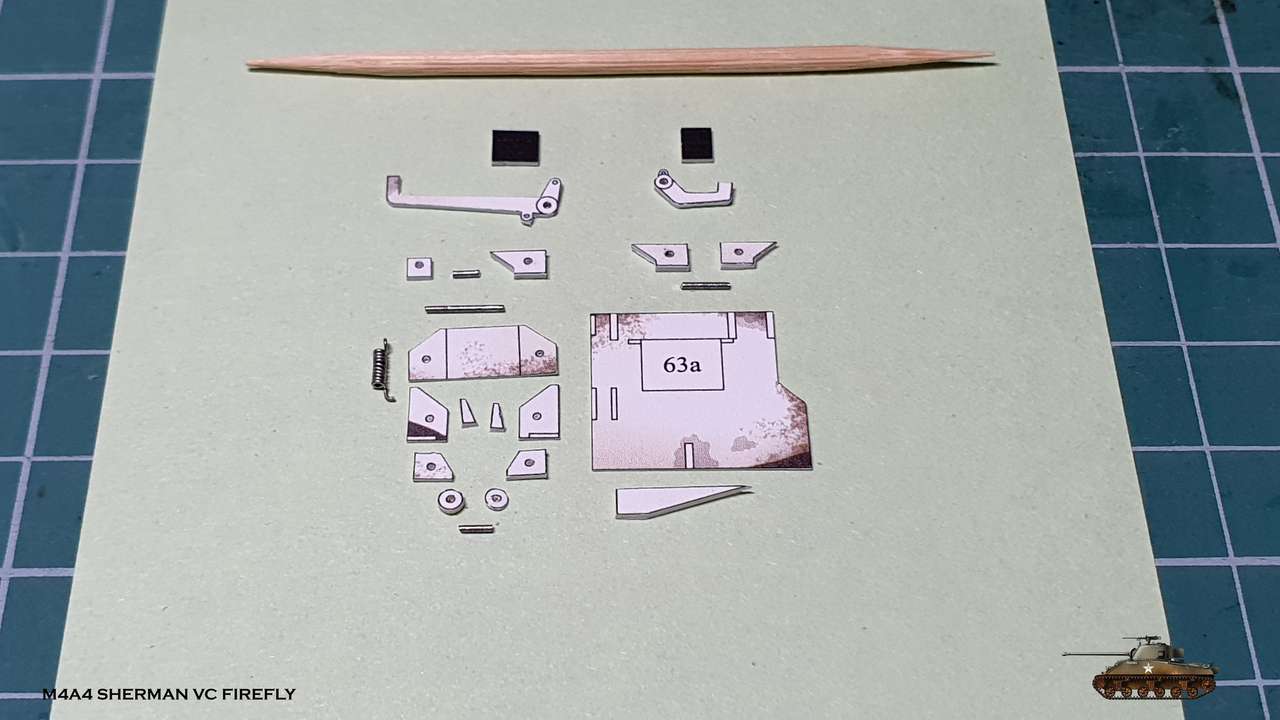
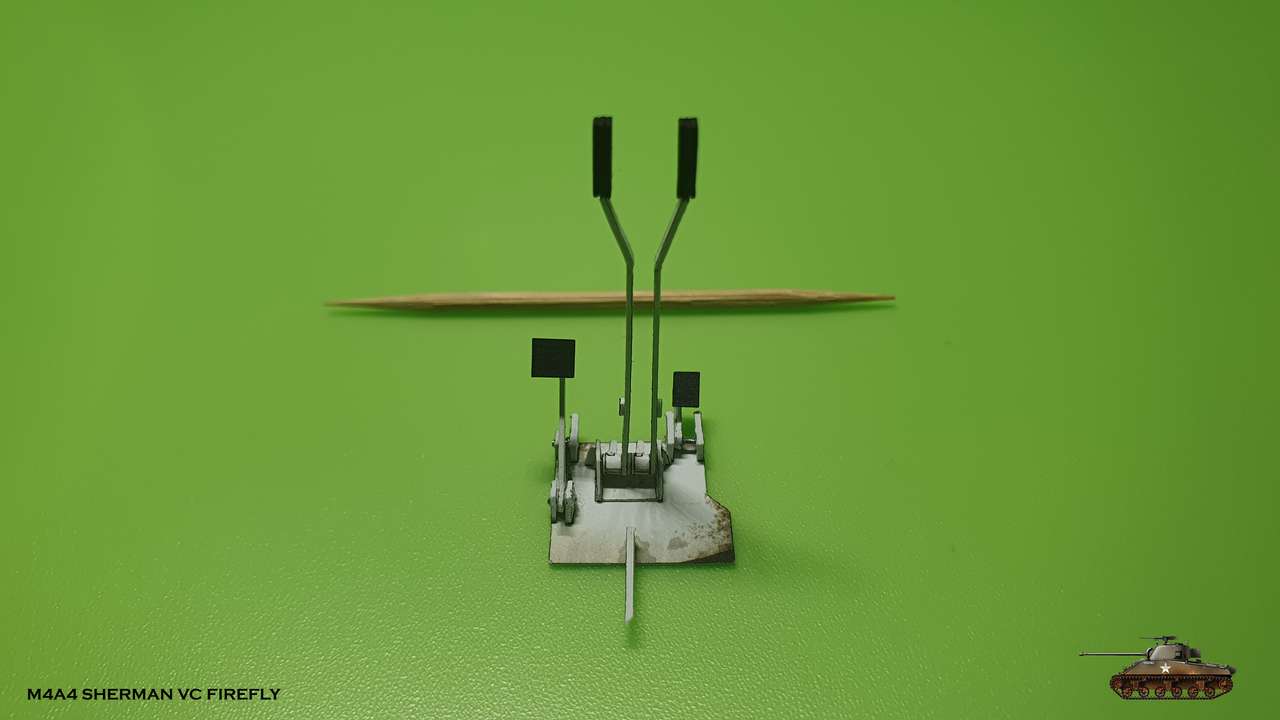
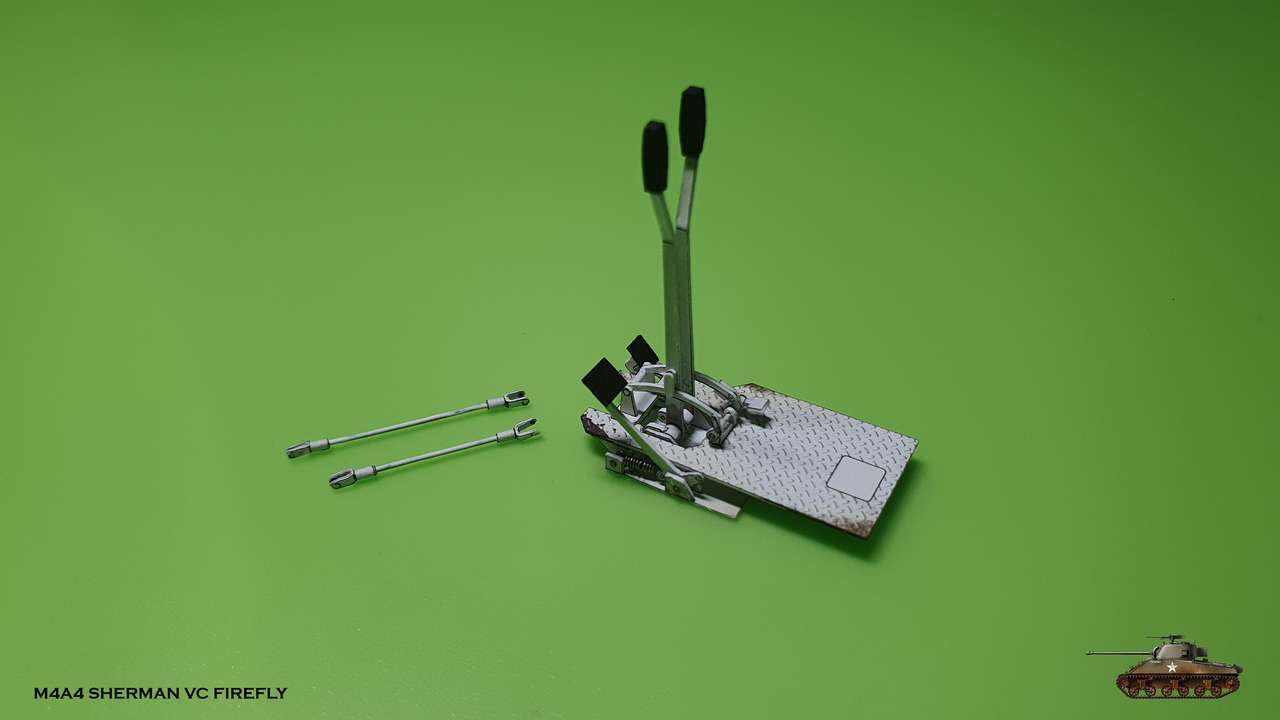
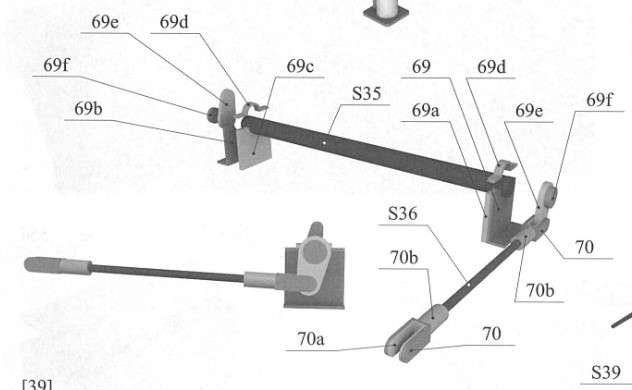
Pedals and levers mechanism.
I'm seriously considering to apply to guild of jewelers")
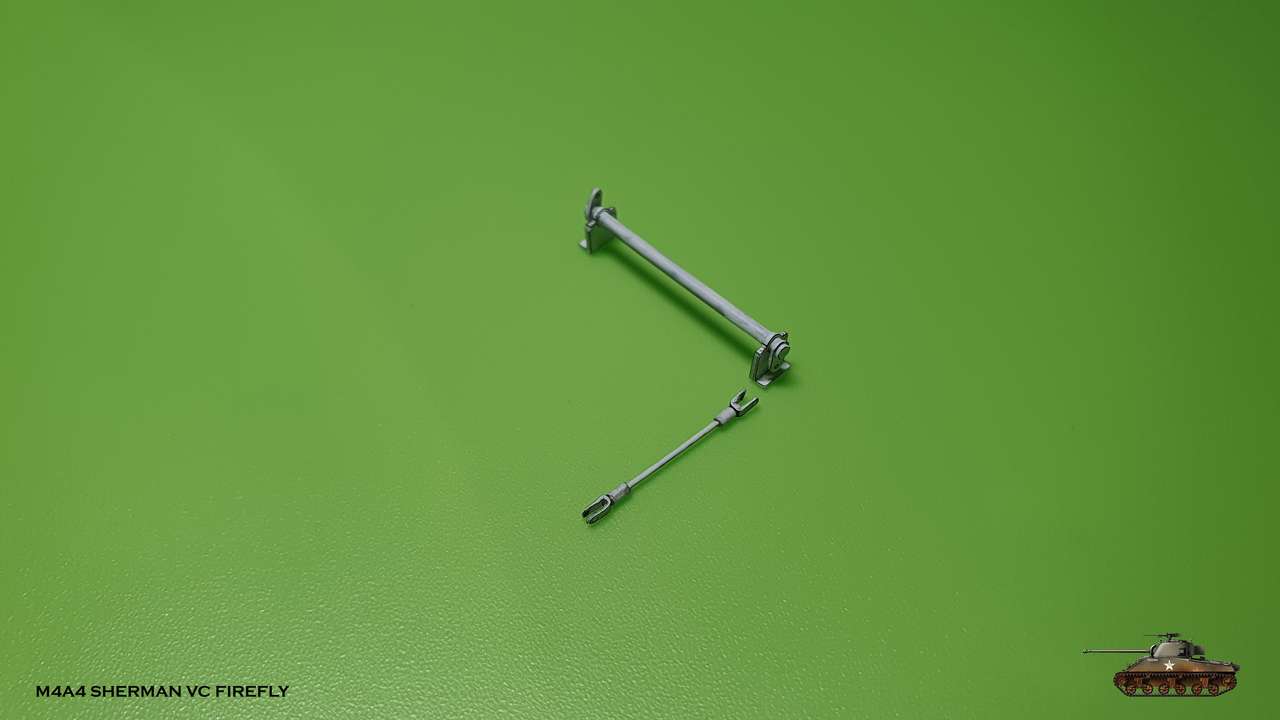
Lower plate with two pedals - accelerator and clutch and
two steering levers.
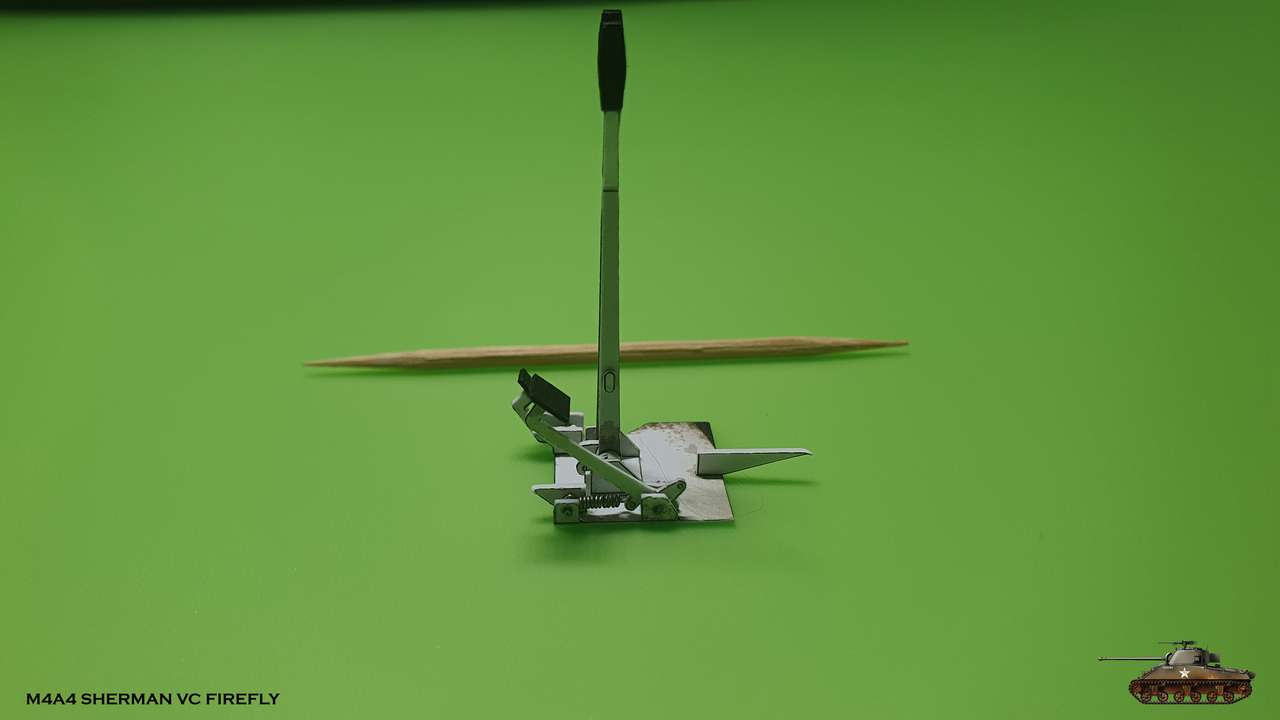
Clutch pedal with spring and also will be attached to mechanism, that disconnects drive shaft from gearbox.
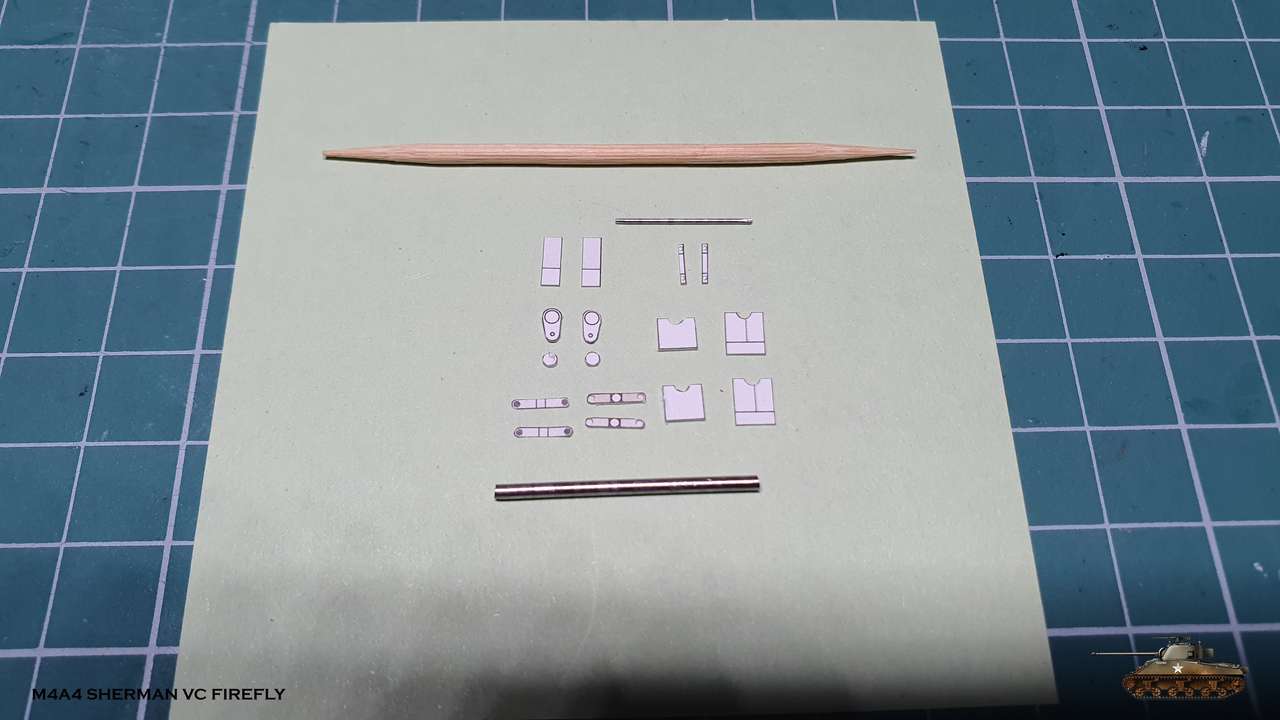
Spring was made from 0.2 mm solder wire wrapped on a needle.
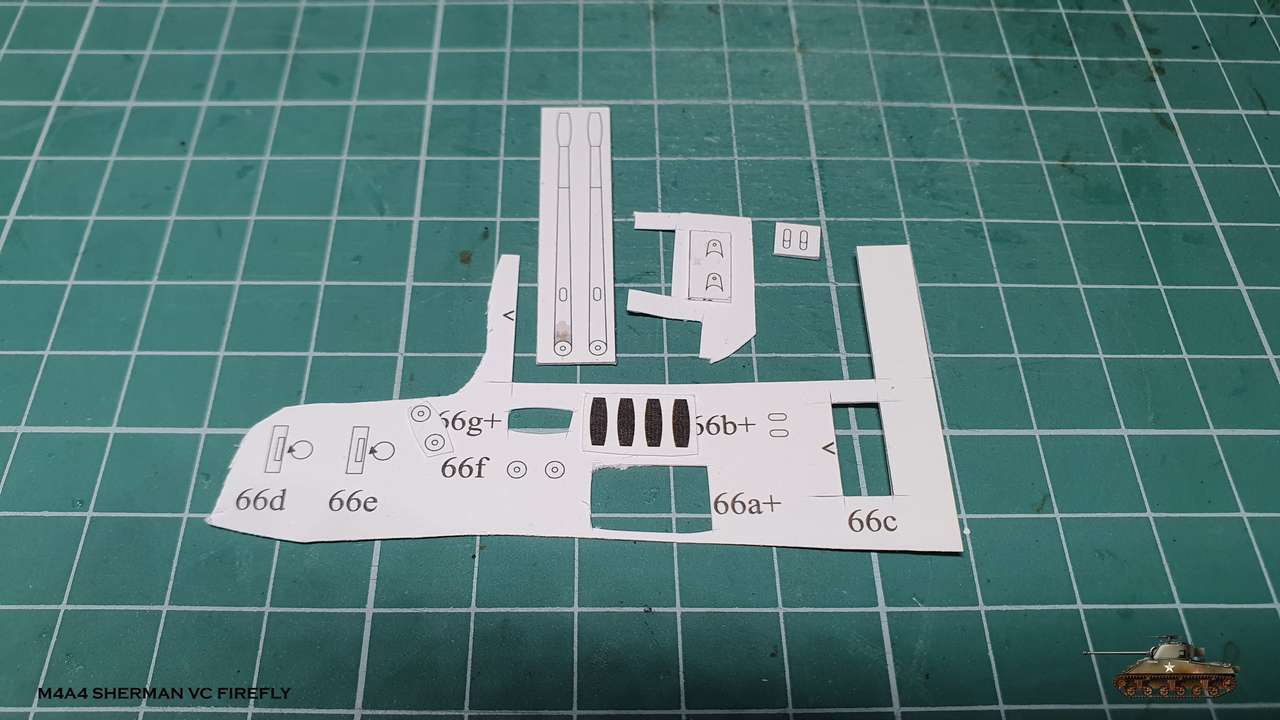
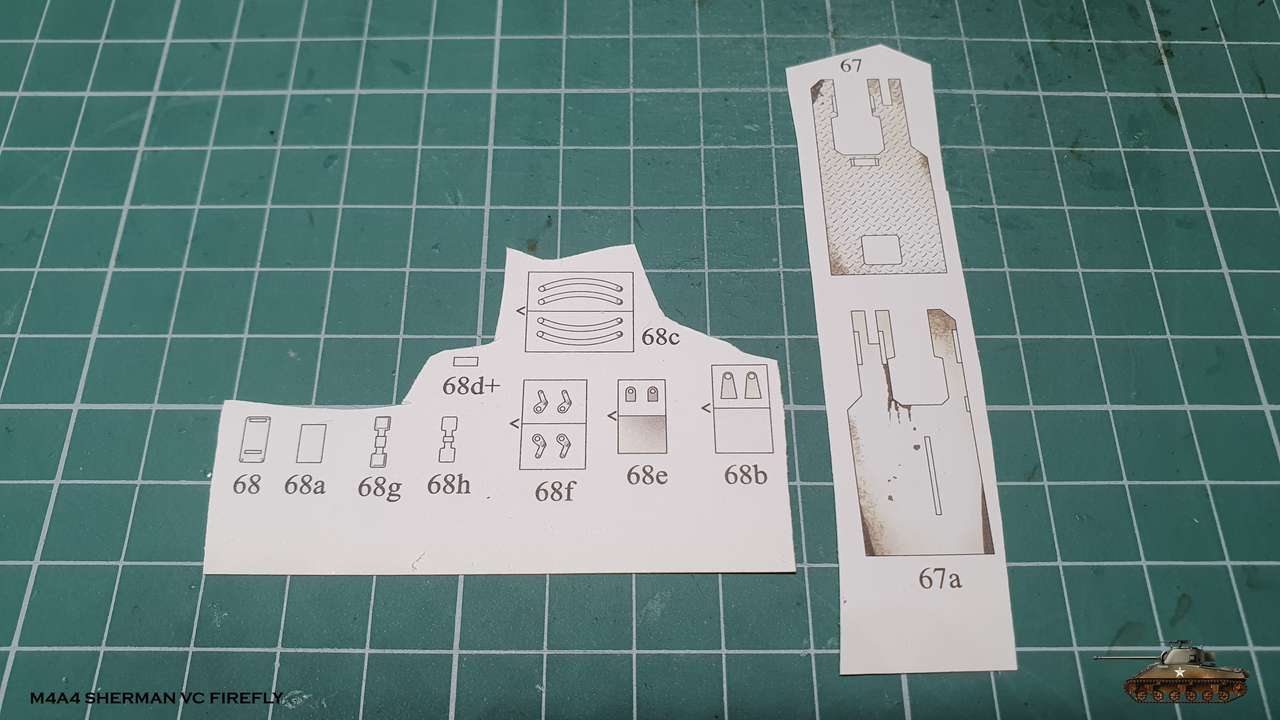
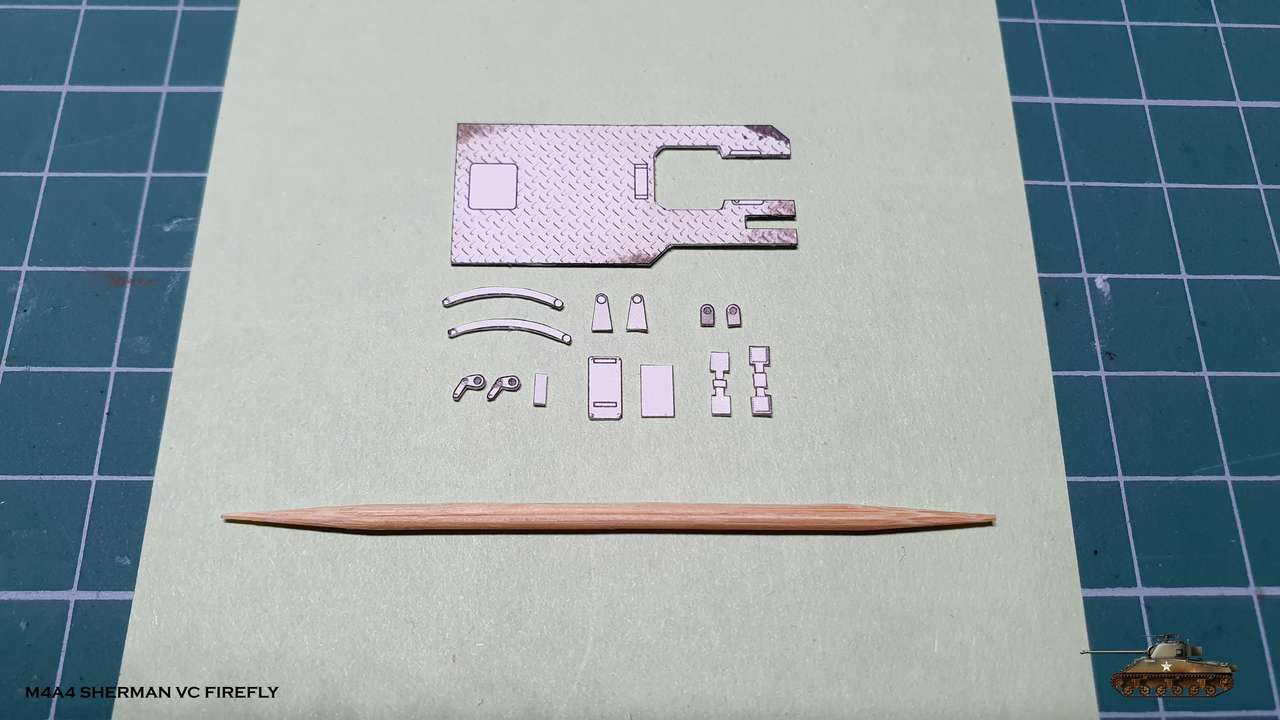
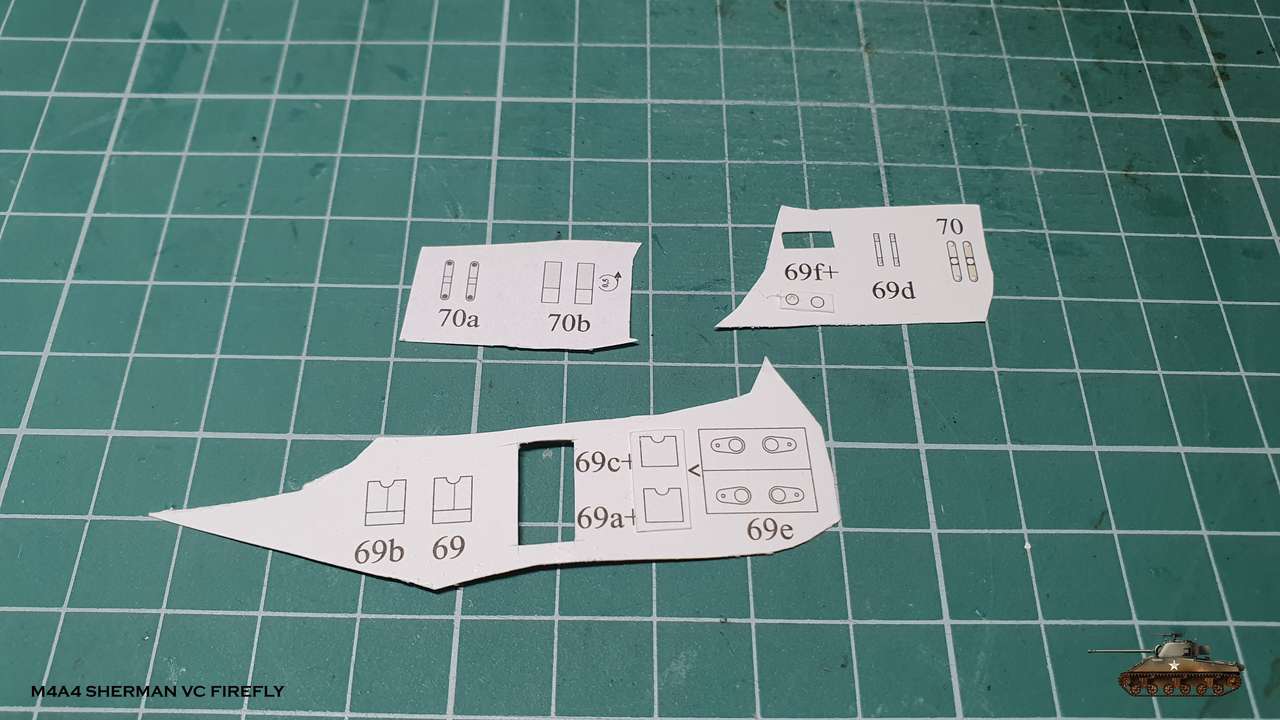
I intentionally collected all the details on notes page, so it will not get lost
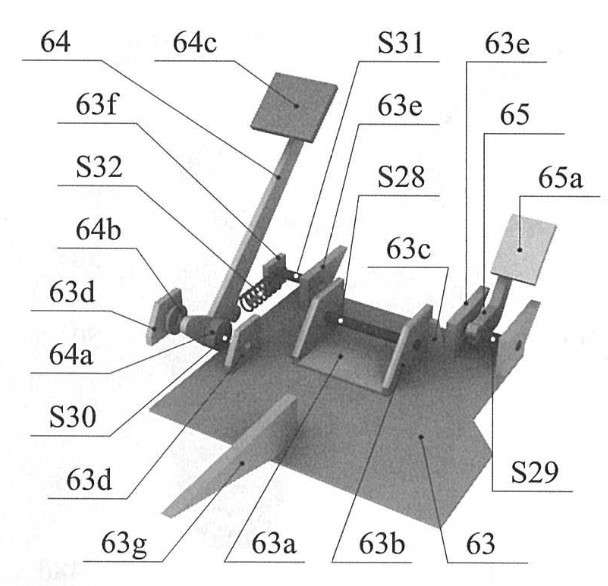

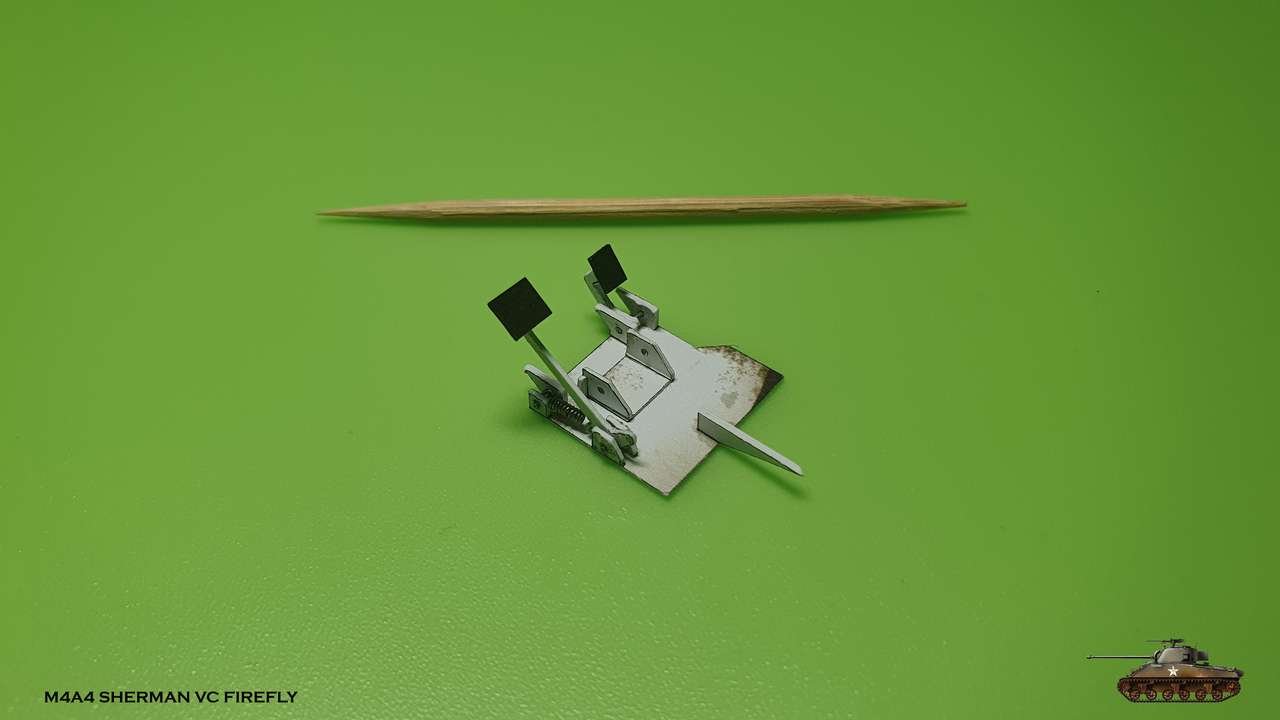
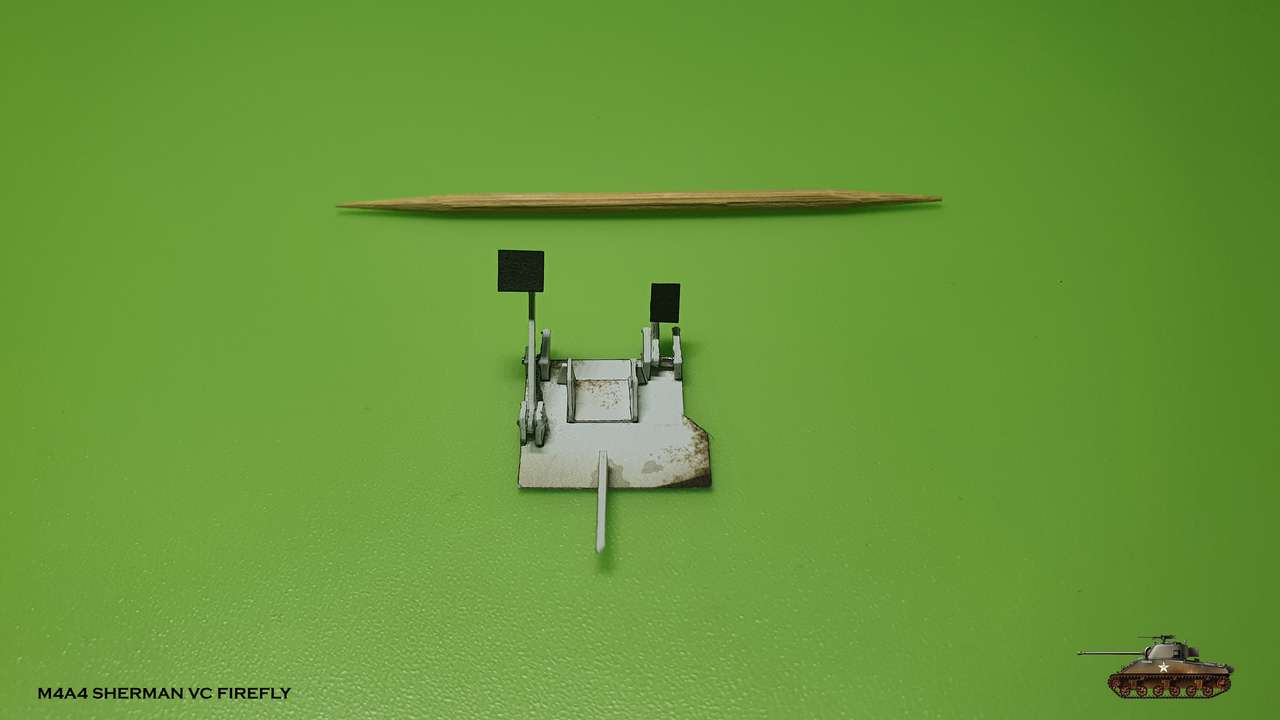
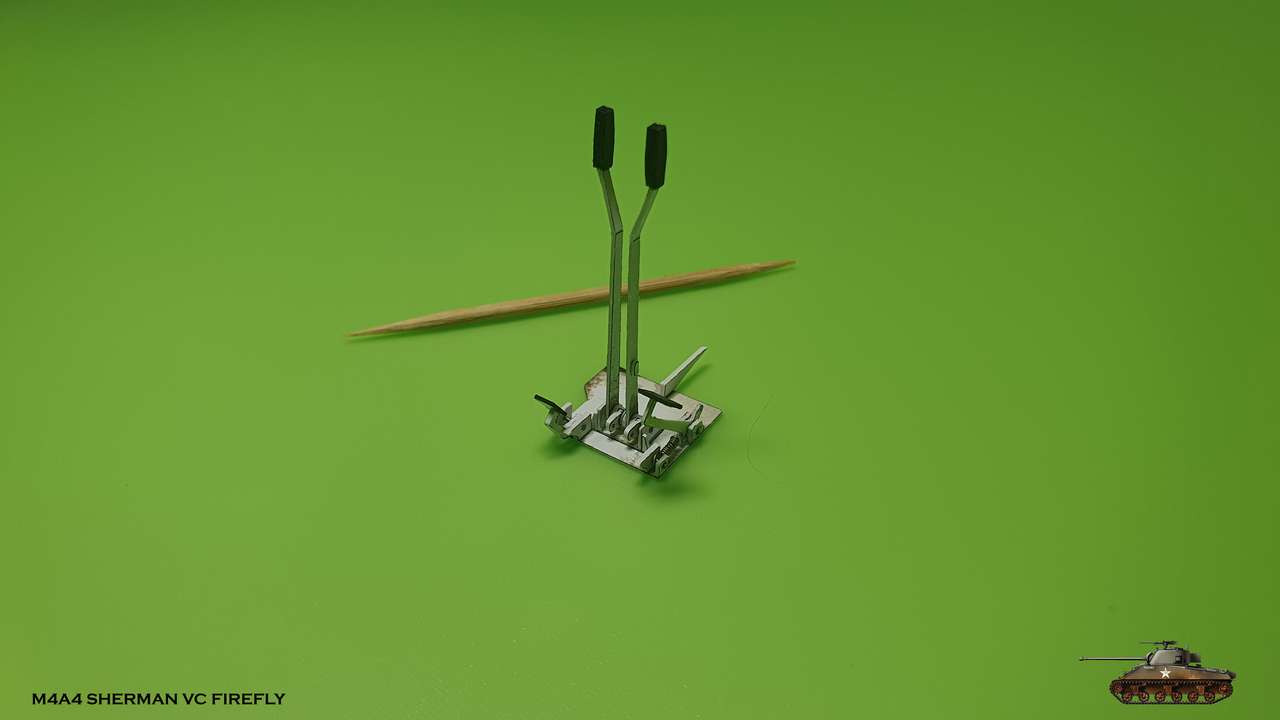
Steering levers. Each one will be Later attached to steering brake, with connecting road.
Little stoppers near assembled levers remind unglued until i will place levers on leading bows.


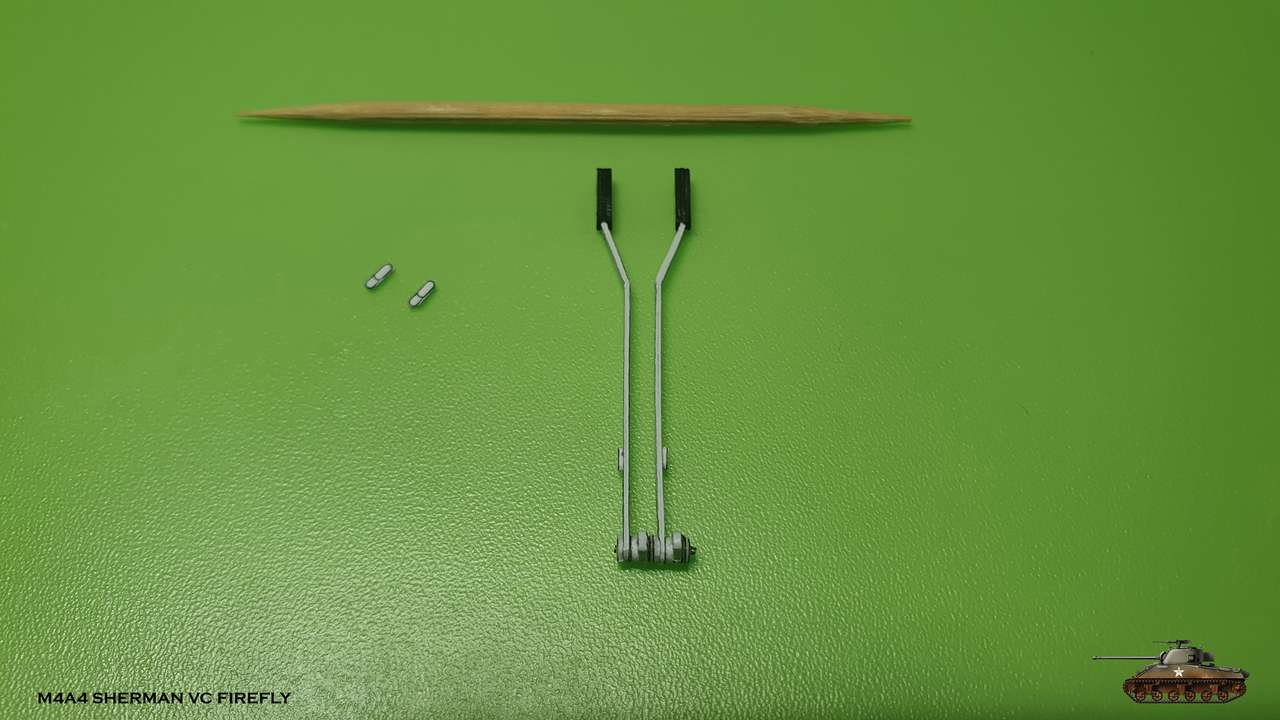
And levers connected to lower plate with pin
To be continued...
And now we're talking hardcore!
Pedals and levers mechanism.
I'm seriously considering to apply to guild of jewelers
Lower plate with two pedals - accelerator and clutch and
two steering levers.
Clutch pedal with spring and also will be attached to mechanism, that disconnects drive shaft from gearbox.
Spring was made from 0.2 mm solder wire wrapped on a needle.
I intentionally collected all the details on notes page, so it will not get lost
Steering levers. Each one will be Later attached to steering brake, with connecting road.
Little stoppers near assembled levers remind unglued until i will place levers on leading bows.
And levers connected to lower plate with pin
To be continued...
That's crazy. Snake, I think you should conduct a master class on cutting and assembling.
But I have a philosophical question. Assuming there are 500 prints of this model ( if I am not wrong, 500 is the minimum amount for offset print), how many models will be built with such level of details? Well, I guess, this question becomes rhetoric now...
But I have a philosophical question. Assuming there are 500 prints of this model ( if I am not wrong, 500 is the minimum amount for offset print), how many models will be built with such level of details? Well, I guess, this question becomes rhetoric now...
That's crazy. Snake, I think you should conduct a master class on cutting and assembling.
But I have a philosophical question. Assuming there are 500 prints of this model ( if I am not wrong, 500 is the minimum amount for offset print), how many models will be built with such level of details? Well, I guess, this question becomes rhetoric now...
Well. i know at least about 4 completed models. And those only ones that decided to post their build on internet.
This whole unit is so detailed, that needs a lot of patience and attention. But
the build is a joy and also the final result is super satisfying!
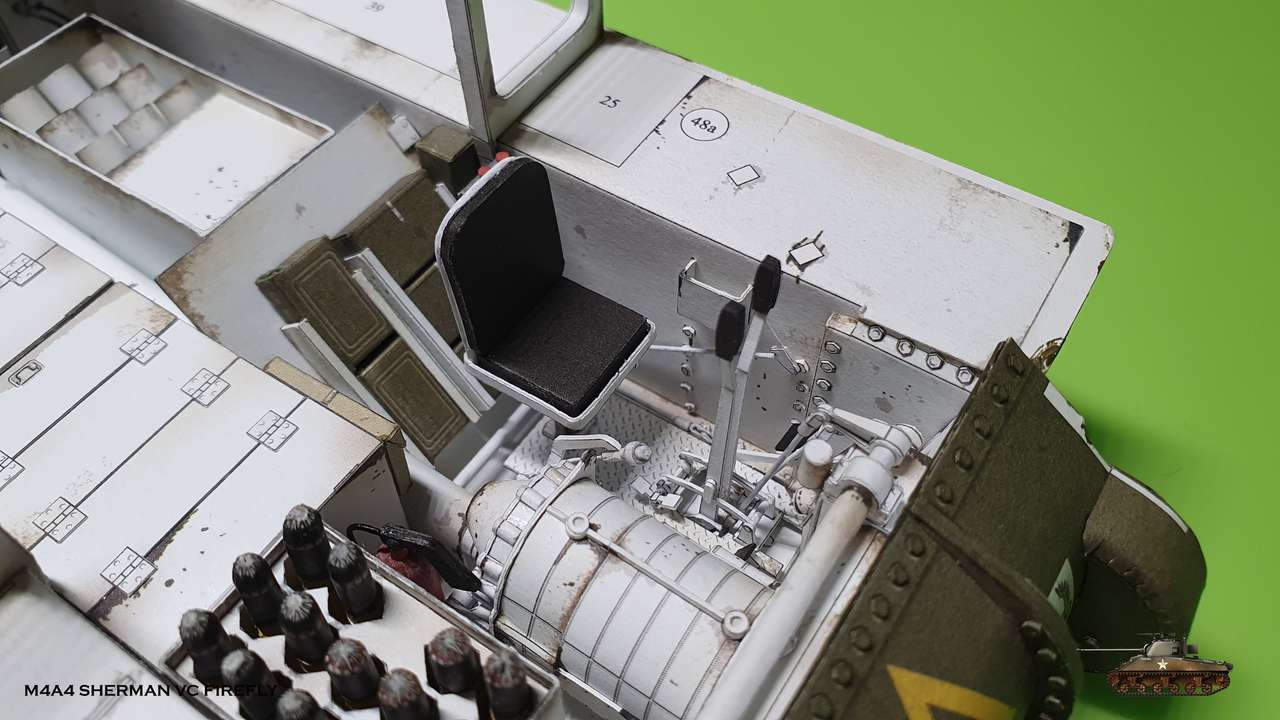
Upper deck. I decided to glue parts on demand and not as completed unit, as shown on drawings. Otherwise steering levers would interfere.
So first of all, i attached upper deck itself and then all other details.
Tried to take a lot of pictures for future reference


Next is mechanism that transfers momentum from clutch pedal to disconnect driveshaft from engine.
Here i assembled whole unit and then placed inside. The only issue was how much offset to take from supportings, when gluing the rod. Did it by eye.
And everything placed inside. Also connected rods from steering levers and clutch pedal. It was very tight process, but with hardly any issues. Just remember not to sneeze or breathe :-D

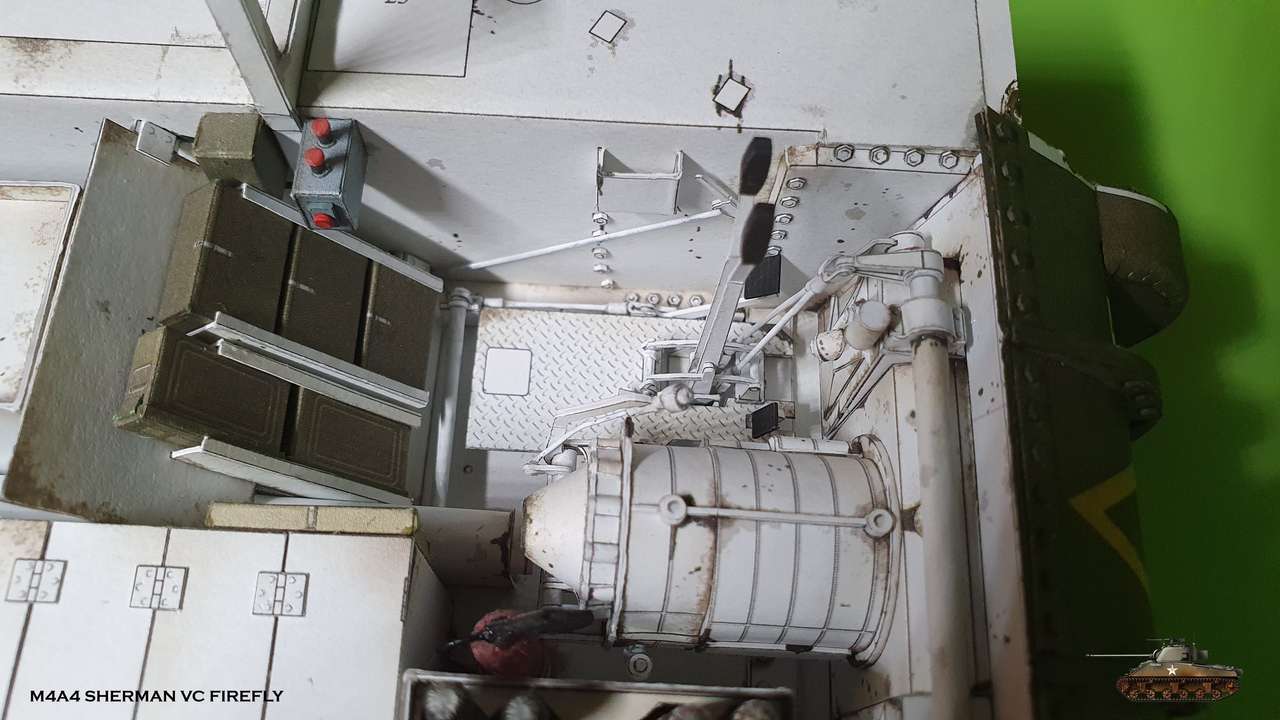

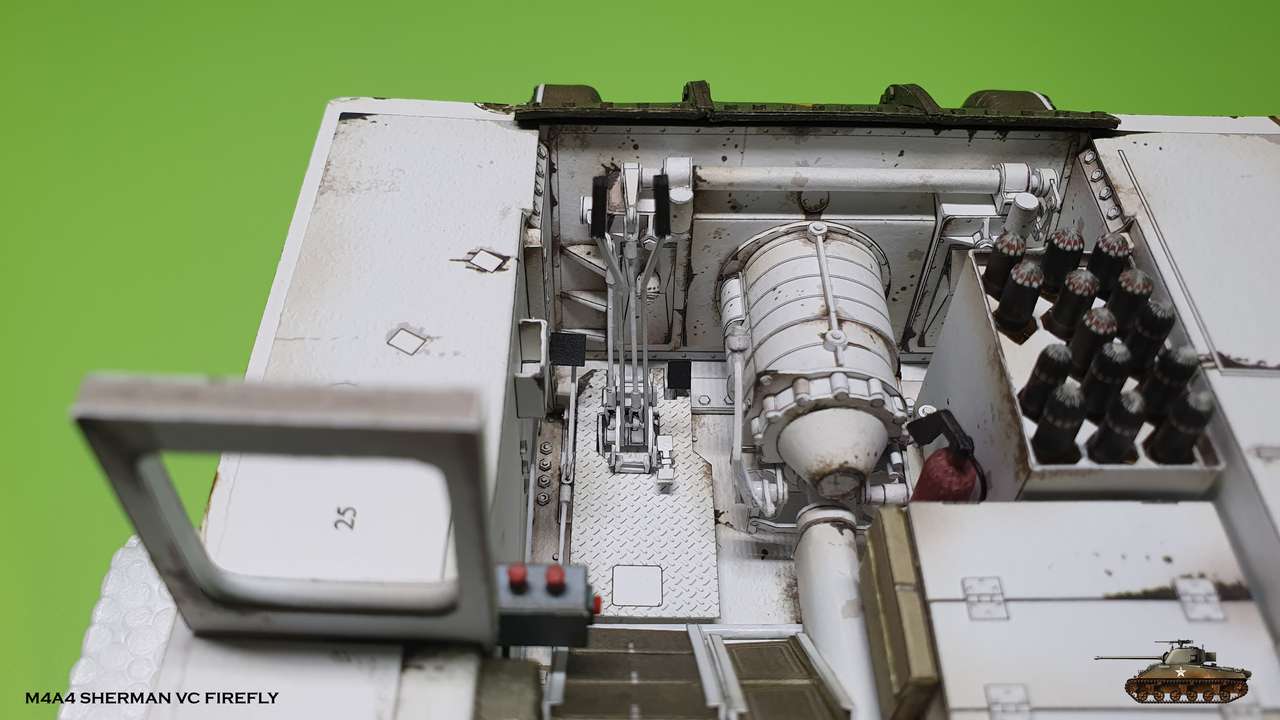
To be continued (driver's chair)...
the build is a joy and also the final result is super satisfying!
Upper deck. I decided to glue parts on demand and not as completed unit, as shown on drawings. Otherwise steering levers would interfere.
So first of all, i attached upper deck itself and then all other details.
Tried to take a lot of pictures for future reference
Next is mechanism that transfers momentum from clutch pedal to disconnect driveshaft from engine.
Here i assembled whole unit and then placed inside. The only issue was how much offset to take from supportings, when gluing the rod. Did it by eye.
And everything placed inside. Also connected rods from steering levers and clutch pedal. It was very tight process, but with hardly any issues. Just remember not to sneeze or breathe :-D
To be continued (driver's chair)...
Last edited:
Thank you Boris, Rhaven Blaack and Zathros!
I am excited myself with this level of details.
I think I am going to make this, Poof!, it's made. That happens with everything you have posted, perfect miniatures of the big thing. Unreal!!
I am excited myself with this level of details.
- Apr 5, 2013
- 13,876
- 10,216
- 228
You should be, and also, be very proud. You should be very proud. we are thankful that you have taken us through the building journey, interacted with every question asked. Honestly, this thread is representative of the best of build threads that you and others on this forum are making that make people like myself feel like we are part of the process, and appreciate the time you take to share and explain what you do. Thanks You!!
Too true @zathros this build thread, if not already a "sticky" needs to be on. I can't wait to see a new post with build pics, and I am not an Armour fan.You should be, and also, be very proud. You should be very proud. we are thankful that you have taken us through the building journey, interacted with every question asked. Honestly, this thread is representative of the best of build threads that you and others on this forum are making that make people like myself feel like we are part of the process, and appreciate the time you take to share and explain what you do. Thanks You!!
In thought you had, I just din't know, I usually just use the n"What's New" tab, and then "New Posts"I made this thread a "STICKY" a long time ago.
- Apr 5, 2013
- 13,876
- 10,216
- 228
Micah, when you suggest something I make it a priority to check into it.
well damn, aint I specialMicah, when you suggest something I make it a priority to check into it.
")
- Apr 5, 2013
- 13,876
- 10,216
- 228
You really start to believe that designer of this model was serious,
when one chair consists of 24 parts
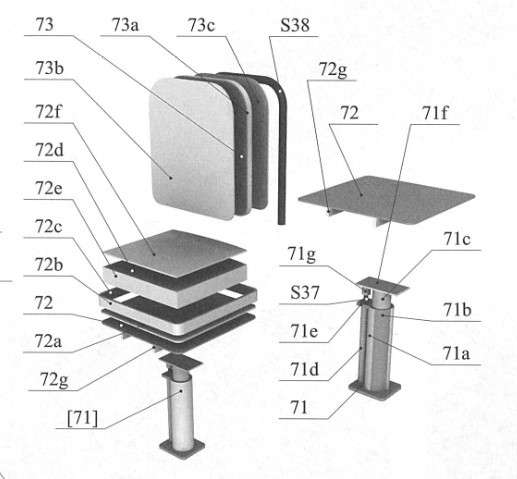
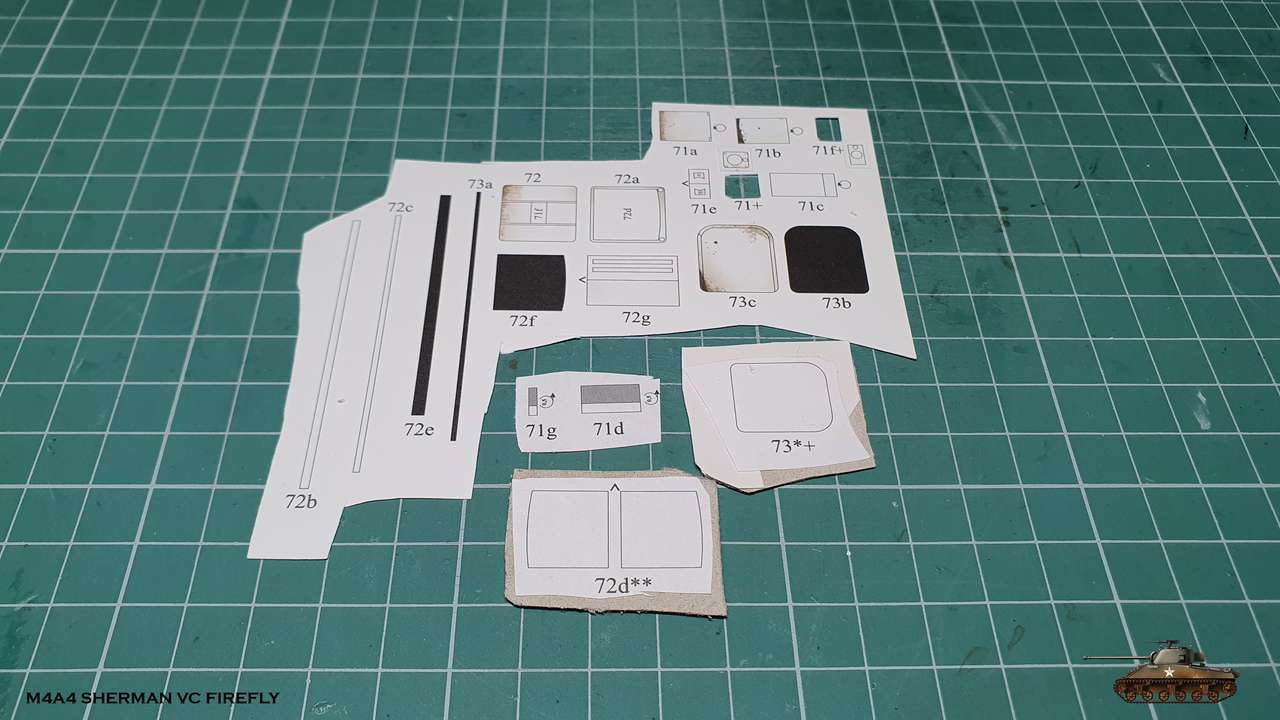

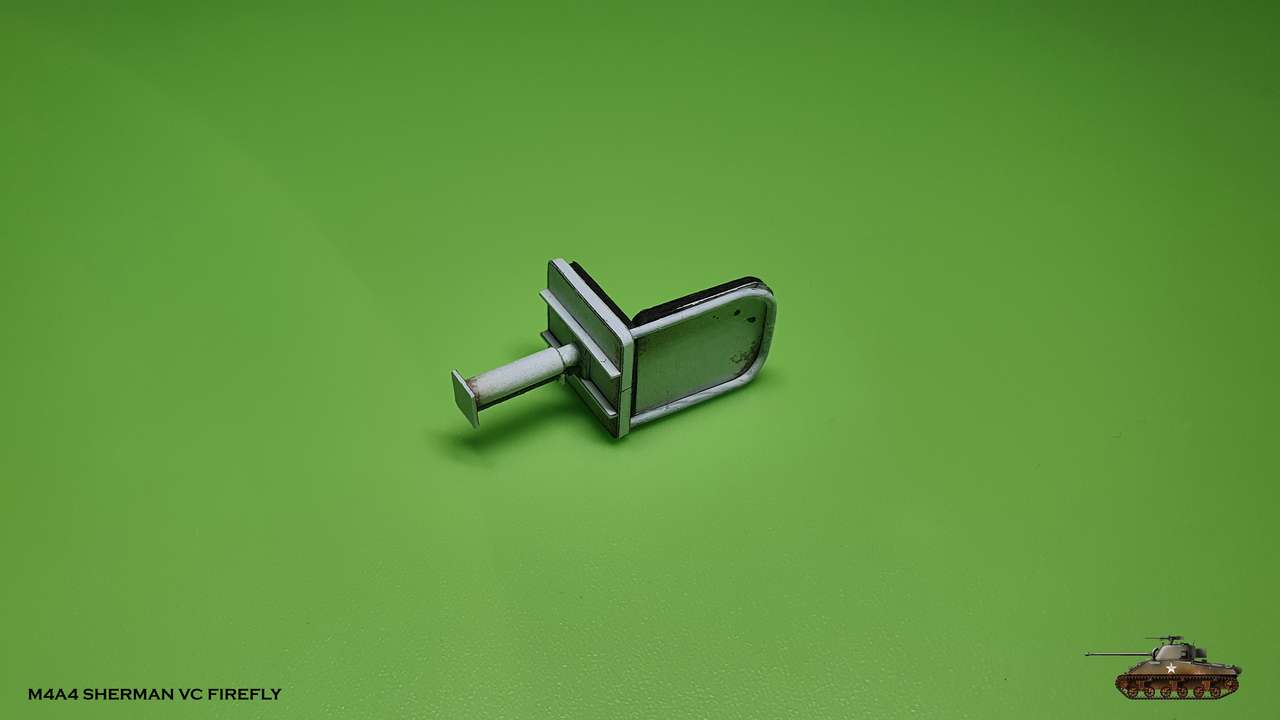


You can clearly see pneumatic height adjustment mechanism.
I assume it is for drivers convenience, when he drove the thank through open hatch. Correct me if i wrong.
Driver's spot is ready and so the floor of fighting compartment.
Next shelves.
Stay tuned!
when one chair consists of 24 parts
You can clearly see pneumatic height adjustment mechanism.
I assume it is for drivers convenience, when he drove the thank through open hatch. Correct me if i wrong.
Driver's spot is ready and so the floor of fighting compartment.
Next shelves.
Stay tuned!