

You continue to do outstanding work on one of the most detailed models I have ever seen. That the kit included (and that you then assembled) the drive shaft that was then completely enclosed speaks to the research and dedication that went into both the design and your assembly.
M4A4 Sherman VC Firefly, Halinski 1:25
- Thread starter snake7
- Start date
You are using an out of date browser. It may not display this or other websites correctly.
You should upgrade or use an alternative browser.
You should upgrade or use an alternative browser.

Thank you!
Hope you all stand strong against world pandemia.
Building paper models helps")
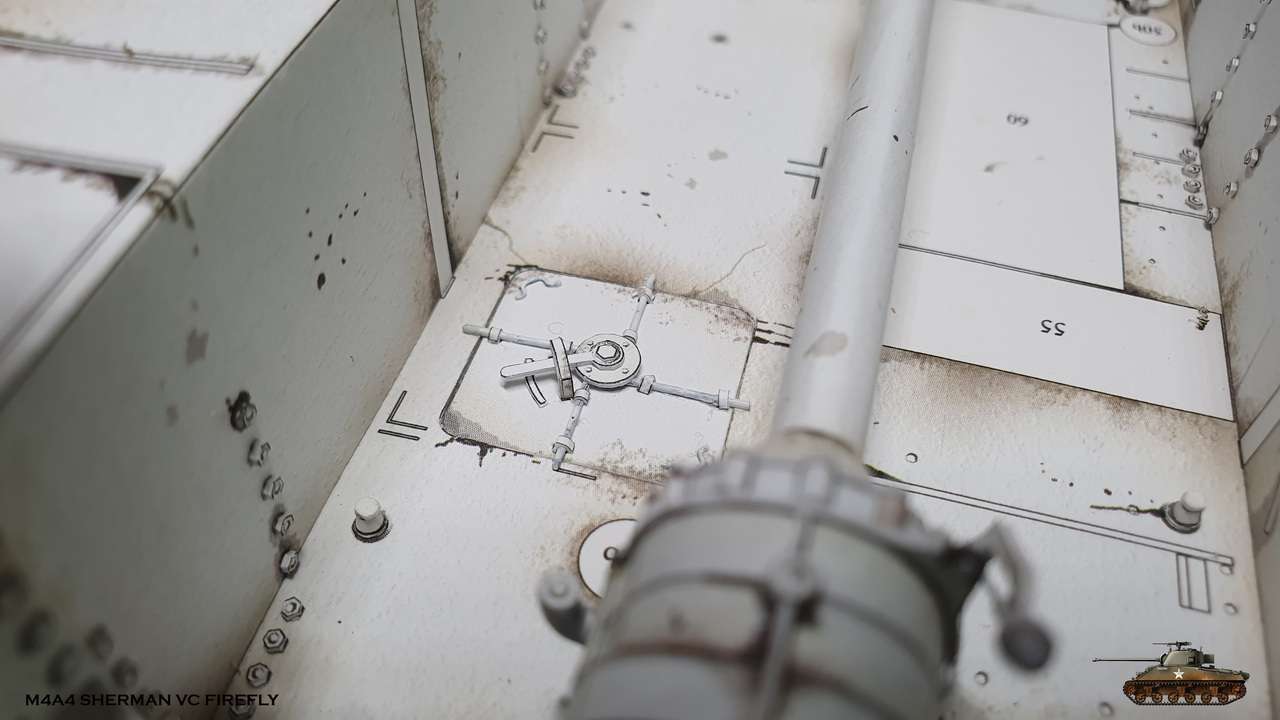
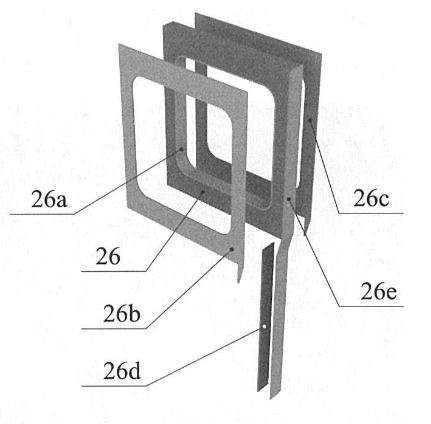
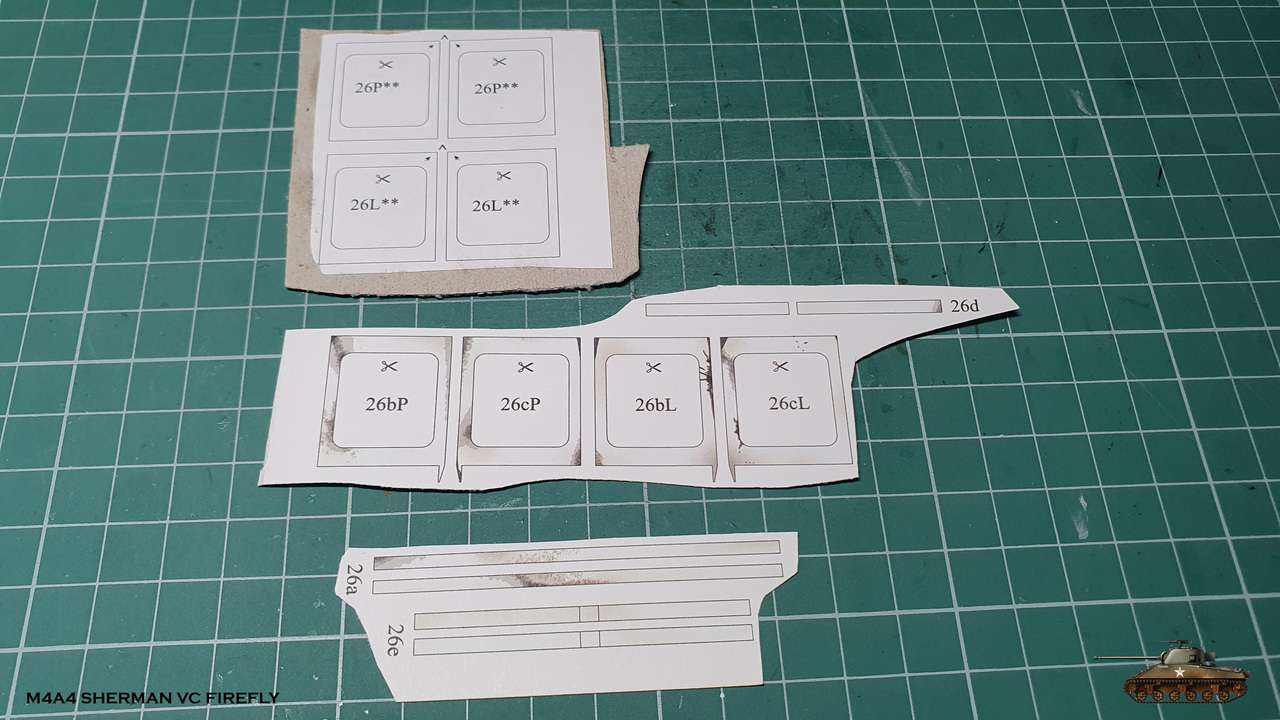
Before I continue to fill the hall, i've assembled escape hatch cover.
Though it is a simple part, you must pay attention to couple of details:
It is advised to dry fit basis of cover into a hatch. Chances are it won't fit, because the hatch was cut before in several layers.
Second thing - do not glue inner cover to the basis, because after putting all the details on the basis you will not be able to place tha cover in the hatch - the hinges of the cover will interfere. I did this mistake and was in need to glue all the little details on site, in the hall


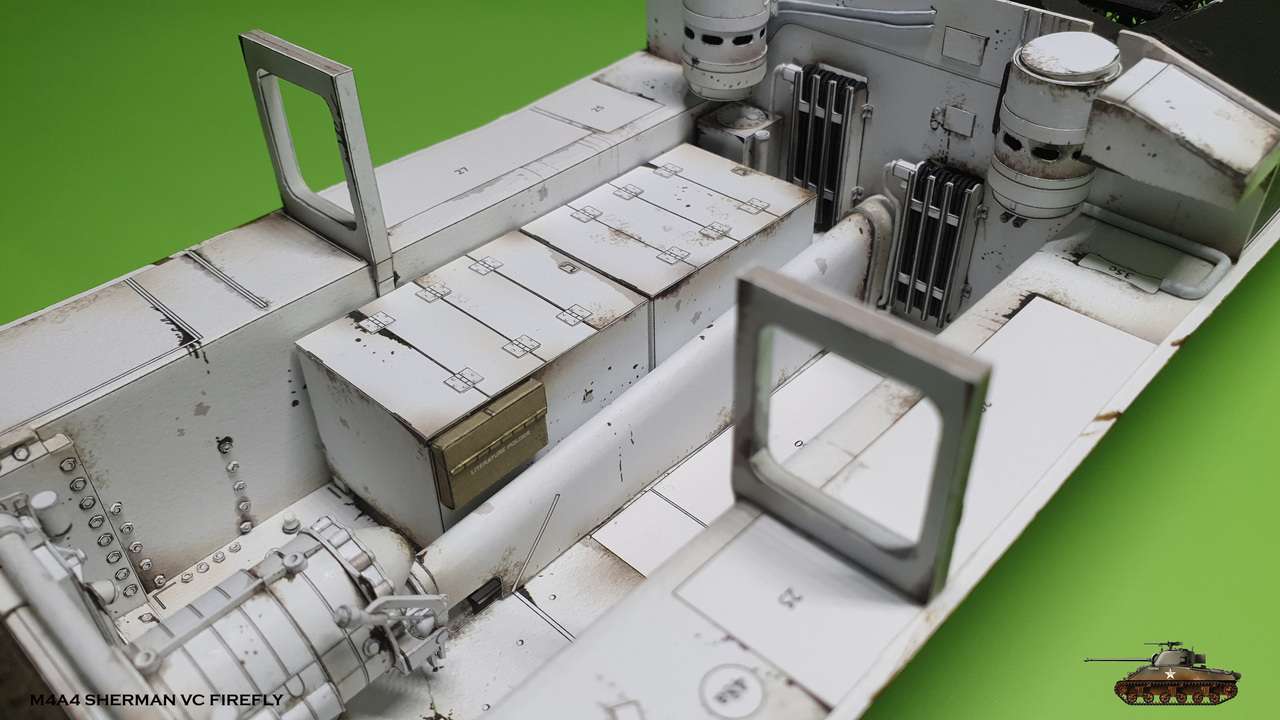
The instructions suggest to assemble all the parts on floor and walls of a hall and only then on shelfs. I decided to go by this way and to check if it is the optimal one, but only after i assembled middle supportings.

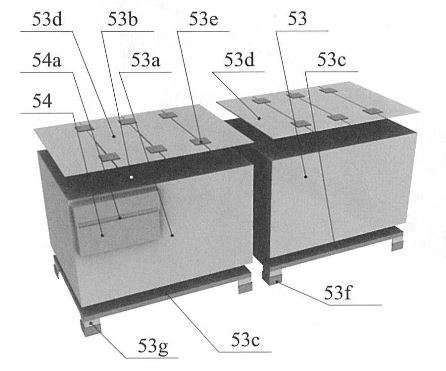
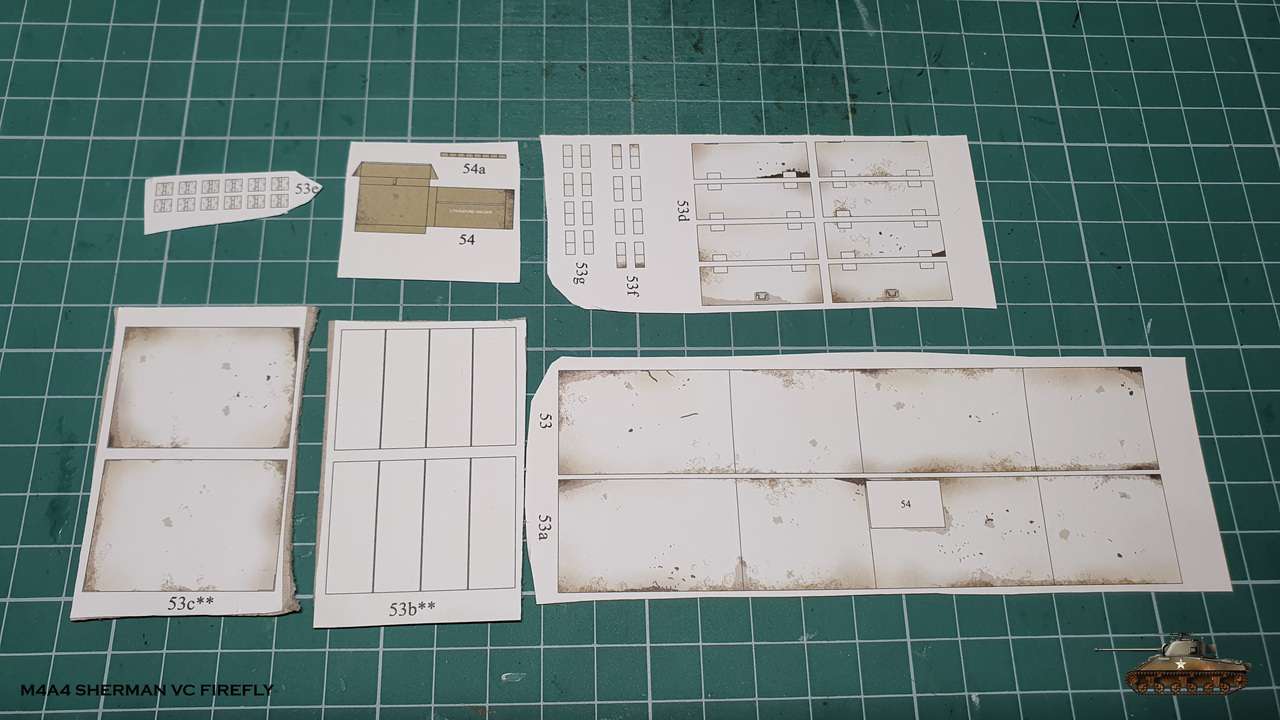
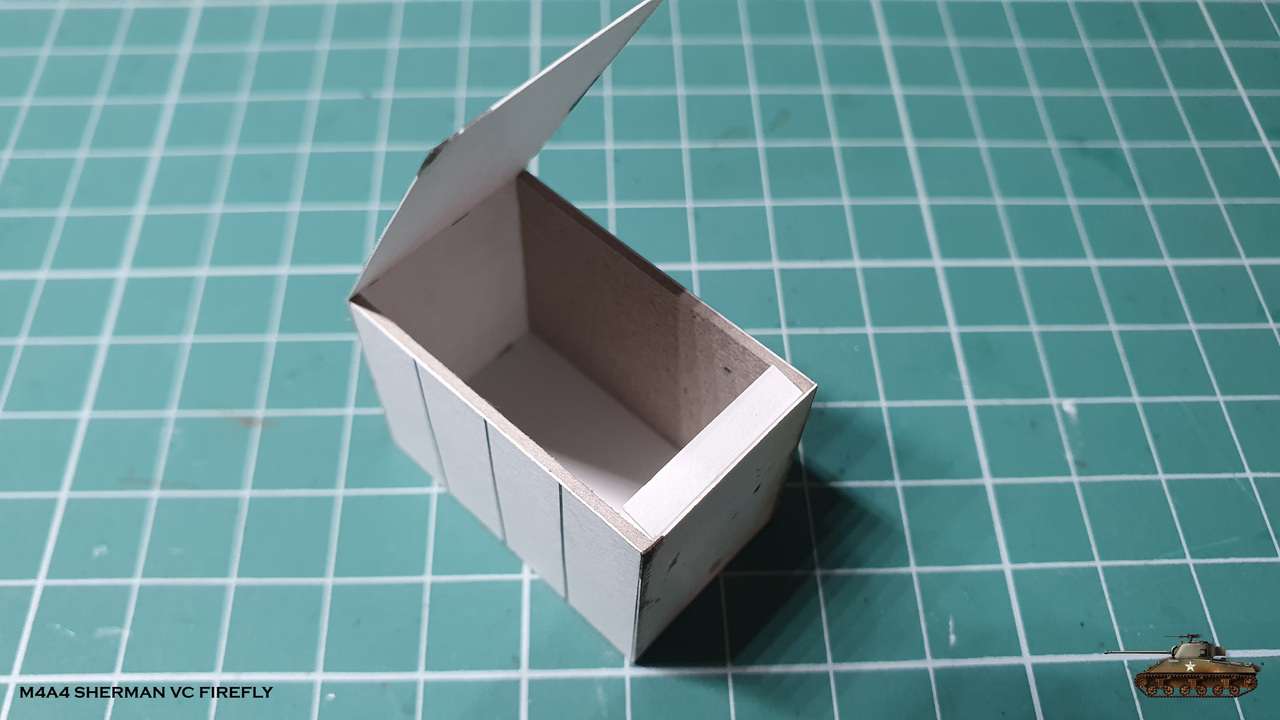
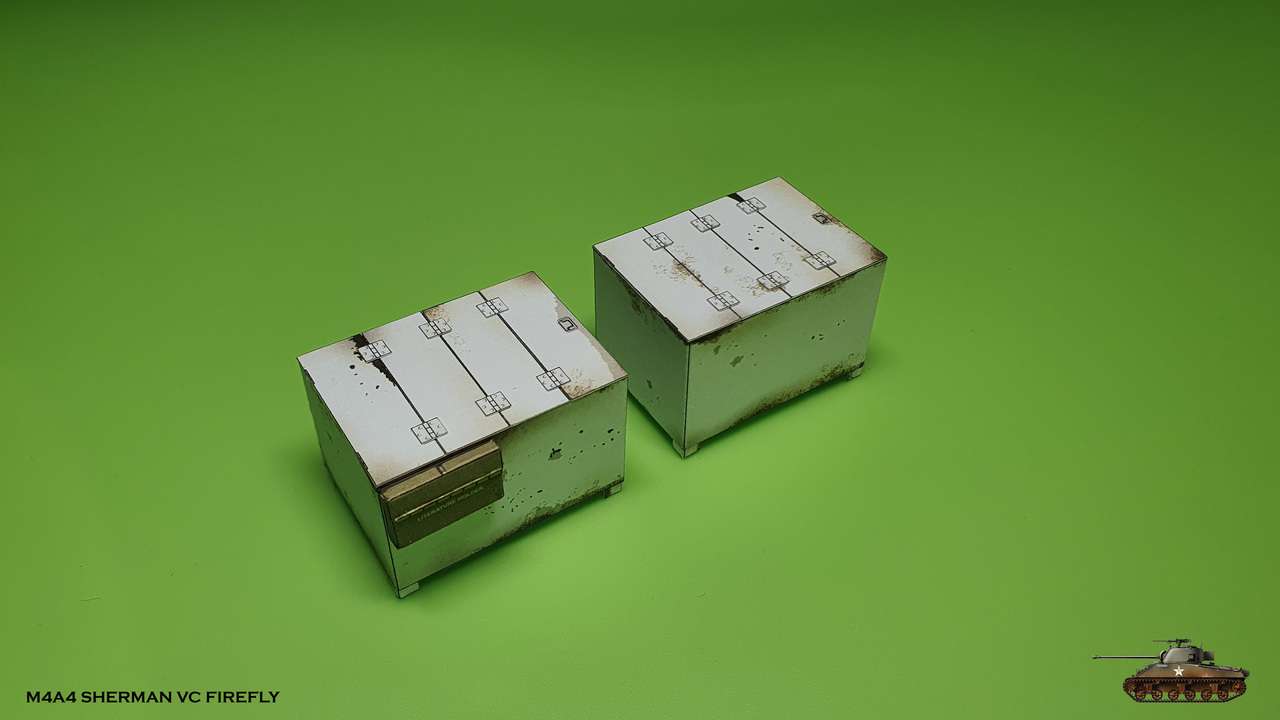
Then come two big ammunition rounds wet storage boxes. The design of this simple boxes is superb - lower and upper parts laminated on 1 mm cardboard and this gives easy way to glue the casing. I only added flap in the end for straighter closing.
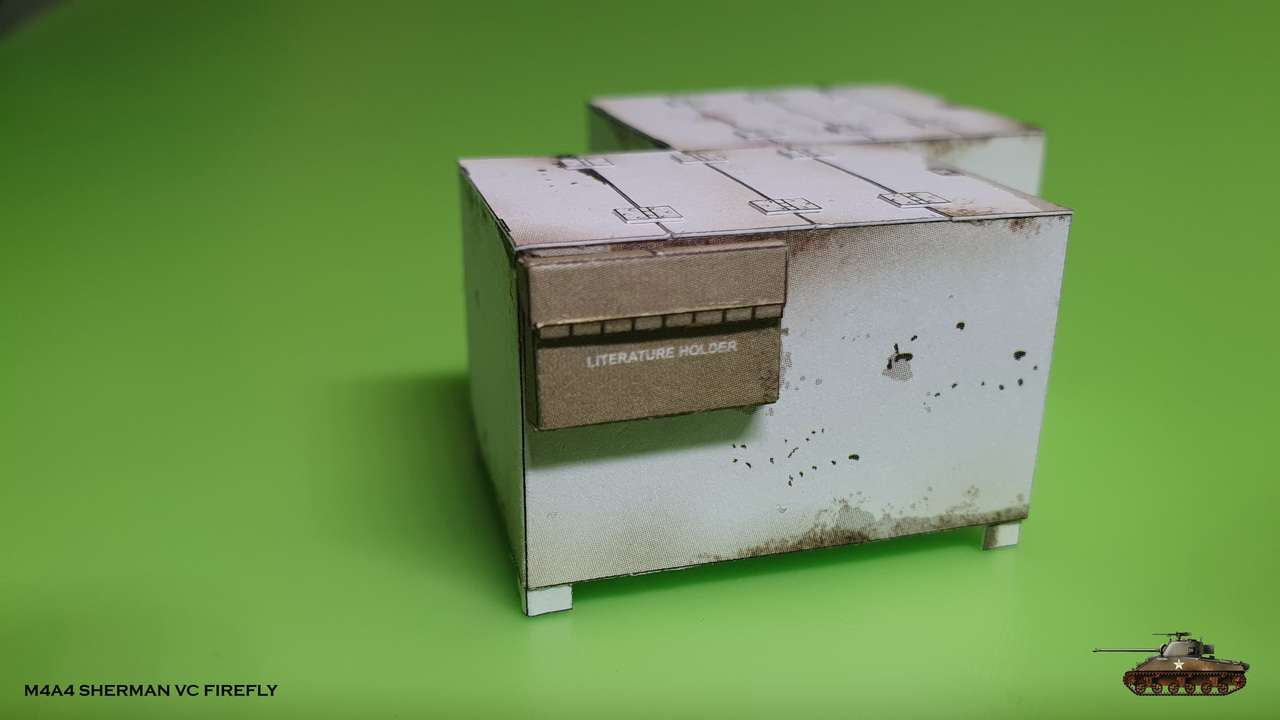
Pay attention on side bag for literature
And it's time to put all parts in place. The supportings are in place, the boxes are in place... and the hatch disappeared Only the edge is visible.
There are no compromises in this model")


Hope you all stand strong against world pandemia.
Building paper models helps
Before I continue to fill the hall, i've assembled escape hatch cover.
Though it is a simple part, you must pay attention to couple of details:
It is advised to dry fit basis of cover into a hatch. Chances are it won't fit, because the hatch was cut before in several layers.
Second thing - do not glue inner cover to the basis, because after putting all the details on the basis you will not be able to place tha cover in the hatch - the hinges of the cover will interfere. I did this mistake and was in need to glue all the little details on site, in the hall
The instructions suggest to assemble all the parts on floor and walls of a hall and only then on shelfs. I decided to go by this way and to check if it is the optimal one, but only after i assembled middle supportings.
Then come two big ammunition rounds wet storage boxes. The design of this simple boxes is superb - lower and upper parts laminated on 1 mm cardboard and this gives easy way to glue the casing. I only added flap in the end for straighter closing.
Pay attention on side bag for literature
And it's time to put all parts in place. The supportings are in place, the boxes are in place... and the hatch disappeared
Only the edge is visible.There are no compromises in this model
Last edited:

- Apr 5, 2013
- 13,876
- 10,215
- 228
All I can do is look. I have run out of words. This thread will be a "must go to" thread for anyone building this model.
Thanks Zathros and Boris.
I didn't update for couple of weeks, but there was a progress.
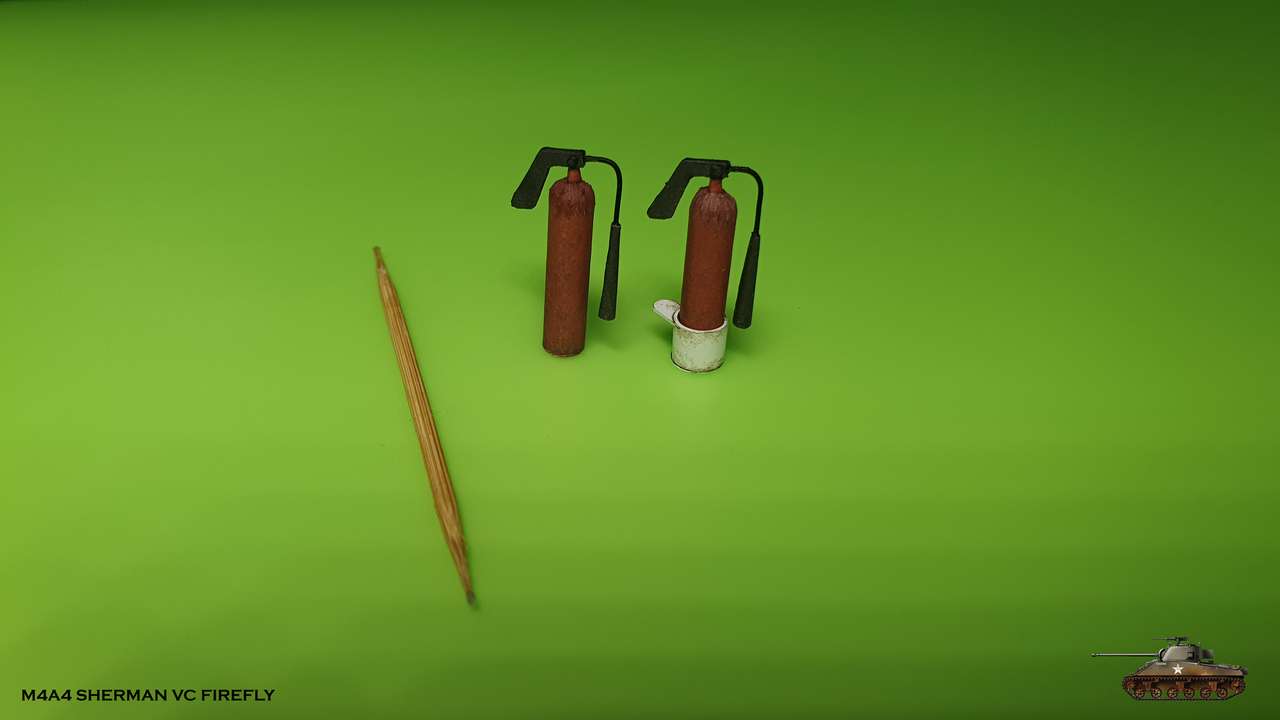
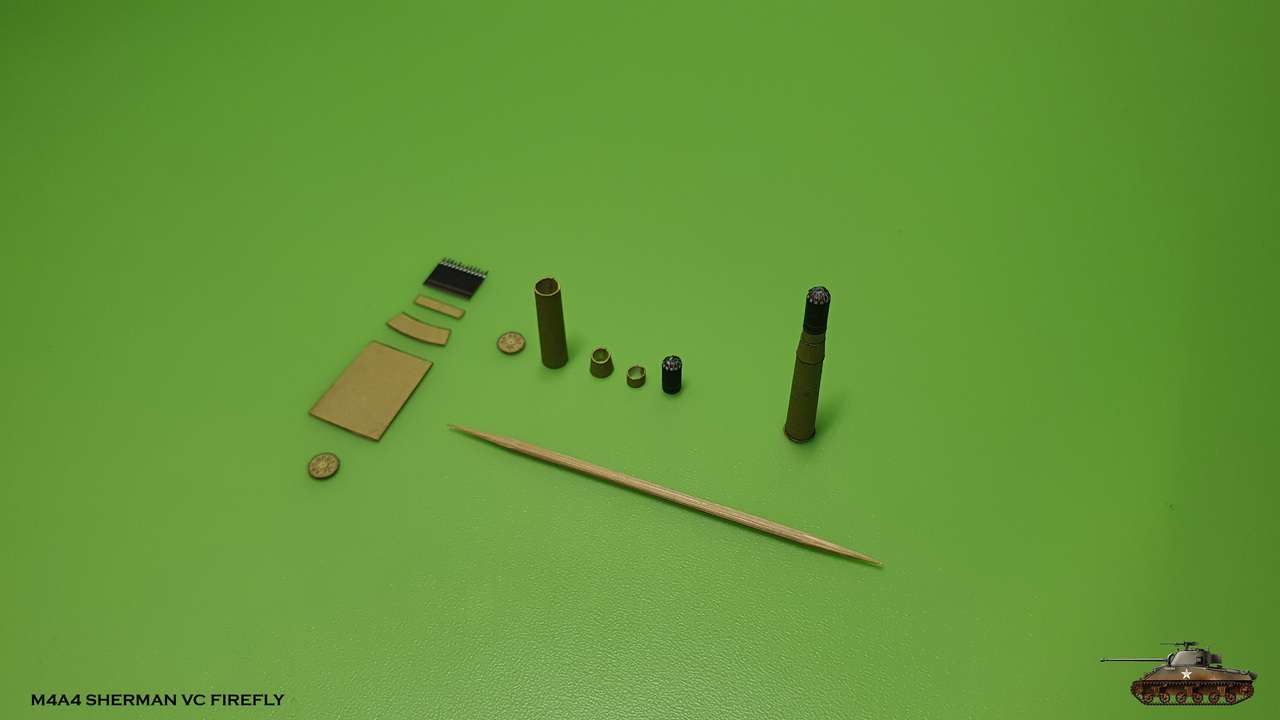
Continue to fill right side of a hall, i build two manual fire extinguishers.
One will be placed right bottom and the other left top.


Also i assembled quick drawing rack with ammo rounds.
On this side two types of rounds: Armor Piercing (AP) and Armor Piercing Cup (APC). Also there will be third type on left side.
Actually, you can see the markings on casing cups!
I must admit, that cylindrical and cone parts are not my strong side.
So i did as good as i could, but got a lot of experience on the way.
I'm good with the result, though it is not perfect.
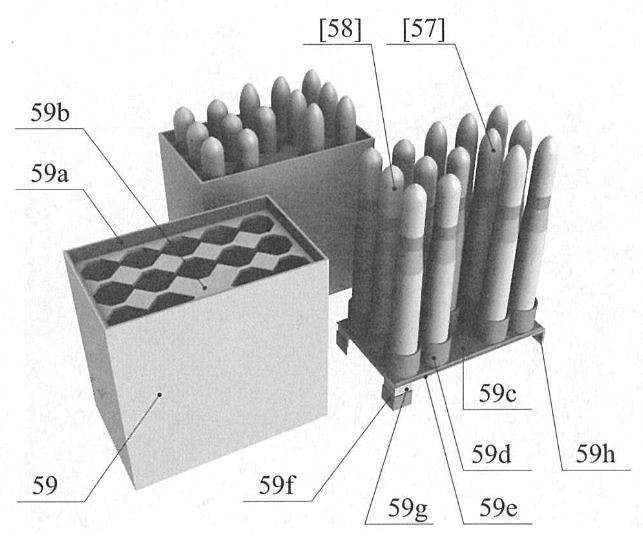

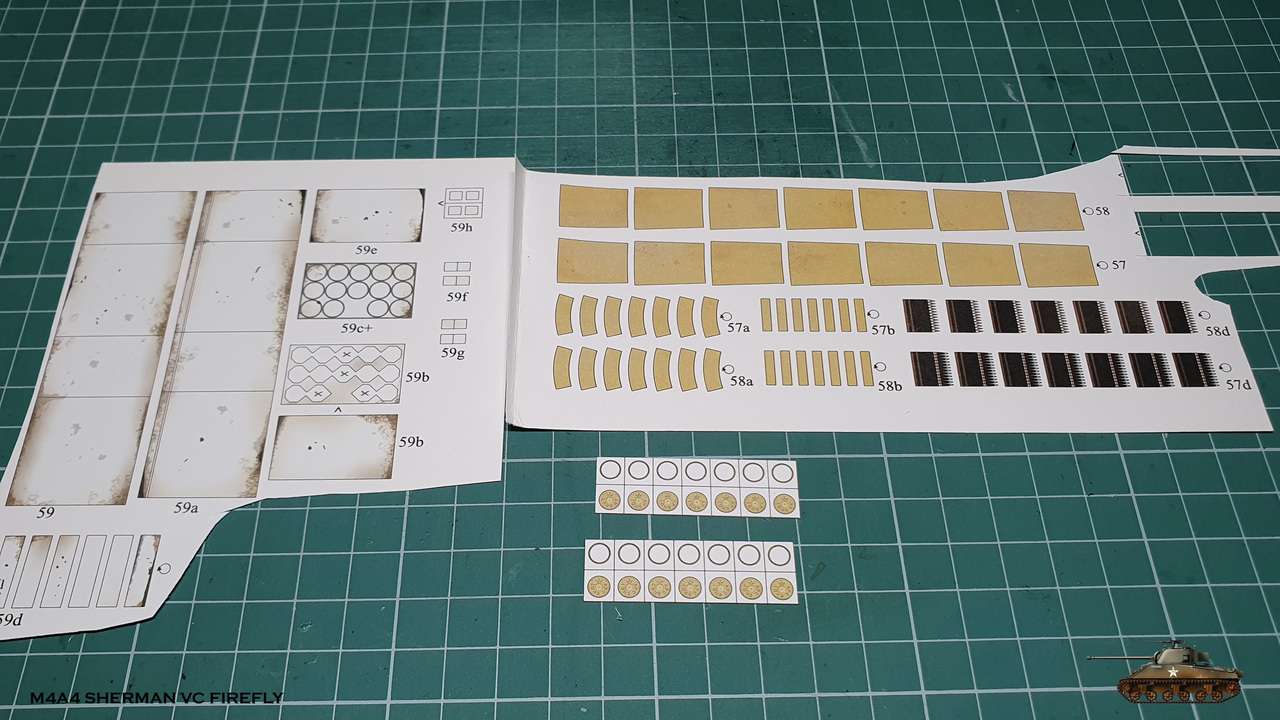
Every round is assembled from five parts.
The box itself contains upper hive part, that i socked with super glue for stiffness.
Also, you must assemble it in correct order - don't glue bottom side to walls, before you insert all the rounds into cups.


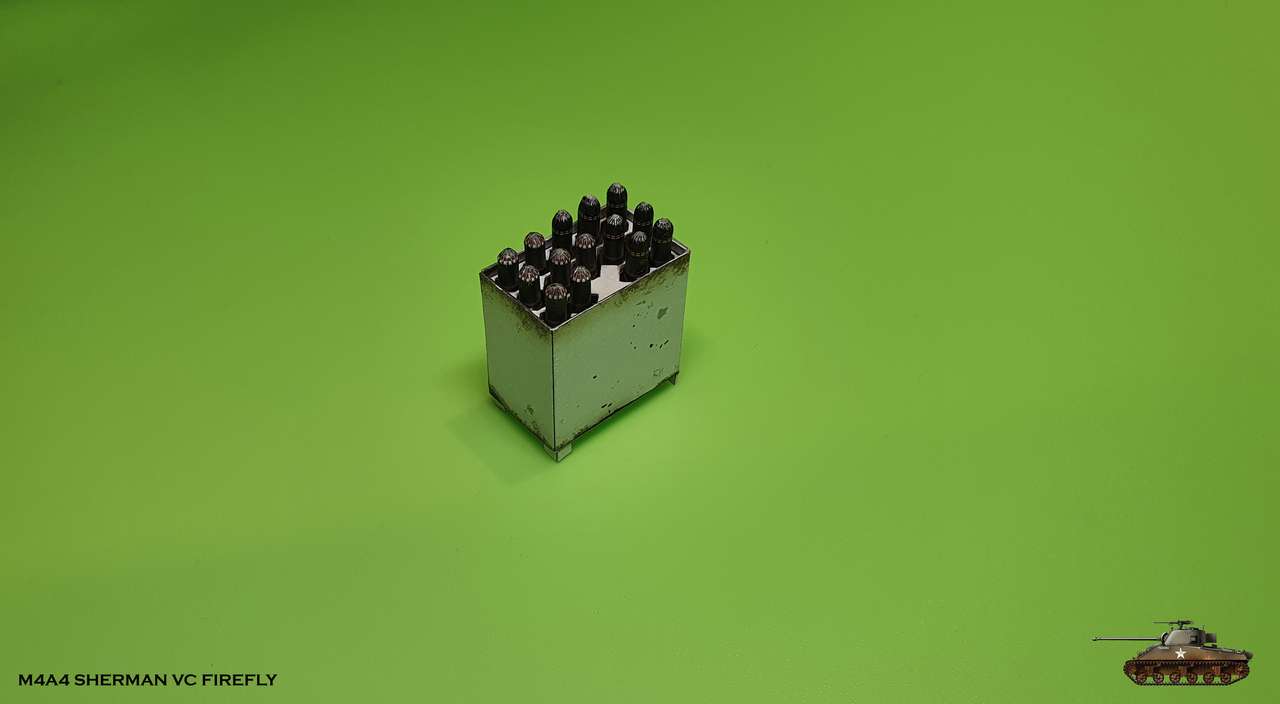
And the parts are placed in their markings.


I didn't update for couple of weeks, but there was a progress.
Continue to fill right side of a hall, i build two manual fire extinguishers.
One will be placed right bottom and the other left top.
Also i assembled quick drawing rack with ammo rounds.
On this side two types of rounds: Armor Piercing (AP) and Armor Piercing Cup (APC). Also there will be third type on left side.
Actually, you can see the markings on casing cups!
I must admit, that cylindrical and cone parts are not my strong side.
So i did as good as i could, but got a lot of experience on the way.
I'm good with the result, though it is not perfect.
Every round is assembled from five parts.
The box itself contains upper hive part, that i socked with super glue for stiffness.
Also, you must assemble it in correct order - don't glue bottom side to walls, before you insert all the rounds into cups.
And the parts are placed in their markings.
Last edited:
Snake, this ammo looks great. I don't know what you're complaining about. The shell itself is about 2.5mm in diameter, right? You could have made them from wooden skewers and paint them, but it's 100% paper. Good job
Yep, about that size.
And i corrected my post a little, with right terminology. Thank you
Thanks again, friends
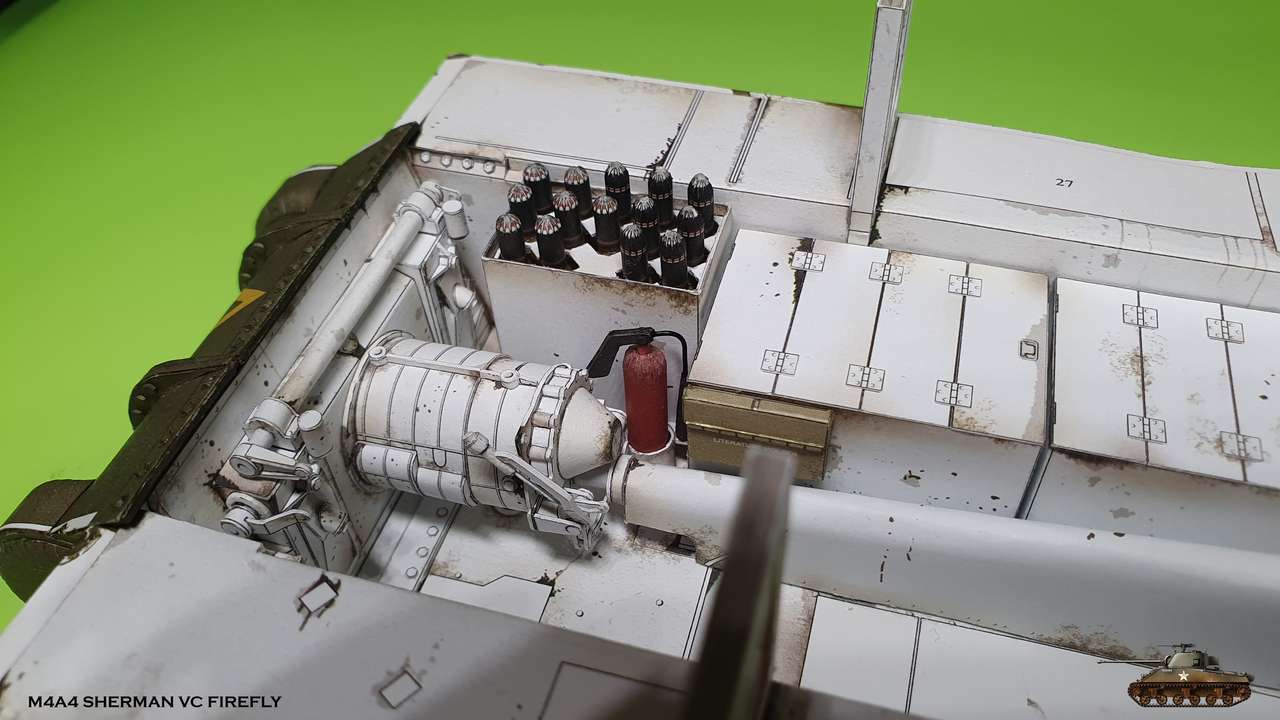
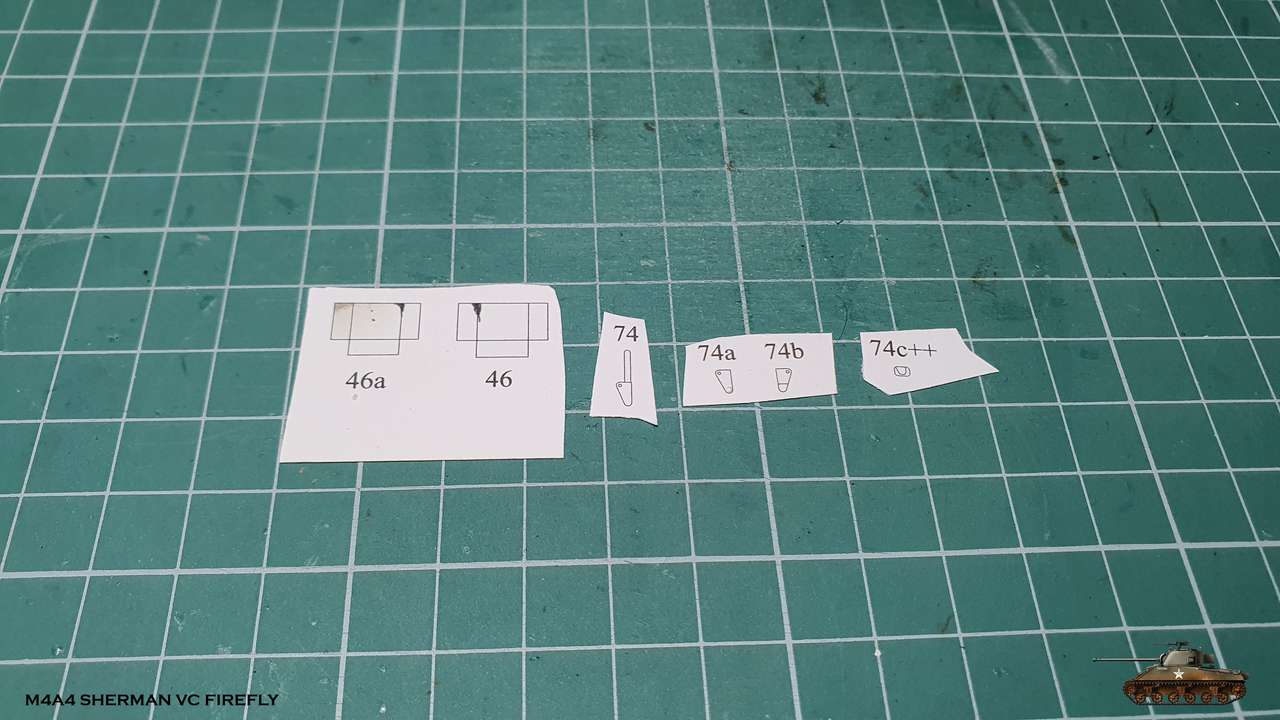
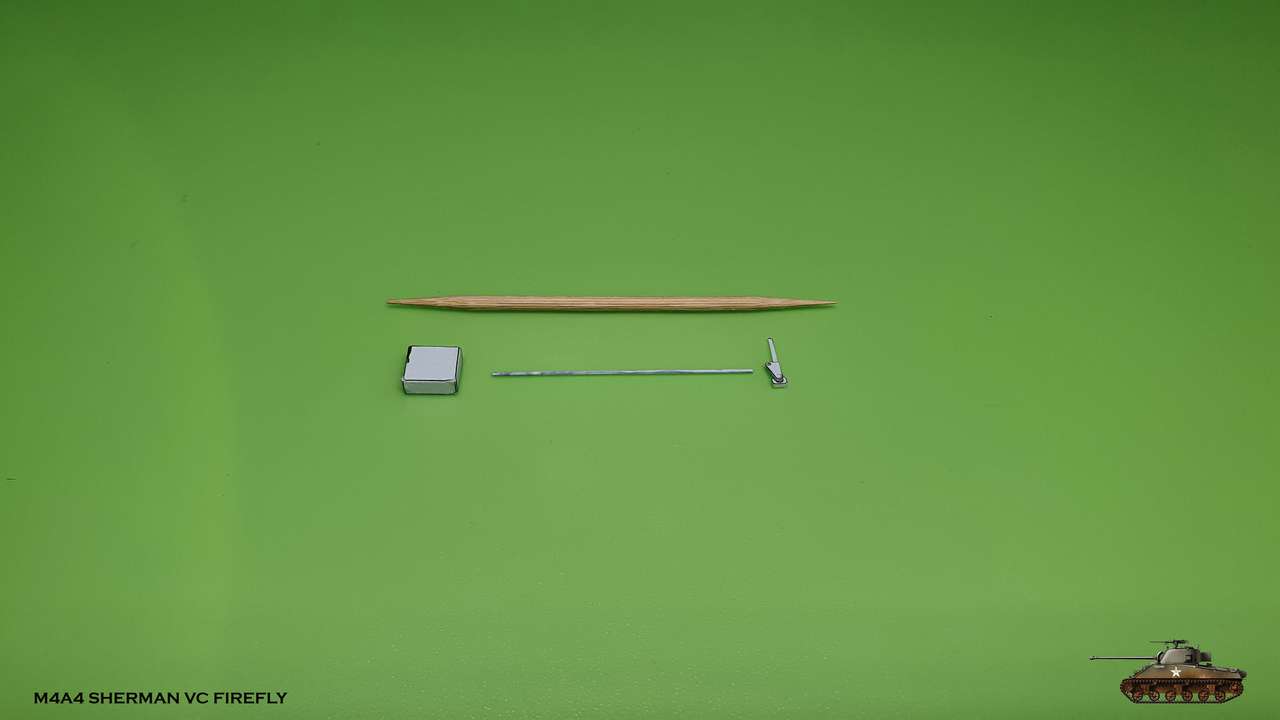
Switched to left side. Decided to fill the wall first and then the floor.
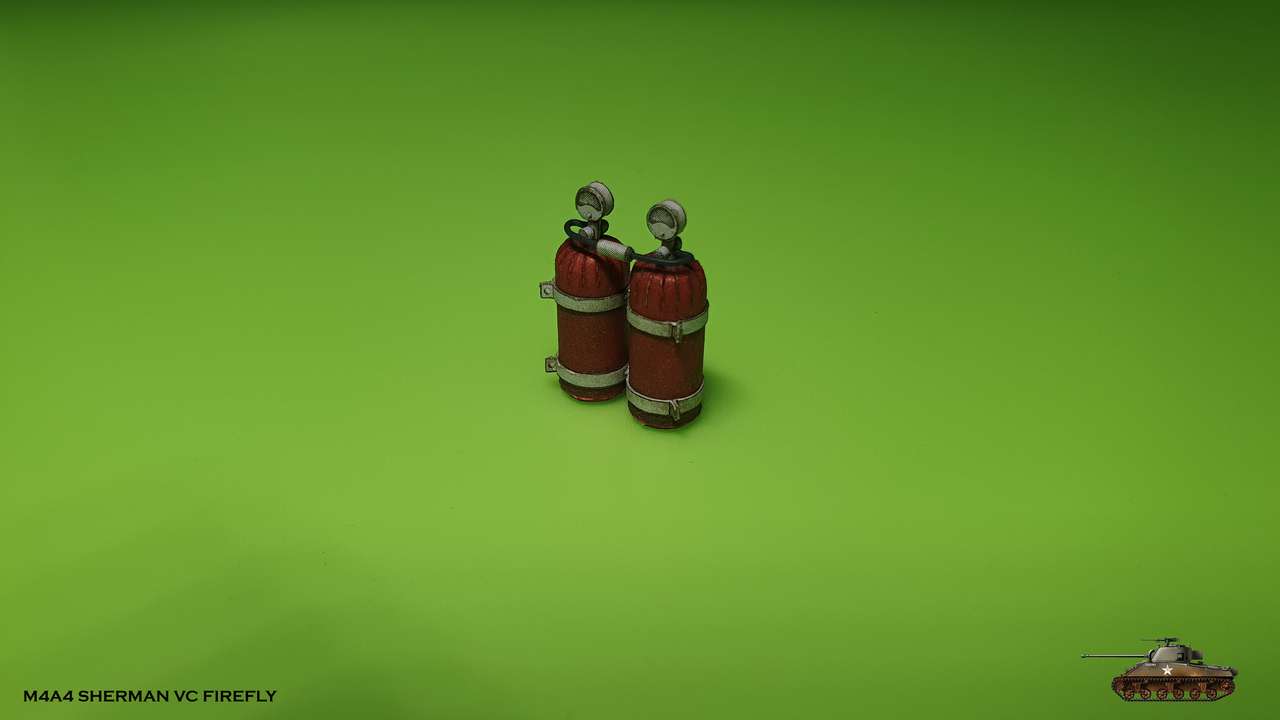
Fire extinguishers as part of engine compartment fire system. Though those are again cylindrical/dome shapes that i don't favor,
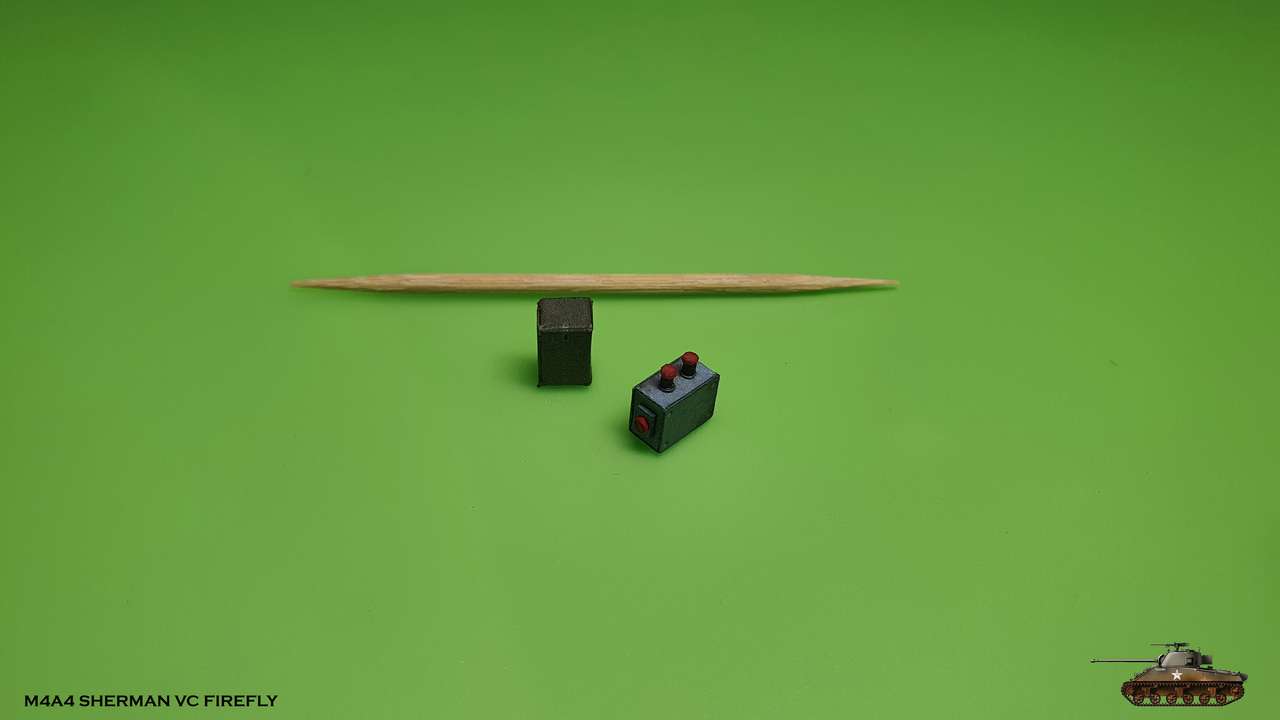
I like little parts like this. You understand what it is and when you hold it in 1:25 scale in your palm - it's exciting!
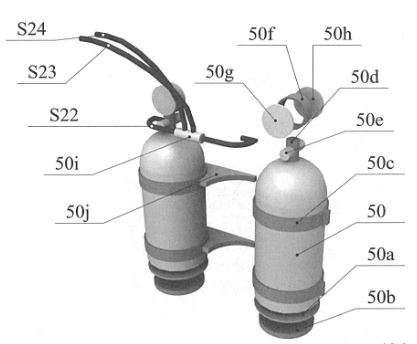
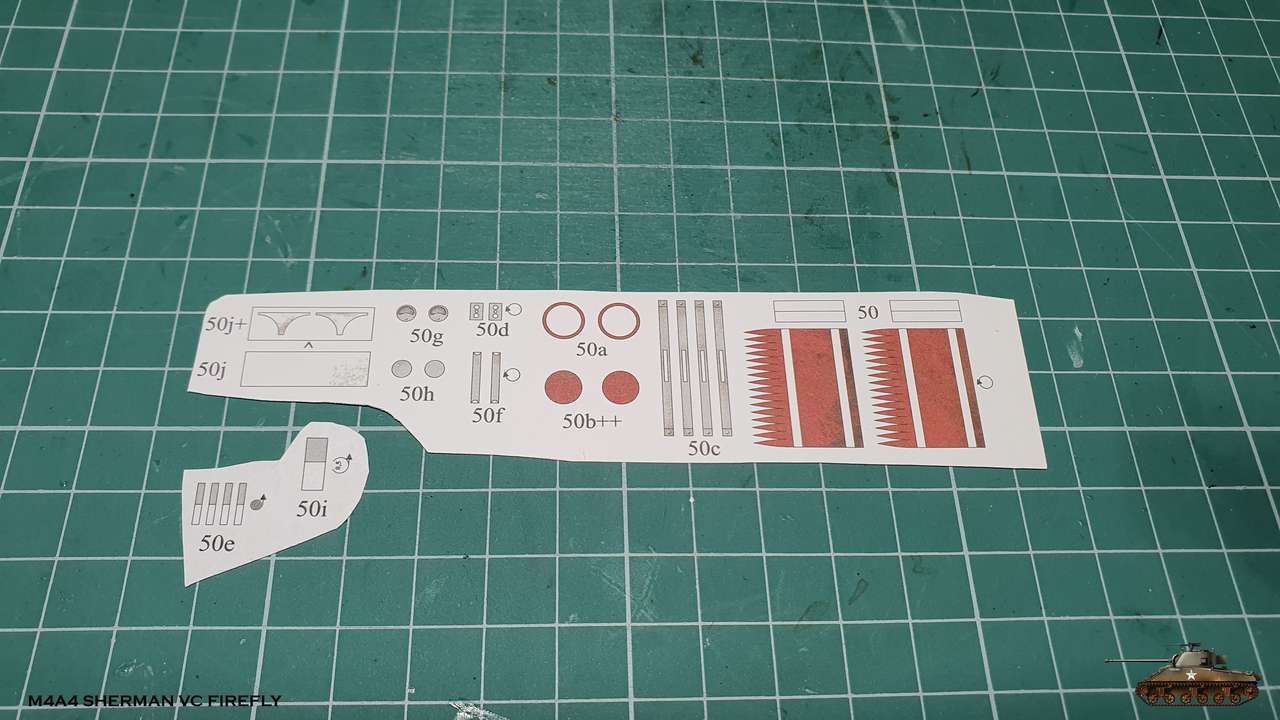
Pair of regulators - one for power unit generator and one for auxiliary generating unit.
Sorry, but forgot to picture them assembled (you will see them later placed in fighter compartment)
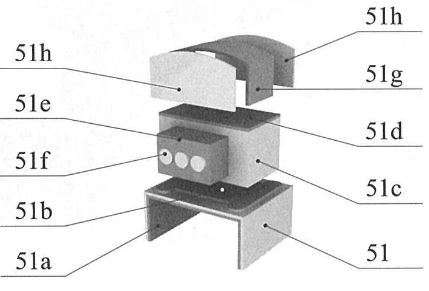
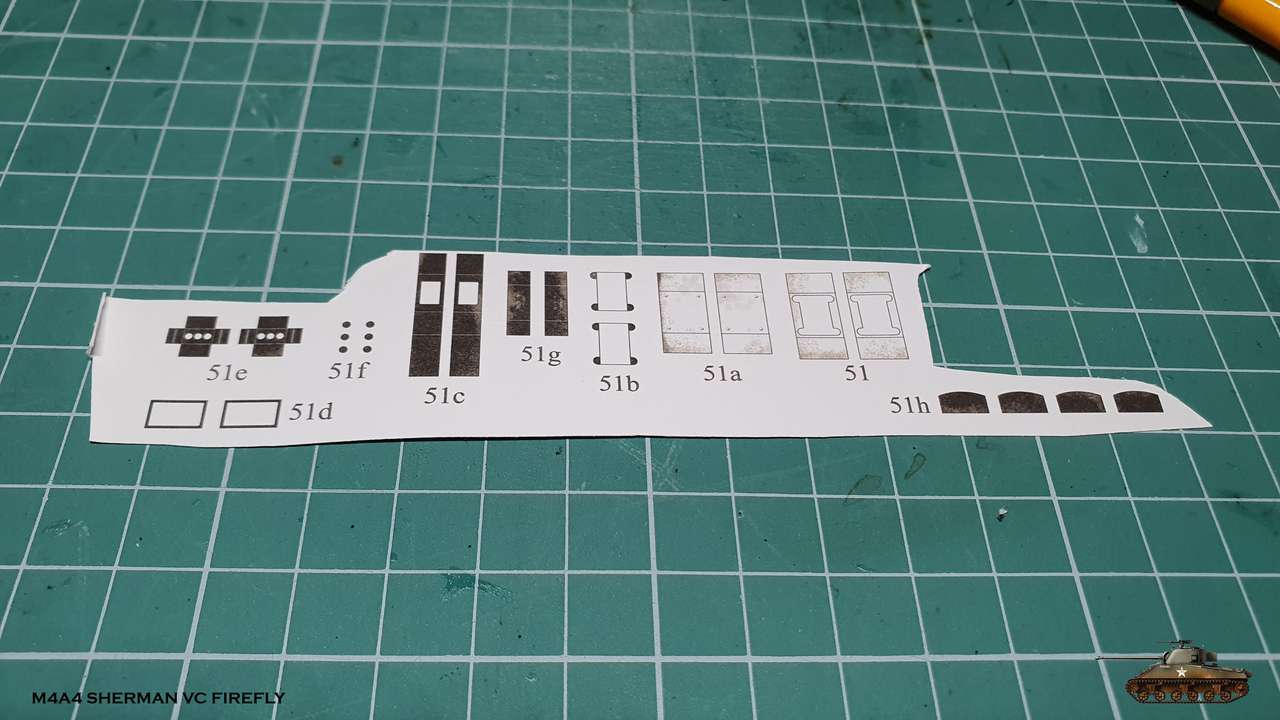
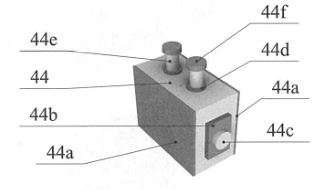
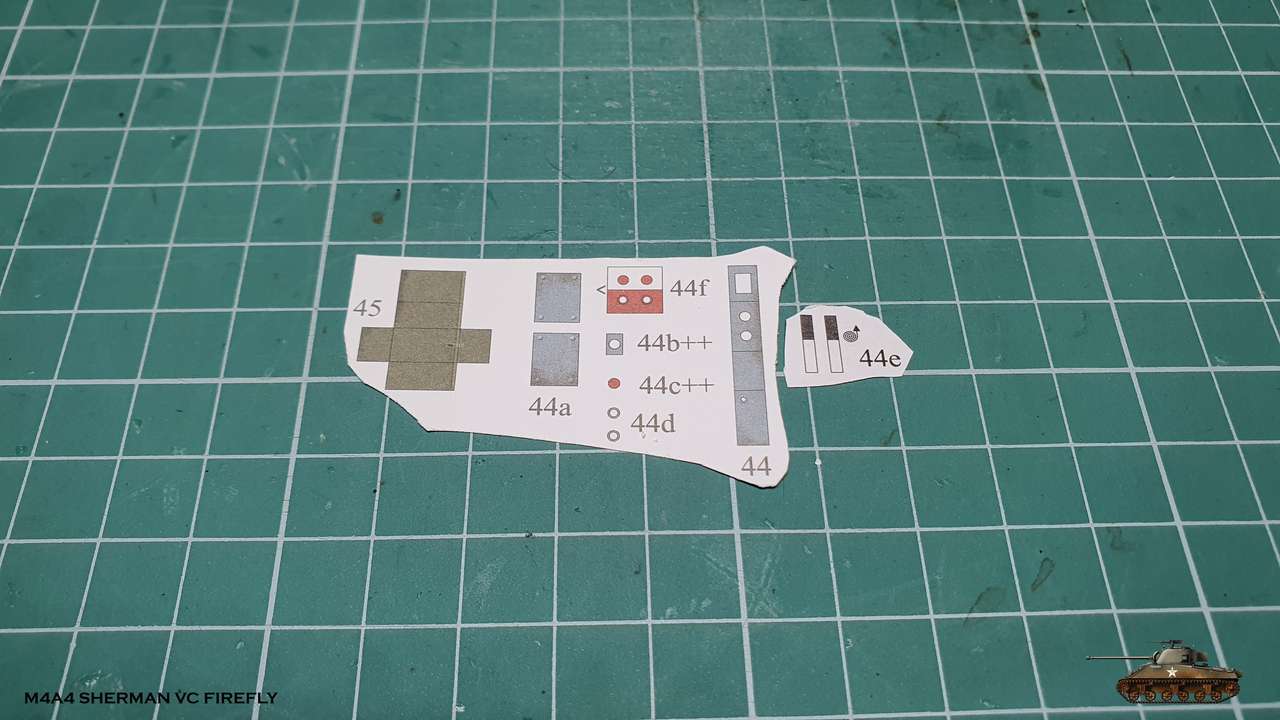
Some pauch, that i didn't find it's function and starter/generator buttons box
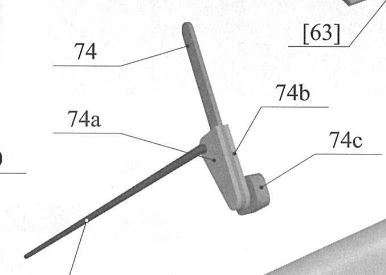
And last but not least - spare periscope box and choke lever
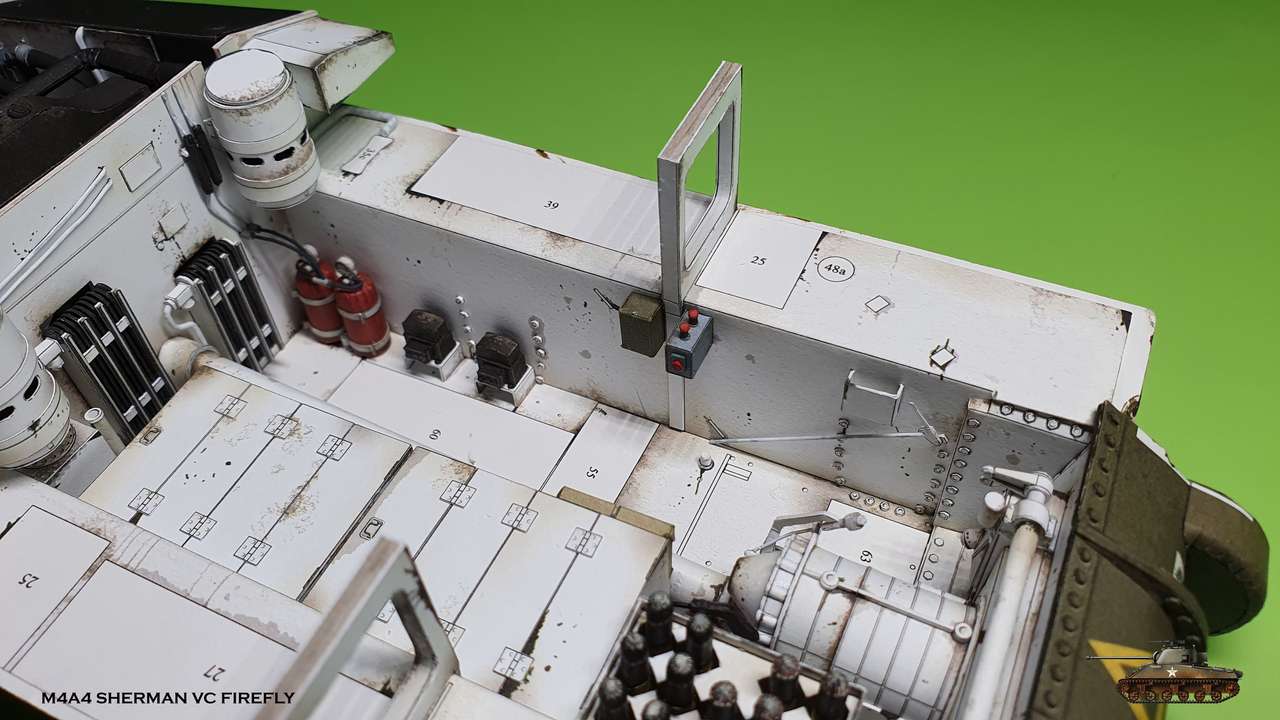
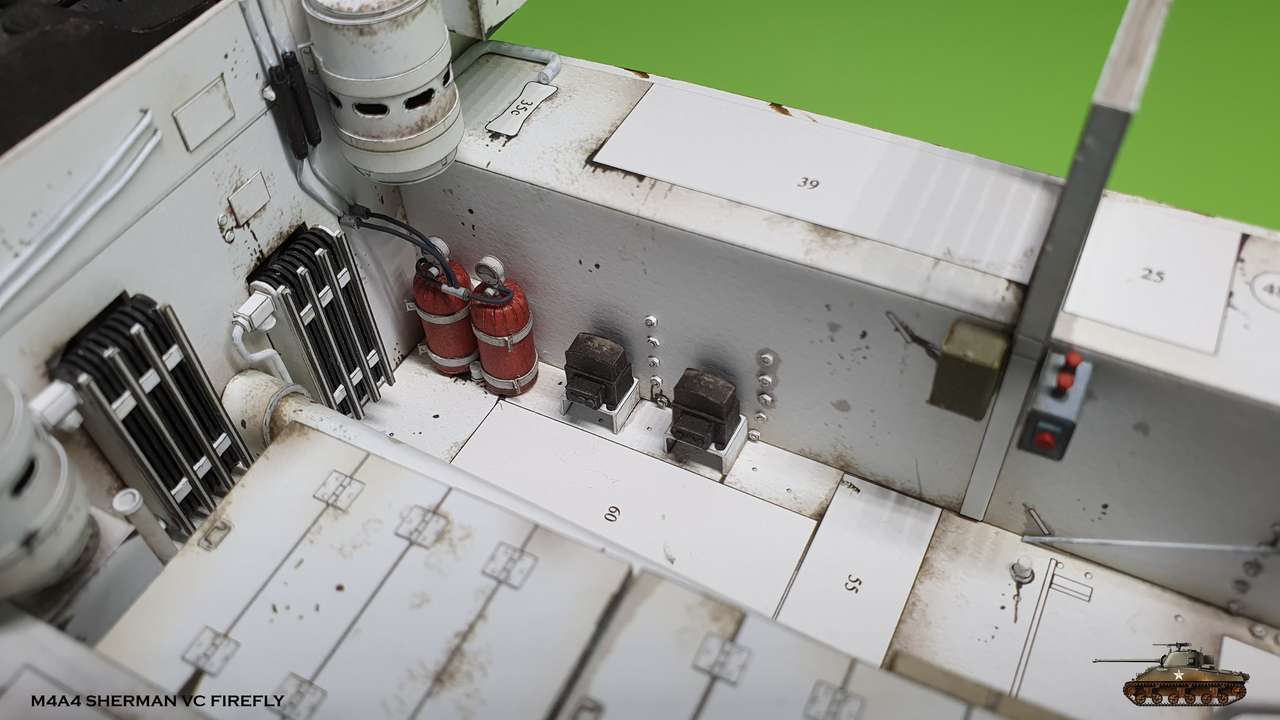
Glued all the parts to their markings. You can see now two black regulators in their places.
Fire extinguishers connected with tubes to fire system, that goes into engine compartment.
Choke connected via road.

Switched to left side. Decided to fill the wall first and then the floor.
Fire extinguishers as part of engine compartment fire system. Though those are again cylindrical/dome shapes that i don't favor,
I like little parts like this. You understand what it is and when you hold it in 1:25 scale in your palm - it's exciting!
Pair of regulators - one for power unit generator and one for auxiliary generating unit.
Sorry, but forgot to picture them assembled (you will see them later placed in fighter compartment)
Some pauch, that i didn't find it's function and starter/generator buttons box
And last but not least - spare periscope box and choke lever
Glued all the parts to their markings. You can see now two black regulators in their places.
Fire extinguishers connected with tubes to fire system, that goes into engine compartment.
Choke connected via road.
Last edited:
- Apr 5, 2013
- 13,876
- 10,215
- 228
Your components look better than the instructions, and far better than the flattened parts!!
Your work is breathing life into this model! The components are clean, clear, and crisp.
Thanks again
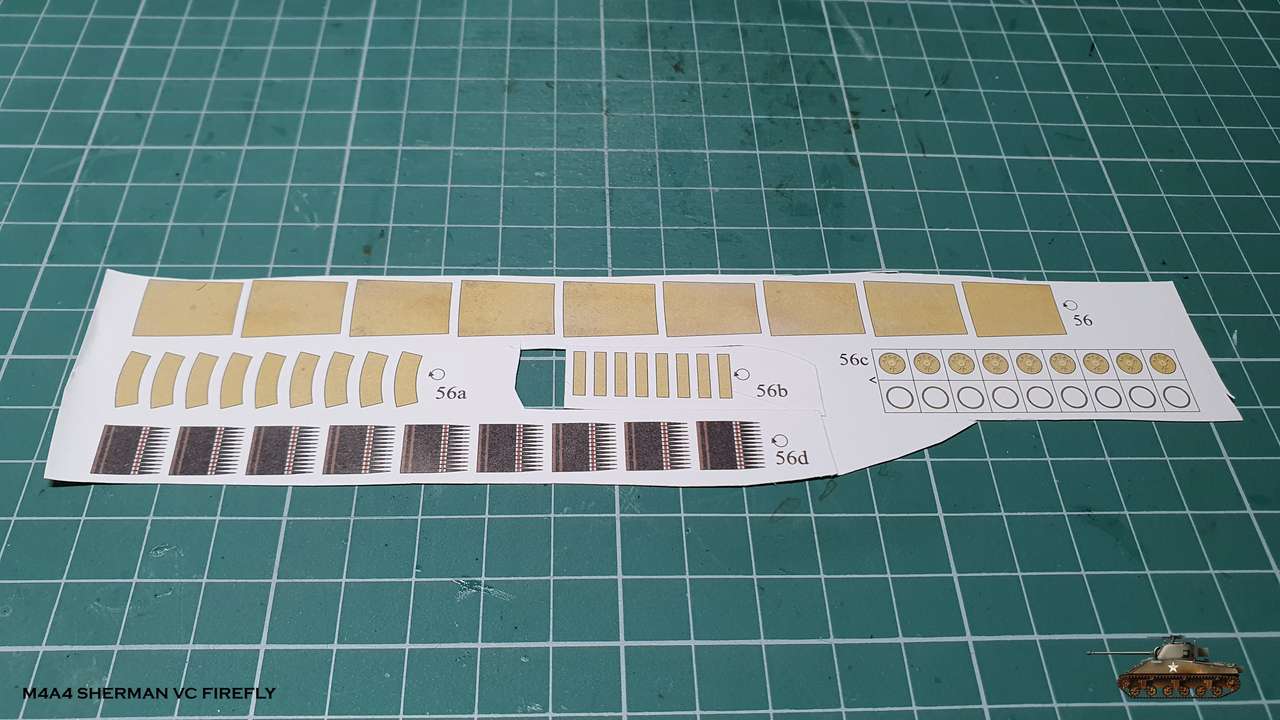
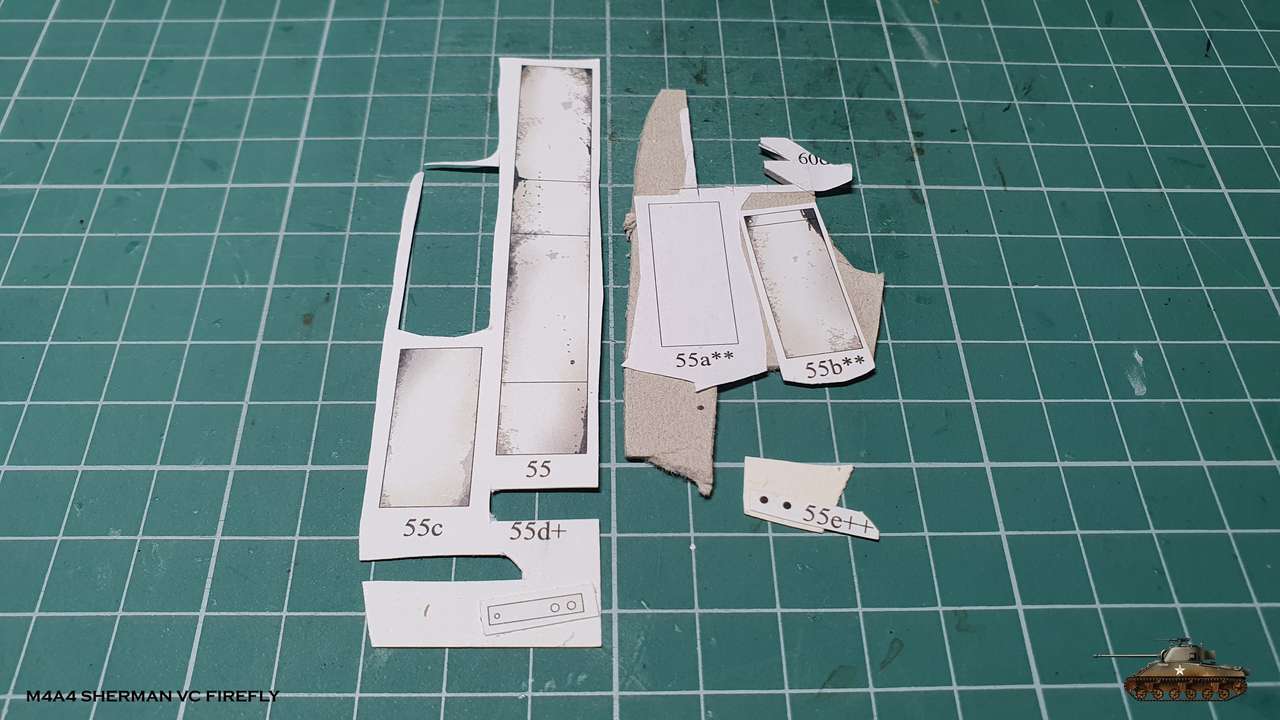
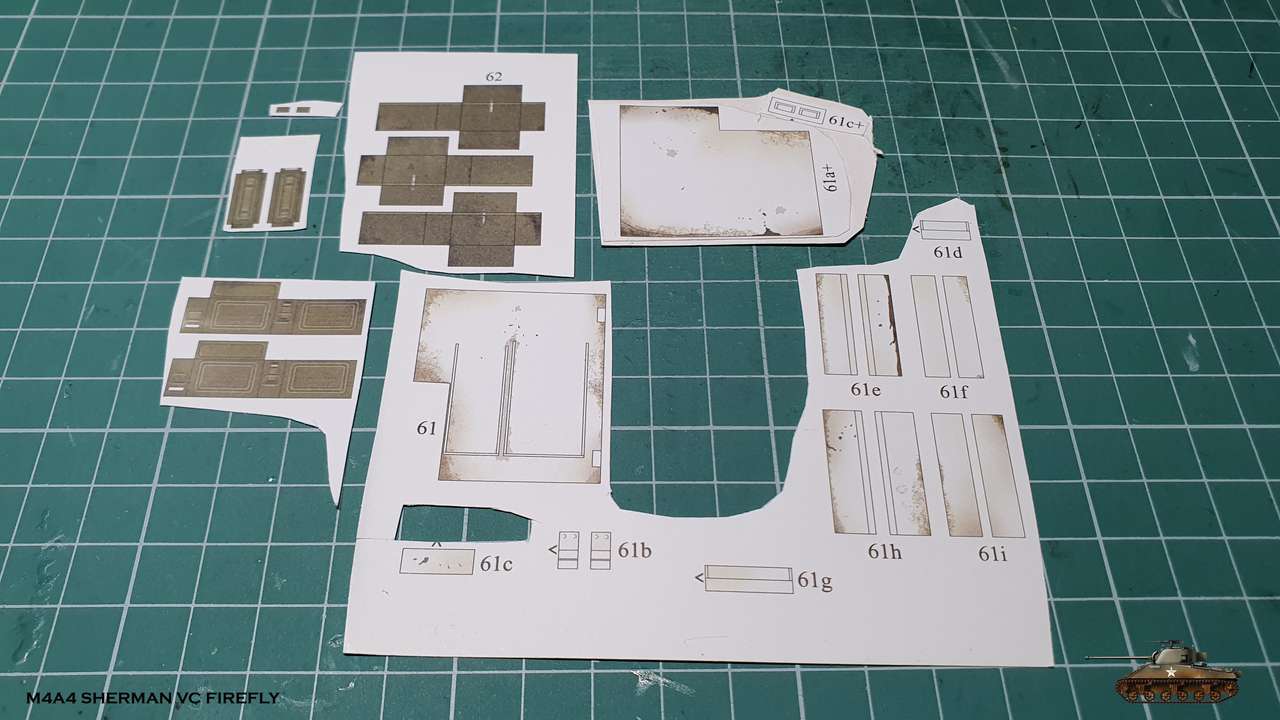
I continue to replenish the fighting compartment.
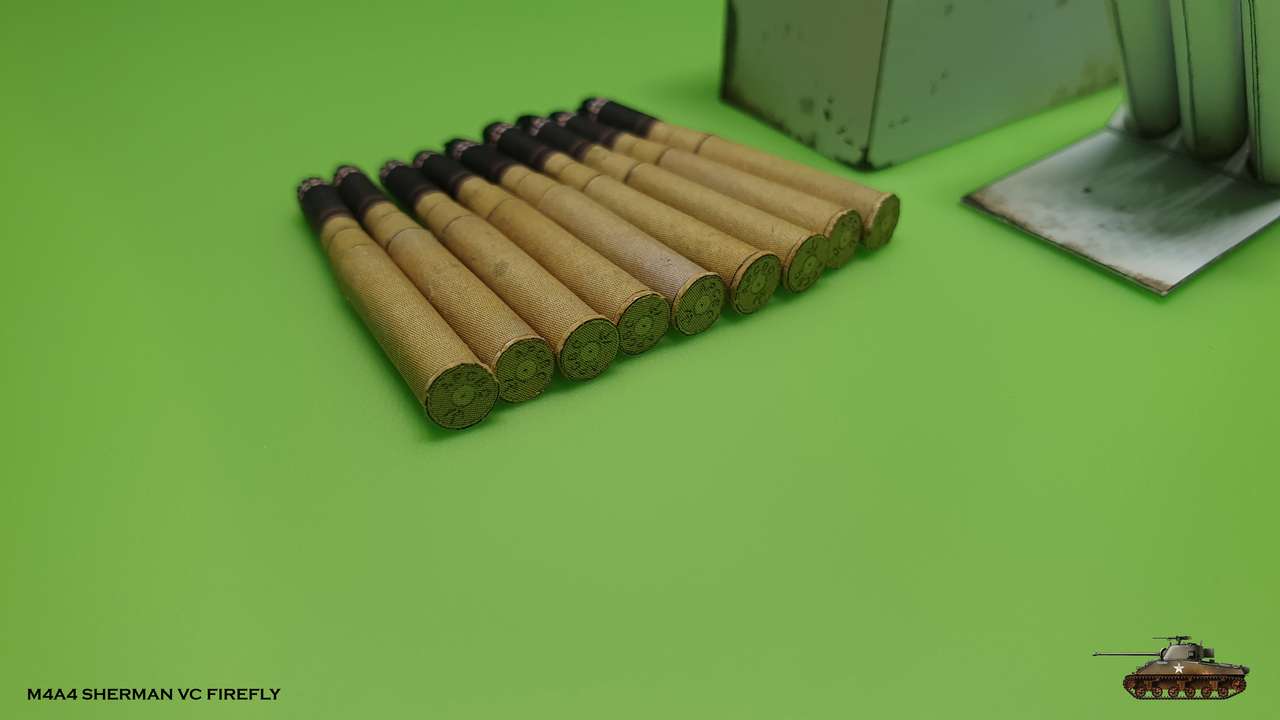
Assembled quick drawing rack for APCBC rounds.
APCBC - Armor-Piercing Capped Ballistic Cap.
The cap gave more velocity and piercing power to the shell and crumpled on impact.
You can see its markings on casing.
An interesting rack with pipes for each round.
My advice - to glue bottom with pipes to box itself in last step.
Strange, unexpected error - the diameter of casing cap is a bit larger than the diameter of pipe, it must be inserted to, so i was in need to correct it.

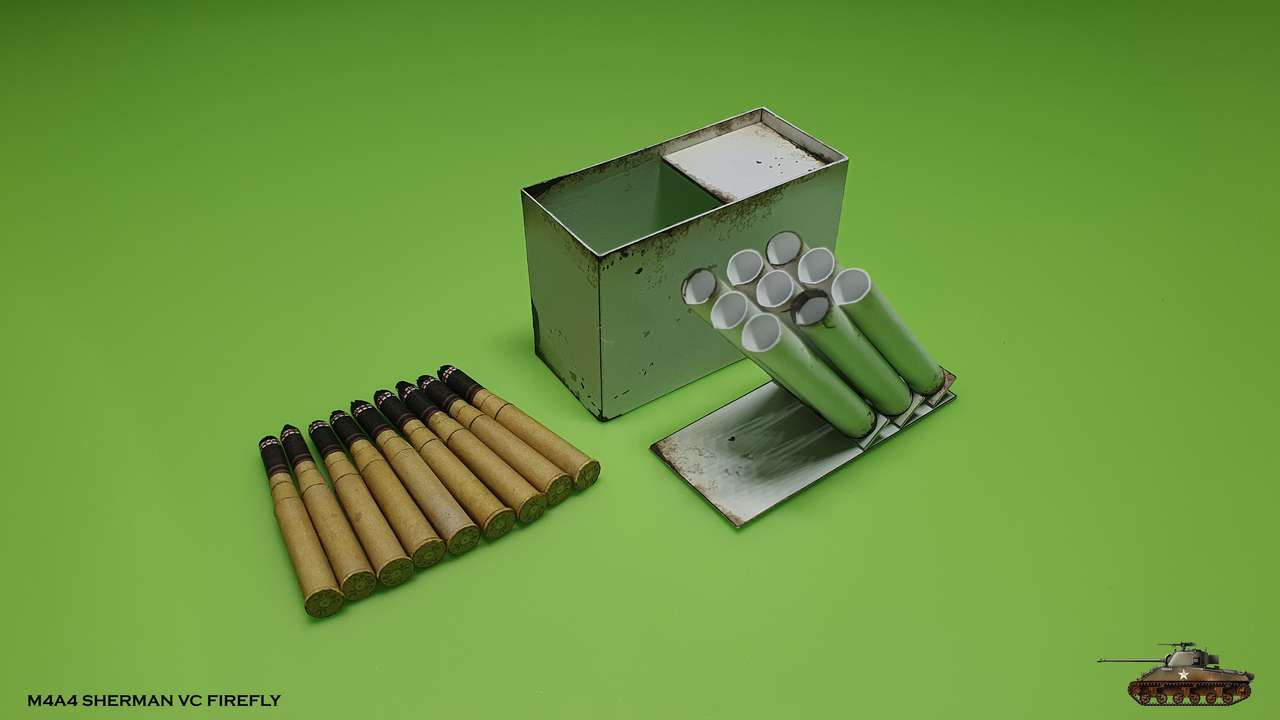
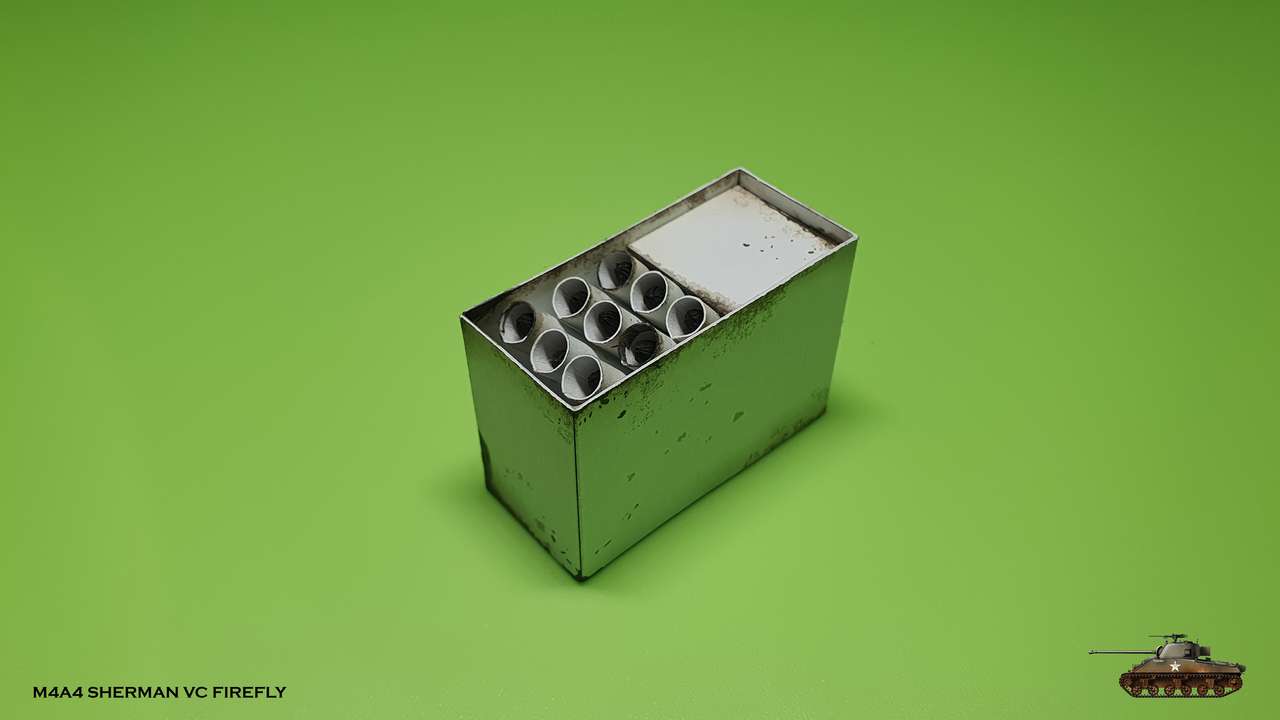
And the rack placed inside
I continue to replenish the fighting compartment.
Assembled quick drawing rack for APCBC rounds.
APCBC - Armor-Piercing Capped Ballistic Cap.
The cap gave more velocity and piercing power to the shell and crumpled on impact.
You can see its markings on casing.
An interesting rack with pipes for each round.
My advice - to glue bottom with pipes to box itself in last step.
Strange, unexpected error - the diameter of casing cap is a bit larger than the diameter of pipe, it must be inserted to, so i was in need to correct it.
And the rack placed inside
Last edited:
Boris, micahrogers - thanks.
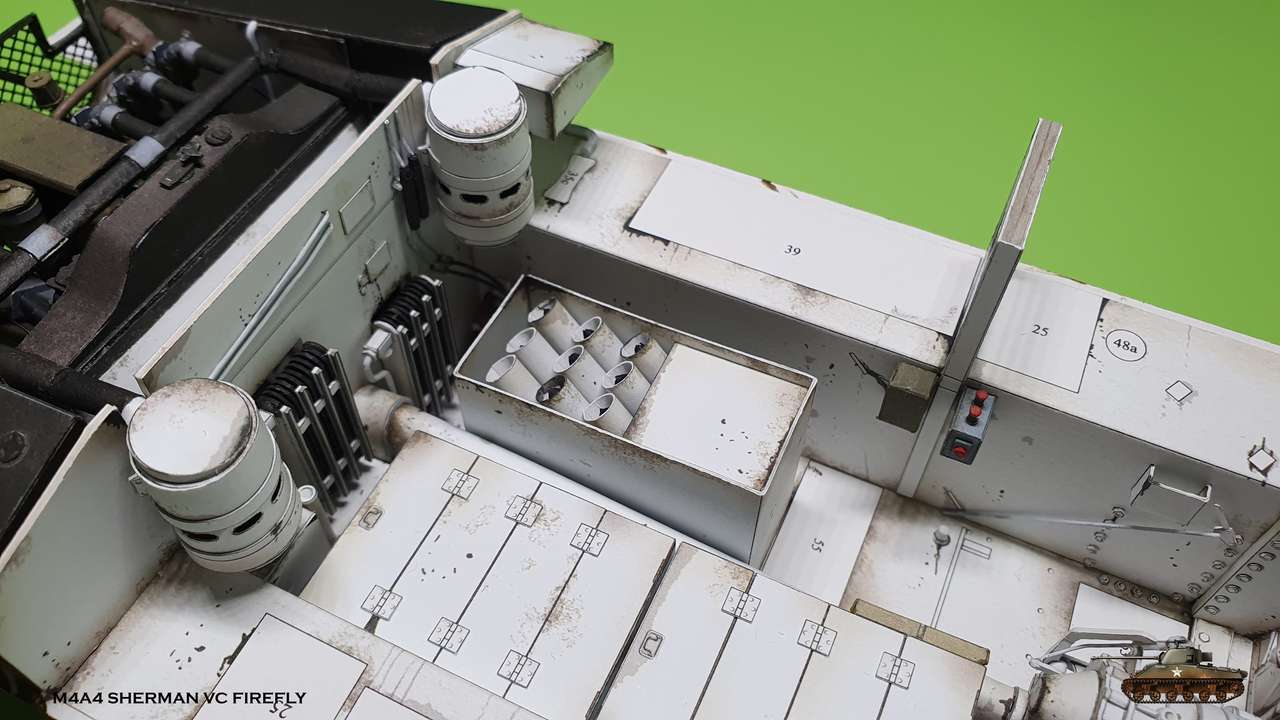
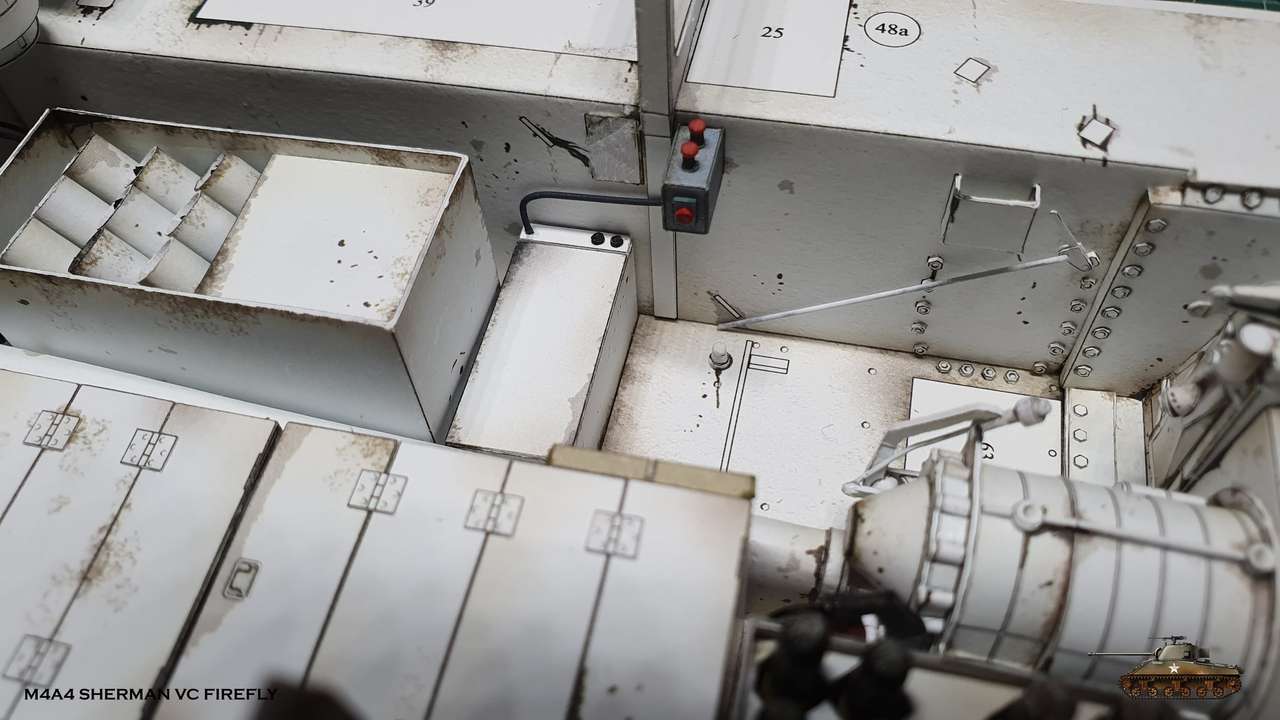
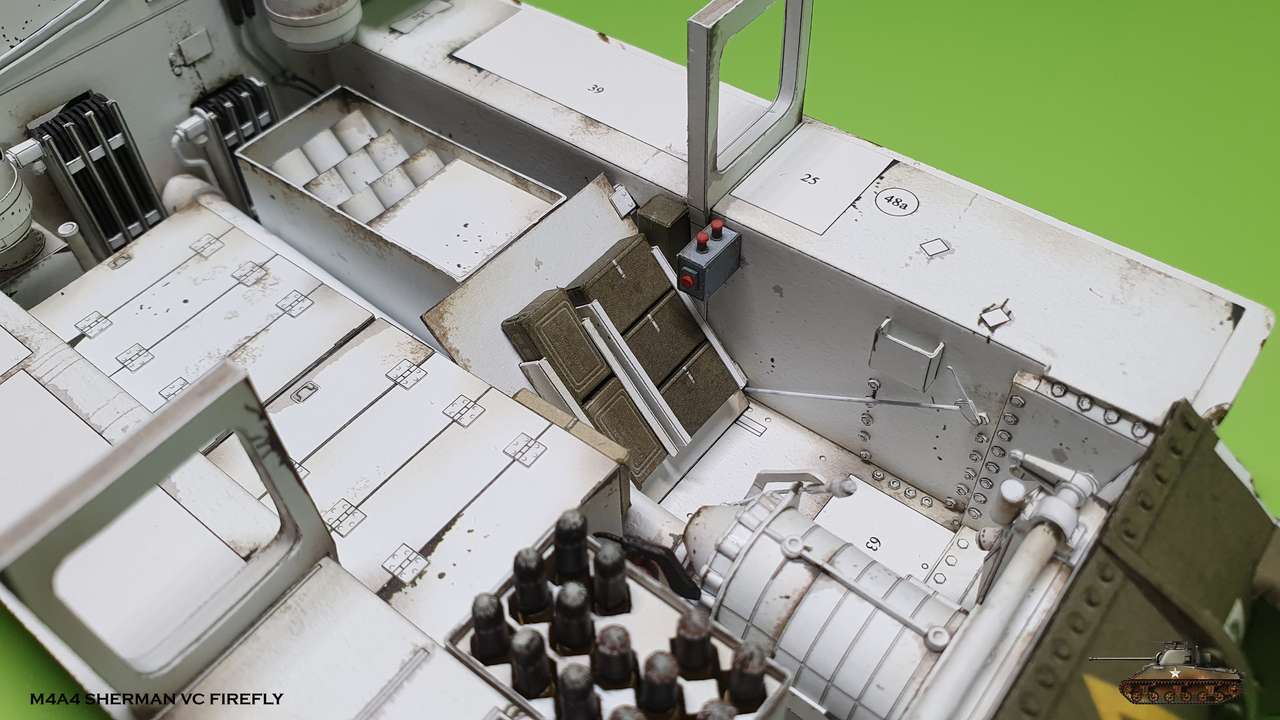
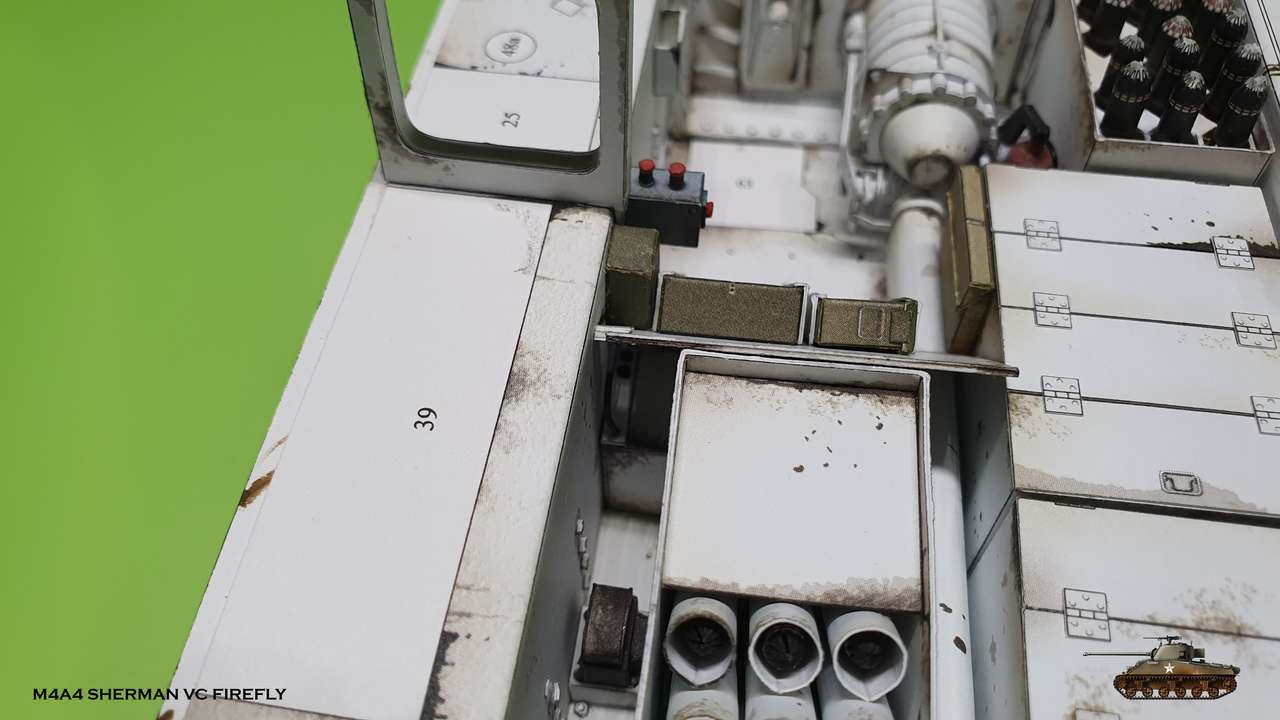
Next are accumulators box and quick draw shelf for MG ammunition.
Assembled easy, but require precision, so that ammunition boxes will slide freely into place.

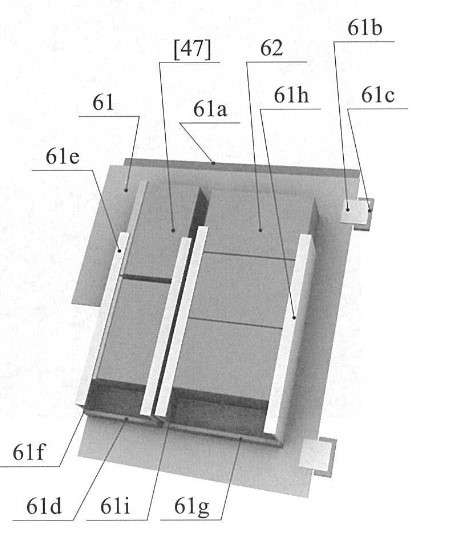


When you place accumulators box, don't forget to connect cable from starter switches box.
Also, very important - do not place pauch (detail 45) on the side wall before accumulators box and shelf are placed. It interferes badly. I was i need to detach it and glue again after.
When i placed everything inside, i realised how crowded it is.
P.S. Changed style of the forum and realized that my thread is in sticky section! Such a honor!
Next are accumulators box and quick draw shelf for MG ammunition.
Assembled easy, but require precision, so that ammunition boxes will slide freely into place.
When you place accumulators box, don't forget to connect cable from starter switches box.
Also, very important - do not place pauch (detail 45) on the side wall before accumulators box and shelf are placed. It interferes badly. I was i need to detach it and glue again after.
When i placed everything inside, i realised how crowded it is.
P.S. Changed style of the forum and realized that my thread is in sticky section! Such a honor!