

That's actually what I want to use (they actually have an improved version called Black 3.0), but man.... that price!!!!!! But though the price might not be that bad when you consider that it's 5 ounces. I really do want to give that stuff a shot. But I'm still going to need "regular" flat black too for some of the roofing material, etc.Vallejo's RLM66 is a good deep grey, but a true black , would be this stuff.
This stuff is soo black, you cant even see shadows on it.
Indianapolis International Airport in 1:400
- Thread starter IndyJets
- Start date
You are using an out of date browser. It may not display this or other websites correctly.
You should upgrade or use an alternative browser.
You should upgrade or use an alternative browser.
I us AV Vallejo for model paints, thier black is good, and covers well. The RLM66 is a good very dark grey, then thier Battleship grey is lighter , then Neutral Grey.
How do they do on mixing? I'm going to need a few different shades of brick and concrete colors, and some flat white (or possibly very, very light gray), in addition to the main two-tone gray color scheme for the concourses.I us AV Vallejo for model paints, thier black is good, and covers well. The RLM66 is a good very dark grey, then thier Battleship grey is lighter , then Neutral Grey.
They mix with other Vallejo colors with no problems. Test any mix with another brand for compatibility. I know they mix well with The Army Painter, but not at all with Tamiya Acrylics.
Vallejo also mix ok with Apple Barrel craft paint.
Vallejo also mix ok with Apple Barrel craft paint.
I know you will try to build a Black Hole with all bells and whistles immediately.That is very cool and interesting. I may have to order a bottle to see what all I can do with it!
")


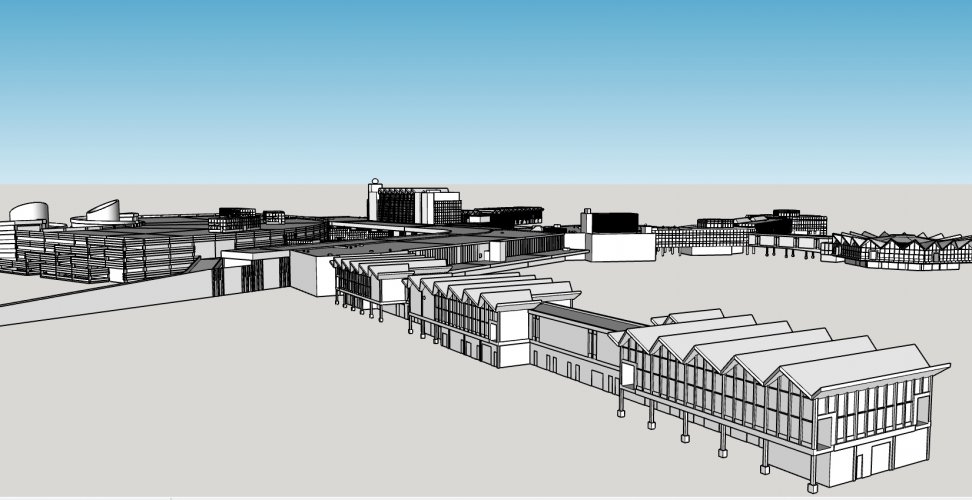
Here is a rendering of the fully detailed, fully assembled terminal and concourses in Sketchup. All parts shown here are ready for 3D printing. All that remains from a part creation perspective is the parking garage. Then to design the decals for the details, then to finish and paint and assemble the structure.

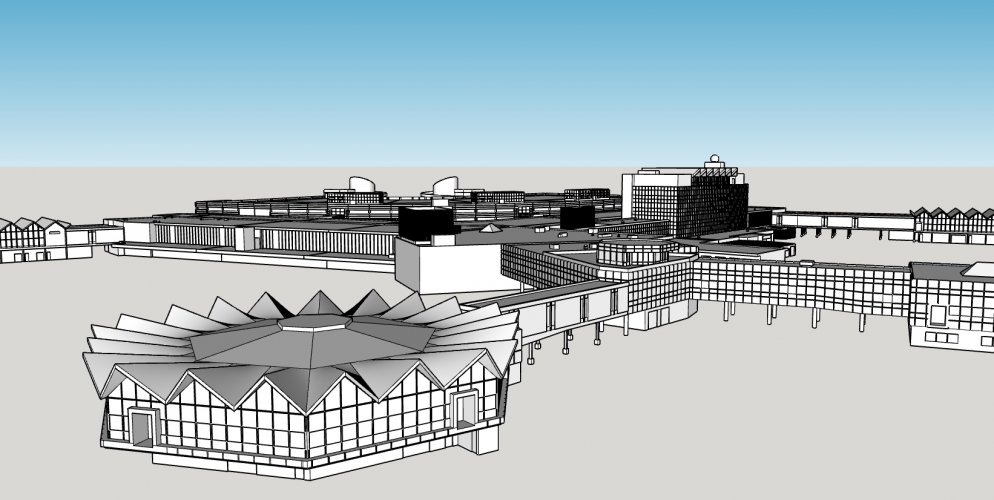
With all that I learned during the rest of the project, I decided it was time for an almost complete do-over on the parking garage. The real one forms a 75-degree arc through 19 segments, and this new shape replicates that shape exactly. My prior effort used an arc tool to generate the curve automatically as I had planned to form the shape in paper and I wasn't too concerned with the exact number of segments as it was going to be a smooth curve anyway. But I came to realize that if I modeled it the way I'm doing now, the skybridges would be able to fit up against a flat surface, greatly simplifying assembly as well as improving accuracy. I also discovered that I needed to deflect the skybridges slightly to one side or the other to clear the support columns on the previously-existing facade (built 1974, the parking garage and skybridges went up in 1987). Close observation of real-world photos bore this detail out precisely; the skybridges deflected very slightly to one side or the other in the same manner that I did, which also confirms the accuracy of the column placements.
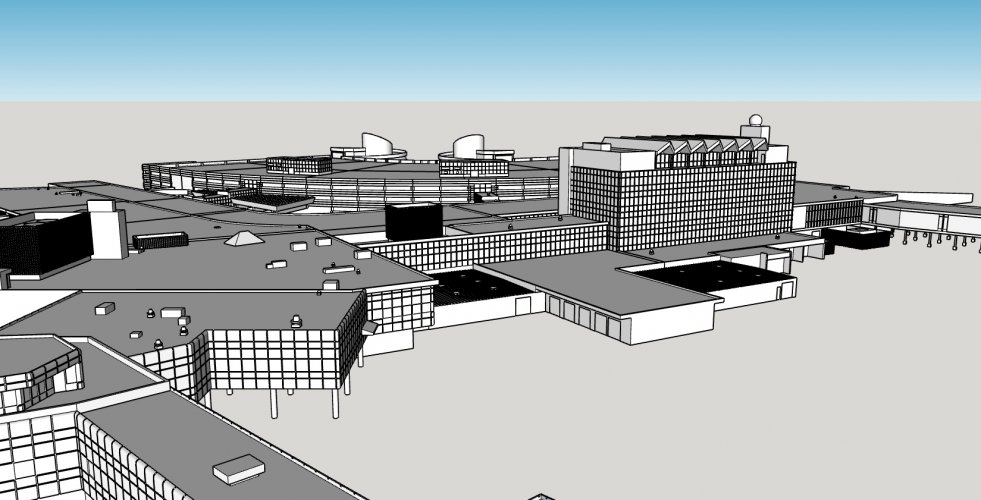
Here we see the basic shape of the parking garage laid out with the placements of the skybridges determined. The top deck is hidden in order to facilitate visibility inside while shaping the columns and side walls. The final shape of the skybridges will be created later on; they will step down in two stages to reach the level of the upper level roadway at the terminal facade. I will next hide the skybridges from view in order to continue focusing on creating the details of the structural columns and side walls around the perimeter of the garage. There will be two helical ramps for vehicle entry and exit; these are separate model files and will removed from this view once the precise point of their attachment to the garage is finalized. In fact, the entry ramp model has already done its job and been removed here.
This parking garage will be approximately 12 x 18 inches by an inch and a half high when completed. The top deck will be overlaid with cardstock printed with the parking spaces and other pavement markings, and the thickness of the stock has been accounted for in the model.

While working to divide the parking garage up for 3D printing, I captured this screenshot (in Sketchup) of the bus shelter canopy (in real life, this was made of vacuum formed plastic panels, transparent light blue in color, supported by a steel web truss framework), with Skybridge A and the original 1974 terminal facade beyond. As I'm working on this it's so easy to forget that this is a 1:400 scale model! It feels as though I'm climbing all over the actual buildings...
Attachments
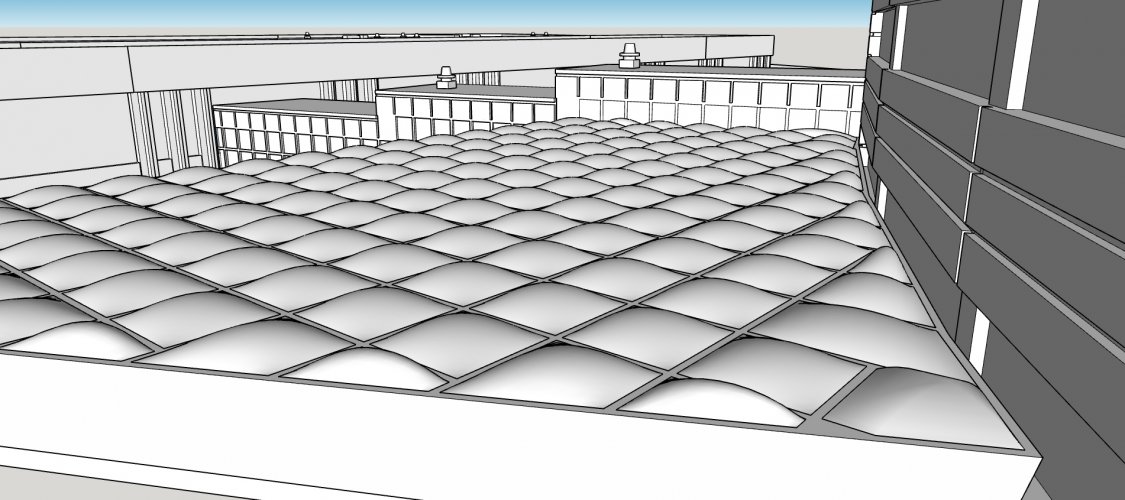
Whoah! How did you make those roof panels? They bulge out. I have never done that in SU. 
I started with a square to establish the shape. Then drew arcs from each corner to the opposite to set the height, forming a sort of X shape above the base square. Then filled in the spaces between the arcs using an extension called Curviloft.Whoah! How did you make those roof panels? They bulge out. I have never done that in SU.
I used a lot of the Fredo6 tools on this project, including Curvishear and Curviloft to form the helical ramps for the parking garage. Those were actually the very first models I made because I wanted to make sure I would be able to make those before going on with the rest of the project. I also made extensive use of RoundCorner to form the rounded edges on Concourse C and the adjoining sections of the main terminal which were part of the same project in 1987, as well as JointPushPull in more places than I can possibly count!
")
Finally finished the 3D design work. For everything except the parking garage office, that is (which is detached from the main structure). Unfortunately that was not documented well at all so I'm not really looking forward to trying to recreate that.
Anyhow, I suppose a bit of celebration (and rest!) is in order...

Anyhow, I suppose a bit of celebration (and rest!) is in order...
Attachments
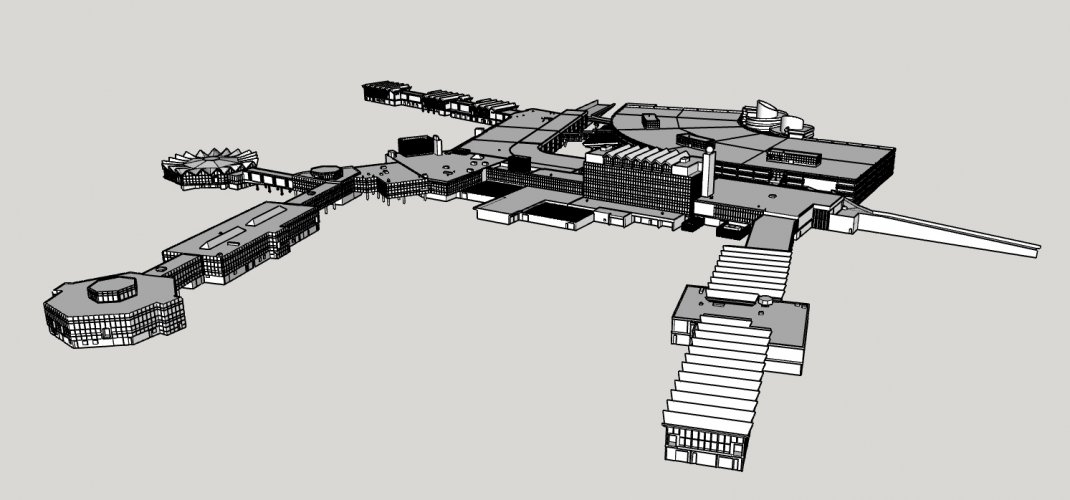
Thank you! This is only half the battle... now to see if it survives the 3D printing process. Then on to painting and assembly...WOW! That is quite the complex! You did a GREAT JOB on this rendering!
Are you planning to make a paper/cardstock template from this as well?Thank you! This is only half the battle... now to see if it survives the 3D printing process. Then on to painting and assembly...
At this point I don't see the need to do that. There are a lot of details that are too fine to be able to render in paper so I would have to go back through and take all of those out all over again, then those details would need to be drawn back in on the final print.Are you planning to make a paper/cardstock template from this as well?
