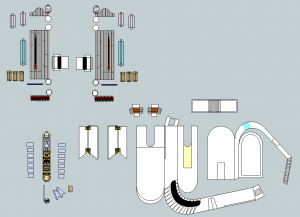
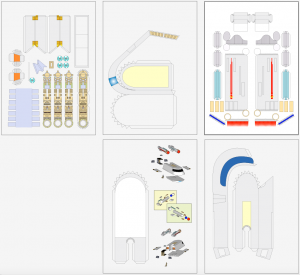
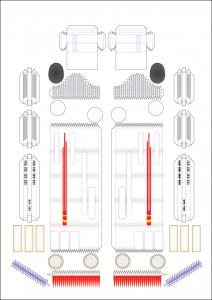
Executive Long Range Shuttle (TOS non-canon)
- Thread starter thehaggard
- Start date
You are using an out of date browser. It may not display this or other websites correctly.
You should upgrade or use an alternative browser.
You should upgrade or use an alternative browser.
This is absolutely fantastic! I can't believe that I haven't seen this thread for so long..! 
Last edited:
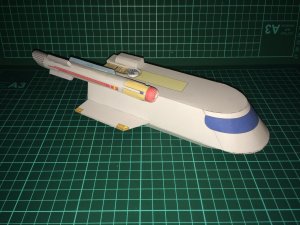
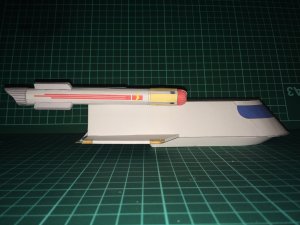
And here is the alpha build. I did it quick and dirty. After almost 4 years of no designing or building I realized something... I HATE domes (as in the warp engine Bussard Collector). I may redo it as layered ring sections rather than tapered flaps. Now on to textures and a real (careful) build. Sometime next year?
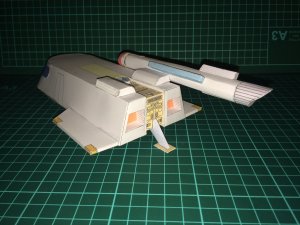
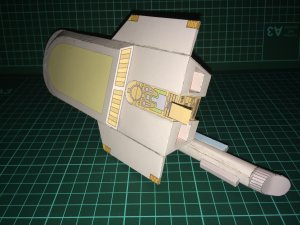
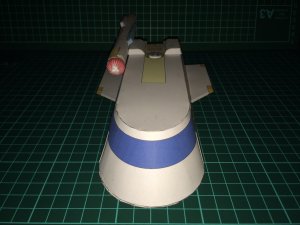
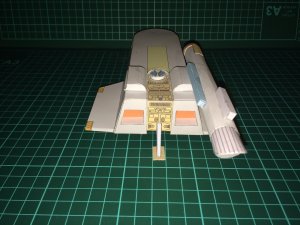


THE DC
Highly Esteemed Member
Very nice detail. Nice design.
I agree with Spaceagent, as it does harken back to Jefferies original design:
http://zealot.com/threads/whither-matt-jeffries-shuttle.177692/#post-990045
However, you have some excellent design ideas in this that are original.
I agree with Spaceagent, as it does harken back to Jefferies original design:
http://zealot.com/threads/whither-matt-jeffries-shuttle.177692/#post-990045
However, you have some excellent design ideas in this that are original.
- Apr 5, 2013
- 13,876
- 10,215
- 228
I think the Domes of the Bussard Collectors are best done with conical rings. Give me a diameter, and profile curve, as long as I have a picture that has the diameter's stated size, just draw the profile curve of the dome, and I can whip you up a set of conical rings. It is really easy to do, if the model is of a decent size., and yours looks big enough. Give me the diameter of the Base of the dome, and I will bang out some conical rings. You could use these if you scale them to your needs. 
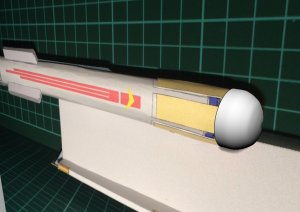


Thanks for the kind offer, but I have no trouble converting it to cone sections. I just need to find time to add the art/skin detail... and make a new build.
- Apr 5, 2013
- 13,876
- 10,215
- 228
Have you ever tried using a cone/petal combination? I did this with a Cessna Aircraft, and the result was amazing. I would connect pieces that lined up in a manner that it was for the most part, not all, but many pieces were all connected somewhere, which made forming with a steel ball ended tool possible. The Bussard collector may not be the best piece for this, but it is a technique worth investigating. Sample below.

That's a cool idea, but I think you are correct that it might not be best for so small of a part. But it is a technique I will use elsewhere. Thanks.
- Apr 5, 2013
- 13,876
- 10,215
- 228
Great! I try to offer ideas, that is all, I never criticize, though I may offer technique improvement suggestions, that is more of a mechanical thing. Some people take it wrong, but I have learned what I know from listening, and looking at what others do. That is what this forum excels at, the exchange of ideas. 
- Apr 5, 2013
- 13,876
- 10,215
- 228
It is a technique that works really well on models that have lots of panel lines. You can make it difficult to see where the pieces came together by following the panel lines. 
I did that very thing on a few of my other models, most notably the Work Horse line of spaceships and the Taiwan Space Command models I did for E-Cardmodels. Unfortunately, I want this model to have the old 60's Trek look with minimal panels and a clean sheen look. the lines are going to be harder to hide, especially right around the nose where the parts are just too big to keep on one page as one part.
- Apr 5, 2013
- 13,876
- 10,215
- 228
There are those limitations with paper. I have been experimenting with setting papers and using different size spoons, some very round, to try and fold the wet part over. As long as you are using Pigment Ink, you can actually almost pull the fibers apart, and when it dries, put some glue in the back to strengthen the part. Some incredible blisters made of paper can be made that way. 


