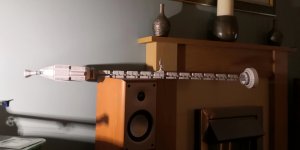
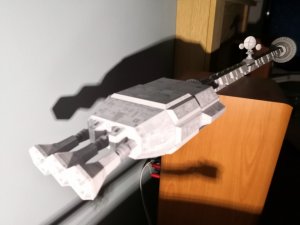
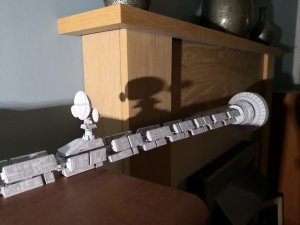
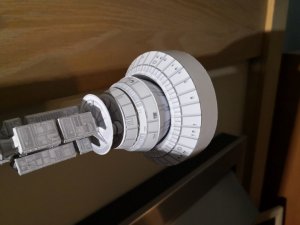
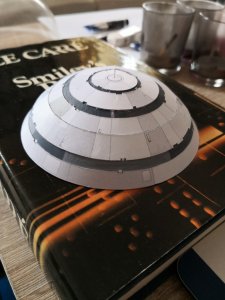
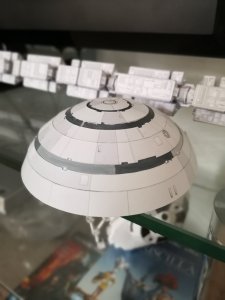
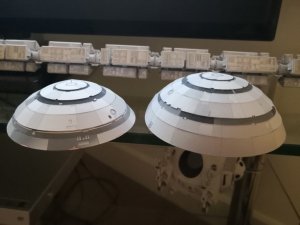
Just to be clear - I was joking about the yellow, I just hope it looks OK without the lighting. In fact - I just hope it will look OK when it's done!i'll have to get all the pics back up for you and all to see. lighting not the best, but looks good.
painting it yellow? hummm..
could even have a large picture of Jupiter in the back ground and have it slowly spinning..
food for thought..
Discovering UHU02's 2001 Discovery One
- Thread starter Jacopo1969
- Start date
You are using an out of date browser. It may not display this or other websites correctly.
You should upgrade or use an alternative browser.
You should upgrade or use an alternative browser.
it'll look good no matter what..its a heck of a model to build.i'm not that good at building myself, but its the joy of building. then showing to others and saying " here is my work." no one here puts you down for how the model looks, they ALL look good. i was told by someone here that " you are your own worst critic" . and if you mess something up, you can go back and reprint it and try again. as for lighting, it was a " what if i.." moment.. not the best, but it worked.Just to be clear - I was joking about the yellow, I just hope it looks OK without the lighting. In fact - I just hope it will look OK when it's done!
- Apr 5, 2013
- 13,876
- 10,216
- 228
it'll look good no matter what..its a heck of a model to build.i'm not that good at building myself, but its the joy of building. then showing to others and saying " here is my work." no one here puts you down for how the model looks, they ALL look good. i was told by someone here that " you are your own worst critic" . and if you mess something up, you can go back and reprint it and try again. as for lighting, it was a " what if i.." moment.. not the best, but it worked.
Well said!! That's the heart of this forum speaking.
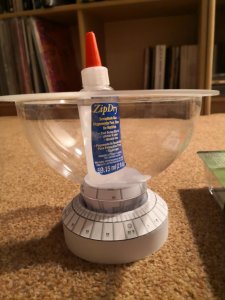
Shaping up! I'll get a bit more of the neck done and then do a close up. assembling these rings is my first proper effort at edge-glueing. So far so middling  Still haven't secured the section to the rear of the spine, so the rockets are a bit wonky at the mo.
As you can see, I've been reading @DanBKing s thread - applied weight to shape up the main section as I've been building it up.
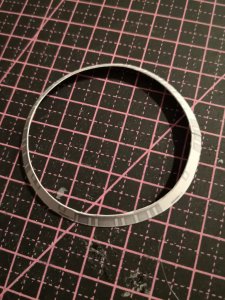
I've included a pic of a single ring - edge-glueing is certainly an art. So much so, I've called it a day on the tiniest of the sections - using the tabs to help strengthen it before shaping around a gluhwein glass - zum wohl!
And so, neck section is coming together...
Attachments
Last edited:
i got a small kit of childrens water color paints. about $3.00, has 5 different colors to it. just use very little water to paint edges. i used it to paint the edges of the Toyko tower i built.Having read @DanBKing s thread, I was interested to hear he's used water colour pencils to tidy up edges - I wondered if there's any schools of thought on what to use, as some of my joins might well benefit from some treatment!?
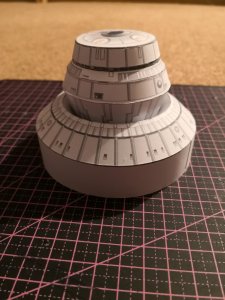
This is getting scary now - not many sheets of paper left to go! Here's the completed neck, made largely out of edge glueing. The large rings weren't as tricky as I'd expected. Nor were the little 'escape rocket' assemblies to the front of the heat shield before the spine section. It was just a matter of aligning the seams of the three parts that make up each one. So it's the command sphere next! And some finalised glueing fore and aft. Still very happy with progress so far...
Attachments
- Apr 5, 2013
- 13,876
- 10,216
- 228
Thank you Zathros thumbsupSo very clean and true looking!
as far as a "realistic" design, the Discovery was ahead of it's time. Keep up the good work on this masterpiece.
Slowly, the top hemisphere takes shape. I've had a printer nightmare - so printing the additional sheets for the recessed sections didn't work out. So I've used some watercolours to address the issues with the recessed rings.
Needless to say, I've followed @DanBKing s lead here - I could not go ahead with building a 'simple' ball after reading his thread. So here goes! I do not, however have strips of lifetime guarantee sticky stickers - which means I've gone for edge glueing as the means of holding it together. So far not bad - but I've had to reinforce from behind here and there. I also had a brief dabble with waterforming but bottled it after using too much water and had a narrow escape. Still using the ball and hemisphere, but just to try and force a rounder look. I've even taken the trouble to do a couple of greebles (my first!) by recessing those little round dustbin lids on either side of the sphere - but for once the camera doesn't pick the detail out!!
Needless to say, I've followed @DanBKing s lead here - I could not go ahead with building a 'simple' ball after reading his thread. So here goes! I do not, however have strips of lifetime guarantee sticky stickers - which means I've gone for edge glueing as the means of holding it together. So far not bad - but I've had to reinforce from behind here and there. I also had a brief dabble with waterforming but bottled it after using too much water and had a narrow escape. Still using the ball and hemisphere, but just to try and force a rounder look. I've even taken the trouble to do a couple of greebles (my first!) by recessing those little round dustbin lids on either side of the sphere - but for once the camera doesn't pick the detail out!!
Attachments
Last edited:
- Apr 5, 2013
- 13,876
- 10,216
- 228
I have to agree with the "Z" man, your execution of this model looks to be to notch.
Thank you for the kind words Zealots!  I must be doing something right!
Here's the bottom hemisphere building up. So far so good. Horrible feeling it could still all go very wrong. Only two sheets of parts left to go! (But having thoughts of going off-piste and doing some scratchbuilding on this one!)
Here's the bottom hemisphere building up. So far so good. Horrible feeling it could still all go very wrong. Only two sheets of parts left to go! (But having thoughts of going off-piste and doing some scratchbuilding on this one!)
Attachments
Last edited:
Managed to find some photos from early on in this thread, so I've posted them back in. Pity I couldn't find my first 'nut'!
- Apr 5, 2013
- 13,876
- 10,216
- 228
Managed to find some photos from early on in this thread, so I've posted them back in. Pity I couldn't find my first 'nut'!
Is it cold outside? (Sorry, I couldn't help myself)

Your model has a very real texture on it, and you edge to edge gluing has yielded excellent results. You're doing everything right!
I've managed to knock together a cockpit from bits and pieces of images I found on the net. Completely unethical, probably, and I doubt it'll even be visible once it's all put together, but I couldn't face looking into an empty shell. Nearly completed so will be back on to the main kit again soon
- Apr 5, 2013
- 13,876
- 10,216
- 228
Why unethical, it's a paper model, for your own use, it's not as if you are producing these for sale, imagine how much you would have to charge to recoup you expenditures in time and materials!! 


